


Good morning Friends!!
Welcome back to my blog. It’s an inspiration Wednesday with Heartfelt Creations, again. I have this beautiful shaker window card to share.

Supplies From Heartfelt Creations:
HCD2-7426 Oval Filigree Frame Die
HCD1-7460 Friend Floral Sentiment Die
HCPC-31024 Friend Floral Sentiment Cling Stamp Set
HCD1-7354 Small Floral Butterfly Die
HCPC-3953 Small Floral Butterfly Cling Stamp Set
HCD1-7289 Small Wild Rose Die
HCPC-3906 Small Wild Rose Cling Stamp Set
HCD1-7295 Wisteria Petals Die
HCPC-3911 Wisteria Petals Cling Stamp Set
HCPC-3835 Leafy Accents Cling Stamp Set
HCD1-7193 Leafy Accents Die
HCPP1-475 Deluxe Flower Shaping Paper Pack of 50 – White
HCGP1-488 Luxe Gold Cardstock
HCPP1-475 Deluxe Flower Shaping Paper Pack of 50 – White
HCST1-401 Deluxe Flower Shaping Kit
18002 Rajni Chawla’s Vellum Flowerite – 10 Sheets
HCPP1-468 Deluxe Flower Shaping Paper Pack of 25 – White
RACP436 Ranger Archival Ink Pad – Leaf Green
RACP482 Ranger Archival Ink Pad – Olive
Other Products: Smooth White Cardstock, Funnel Tray, Die Cutting Machine, Foam dots, ScoreBoard, Hero Arts White Pigment Ink.
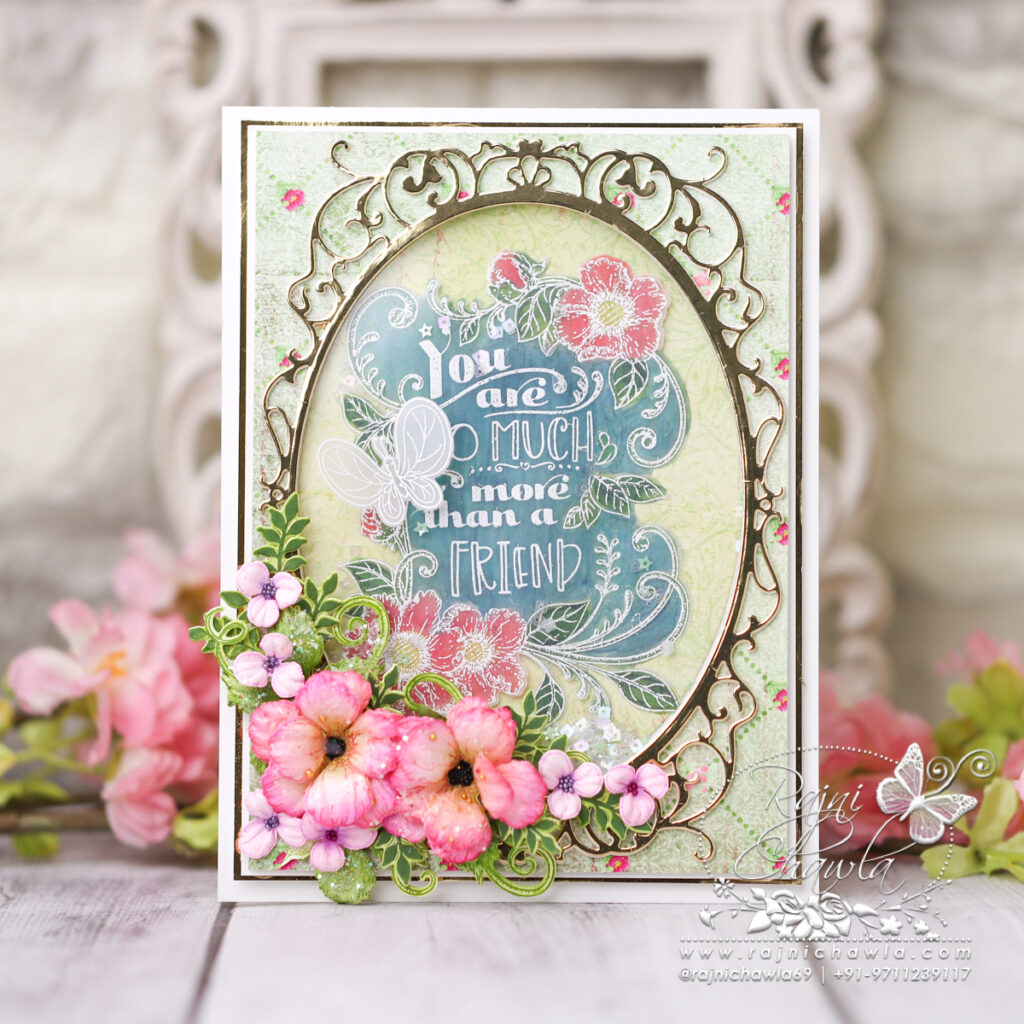
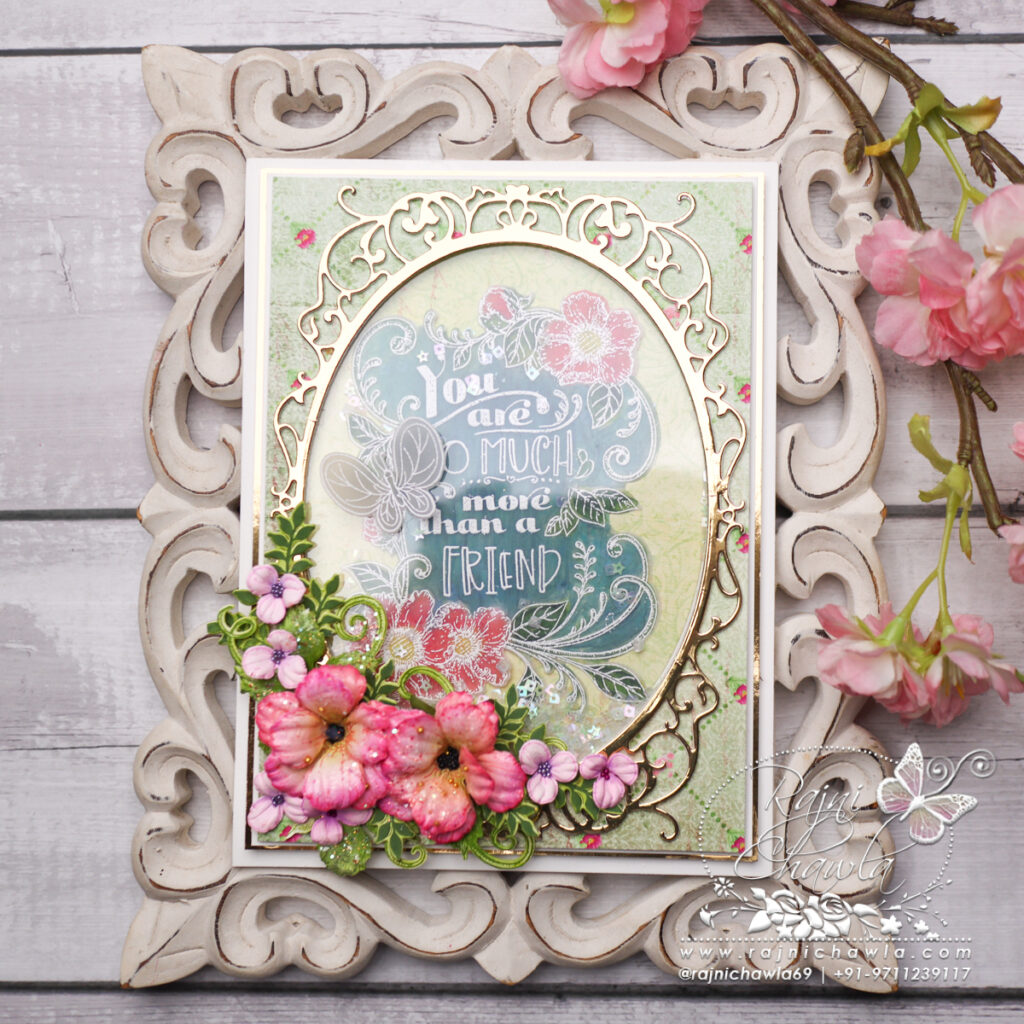
Instructions: The ready-top fold card measures, 8 1/2″ by 6 1/2″. To prepare the card base, cut a smooth white cardstock measuring 81/2″ by 6 1/2″ and a second piece measuring 9″ by 6 1/2″. On 9″ length, score at 1/2″. Glue the smaller panel on the hinge to make the card front.
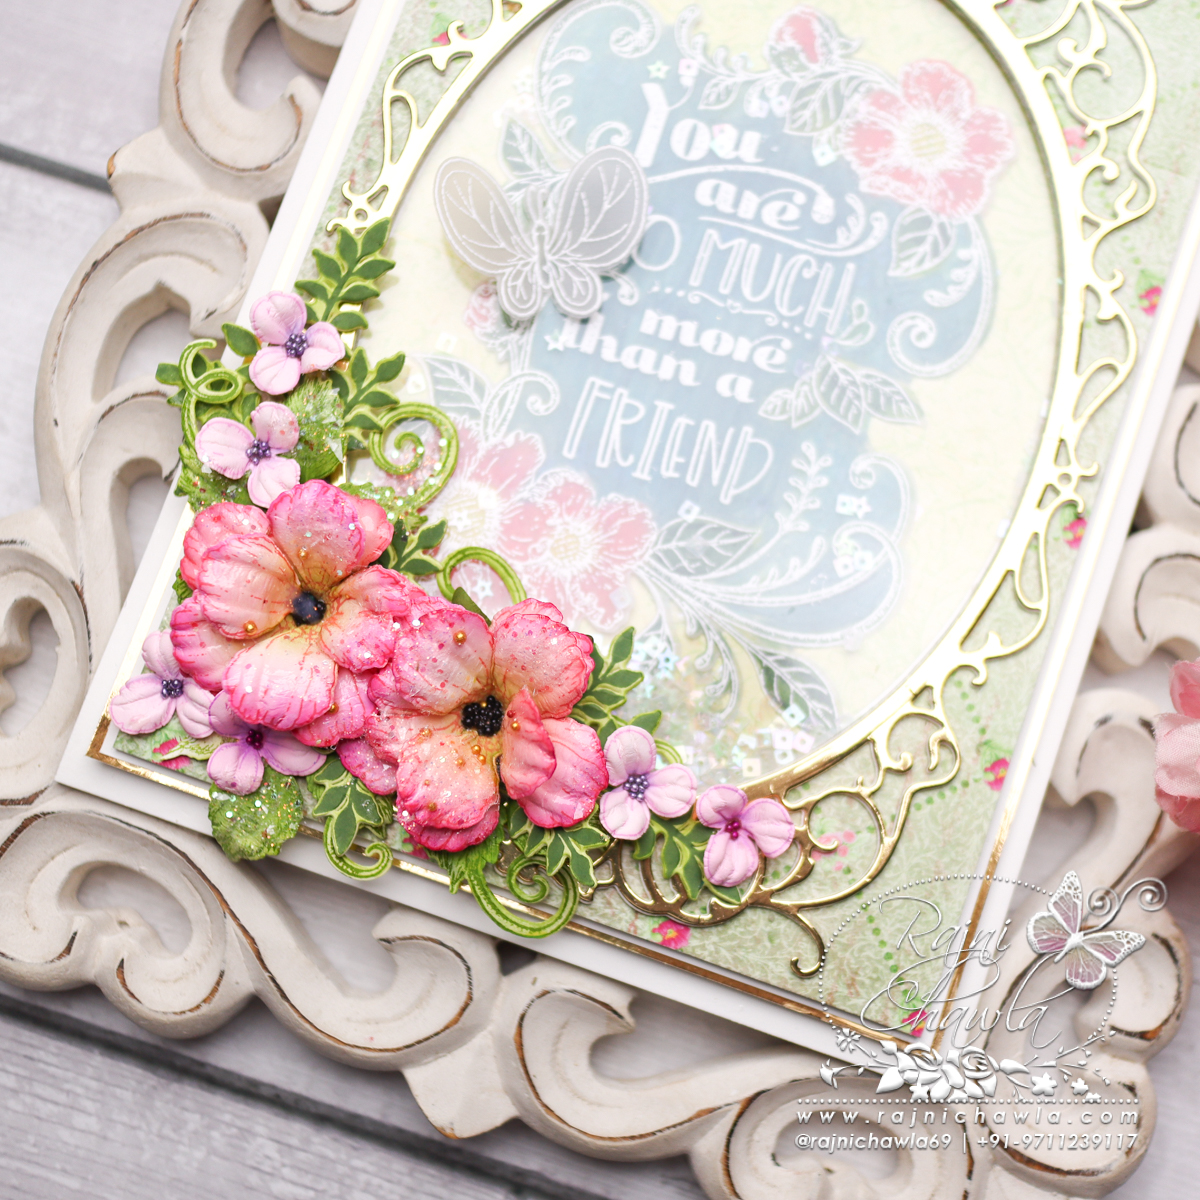
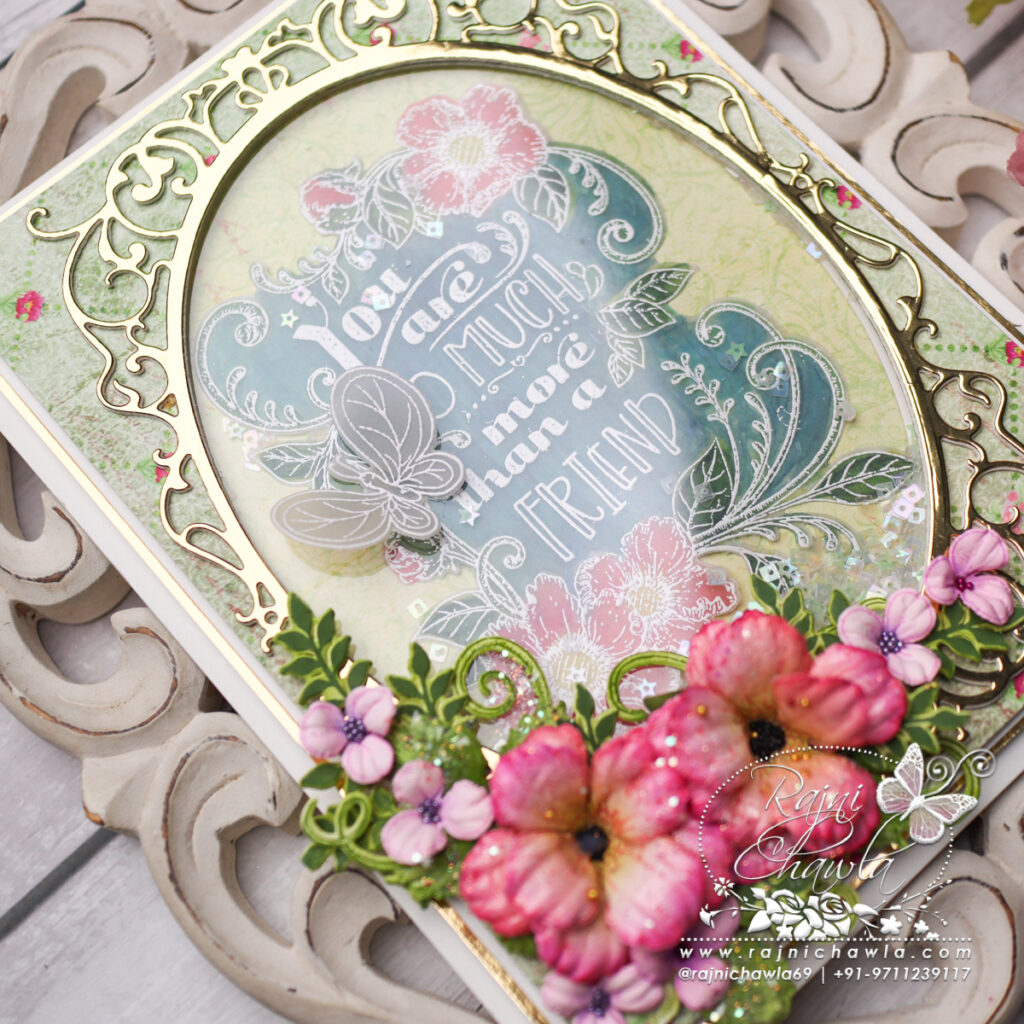
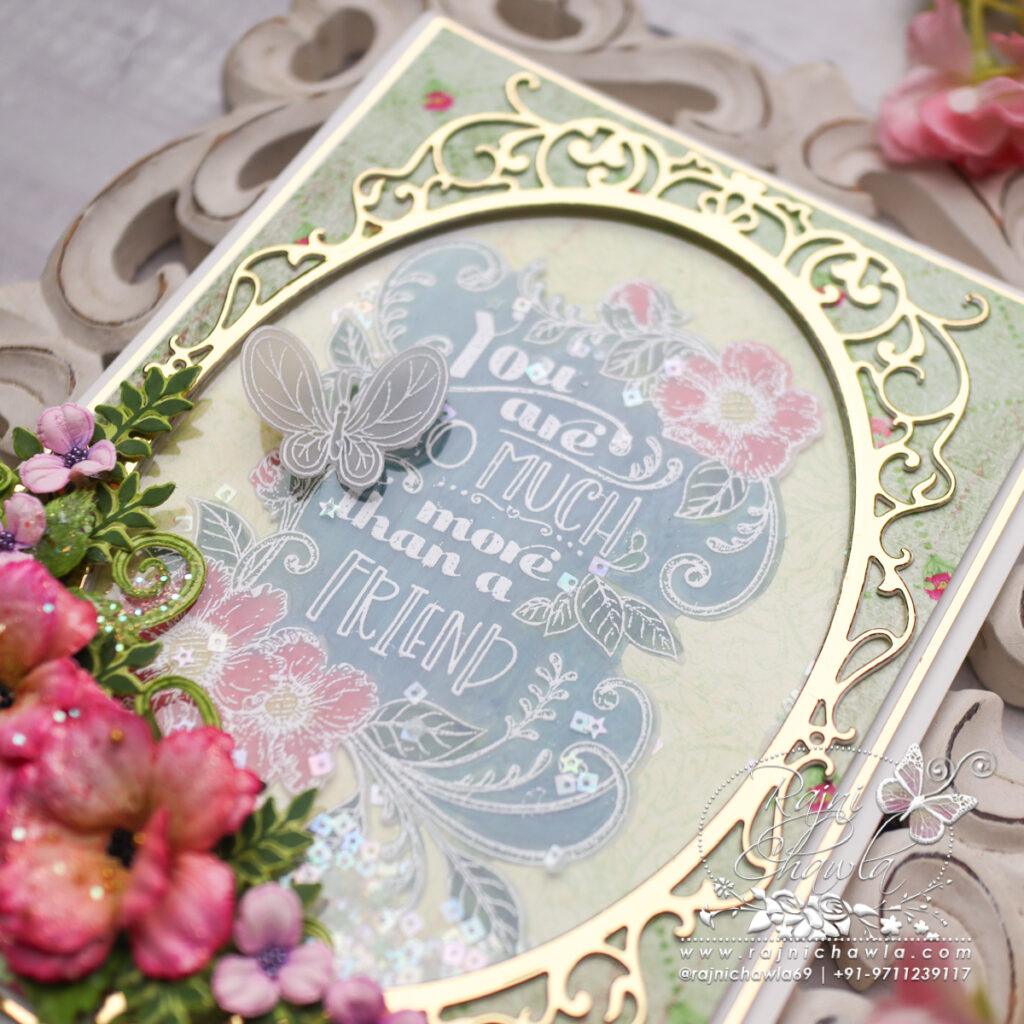
Choose the designer paper from the designer paper collection and cut the panel 1/8″ smaller than the card front. Glue it on the luxe gold cardstock to create a delicate border on all four sides. Secure the oval die from the Oval Filigree Frame Die set and cut the window as shown. To the window adhere an acetate sheet from behind.
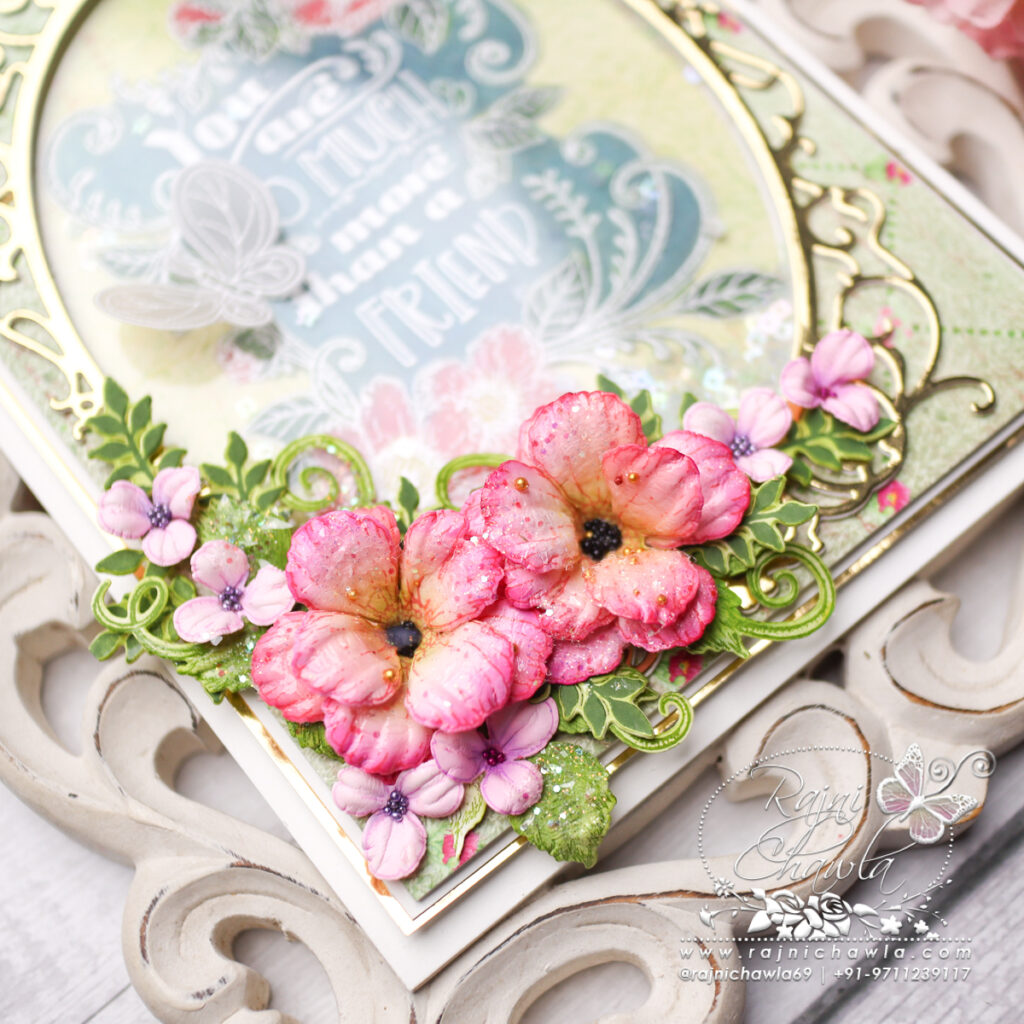
Stamp the floral sentiment frame on Rajni Chawla’s vellum cardstock with white pigment ink using Friend Floral Sentiment Cling Stamp Set and sprinkle white heat embossing powder. Dust extras and heat set it using a heating tool. Cut the image using Copic markers from the back and cut the image using its coordinating die set. Glue the image in the center so that it shows from the window above.
Next, put some shaker elements and layer the window panel on the card front using double-sided tape and close the window.
For the wild roses, stamp the flower petals with Magenta Hue archival ink using the Small Wild Rose Stamp set and cut them using its coordinating dies. Ink the flower centers using Leaf Green and color the flowers using Magenta Hue. Shape the flowers using a Deluxe flower shaping kit. Once the shaping is done, assemble a few flowers using ball tools from the shaping kit and add matching seed beads to the flower centers. Apply a layer of crystal lacquer on the flowers and dust Rajni Chawla’s Crystal Clear Powder.
Stamp, color, and cut a few Wisteria flowers using Magenta Hue Archival ink and shape them using a flower shaping kit. Add flower pollens using a glossy accent and use these flowers as fillers. Also, stamp 2 sets of leaves using Leafy Accent stamp and Olive Green Archival ink and cut them using its coordinating die. Color the leaves using the same inks and shape them using a deluxe flower shaping kit. Once, all the elements are ready, assemble a small bouquet on the left side corner and complete the card by adding a white heat-embossed vellum butterfly.
