Hello, my dear friends
Welcome back to my blog. Today, I have a Slimline card to share using the latest Floral Frames Collection from Heartfelt Creations. You can easily chop and arrange the frames to create focal image for your cards as per your choice.
Supplies from Heartfelt Creations:
HCD3-7447 Slim Elegant Rectangle Die
HCPC-31025 Grateful Floral Sentiment Cling Stamp Set
HCD1-7461 Grateful Floral Sentiment Die
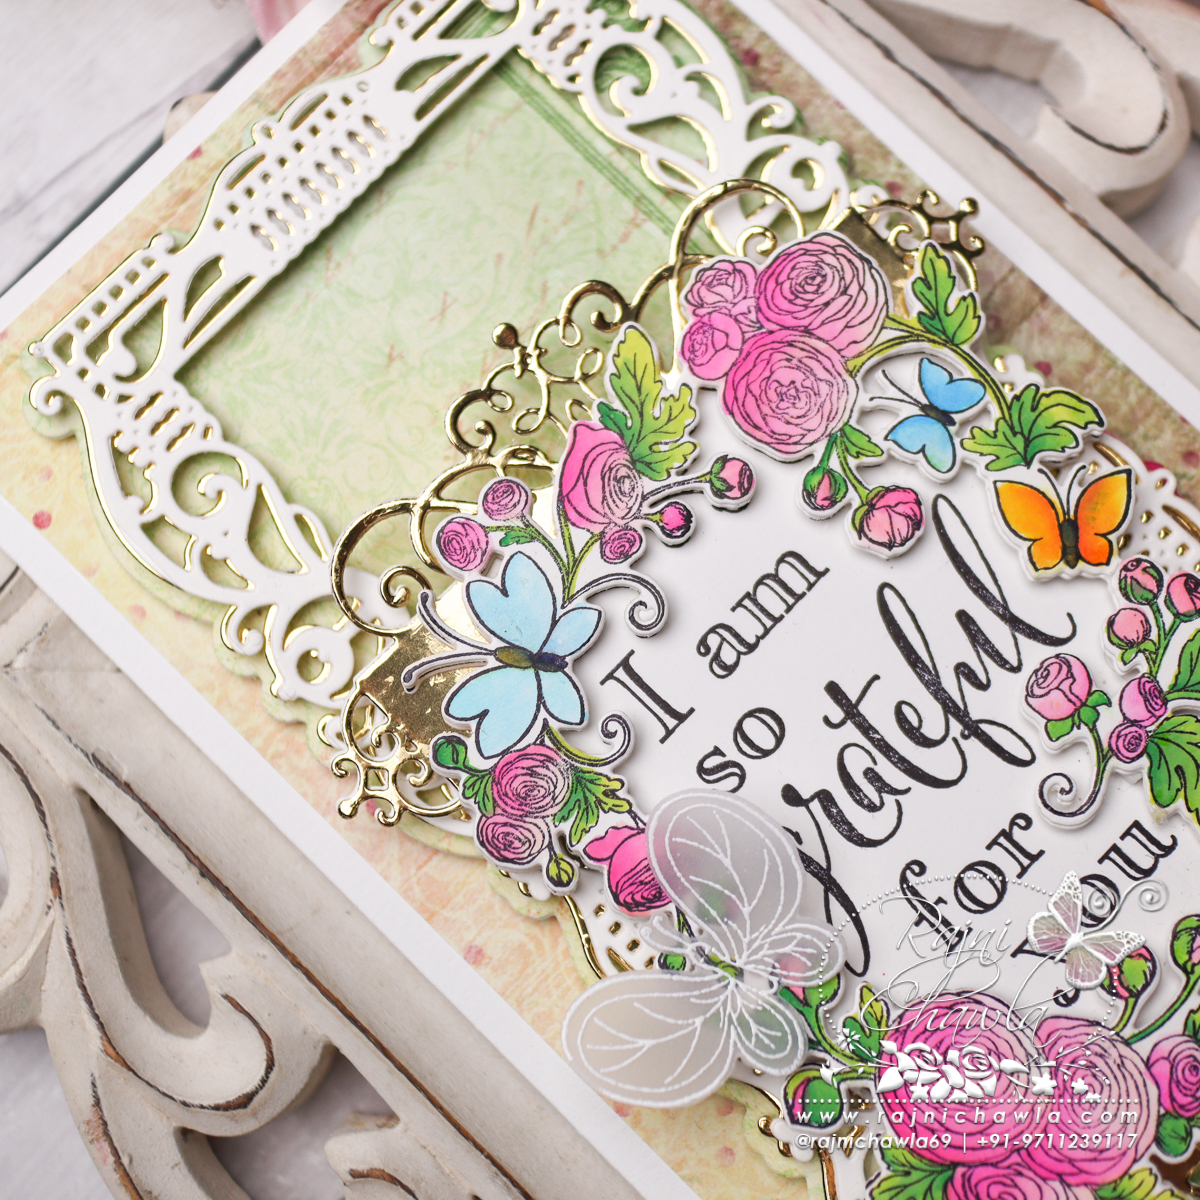
HCD1-7203 Ornamental Tags Die
HCD1-7354 Small Floral Butterfly Die
HCPC-3953 Small Floral Butterfly Cling Stamp Set
HCGP1-488 Luxe Gold Cardstock
18002 Rajni Chawla’s Vellum Flowerite – 10 Sheets
478594 Zig Clean Color Real Brush Markers – 48 Pack
Other Products: Smooth White Cardstock, Funnel Tray, Die Cutting Machine, Foam dots, ScoreBoard, Hero Arts White Pigment Ink.
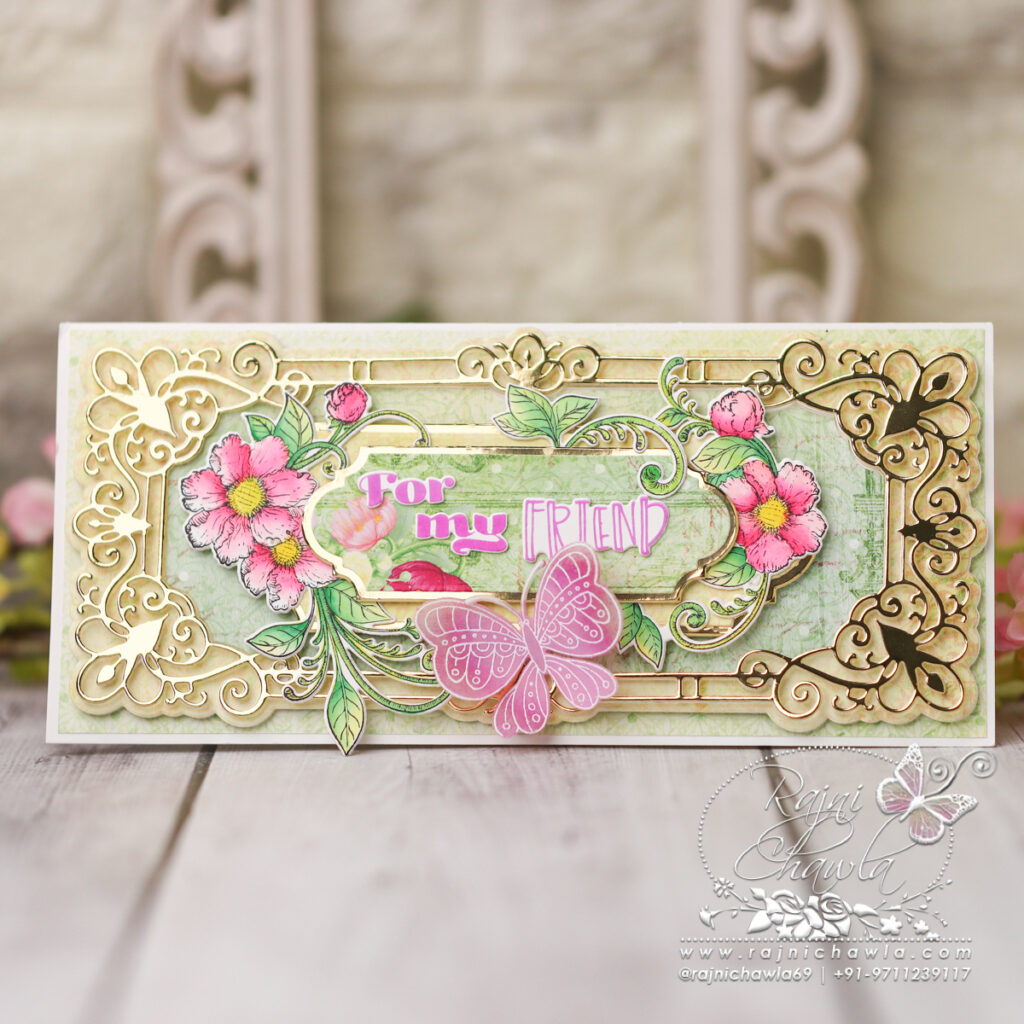
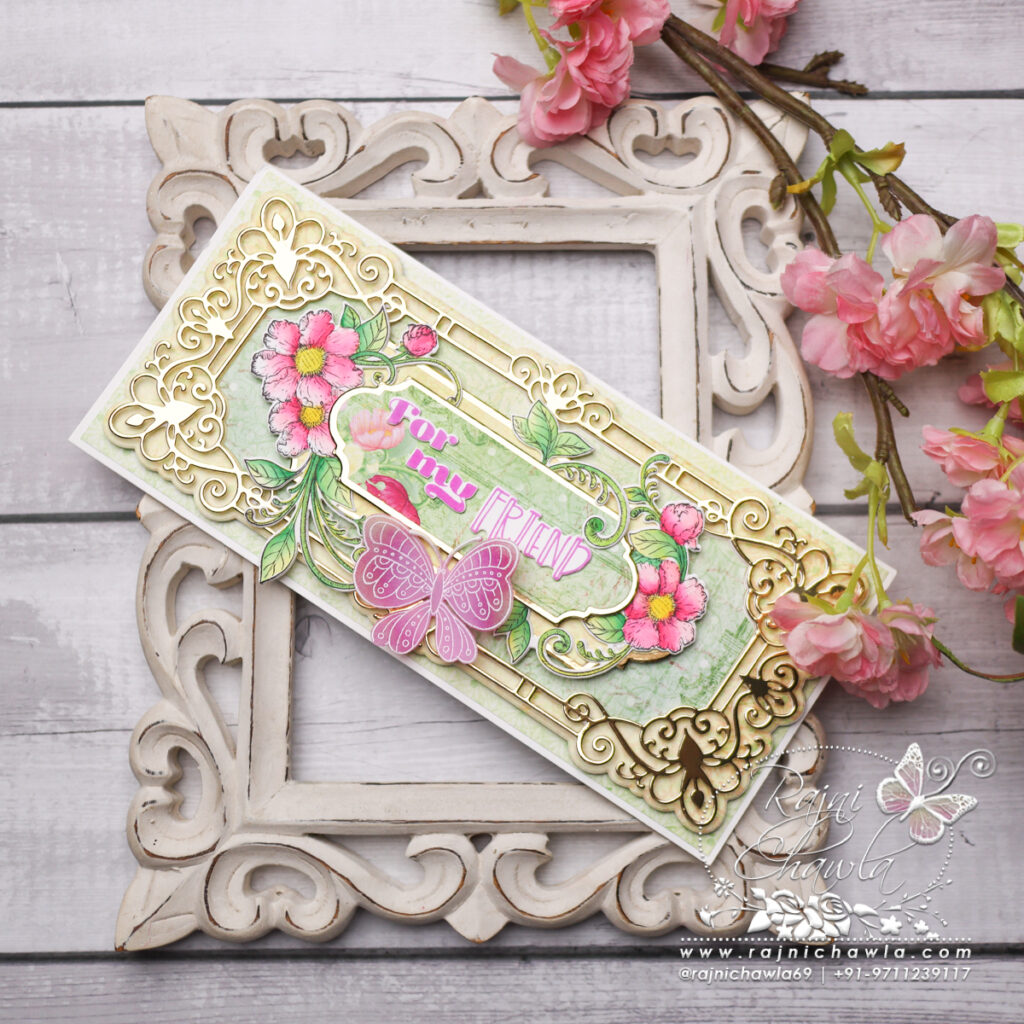
Instructions: The ready top-fold slimline card from smooth cardstock measures 9 1/2″ by 4 1/2″. To prepare the card base, cut the paper measuring 9 1/2″ by 9 ” and score at 4 1/2″ on 9″ length and crease well.
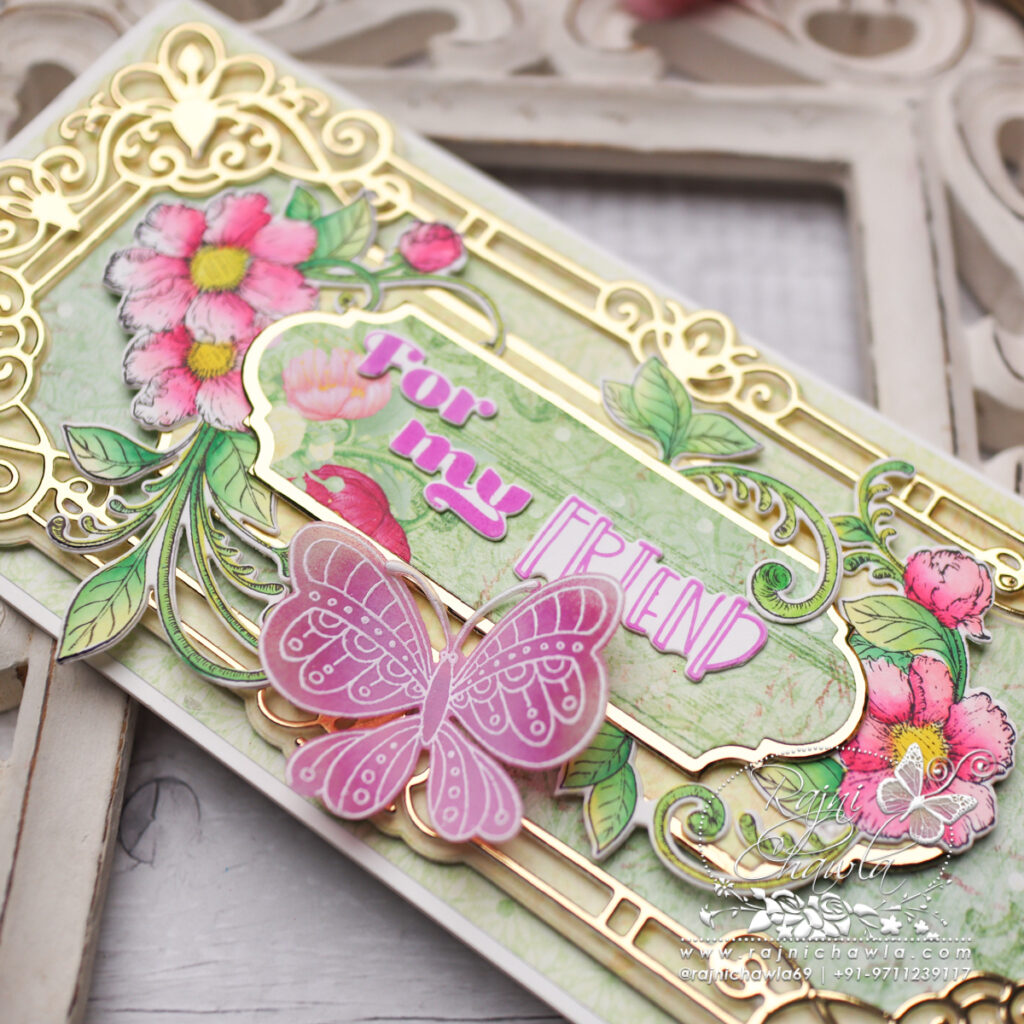
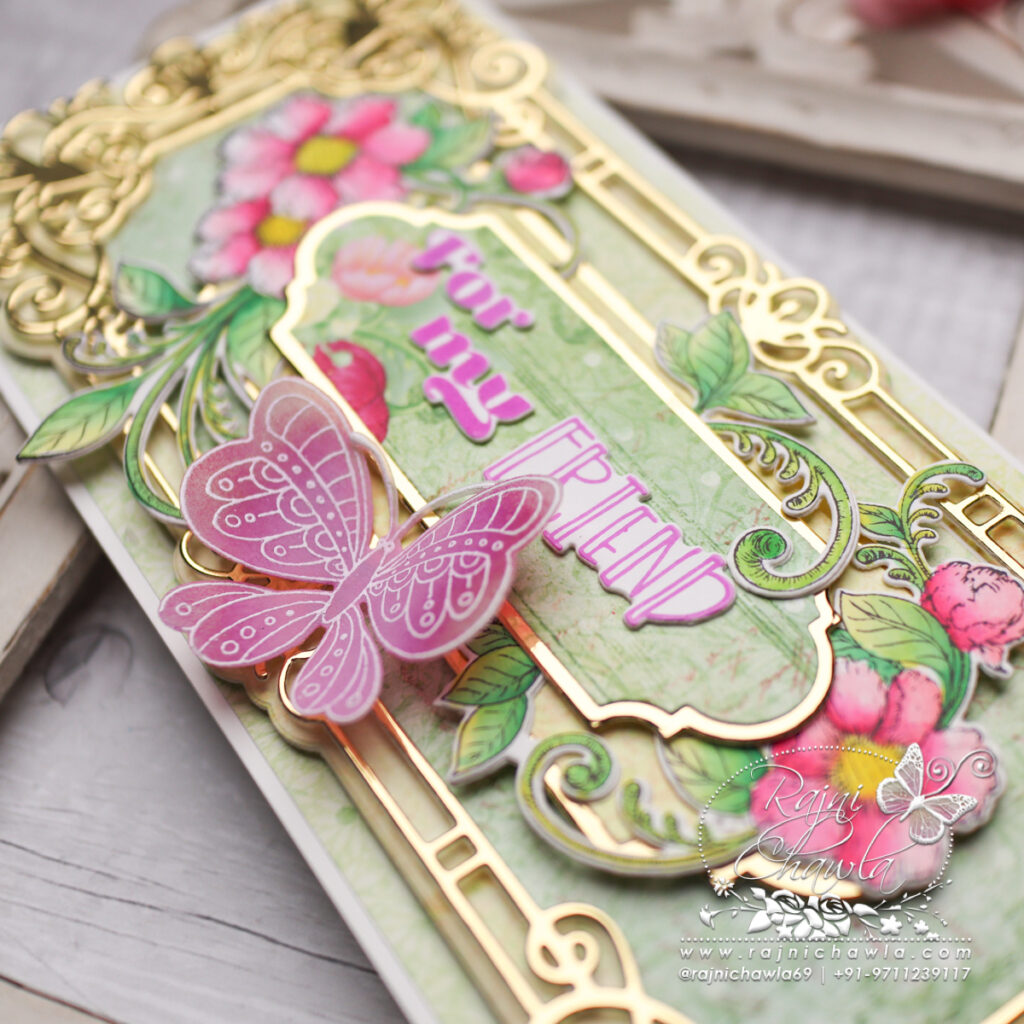
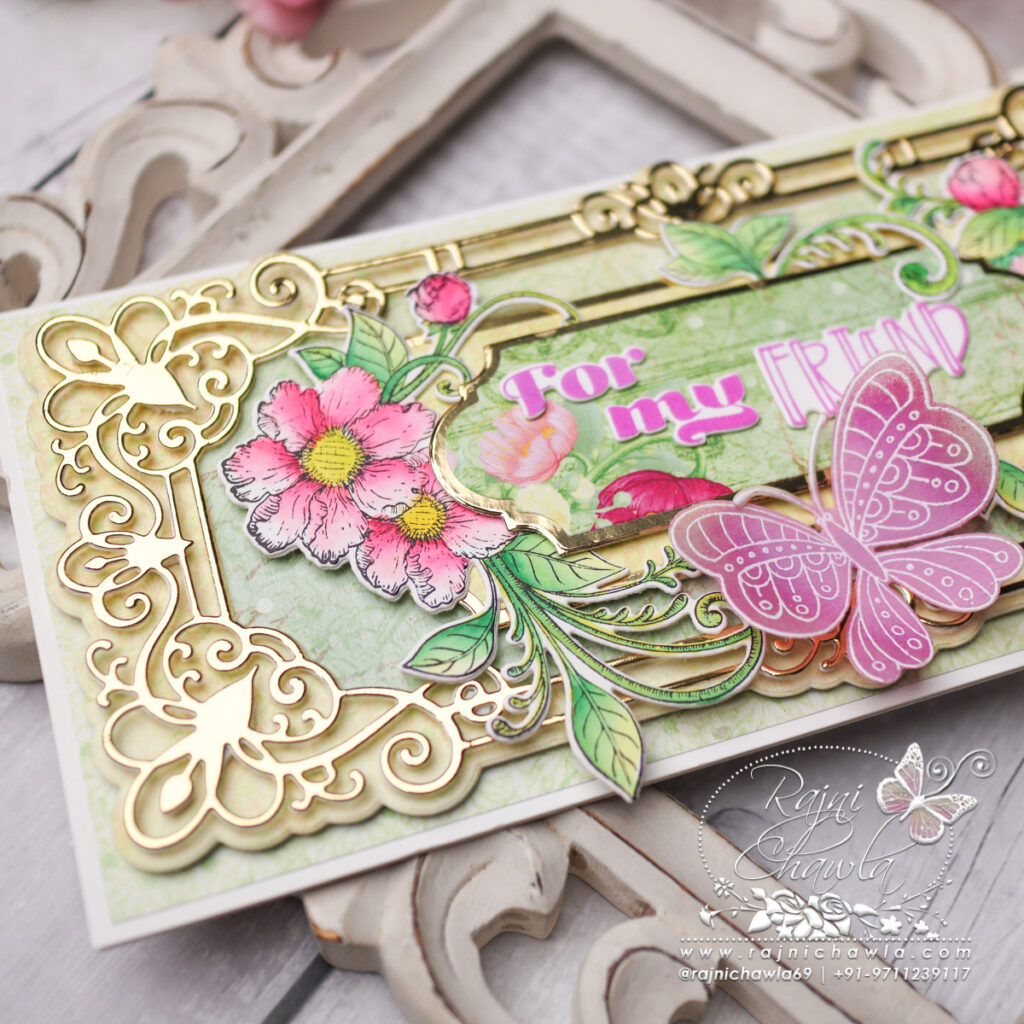
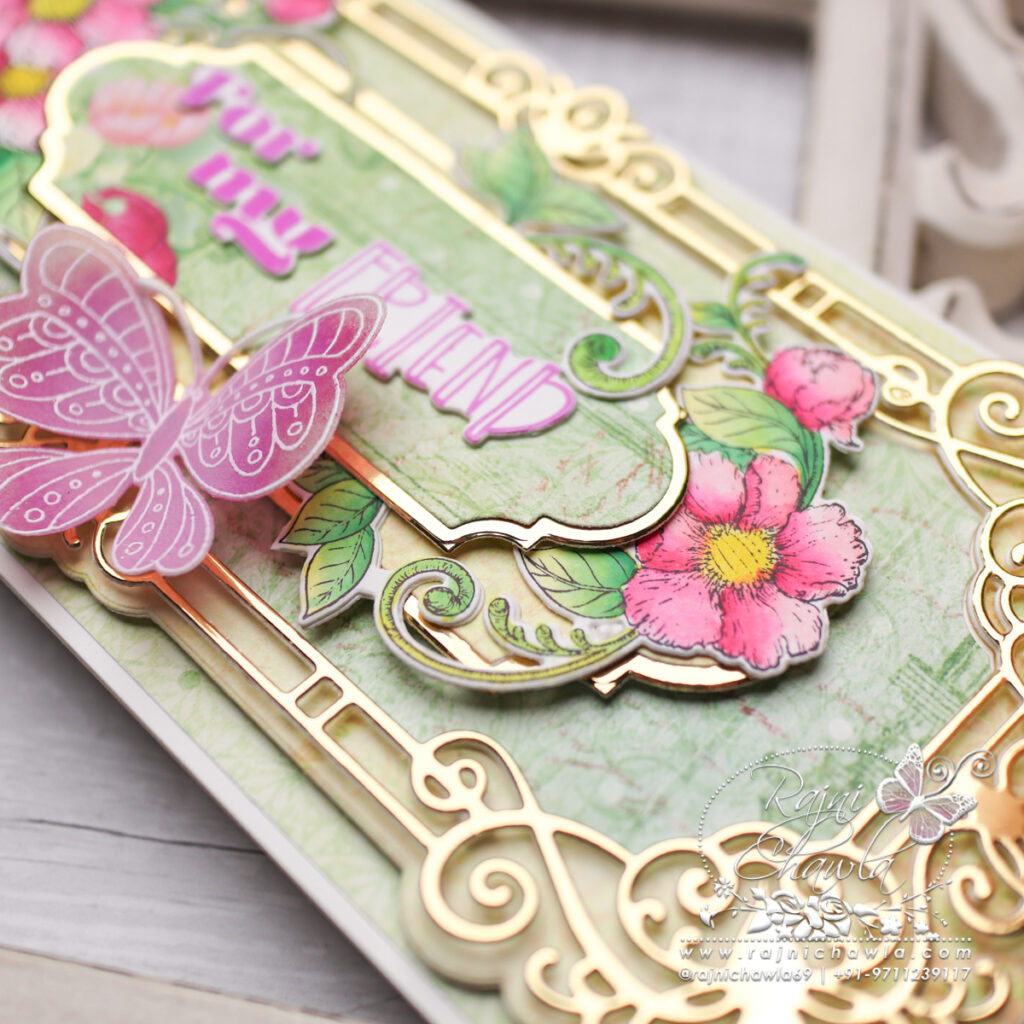
For the card front, choose the pattern paper from the Floral Sentiments paper collection and cut measuring 9″ by 4″, and frame it with a panel cut from Luxe Gold cardstock creating a delicate border of 1/16″ on all four sides. Layer the panel on the ready card front using dimensional tapes.
Next, cut one each of white and gold die-cut using HCD3-7447 Slim Elegant Rectangle Die. Glue the white die cut on the bottom to add extra strength to the gold one. Next, cut the solid die cut from light color cardstock from the same paper collection and layer the fancy frame on it using glue dots. Further, layer this die-cut panel on the card front. Choose the pattern paper from the designer paper collection and cut the center solid piece. Layer this panel using foam dots in the open window space. Also, prepare 2 labels with pattern paper with a gold border and layer them on top as shown.
Stamp the floral image with black archival ink on smooth white cardstock using HCPC-31024 Friend Floral Sentiment Cling Stamp Set and paint it using Zig Clean Clear Brush Markers. Cut the frame using its coordinating die set. Glue an extra die cut behind the painted image to add little strength. Now chop the image in 2 parts and embellish the card front as shown. Also, stamp the sentiment from the same stamp set and cut it using its coordinating die set. Glue the sentiment in the center as shown.
Stamp the butterfly image with white pigment ink on Rajni Chawla’s vellum cardstock using HCPC-3953 Small Floral Butterfly Cling Stamp Set and sprinkle white heat embossing powder. Dust extras and heat set it using a heating tool. Cut the butterfly using its coordinating die set and color it using Seedless Preserves Distress Oxide.