Good morning, all!!
Welcome back to my blog. Here I have another inspiration to share using Floral Frames Collection from Heartfelt Creations.


Supplies From Heartfelt Creations:
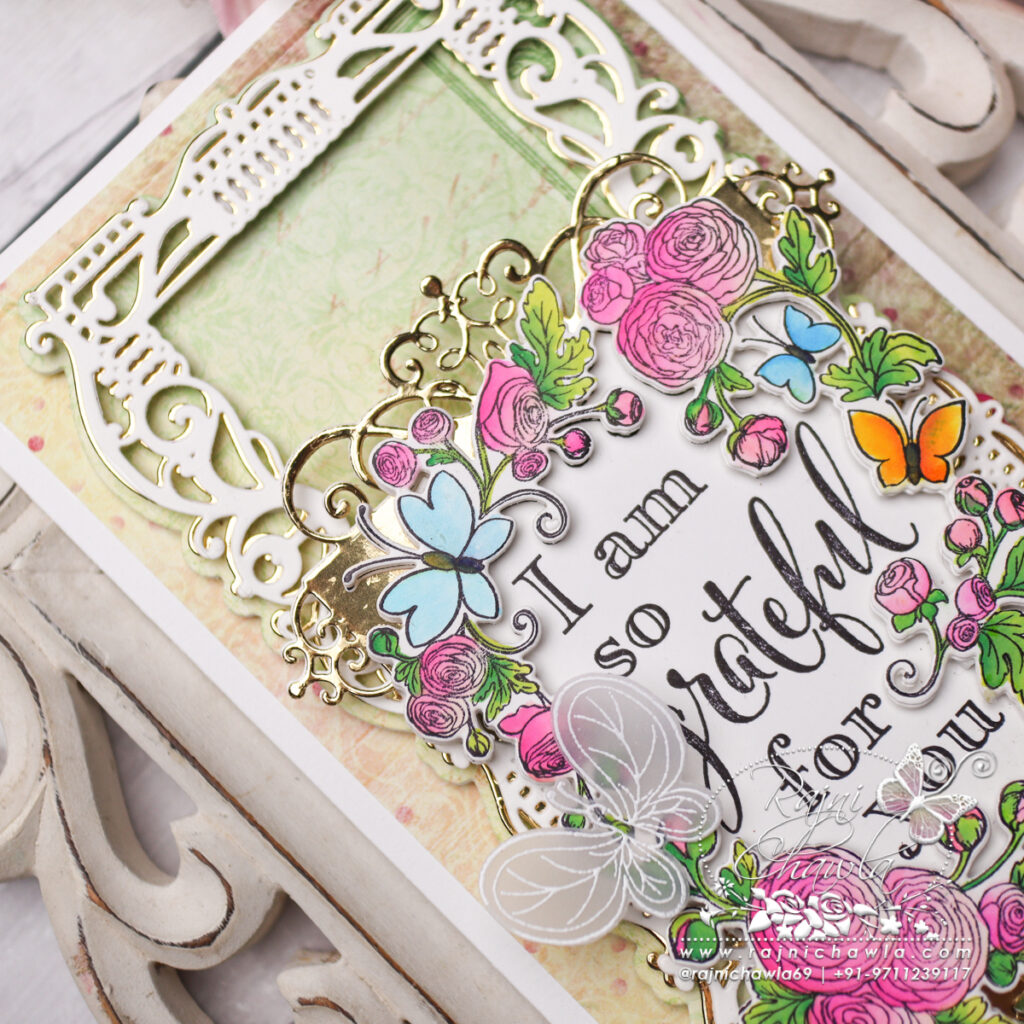
HCD3-7448 Slim Ornate Rectangle Die
HCPC-31025 Grateful Floral Sentiment Cling Stamp Set
HCD1-7461 Grateful Floral Sentiment Die
HCD1-7203 Ornamental Tags Die
HCD1-7354 Small Floral Butterfly Die
HCPC-3953 Small Floral Butterfly Cling Stamp Set
HCGP1-488 Luxe Gold Cardstock
18002 Rajni Chawla’s Vellum Flowerite – 10 Sheets
478594 Zig Clean Color Real Brush Markers – 48 Pack
Other Products Used: Smooth White Cardstock, Funnel Tray, Die Cutting Machine, Foam dots, ScoreBoard, Hero Arts White Pigment Ink.
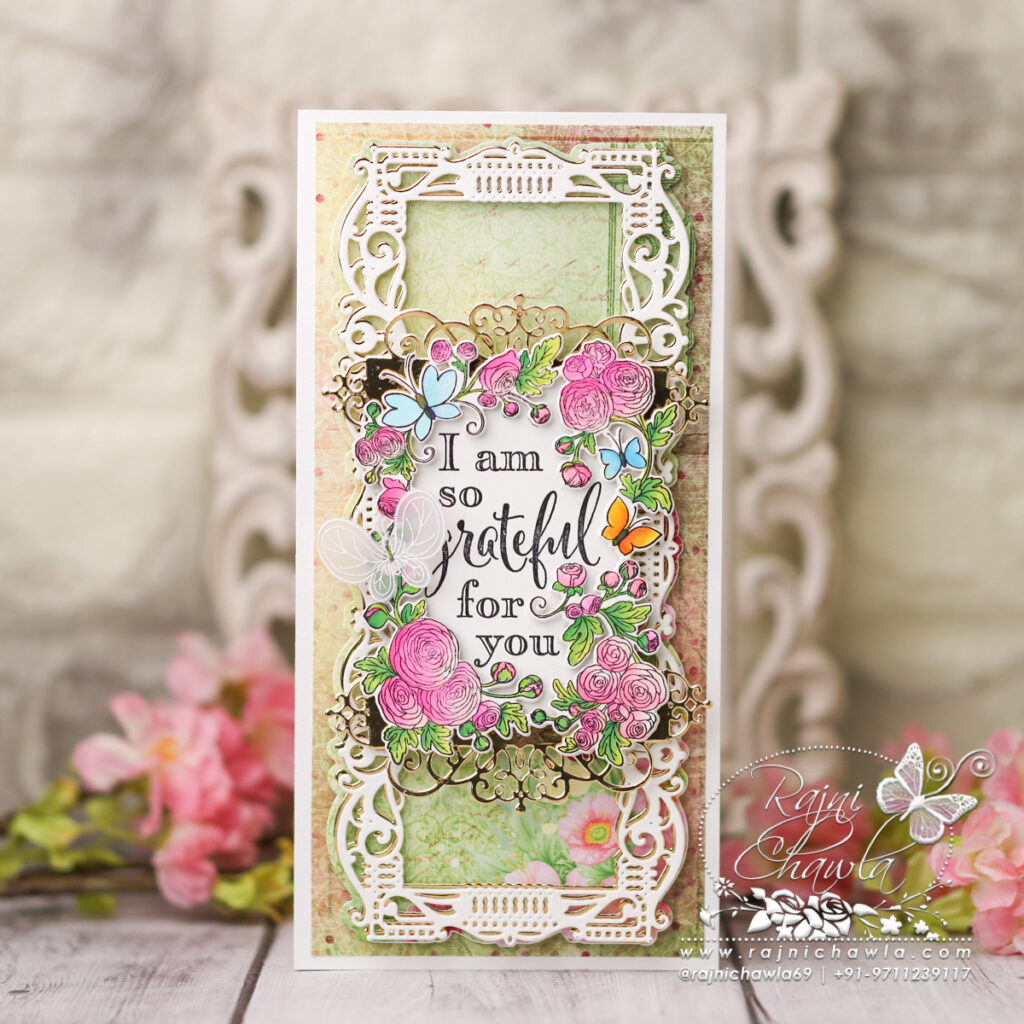
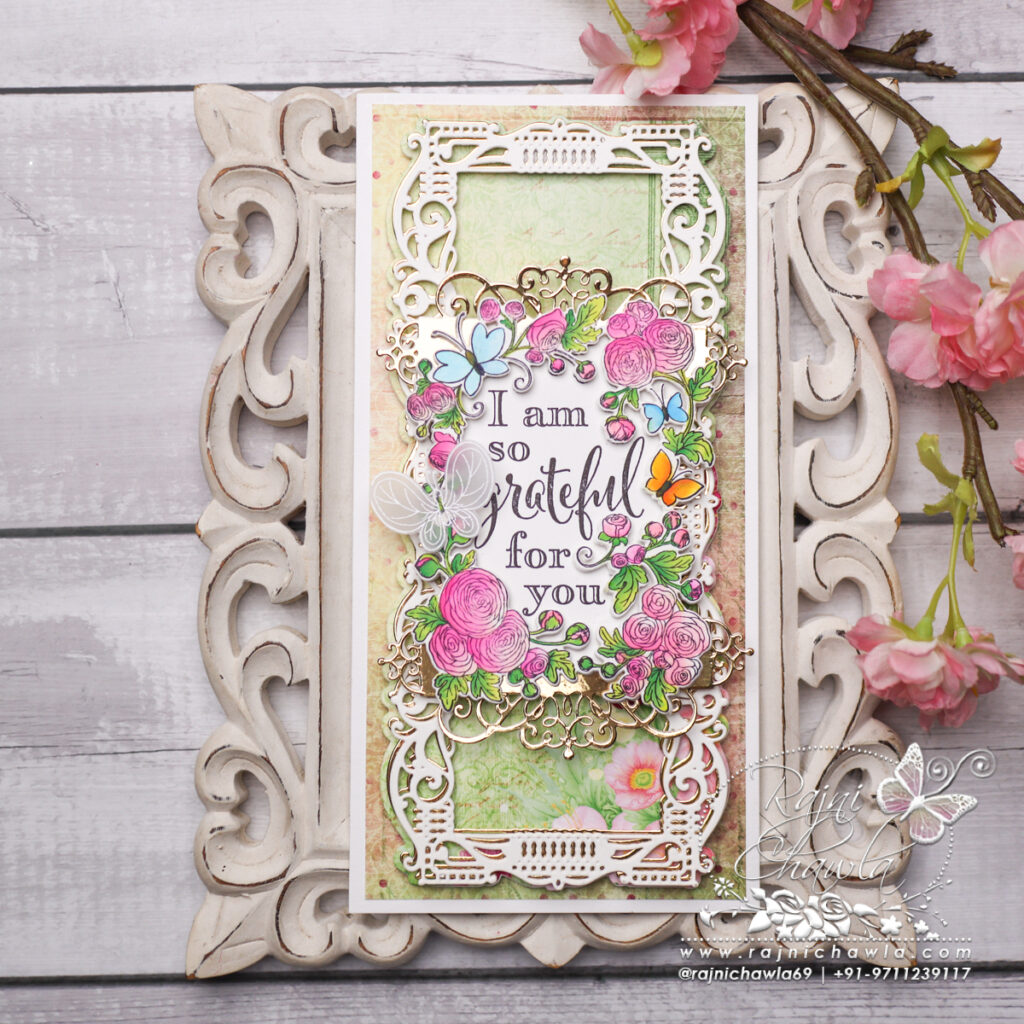
Instructions: The ready side-fold slimline card from smooth cardstock measures 9 1/2″ by 4 1/2″. To prepare the card base, cut the paper measuring 9 1/2″ by 9 ” and score at 4 1/2″ on 9″ length and crease well.
For the card front, choose the pattern paper from the Floral Sentiment Paper Collection and cut measuring 9″ by 4″. Layer the pattern paper on the card front using dimensional tape.
To decorate the card front, choose the paper from the designer paper collection and cut a solid panel using the outermost die from the HCD3-7448 Slim Ornate Rectangle Die. Next, cut a lacy frame in Luxe Gold and white cardstocks using the same die set and glue them together keeping the white on top. Next, layer the fancy frame on the card panel as shown, using tiny glue dots.
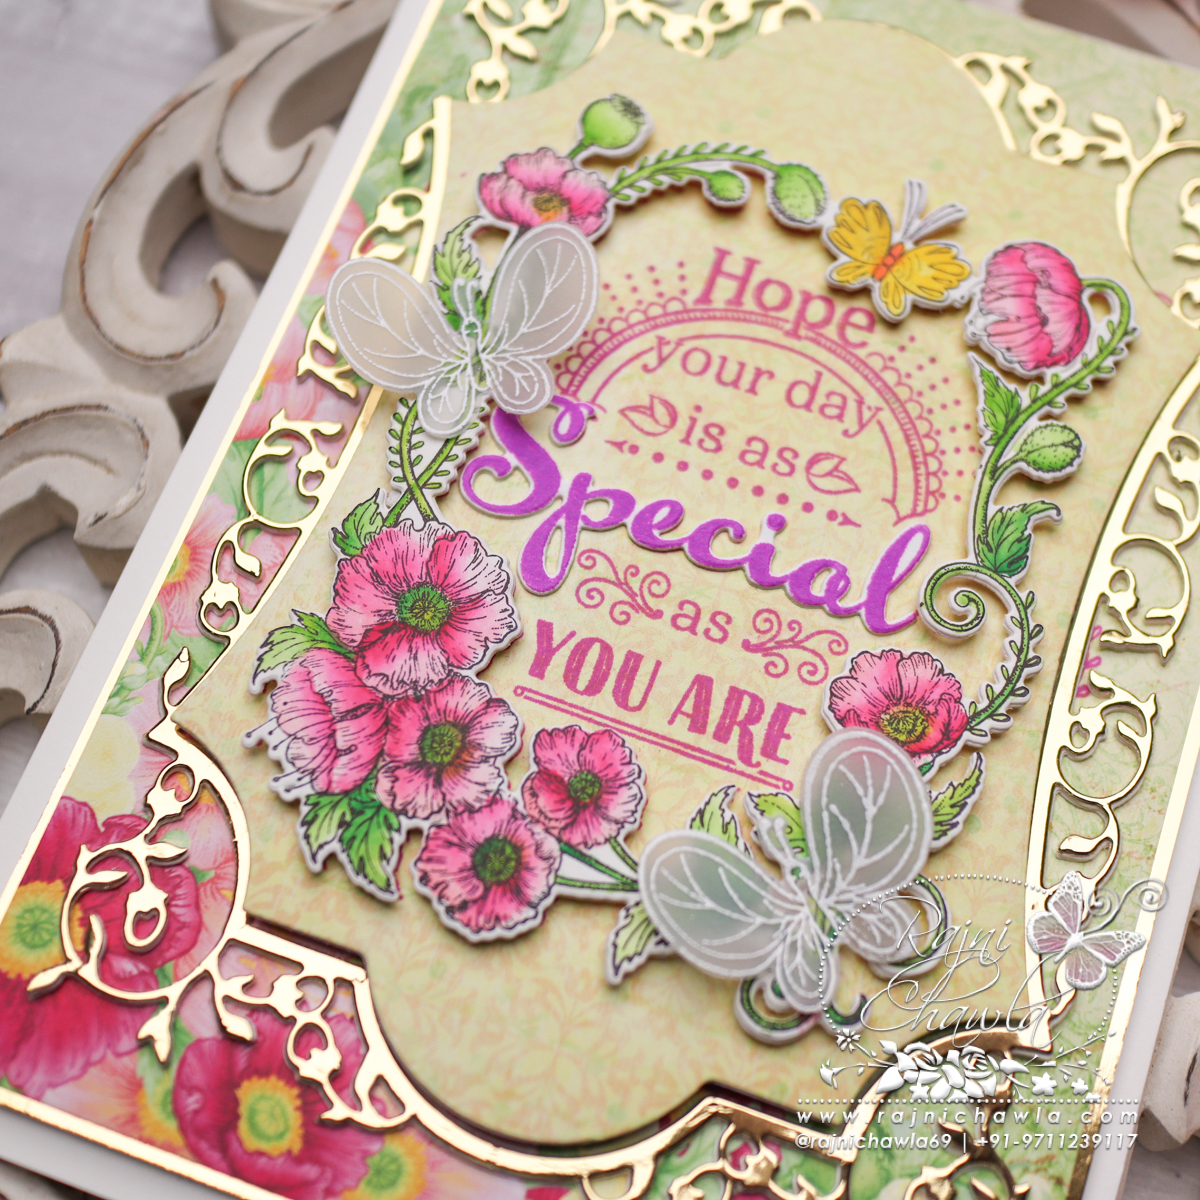
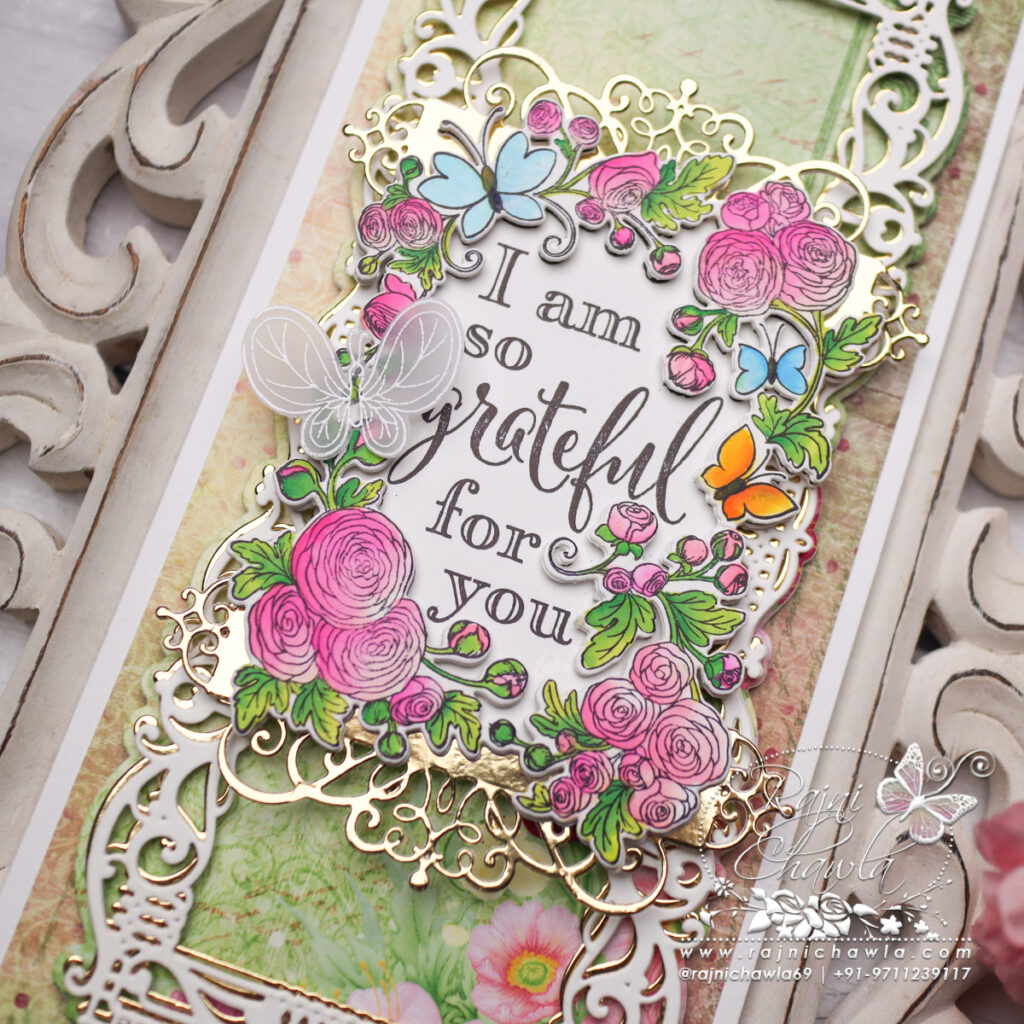
Stamp the floral sentiment image twice with black archival ink on smooth white cardstock using HCPC-31025 Grateful Floral Sentiment Cling Stamp Set. Cut one stamped image using the outermost die from its coordinating die set. Cut the frame of the second image and paint it using the Zig Clean Clear Markers. Once done with the painting, layer the painted image on the solid sentiment panel using foam dots.
Cut 2 pieces of ornate tags in luxe gold cardstock using HCD1-7203 Ornamental Tags Die set and adhere them one each on the top and bottom of the prepared painted panel. Further, double-layer the panel in the center of the card as shown.
For vellum butterflies, stamp the image twice using white pigment ink on Rajni Chwla’s Vellum cardstock and sprinkle white heat embossing powder. Dust extras and heat set the images using a heat gun. Finish the card by adding vellum butterflies.