


Good Morning All….
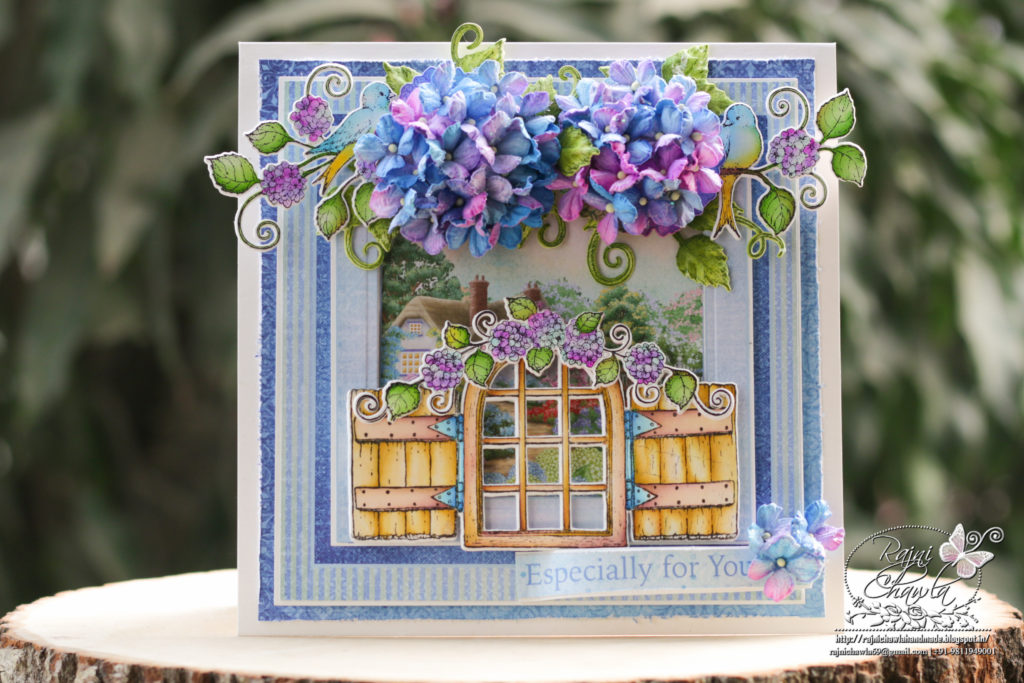
Once again a warm welcome to my blog. For today’s Heartfelt Inspiration, I have this beautiful special Wishes card to share. The detailed window image sits perfectly well on the 6 by 6 inches card panel resulting in an easy n beautiful card front.

Supplies from Heartfelt Creations:
HCD1-7278 Cottage Garden Hydrangea Die
HCD1-7278 Cottage Garden Hydrangea Die
HCD1-7279 Fresh Cut Hydrangea Die
HCD1-7280 Cottage Window & Hydrangea Die
HCDP1-2111 Cottage Garden Paper Collection
HCPC-3900 Cottage Garden Hydrangea Cling Stamp Set
HCPC-3901 Fresh Cut Hydrangea Cling Stamp Set
HCPC-3902 Cottage Window & Hydrangea Cling Stamp Set
HCD2-751 Cut Mat Create 2A Die
HCFB1-467 3D Leafy Accents Shaping Mold
HCD1-7193 Leafy Accents Die
HCPC-3835 Leafy Accents Cling Stamp Set
HCPP1-475 Deluxe Flower Shaping Paper Pack of 50 – White
RACP985 Ranger Archival Ink Pad – Cactus Flower
RACP614 Ranger Archival Ink Pad – Magenta Hue
RACP412 Ranger Archival Ink Pad – Forget-Me-Not
RACP436 Ranger Archival Ink Pad – Leaf Green
RACP482 Ranger Archival Ink Pad – Olive
PGM15015 Rajni Chawla’s Crystal Clear
HCDA2-450 Stack and Store Daubers-Pack of 30
HCST1-401 Deluxe Flower Shaping Kit
159723 Designer Dries Clear Adhesive
Other Supplies Needed: Smooth white cardstock, Paper Trimmer, Scoreboard, Foam tape, Adhesive that dries clear, Hot glue, sharp scissors, and paper distresser.
Instructions: The ready side-fold card from smooth white cardstock measures, 7″ by 7″. Choose the paper and two 6″ by 6″ card panels from the designer paper collection, Cottage Garden Collection. Cut the first square with the cutter, without damaging the outer panel. Glue both the panels on white cardstock creating a border of 1/16″ border on all sides. Next cut the window using Cut Mat Create 2A Die and layer the window on white cardstock using foam tape. From another card panel, cut centerpiece using the same die and adhere the scenic picture inside the window of the already prepared card panel. Layer both the panels as shown.
Stamp the images from Cottage Window & Hydrangea Cling Stamp Set and Fresh Cut Hydrangea Cling Stamp Set using black archival ink and color them using Zig Clean Clear Brush Markers. Once done with coloring, cut the images using their coordinating dies. Glue one extra layer on the back for extra strength.
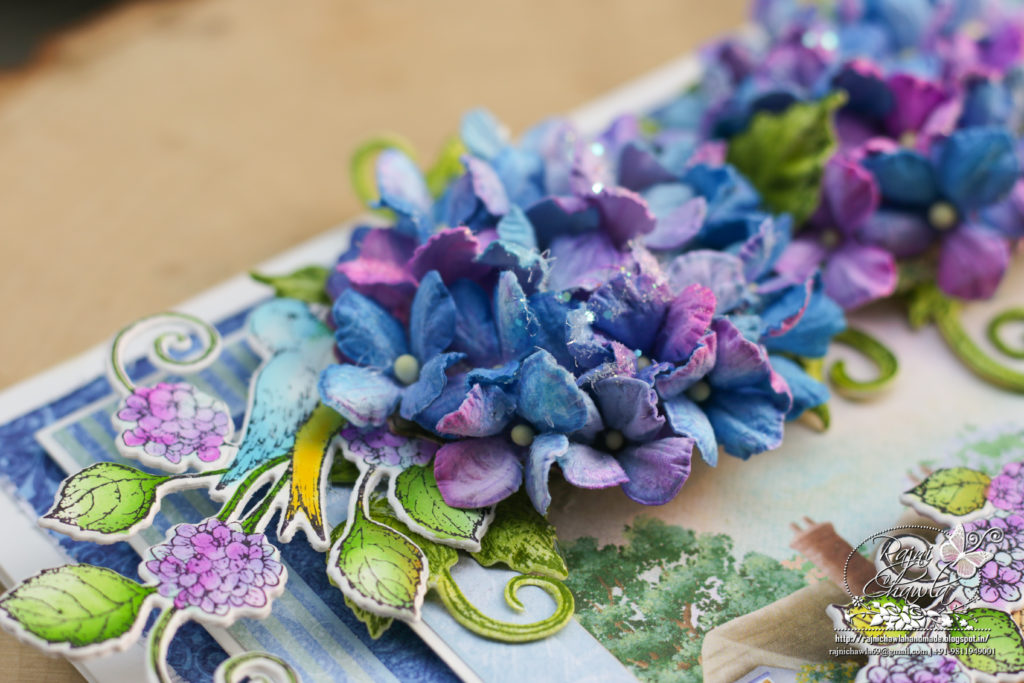
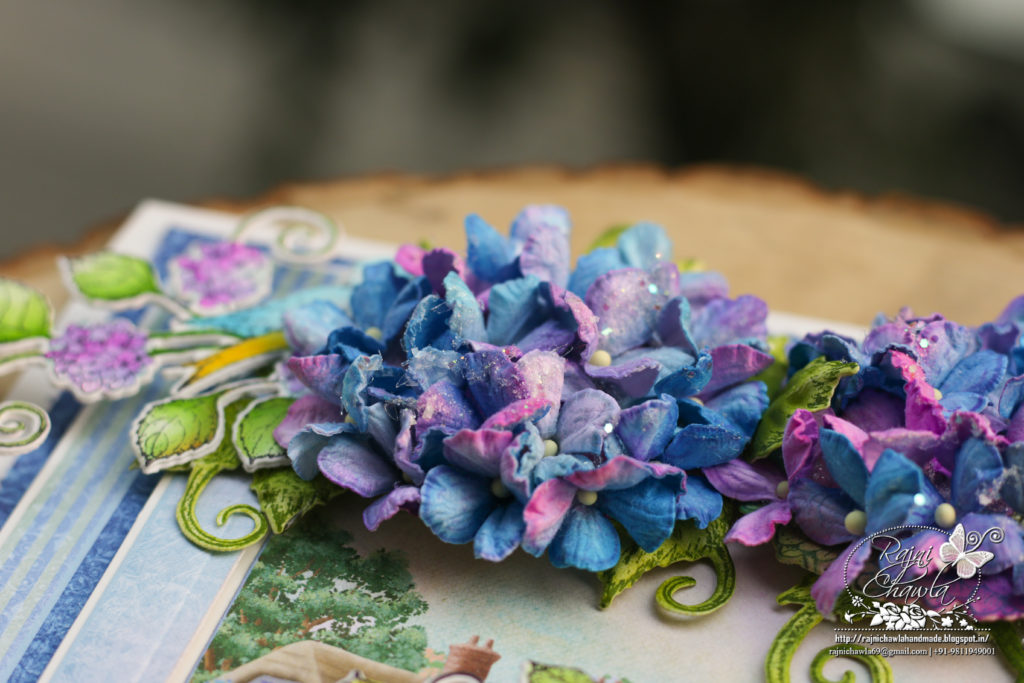
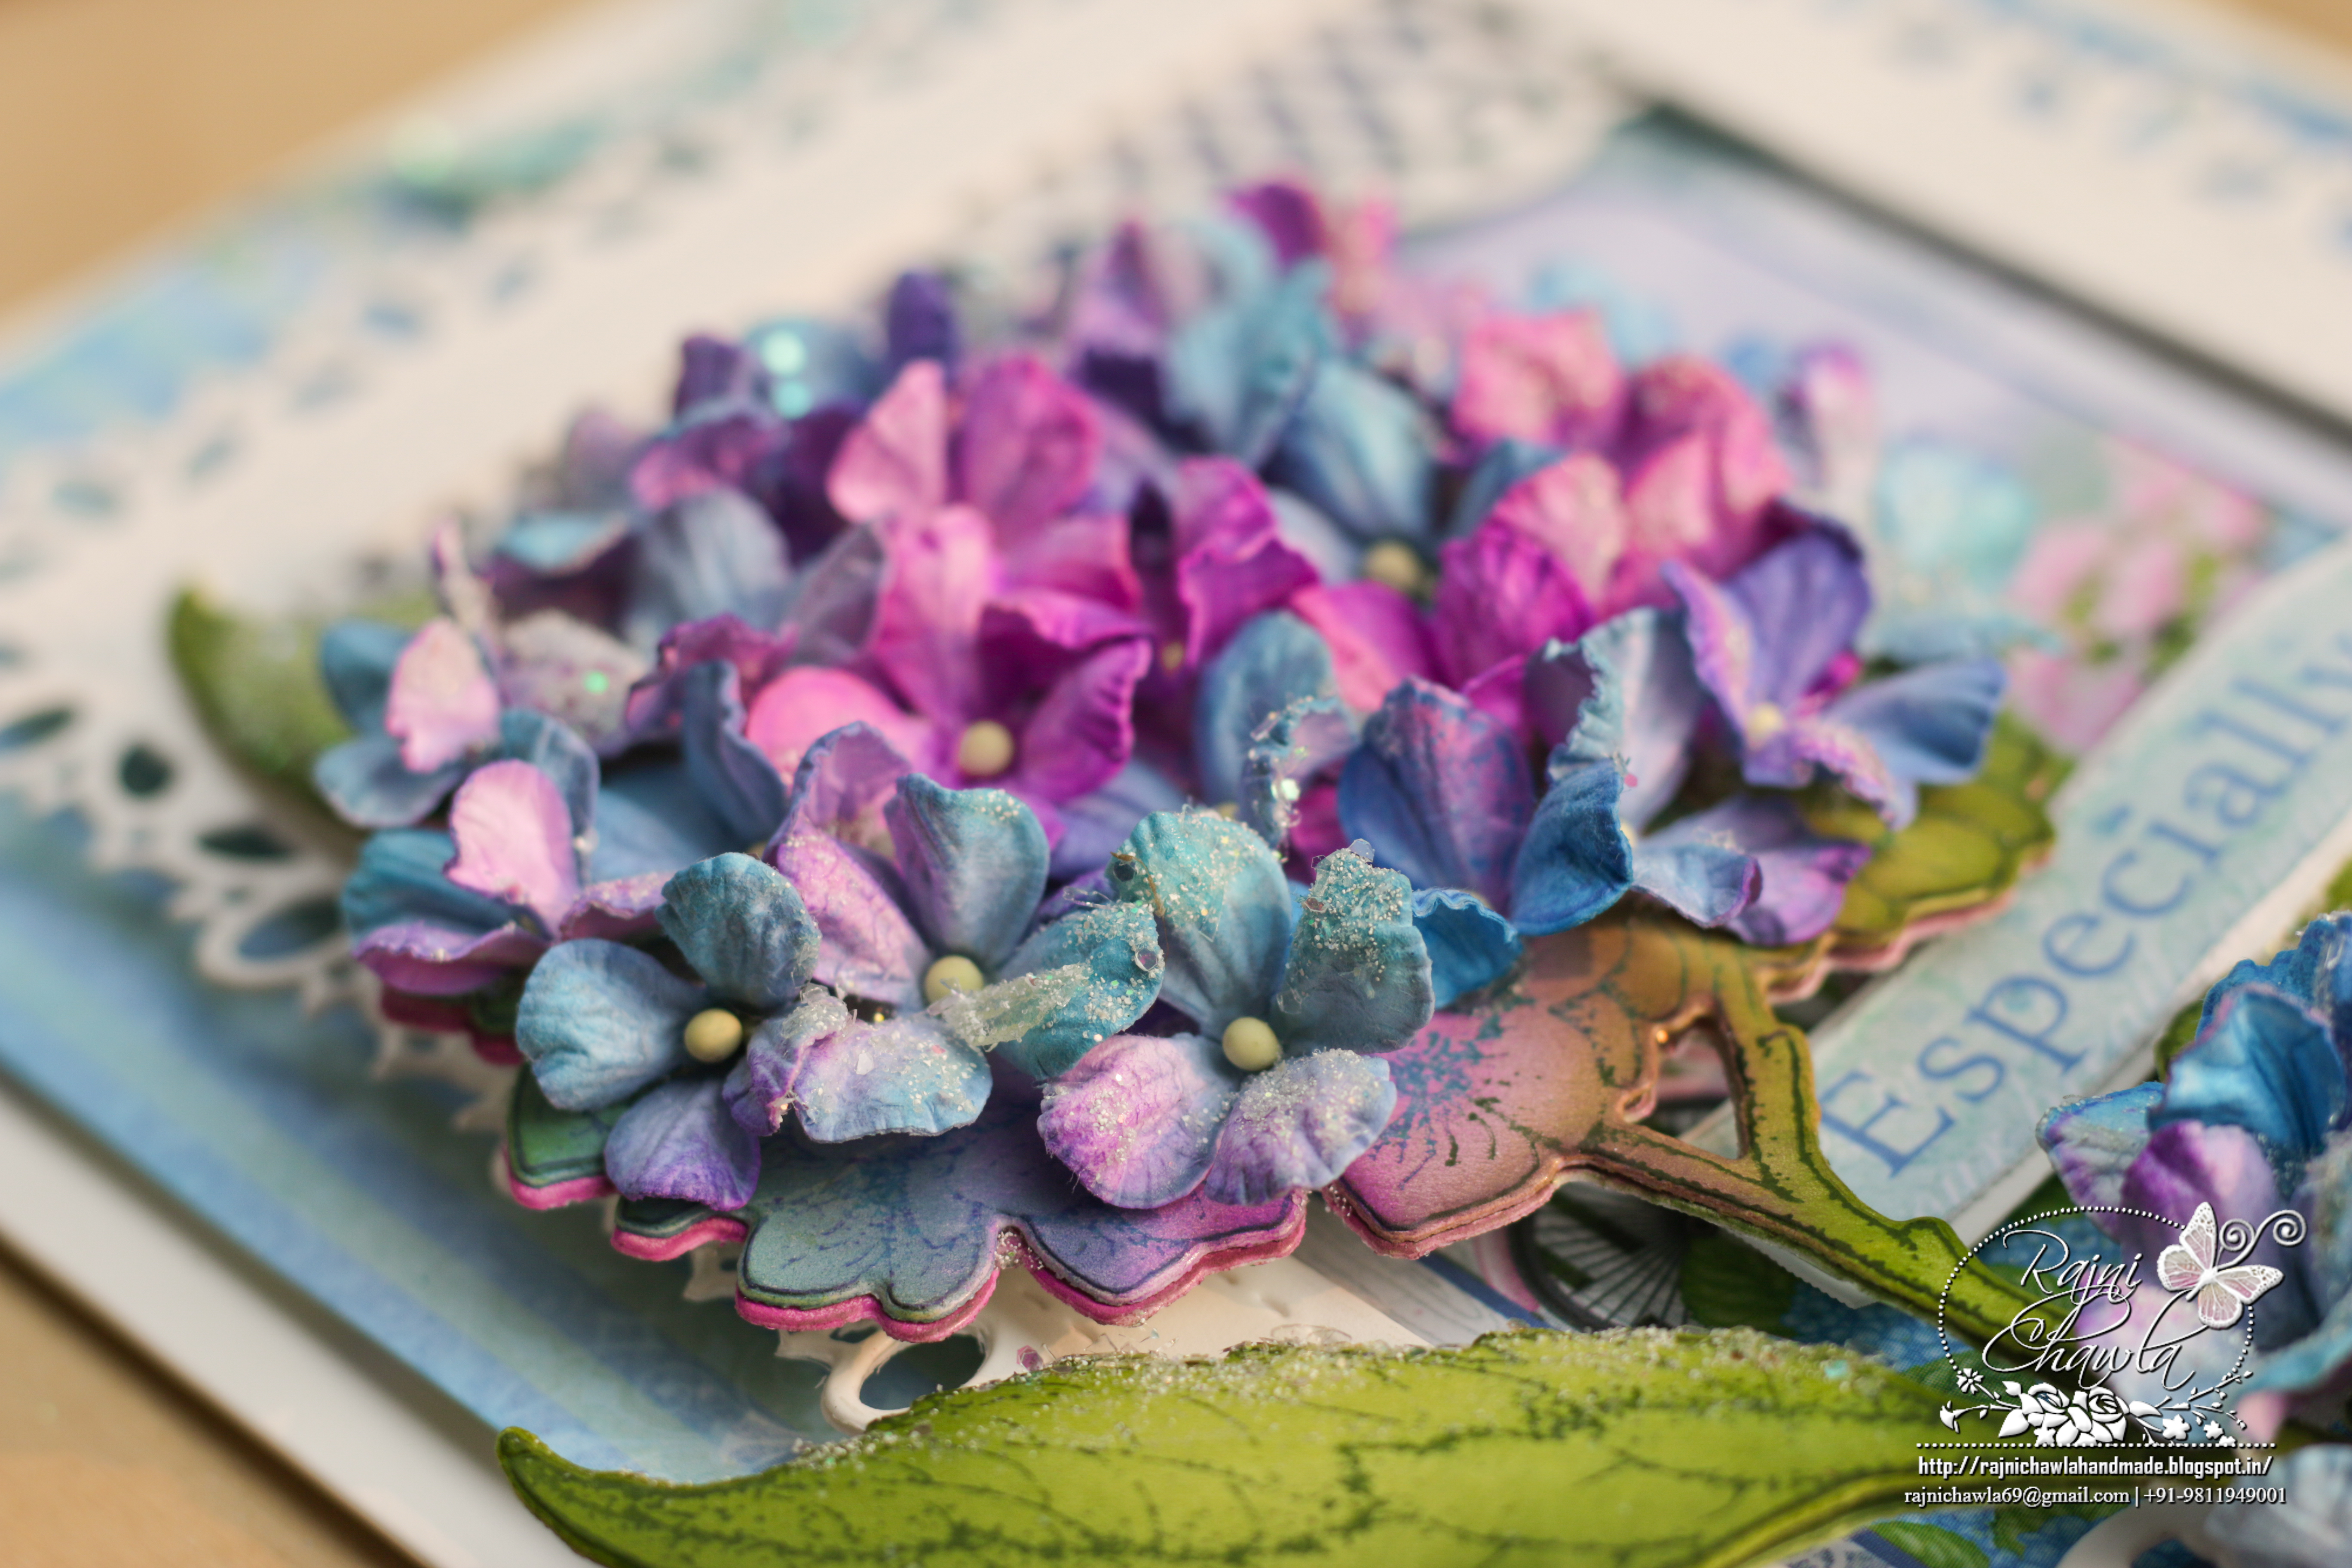
Stamp the image of medium size Hydrangea twig from Fresh Cut Hydrangea Cling Stamp Set using Cactus Flower, Forget Me Not and Olive Green archival ink and cut it using it’s coordinating die. Also, stamp and cut the loose Hydrangeas of both sizes multiple times and cut them using it’s coordinating die as well. Paint them using Forget Me Not and Cactus Flower. Do color the back as well. Soak the petals in water for a few seconds in a bowl of water, damp them with a dry cloth and shape them using golf groove tools. Once shaped, press the center from the front. Pierce the center and glue tiny pollen.
To prepare the Hydrangea, mound, color the stamped Hydrangea using Forget me Not and Cactus Flower and shape the mound from the back. Next, fill the mound gluing shaped Hydrangeas. The leaves of the stem are removed, instead, I have used the Leafy Accents Cling Stamp Set and it’s coordinating die and mold to create foliage for which I have used Leaf Green and Olive green archival ink to paint.
Finally, assemble the card as shown, keeping the painted window on the bottom of the card front and creating a small bouquet of 2 Hydrangea mounds on the top. Add the sentiment from the same paper collection. Add a little sparkle by adding crystal clear powder using an adhesive that dries clear.
This is beautiful Rajni! I love how you used the window as a gate…so creative!