


Products From Heartfelt Creations:
HCPC 3749 Snow Kissed Spruce Cling Stamp Set
HCPC 3794 Window Frame Cling Stamp Set
HCD1 7148 Window Frame Die
HCD1 7146 Festive Holiday Die
HCD1 7145 Festive Holly Cardinals Die
HCPC 3791 Festive Holly & Cardinals Cling Stamp Set
HCPC 3768 Woodsy Critters Cling Stamp Set
HCD1 7124 Woodsy Critters Die
HCPC 3622 Poinsettias & Holly Clusters Cling Stamp Set
HCD1 7176 Poinsettias & Holly Clusters Die
HCD1 7120 Fleur Borders Basics Die
CST1-401 Deluxe Flower Shaping Kit
RAHT Heat It Craft Tool
PGM15015 Rajni Chawla’s Crystal Clear
HCDA2-450 Stack and Store Daubers-Pack of 30
HCPP3-452 12 x 12 Cardstock Pack of 25 – White
ANC820 Coral See Prills
159723 Designer Dries Clear Adhesive
Other Products Used: Distress ink Picked Raspberry and Wilted Violet, Archival Inks Black, Library Green, Leaf Green, Plum, Magenta Hue, Paper Distressing tool or a pair of sharp scissors, Acetate Paper, Versamark ink, Funnel Tray, Glossy Accent, White Smooth Cardstock, Black Chipboard, Double sided tape, Fuschia Color Ribbon, Crop -a-Dile, Thin Wire, paper towel, Heat Gun.
Videos Referred: For more tips on creating the Winter’s Eve collection, watch the tutorial at https://youtu.be/Hf9-3YQWBXM.
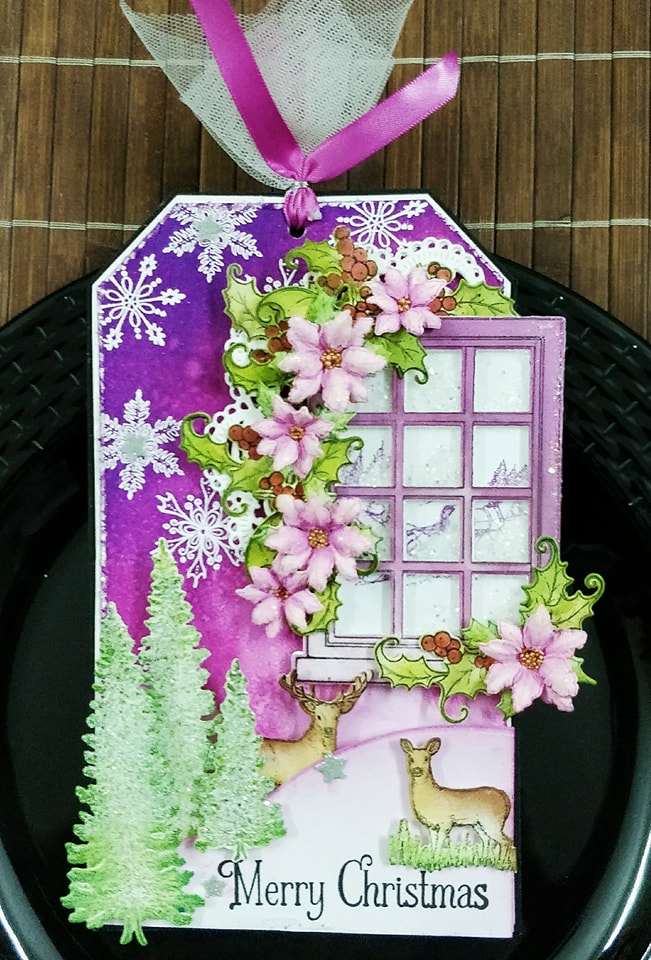
Instructions: Cut a tag from a smooth white cardstock measuring 4 1/4″ by 7 1/2″. Stamp few images of snowflakes randomly from Snow Kissed Spruce Cling Stamp Set with Versamark and sprinkle white heat embossing Powder.Heat set it using a heat gun. Distress the tag using first with Picked Raspberry and the with Wilted Violet. Once happy with the background, mist a little with water and dab it with a paper towel. Further distress all the sides with Paper distressing tool or scissors. Layer it on a white cardstock 1/8th inch larger on all sides from the original tag. The next layer added is with black chipboard, again 1/8″ larger on all the sides.
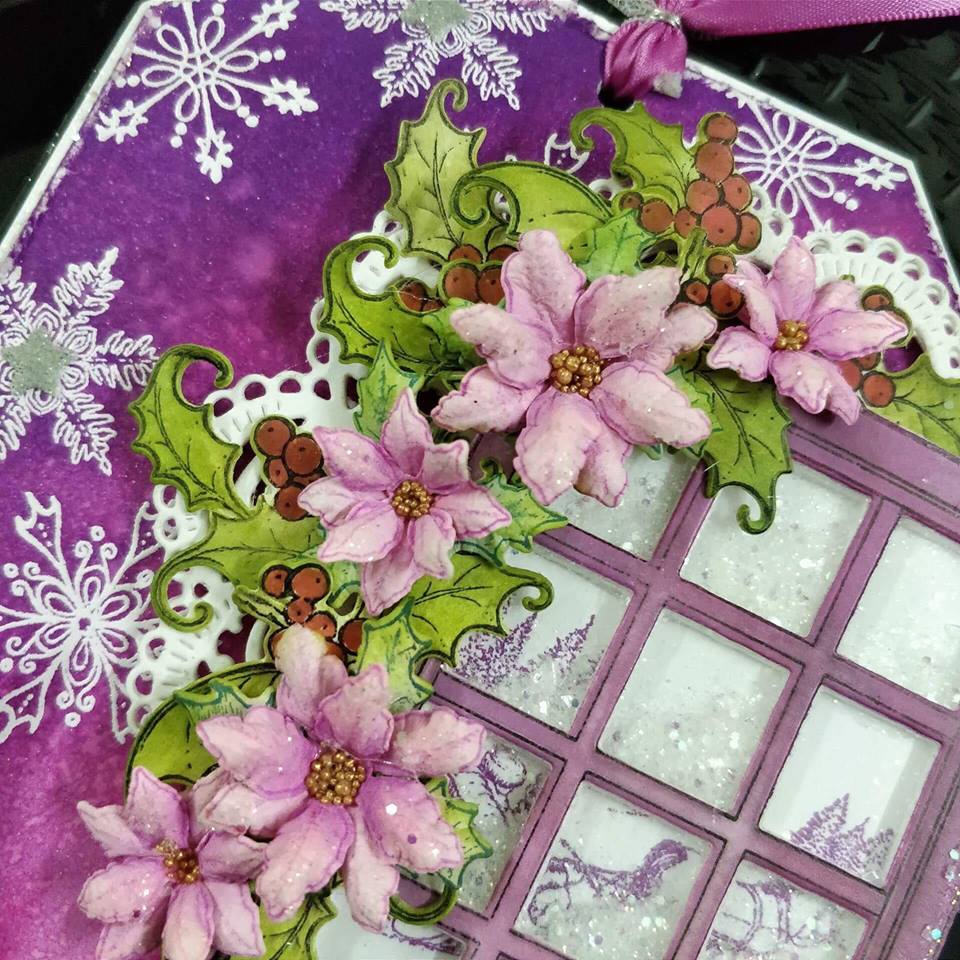
For The shaker Window, Stamp the window image from Window Frame Cling Stamp Set, with black archival, and cut it using it’s coordinating die.Color the window using Wilted Violet and Picked Raspberry and adhere an acetate measuring 21/2″ by 31/2″, behind the window. Cut extra 4 windows without stamping. Glue all these together to create dimensions. Cut a piece of white cardstock measuring 2 1/2′ by 3 1/2″ and stamp an image with Fushchia Pink Stazon. Glue this image behind the window panel to create a scene. Fill the window with Crystal Clear Powder and close the window by gluing colored window panel.
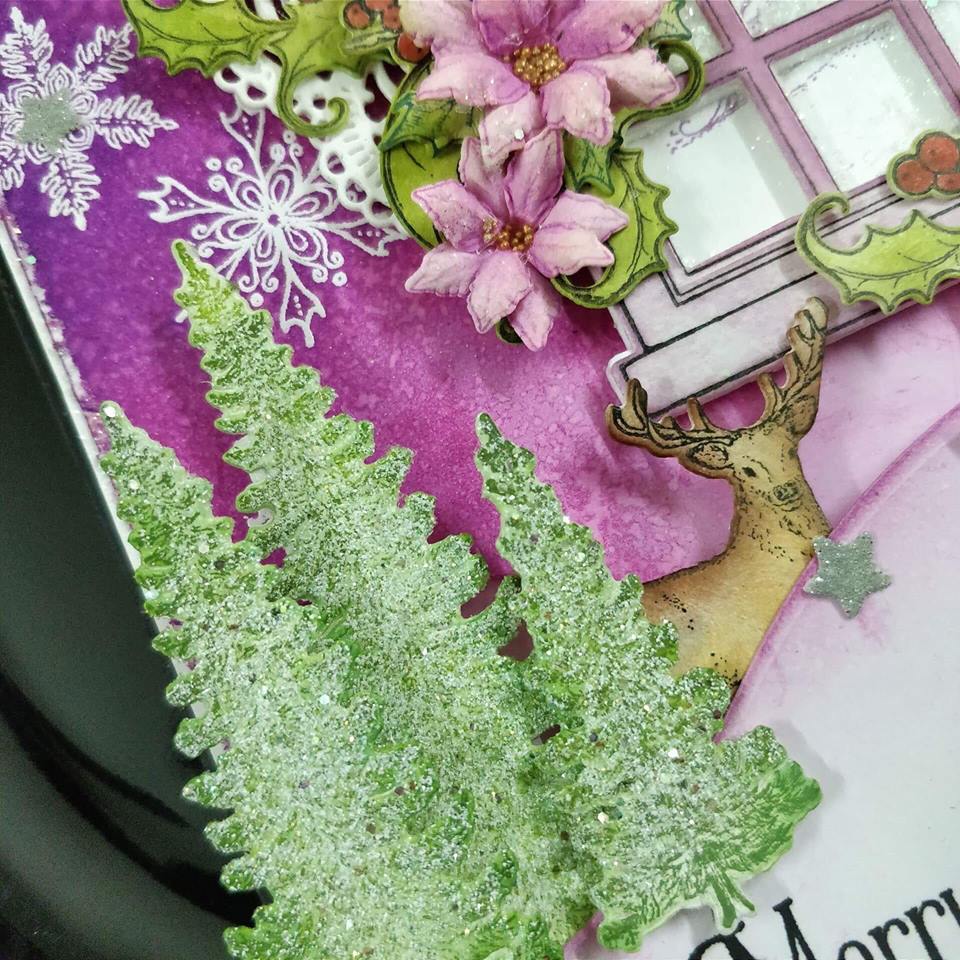
Trees from Snow Kissed Spruce Stamp Set are stamped using Archival ink Library Green and then painted the edges with Leaf Green. With the help of Adhesive that dries clear, add a little sparkle to all the trees.
Images of dear from Woodsy Critters Cling Stamp Set is stamped with black archival ink and then cut using its coordinating die. These are then painted using distress ink, Vintage Photo, and Peeled Paint.
For Poinsettias, stamp multiple images from Poinsettias & Holly Clusters Cling Stamp Set with Plum Archival Ink and Holly leaves with Library Green. Cut them using their coordinating dies. Poinsettias are colored using Magenta Hue and leaves are colored using Leaf Green and Olive Green.Shape them using Deluxe flower shaping kit. Arrange the flower and add prills in the center.
Holly leaves from Festive Holly Cardinal Stamp set are stamped using Black Archival and then painted using Peeled paint and Mowed Lawn Distress inks.
For snow hill, cut a small piece of white cardstock measuring 3″ by 4 1/2″ and cut it using Fleur Border Basic Die as shown. Distress a little with Picked Raspberry and stamp a sentiment from Ornate Sleigh Cling Stamp Set, with Black Archival ink.
Once all the elements are ready, layer them as shown, using foam dots creating different dimensions. Finish the tag by tying a ribbon along with a small tule of net and lots of sparkle.
Oh Rajni, this is stunning! I love all the lovely sparkly beauty displayed here. The poinsettia are lovely and everything just rolls into the perfect package! Well done my friend!
Absolutely gorgeous!!
What an absolutely gorgeous tag Rajni! I love the colors, the sparkle, the design, the flowers…I love everything about it!
beautiful shaker tag, love those colors.