Good Morning, Friends…
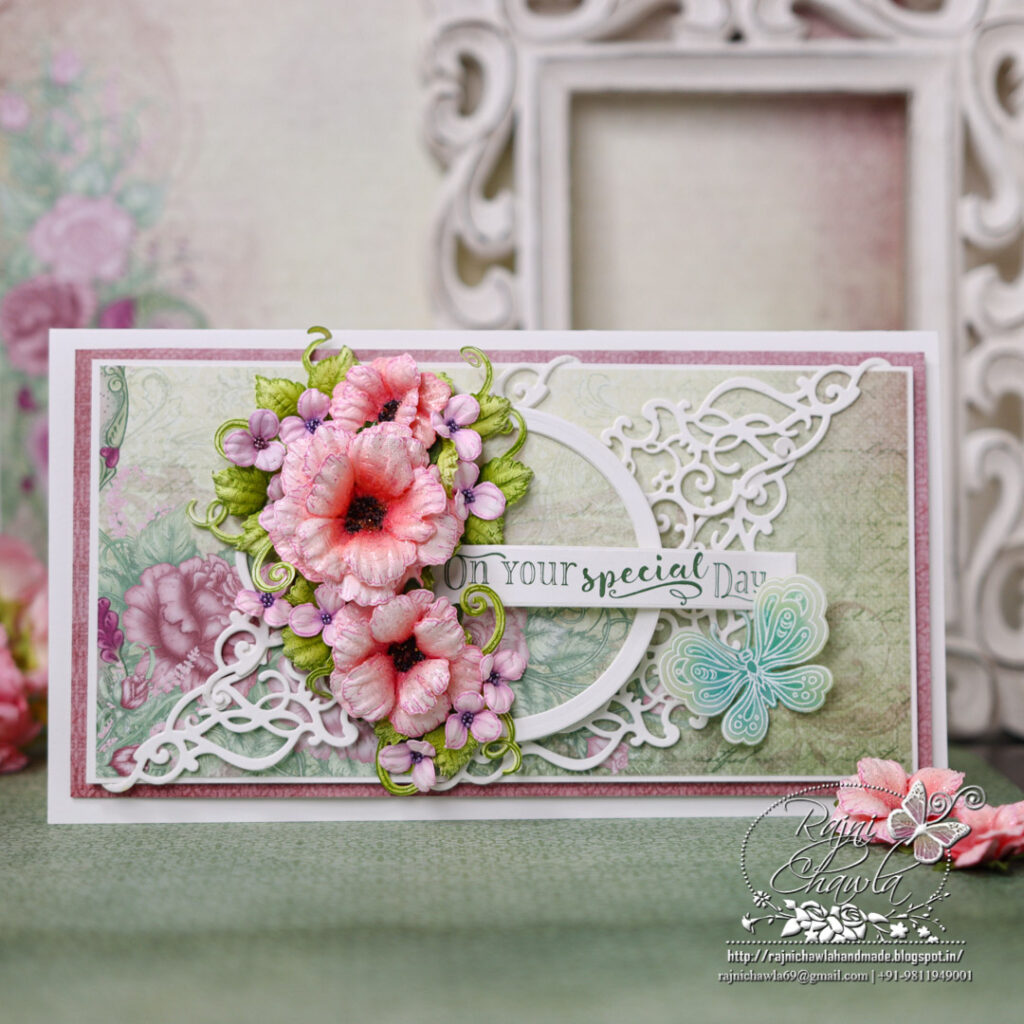
Happy Wednesday!!. Continuing to inspire you with Heartfelt Creations, I have this slimline card to share. Layering simple die cuts and creating backdrops for the floral bouquet is the easiest and quick way to create cards. Isn’t it??

Supplies from Heartfelt Creations:
HCD1-7263 Swirly Accent Spray Die
HCD1-7155 Circle Basics Large Die
HCPC-3847 Celebrate Love Sentiments Cling Stamp Set
HCPC-3911 Wisteria Petals Cling Stamp Set
HCD1-7295 Wisteria Petals Die
HCPC-3952 Floral Butterfly Accents Cling Stamp Set
HCPC-3952 Floral Butterfly Accents Cling Stamp Set
HCD1-7193 Leafy Accents Die
HCPC-3835 Leafy Accents Cling Stamp Set
HCPP1-475 Deluxe Flower Shaping Paper Pack of 50 – White
18002 Rajni Chawla’s Vellum Flowerite – 10 Sheets
RACP985 Ranger Archival Ink Pad – Cactus Flower
RACP436 Ranger Archival Ink Pad – Leaf Green
RACP482 Ranger Archival Ink Pad – Olive
RACP993 Ranger Archival Ink Pad – Red Geranium
EP100 Opaque Embossing Powder – White
RAHT Heat It Craft Tool
Other Supplies Used: Smooth White Cardstock, Double-sided tape, Archival ink Rose Madder, Distress Oxide: Peacock Feather, Die Cutting Machine, Scissors, Score Board, Glossy Accent, and Tacky Glue.
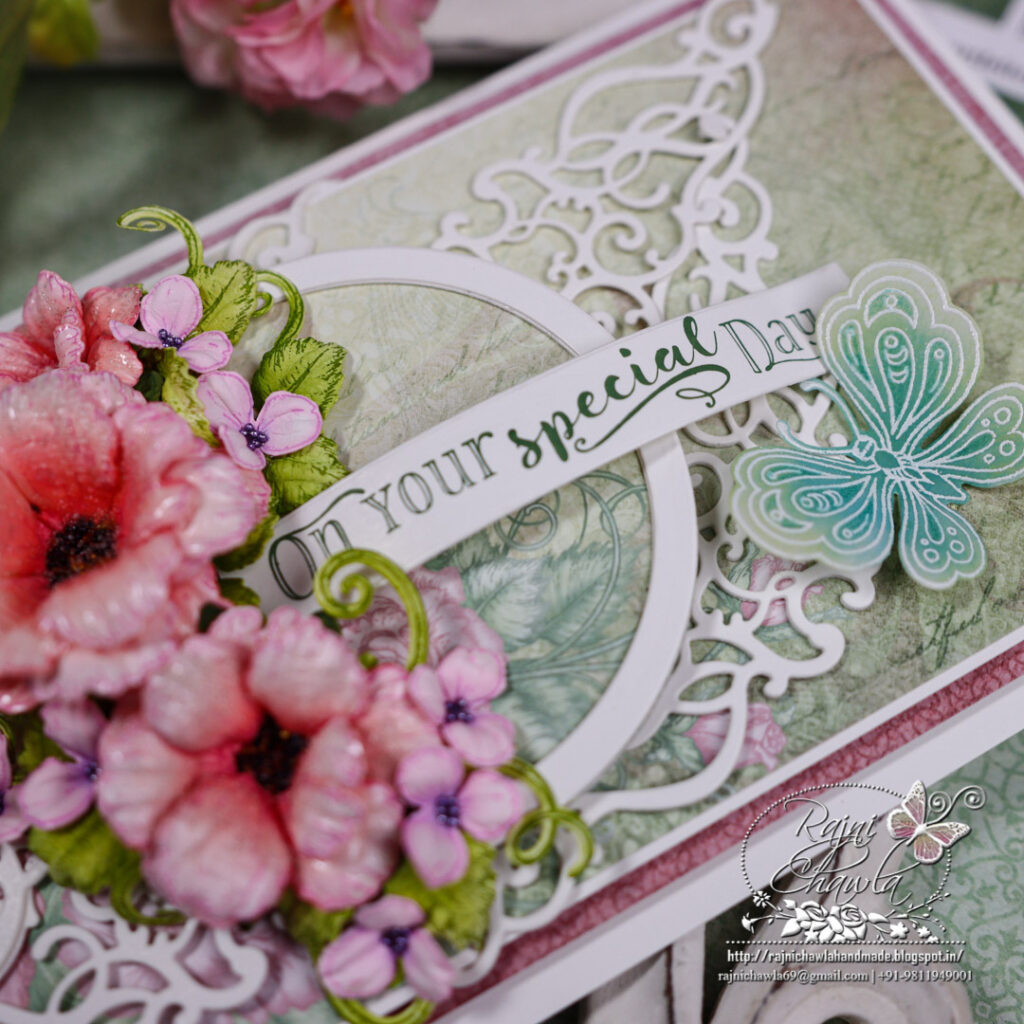
Instructions: The ready top fold slimline card measures, 8 1/2″ by 4 1/2″. To prepare the card base, cut a smooth white cardstock measuring 81/2″ by 9″ and score at 4 1/2″ on 9 ” length. Crease well. Choose the pattern paper from the Floral Banner Paper Collection and chop it to 4″ X 8″ and layer the panel on the card front.
For the top mat, choose the coordinating designer paper from the same paper collection and cut measuring 3 3/4″ by 7 3/4″. Mat it on a white cardstock making a delicate border of 1/16″ on all sides. Layer the panel on the card front using double-sided tape.
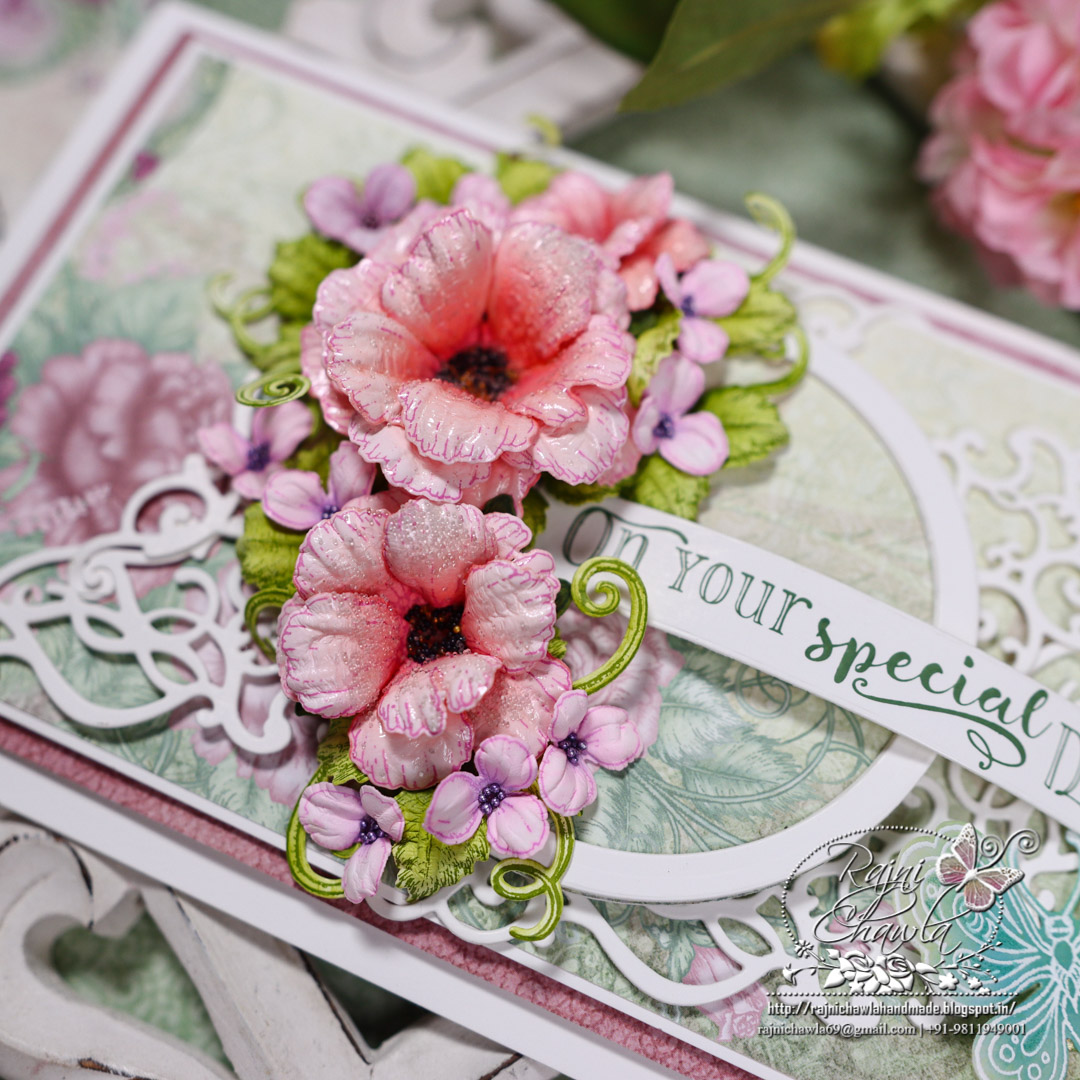
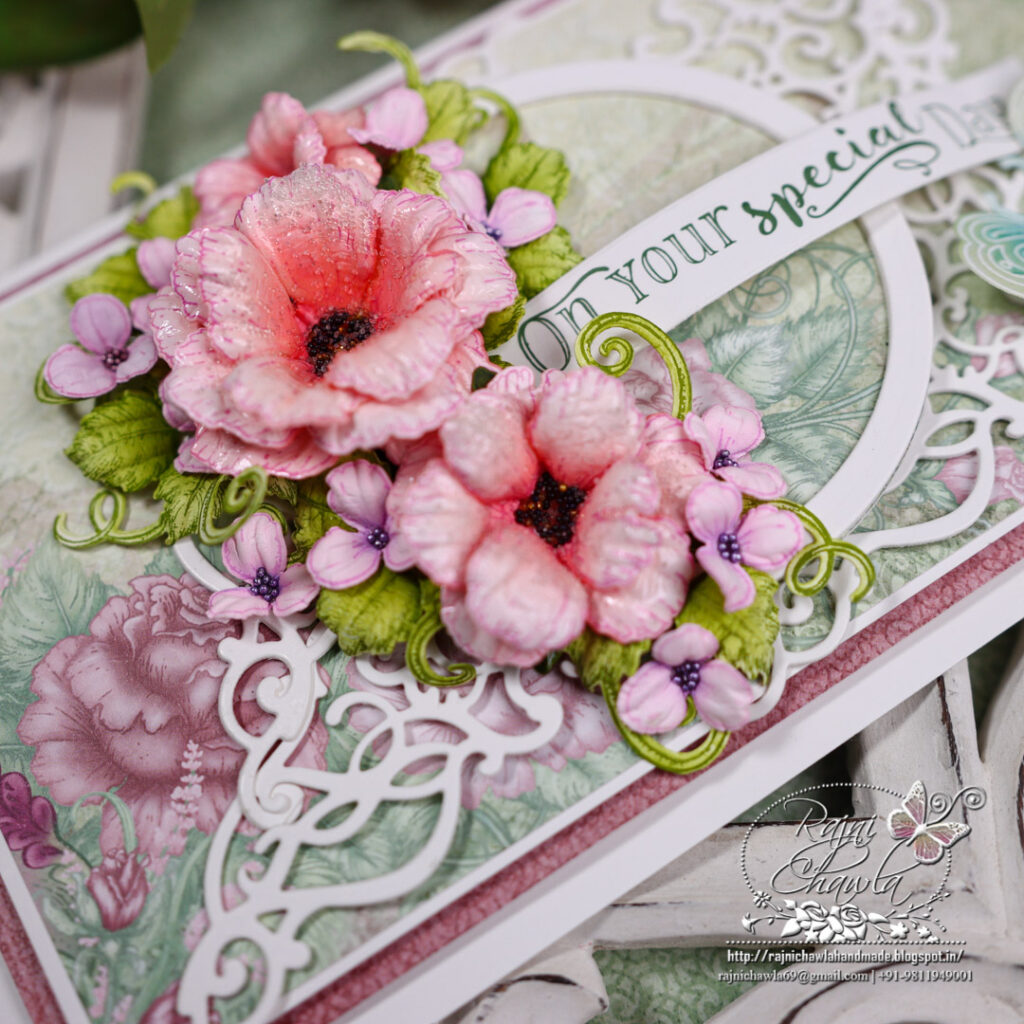
Cut 4 white die cuts using HCD1-7263 Swirly Accent Spray Die and entangle one each with another die to create 2 fancy border accents. Glue them using tacky glue on the ready card front. Next cut a frame using the outer second and third die from the HCD1-7155 Circle Basics Large Die set and layer it on the solid circle piece from the same paper collection. Finally, layer the circular frame in the center using double-sided tape.
For the wild roses, stamp the flower petals with Red Geranium Archival ink using a Small Wild Rose Stamp set and cut them using its coordinating dies. Ink the flowers using Rose Madder and shape them using a Deluxe flower shaping kit. Once the shaping is done, assemble a few flowers using ball tools from the shaping kit and add matching seed beads to the flower centers.
Stamp, color and cut a few Wisteria flowers using Cactus Flower Archival ink and shape them using a flower shaping kit. Add flower pollens using a glossy accent and use these flowers as fillers.
Stamp 2 sets of leaves using Leafy Accent stamp and Olive Green Archival ink and cut them using its coordinating die. Color the leaves using the same inks and shape them using a deluxe flower shaping kit.
Stamp the butterfly image from Floral Butterfly Accents Cling Stamp Set with Versafine on Rajni Chawla’s Vellum Flowerite and sprinkle white heat embossing powder. Dust extras and heat set the image using a heat tool. Cut the butterfly using its coordinating die. Color the butterfly using distress oxides.
Once all the elements are ready, assemble a flower bouquet as shown and finish the card using a sentiment from Celebrate Love Sentiments Cling Stamp Set.