


Hello, everyone!!
Happy New Year. Wishing you all a lot and lots of crafty fun in 2023.
Here is my weekly inspiration for Heartfelt Creations using the Elegant Rose Frames Collection.


HCD2-7424 Rectangle Filigree Frame Die
HCD2-7427 Filigree Accents Die
HCD1-7421 Stylish Rose Frame Die
HCPC-31003 Stylish Rose Frame Cling Stamp Set
HCDP1-2144 Elegant Rose Frames Paper Collection
HCPC-3911 Wisteria Petals Cling Stamp Set
HCD1-7295 Wisteria Petals Die
HCD1-7193 Leafy Accents Die
HCPC-3835 Leafy Accents Cling Stamp Set
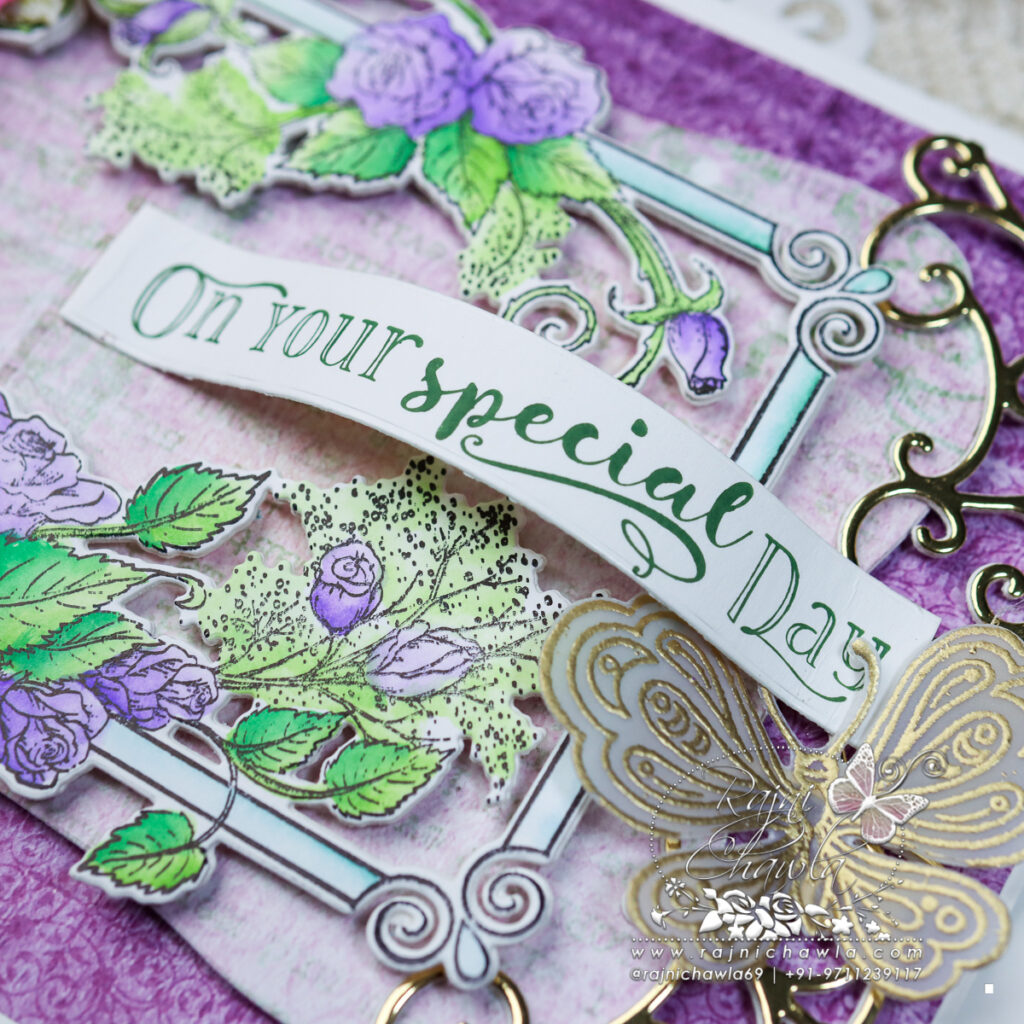
HCPC-3847 Celebrate Love Sentiments Cling Stamp Set
HCGP1-488 Luxe Gold Cardstock
HCPP1-475 Deluxe Flower Shaping Paper Pack of 50 – White
HCST1-401 Deluxe Flower Shaping Kit
478594 Zig Clean Color Real Brush Markers – 48 Pack
RACP482 Ranger Archival Ink Pad – Olive
RACP436 Ranger Archival Ink Pad – Leaf Green
RACP468 Ranger Archival Ink Pad – Jet Black
Instructions: The ready top-fold card base from smooth white cardstock measures, 5 1/2″ by 8 1/2″. Choose the designer paper from the Elegant Rose Frames Collection and cut to size measuring 4 3/4″ by 7 3/4″ Glue the panel on white cardstock creating a sleek border of 1/16″ on all sides. Layer the panel on the ready card base using double-sided tapes for extra dimensions.
Choose the paper from the same collection and cut the inner solid label using Rectangle Filigree Frame Die. To its, both ends add a golden filigree motive that is cut using Filigree Accents Die. Layer this prepared panel on the card front.
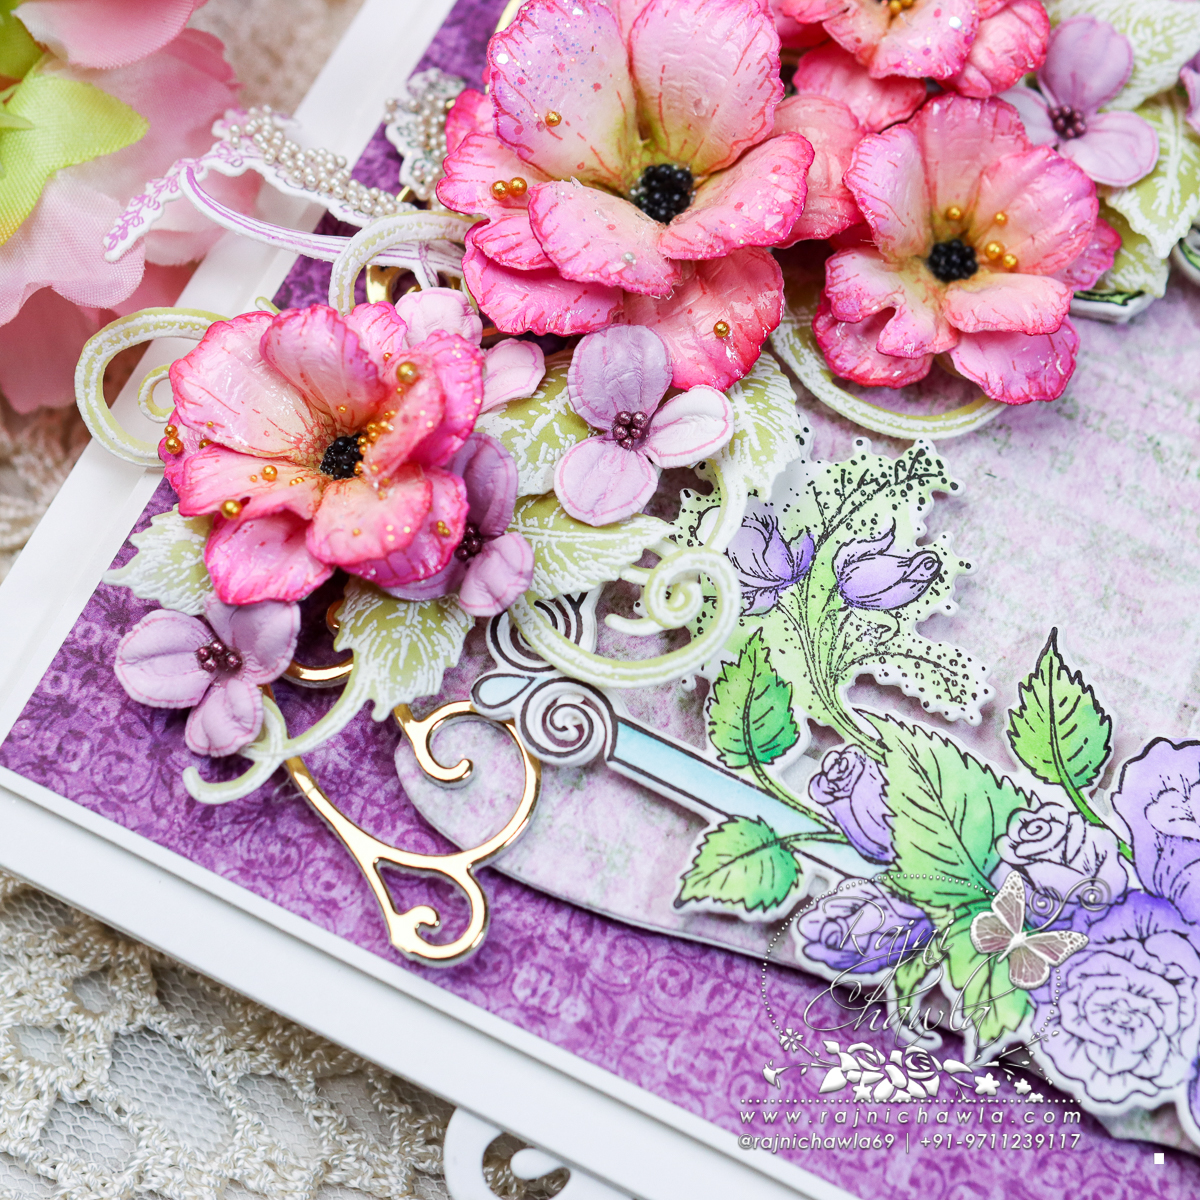
Stamp the image from Stylish Rose Frame Cling Stamp Set on smooth white cardstock, using Jet Black Archival ink. Paint the image using Zig Clear Brush Markers and cut it using its coordinating dies. Glue extra 2 die cuts to the bottom of the painted image to add extra strength. Layer the painted frame on the front panel using double-sided tape.
For the wild roses, stamp the flower petals with Magenta Hue Archival ink using a Small Wild Rose Stamp set and cut them using its coordinating dies. Ink the flowers using Rose Madder and shape them using a Deluxe flower shaping kit. Once the shaping is done, assemble a few flowers using ball tools from the shaping kit and add matching seed beads to the flower centers. Apply a layer of crystal lacquer on the flowers and dust Rajni Chawla’s Crystal Clear Powder.
Stamp a few fillers from Floral Shoppe Fillers Cling Stamp Set using Leaf green and Cactus Flower Archival ink and cut it using its coordinating die set. Sponge adhesive that dries clear on the fillers and sprinkle mixed shades of prills. Dust extras and also sprinkle some Rajni Chawla’s Crystal Clear Powder and keep them for drying.
Cascading Wisterias are first stamped with Cactus Flower Archival ink, cut with its coordinating die, and then colored using the same ink. Once all colored these are shaped using Deluxe Flower Shaping Kit and add glitter balls to the centers.
Stamp Leafy foliage from Leafy Accents Stamp sets on Vellum cardstock using Hero Arts white pigment ink, sprinkle white heat embossing powder, and dust extra. Next, heat set the images and cut them using their coordinating dies. Color the foliage using Peeled Paint Distress Oxide. Shape the foliage using a needle tool. Also, heat emboss the sentiment using the same technique.
Once, ready with all the elements, arrange a floral bouquet, and finish the card by adding sparkle and gloss to the flowers and a stamped sentiment strip from Celebrate Love Sentiments Cling Stamp Set. For the gloss, simply brush a thin layer of crystal lacquer and keep the card aside for drying.
Beautiful. I love your creations.