


Good Morning Friends…
A warm welcome on my blog again!!
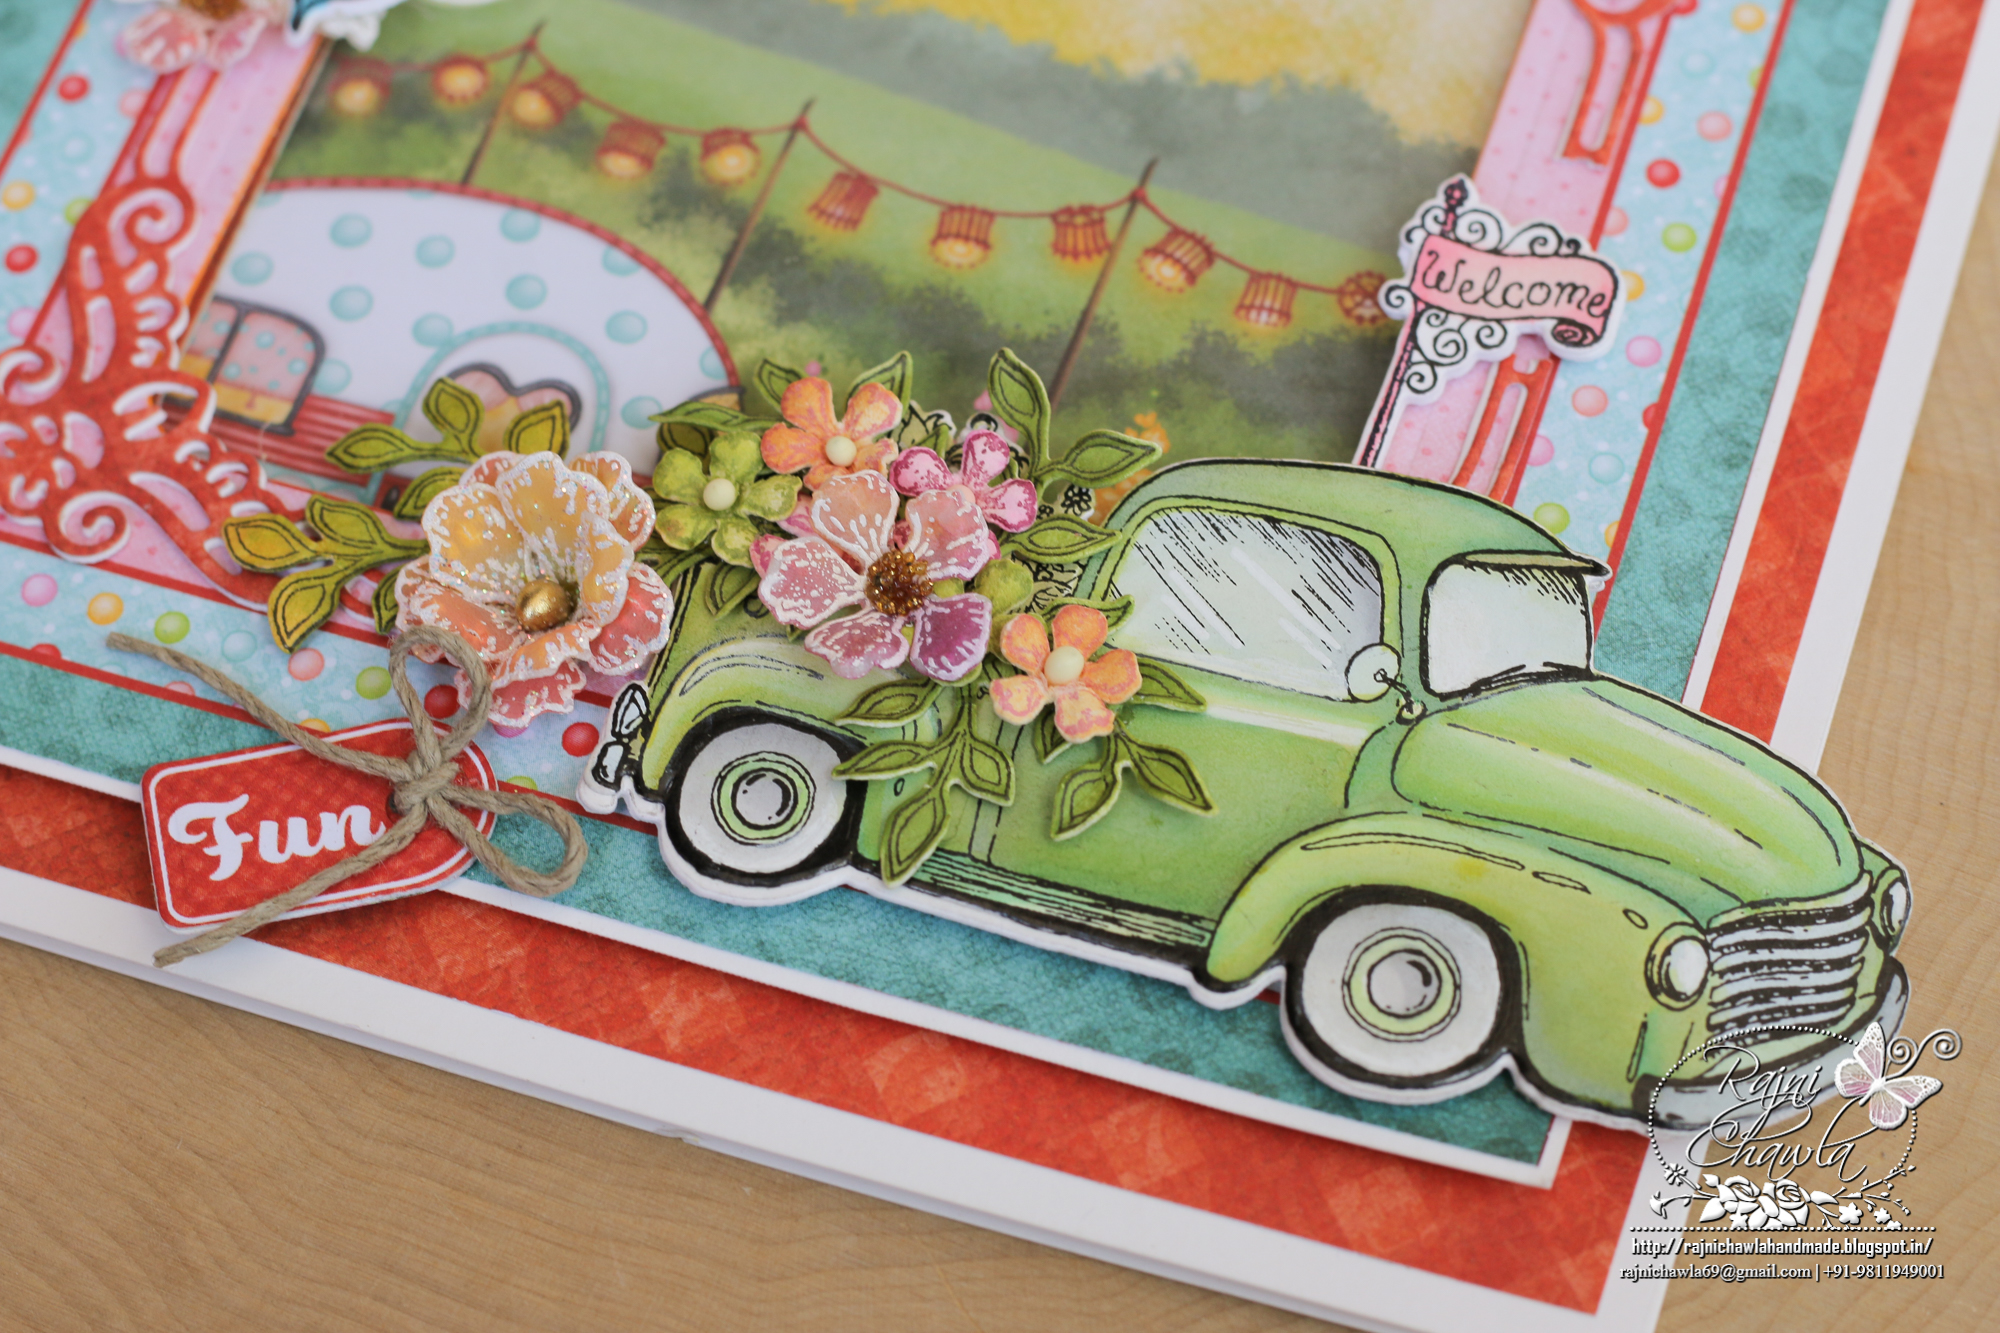
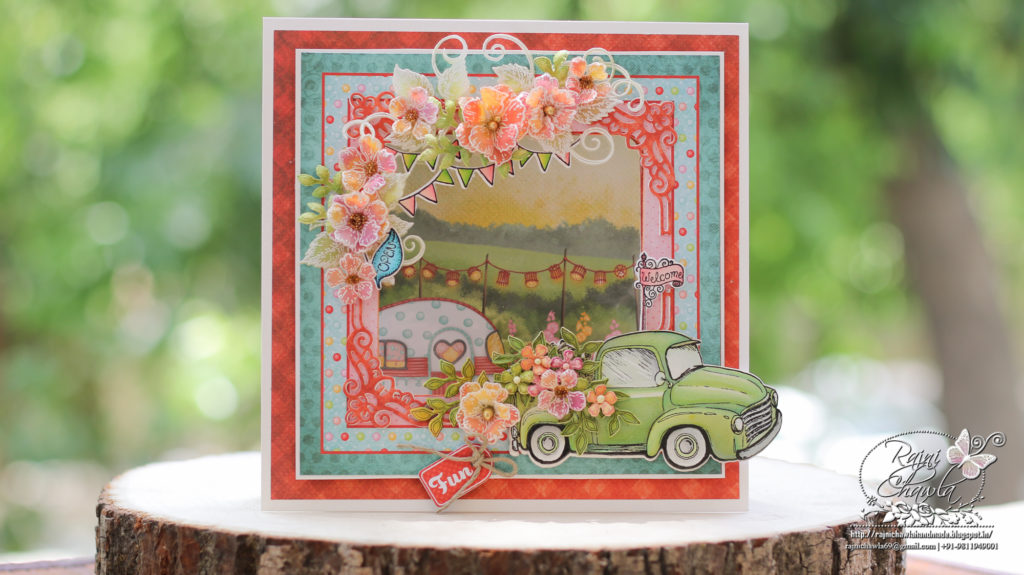
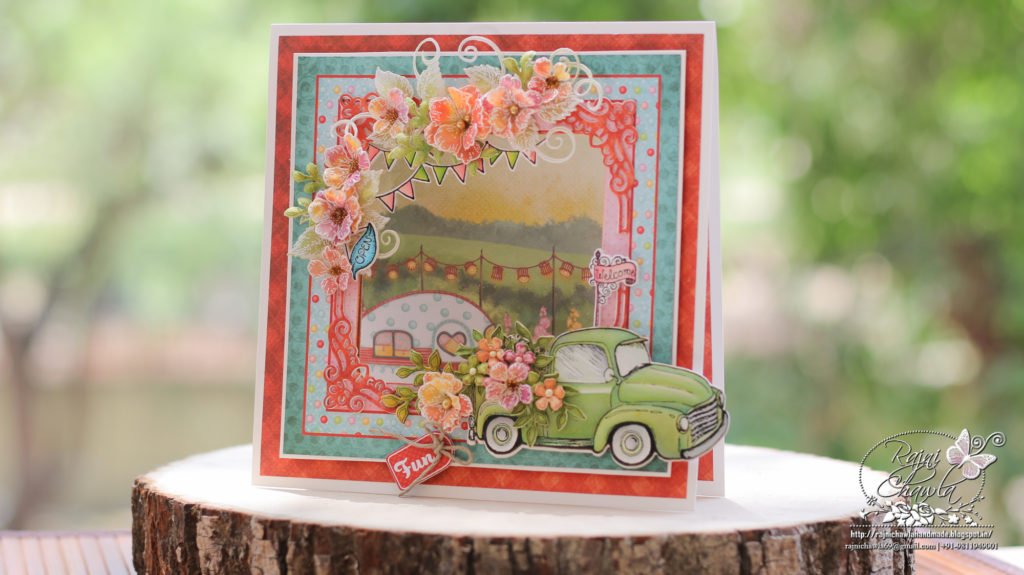
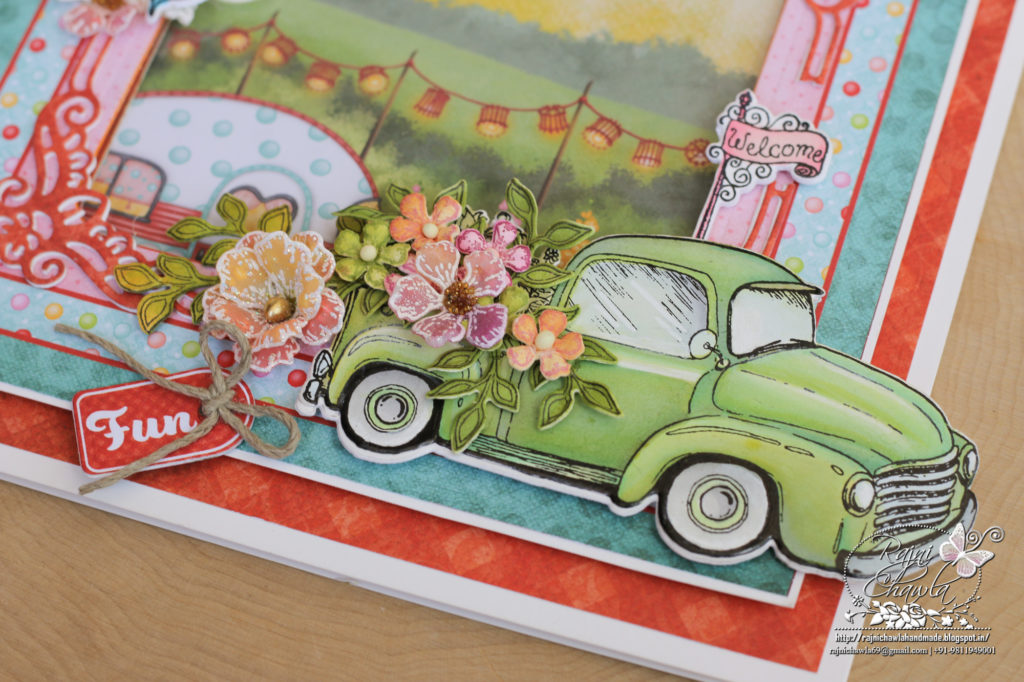
Once again, it’s Wednesday inspiration for Heartfelt Creations. Continuing with Happy Campers Collection, today I have a window card combined with Young At Heart Collection.
HCD1-7244 Elements of Home Die
HCPC-3880 Elements of Home Cling Stamp Set
HCDP1-2103 Happy Camper Paper Collection
HCD2-751 Cut Mat Create 2A Die
HCD1-7179 Butterfly Kisses Decorative Die
HCPC-3752 Classic Rose Cling Stamp Set
HCPC-3801 Simply Classic Cling Stamp Set
HCD1-7159 Simply Classic Die
HCD1-7110 Classic Rose Die
HCFB1-462 3D Rose Shaping Mold
HCST1-401 Deluxe Flower Shaping Kit
478455 Zig Clean Color Real Brush Markers – 36 Pack
18002 Rajni Chawla’s Vellum Flowerite – 10 Sheets
RACP468 Ranger Archival Ink Pad – Jet Black
HCS1-459-1 Assorted Pearl Stamens-Small
PGM15015 Rajni Chawla’s Crystal Clear
HCDA2-450 Stack and Store Daubers-Pack of 30
159723 Designer Dries Clear Adhesive
Other Products Used: Paper Trimmer, Die Cutting Machine, Scoreboard, Distress Oxide, Peeled Paint. Seedless Preserves and Wild Honey, and acetate sheet.
Videos Referred: For more tips on creating with the Happy Camper collection, watch the tutorial at https://youtu.be/FpXtNYGV-3Y.
Instructions: The ready top fold card measures, 7″ by 7″. Choose a 6″ by 6″ card panel from the paper collection and cut apart the complete frame and adhere a layer of the white cardstock making a border of 1/16″ on all the sides. Adhere an acetate sheet from the back of the window. To the next frame also mat white cardstock creating a border of 1/16″. Layer the frame using double-sided tape and finally layer the entire panel on the ready card base.
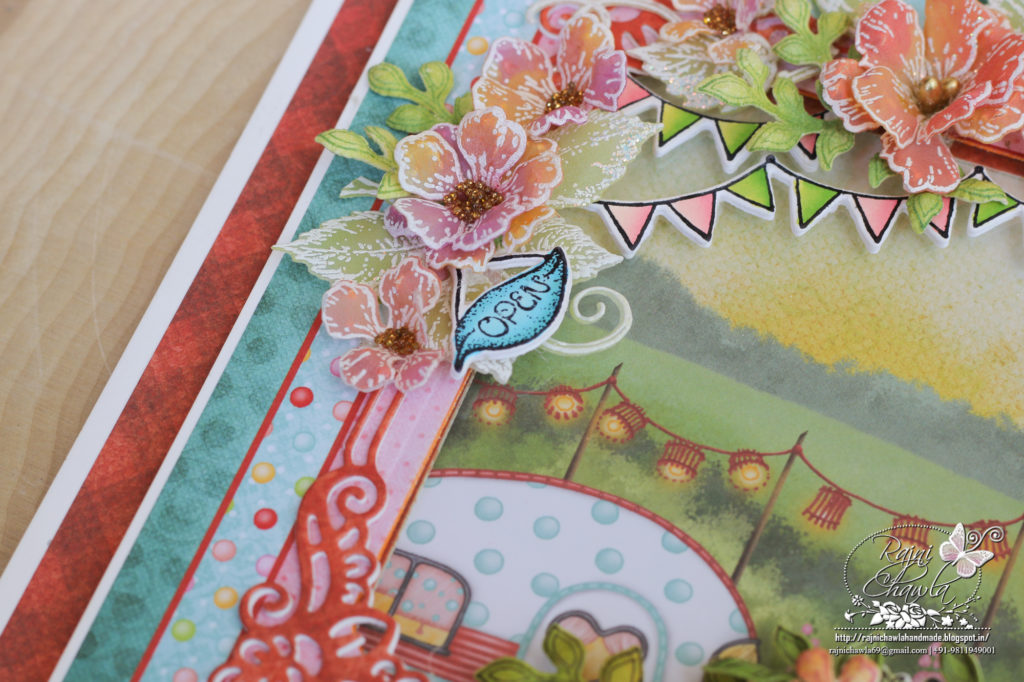
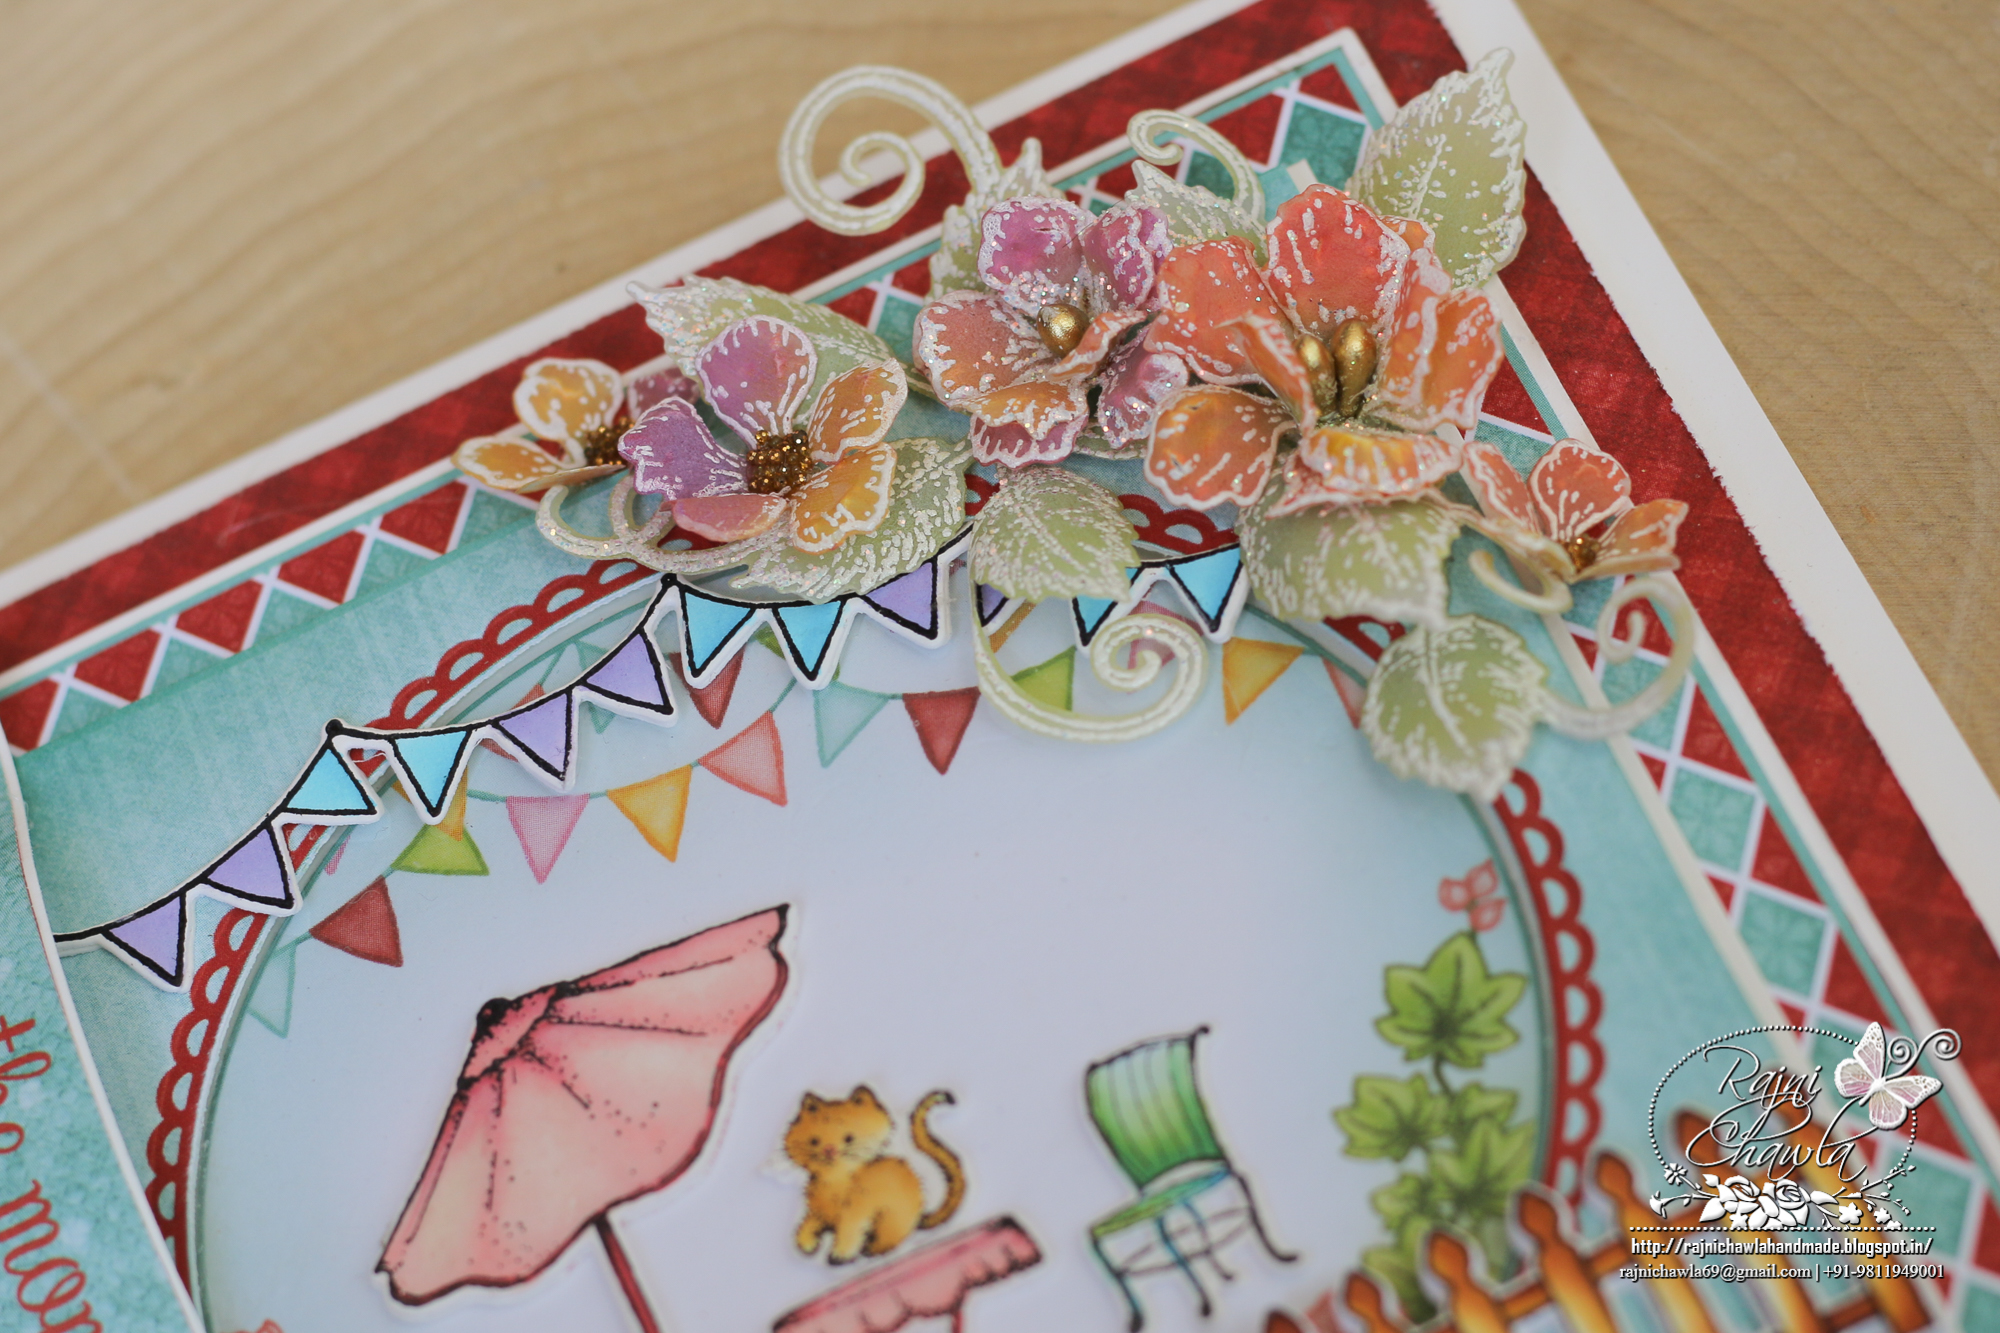
To the inside of the card adhere a scenic paper which can coordinate with the panel in the front. Also cut a die cut from red color paper from the paper collection using Butterfly Kisses Decorative Die and glue around the frame as shown. Stamp and cut the vintage car image from Simply Classic Cling Stamp Set, color it using Zig Markers and cut it using it’s coordinating die. Also, stamp the 4-5 leaves using Olive Green Archival ink and color them using Leaf Green. Cut them using its coordinating die and then shape them using shaping tools. `
Stamp the images from Elements of Home Stamp and My Happy Place Cling Stamp Set with black archival ink on white cardstock and color them using Zig Clean Clear Brush Markers. Once the images are painted cut them using their coordinating dies.
Stamp the Rose flower images from Classic Rose stamp set with white pigment ink on Vellum and white heat embossed them using Ranger’s white heat embossing powder. Color them using Seedless Preserves and Wild Honey. Place the petals facing down the mold, spray them a little and mist some water. Dab the petals with a damp cloth and press the centers. Prick a hole in the center and thread golden color thread stamens to complete the flowers. The leafy vines are also white heat embossed on vellum and then colored using peeled paint distress oxide.
Once all the elements are ready, cut the sentiment from the paper collection using Album Tags and Accent Die and finish the card as shown.
Beautiful card as always Rajni! LOVE your gorgeous vellum roses!
Baeutiful <3