


Good Morning and a Warm Welcome, Friends…
It’s that time of the month when we designers at Heartfelt Creations debut their new launch of the month. Happy Campers Collection has already hit the shelves for sales.
There’s absolutely no better way to spend the lazy, hazy, dog days of summer than packing up the camper and heading out onto the open road for a weekend adventure! Whether parked in a secluded campsite among the towering pines, or hunkered down in a modern camping resort, spending time in your home on wheels always guarantees fantastic memories made, and time to slow down and unwind. Soaking up the sun, splashing in the lake, and then heading back to warm up around the campfire and enjoy a chocolatey s’ more while the stars come out and flickering fireflies dance through the trees…this is life at its finest! Join us as we celebrate grand traveling adventures with the new Happy Camper Collection from Heartfelt Creations! Wind your way through a fun-filled decorative paper collection showcasing picturesque scenes of playful campsites featuring whimsical camper trailers, exciting sentiments, and cheerful florals! Relax and kick up your feet as you soak in the happy colors of grass like greens, sunny yellows, rustic reds, playful pinks, and sky blues, along with enchanting patterns including colorful banners, bright polka dots and pleasing plaids! An adorable assembling of cling stamp sets, along with coordinating dies, allow for designing and creating a multitude of adventurous scenes and settings perfect for the summer season! With two adorable camper trailers, an assortment of camping themed accessories such as stringed lights, playful party banners, a charming patio set, as well as a campfire and your favorite fur baby, the design possibilities for handmade greeting cards, scrapbook layouts, and altered art projects are endless, allowing you to dream up the perfect happy place to escape to! So, come along with us as we hit the trails, set up camp and take time to slow down and enjoy the simple things in life with the new Happy Camper Collection….no bug spray required!
HCD1-7243 My Happy Place Die
HCD1-7244 Elements of Home Die
HCPC-3879 My Happy Place Cling Stamp Set
HCPC-3880 Elements of Home Cling Stamp Set
HCDP1-2103 Happy Camper Paper Collection
HCD1-7204 Arrows and Banner Die
HCD1-7154 Eyelet Circle & Basics Small Die
HCPC-3752 Classic Rose Cling Stamp Set
HCD1-7110 Classic Rose Die
HCFB1-462 3D Rose Shaping Mold
HCST1-401 Deluxe Flower Shaping Kit
478455 Zig Clean Color Real Brush Markers – 36 Pack
18002 Rajni Chawla’s Vellum Flowerite – 10 Sheets
RACP468 Ranger Archival Ink Pad – Jet Black
HCS1-459-1 Assorted Pearl Stamens-Small
PGM15015 Rajni Chawla’s Crystal Clear
HCDA2-450 Stack and Store Daubers-Pack of 30
159723 Designer Dries Clear Adhesive
Other Products Used: Paper Trimmer, Die Cutting Machine, Scoreboard, Distress Oxide, Peeled Paint, Seedless Preserves, Wild Honey.
Videos Referred: For more tips on creating with the Happy Camper collection, watch the tutorial at https://youtu.be/FpXtNYGV-3Y.
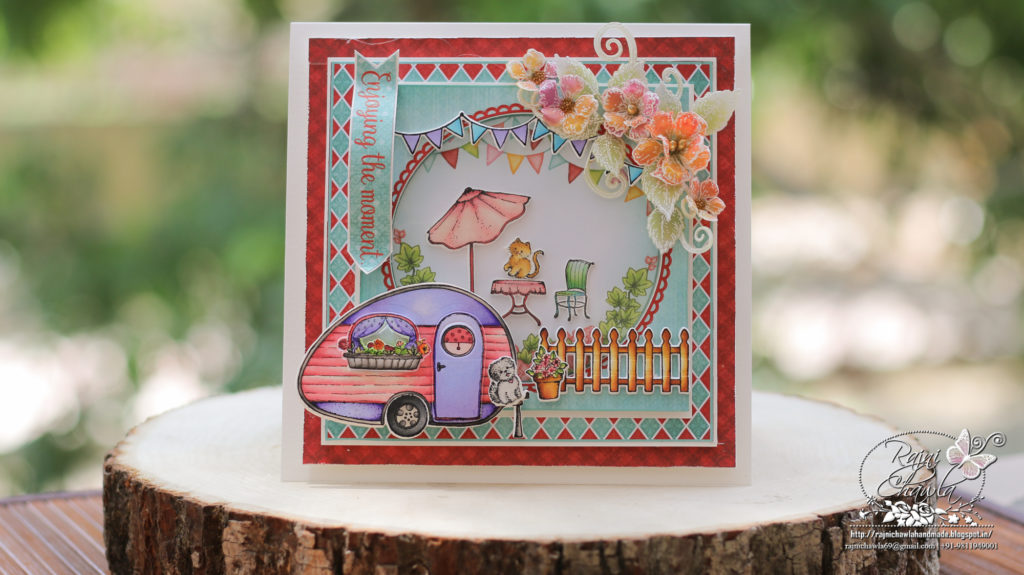
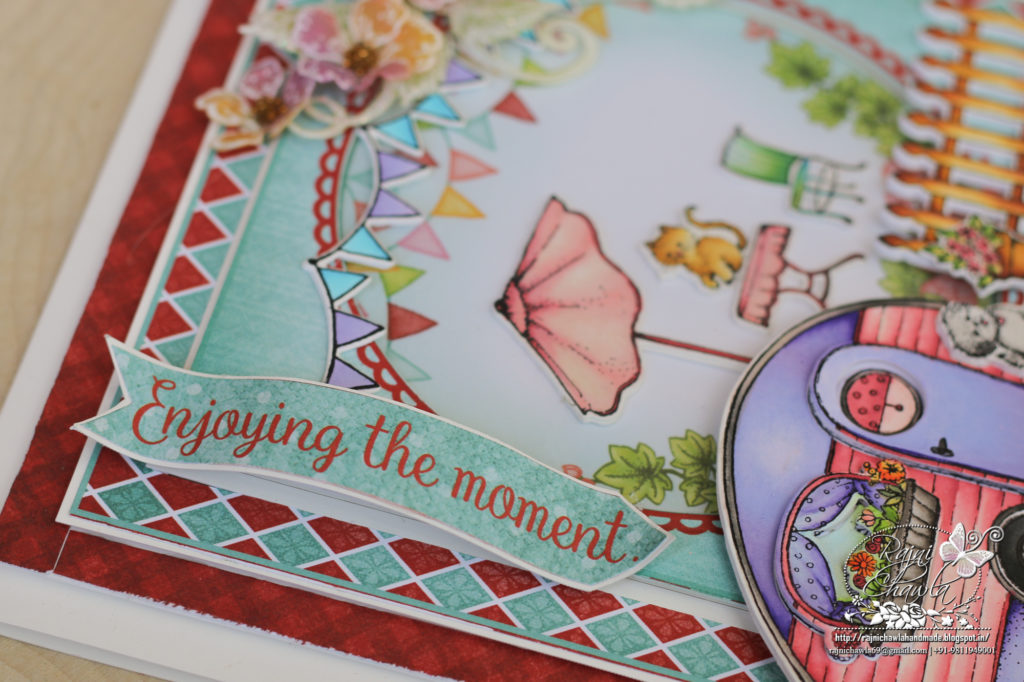
Instructions: The ready top fold card measures, 7″ by 7″. Choose a 6″ by 6″ card panel from the paper collection and cut apart the 3 frames as shown. To the topmost panel, mat a layer of the white cardstock making a border of 1/16″ on all the sides. Next, cut a window using the second largest die from Eyelet Circle & Basics Small Die. Adhere an acetate sheet from the back of the window. To the next frame also mat white cardstock creating a border of 1/16″. Layer all the frames using double-sided tape and finally layer the entire panel on the ready card base.
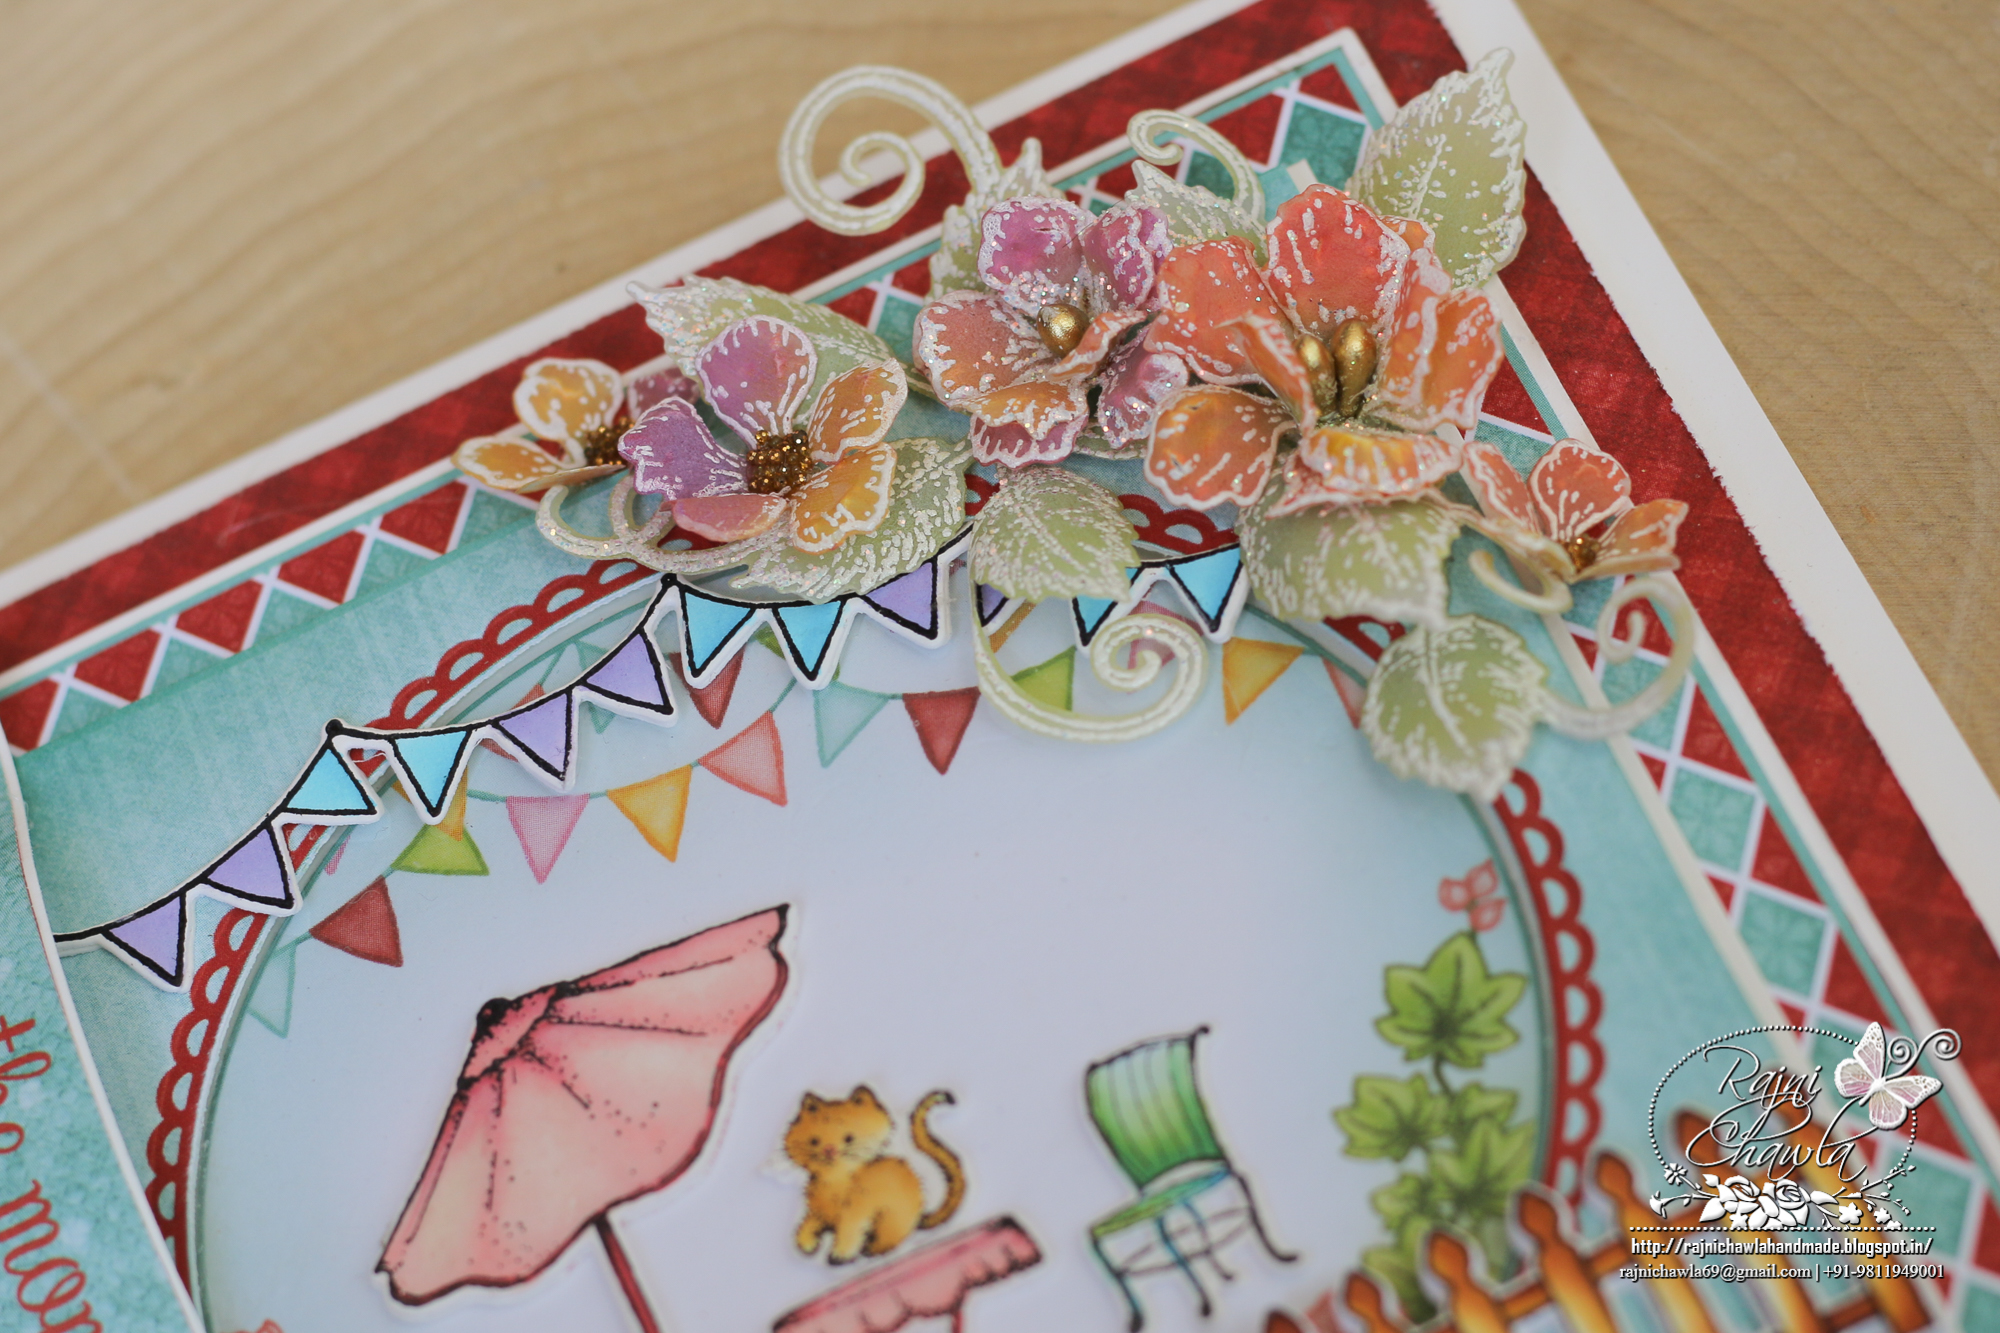
Stamp the images from Elements of Home Stamp and My Happy Place Cling Stamp Set with black archival ink on white cardstock and color them using Zig Clean Clear Brush Markers. Once the images are painted cut them using their coordinating dies.
Stamp the Rose flower images from Classic Rose stamp set with white pigment ink on Vellum and white heat embossed them using Ranger’s white heat embossing powder. Color them using Seedless Preserves and Wild Honey. Place the petals facing down the mold, spray them a little and mist some water. Dab the petals with a damp cloth and press the centers. Prick a hole in the center and thread golden color thread stamens to complete the flowers. The leafy vines are also white heat embossed on vellum and then colored using peeled paint distress oxide.
Once all the elements are ready, cut the sentiment from the paper collection using Arrows and Banner Die and finish the card as shown.
Love the window and your gorgeous vellum flowers Rajni! You’re awesome!
Love the window
Vellum flowers tutorial
Waiting for next session