


Good Morning crafty friends…
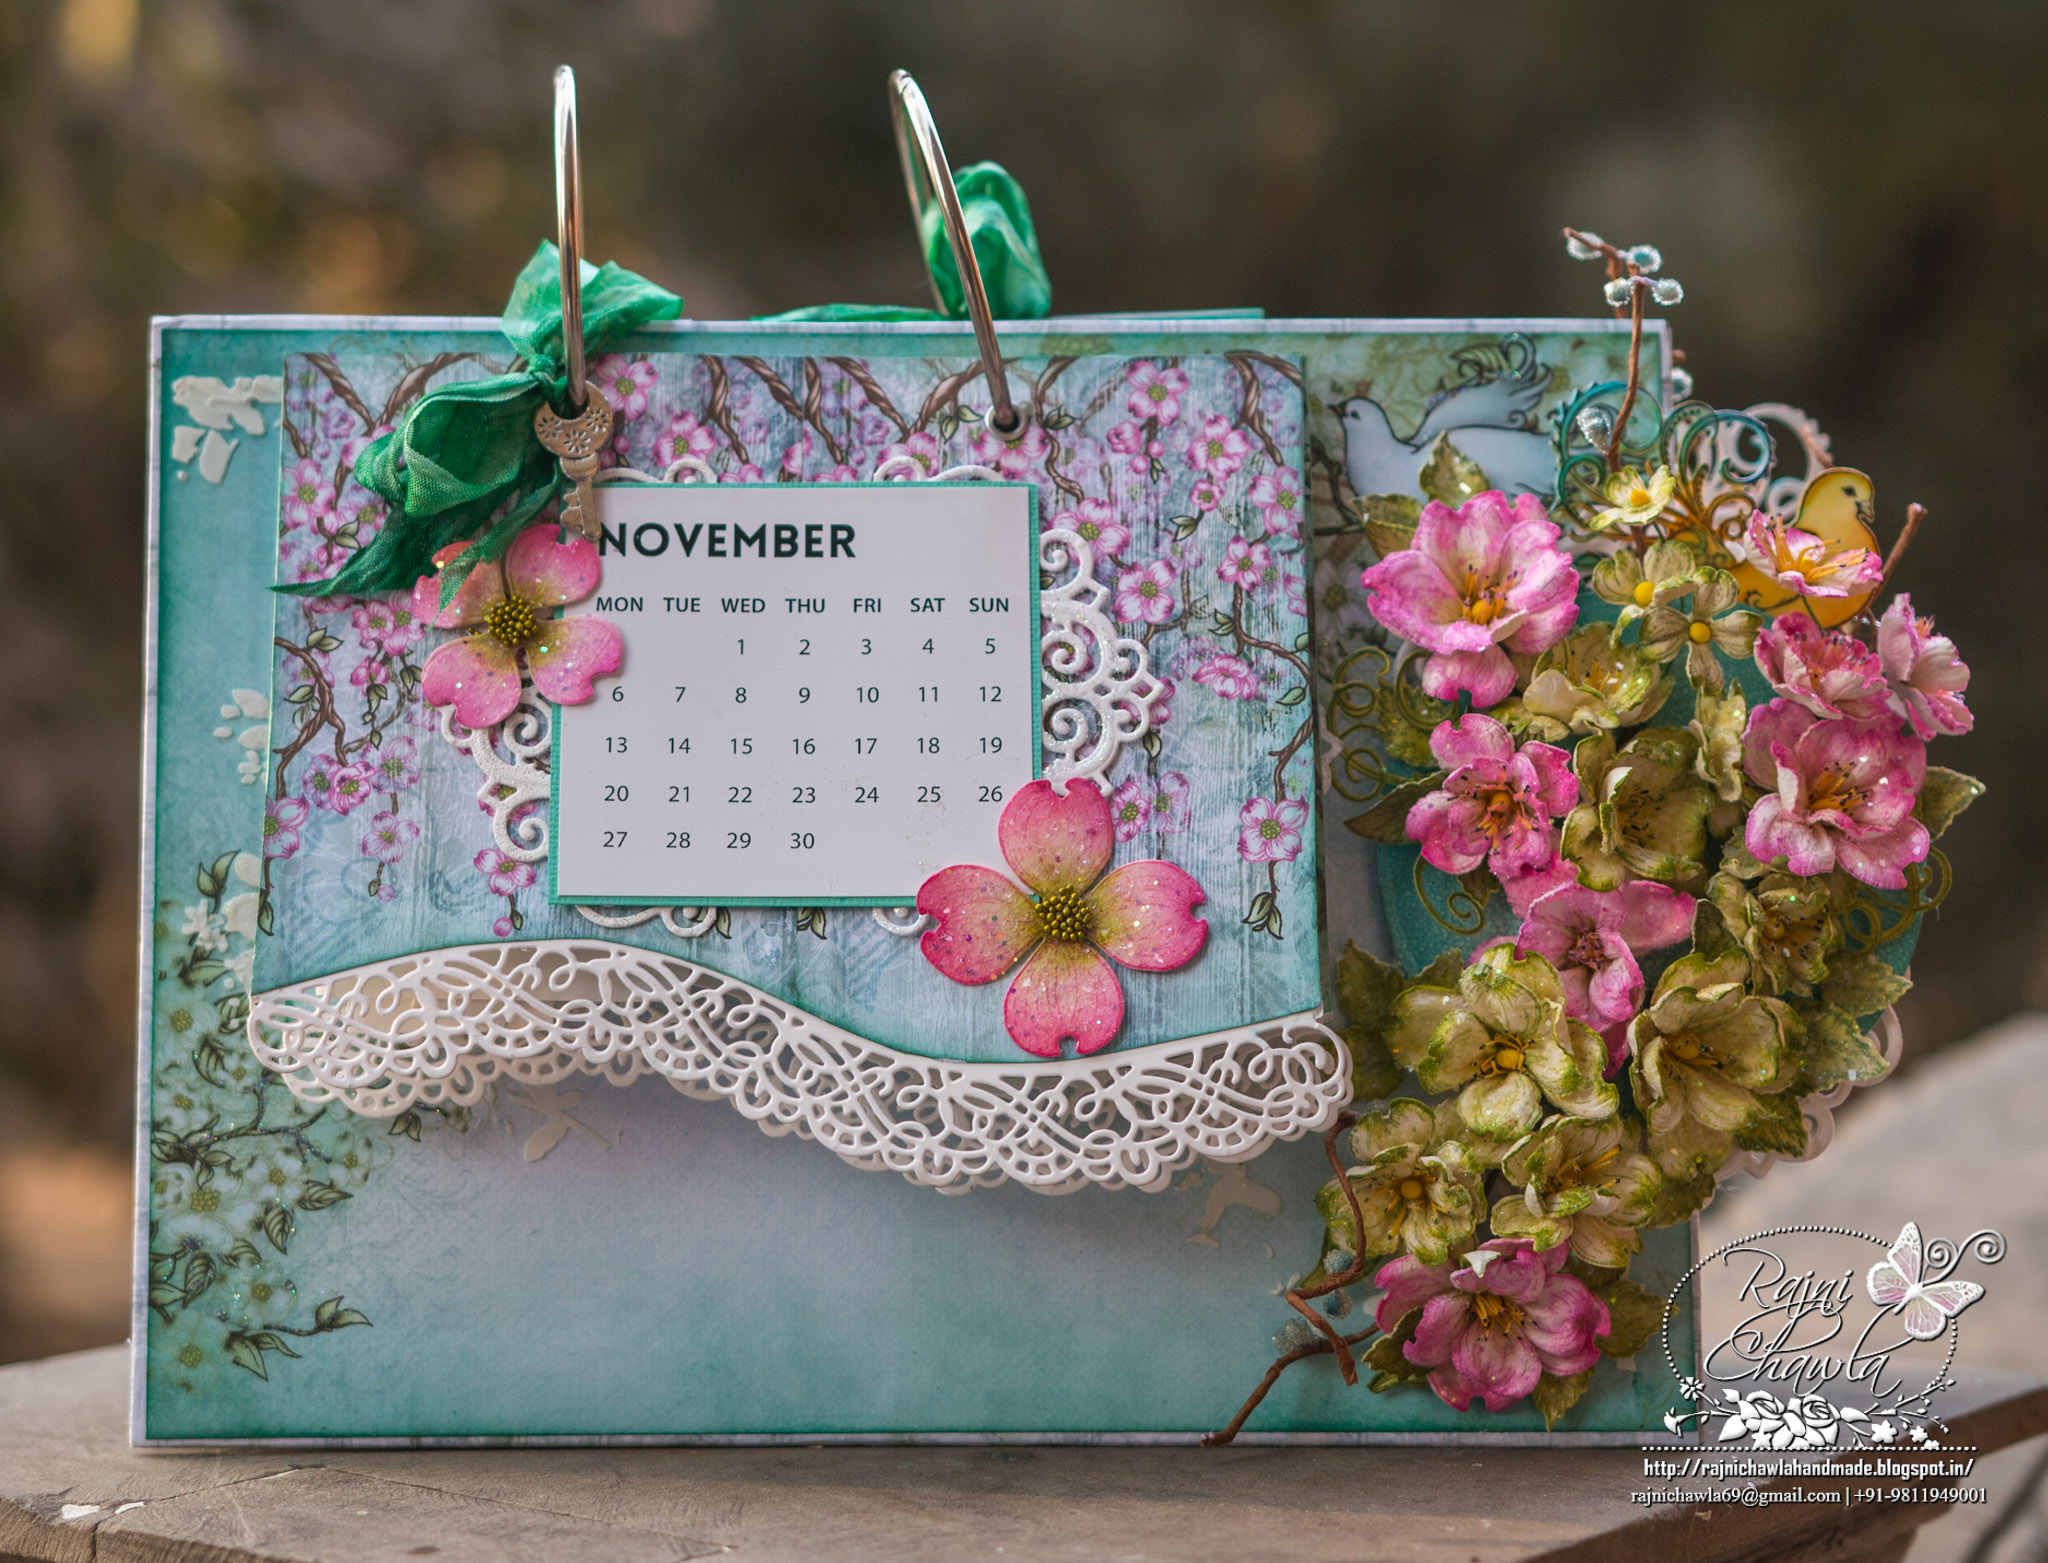
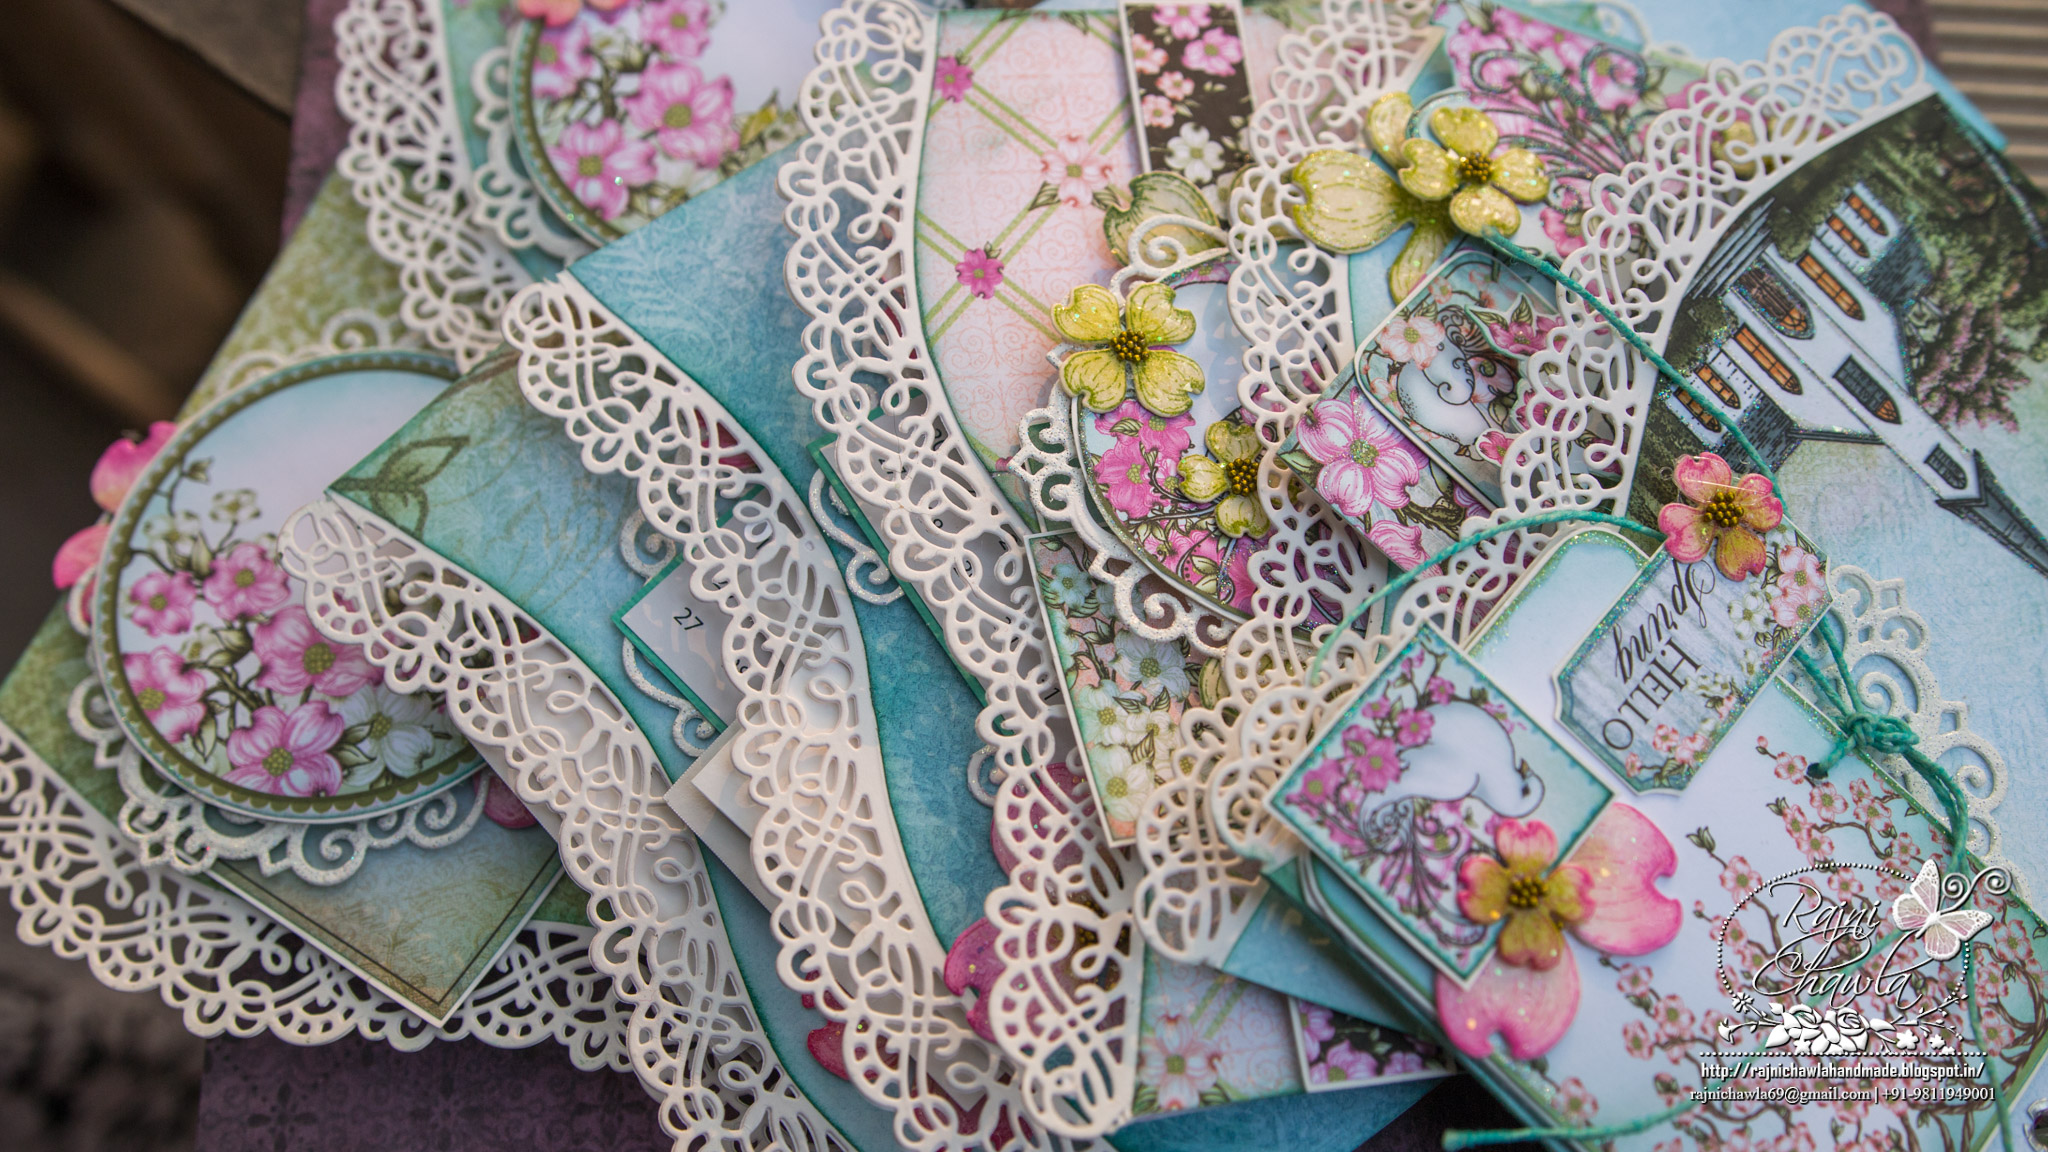
Welcome back to another happy Wednesday!! As you all know we at Heartfelt Creation’s are promoting their latest release of Flowering Dogwood Collection now a days…I am too back with new inspiration for the same. For today’s post, I m sharing one of my favorite project that created last year and submitted as one of an entry for Heartfelt Creation’s Design Team. I so wanted to send one similar project for the company so I recreated it using their Dogwood release and Black Friday dies. You can check my previous calendar HERE.
Products from Heartfelt Creations:
Flowering Dogwood Paper Collection HCDP1-275
Flowering Dogwood & Doves Die HCD1-7131
Flowering Dogwood Die HCD1-7129
Flowering Dogwood & Doves Cling Stamp Set HCPC-3775
Flowering Dogwood Cling Stamp Set HCPC-3773
Fleur Border Basics Die HCD1-7120
Raindrops on Roses Die HCD1- 743
Double Dots 100pc. -3D Foam Circles, DDOTS
Designer Dries Clear Adhesive, 159723
Memento Dye Ink Pad – Cantaloupe, TSMP103
ColorBox Fluid Chalk Ink Pad – Berrylicious, 71053
ColorBox Fluid Chalk Ink Pad – Guacamole, 71058
Deluxe Flower Shaping Kit, HCST1-401
Stamp Mat Pad, SMP001
Metal Tip for Adhesive Bottles, 352854
Other Products Used:
Heavy chipboards, Spellbinder’s Classic Circle die, Archival Leaf green and Olive Green, Crystal clear glitter, dry floral stems, Dusty Attic chipboard, album rings, eyelets, crop -a -dile, Frosting powder, multi medium matte, Texture paste, White Smooth cardstock, scoreboard, paper trimmer, die cutting machine.
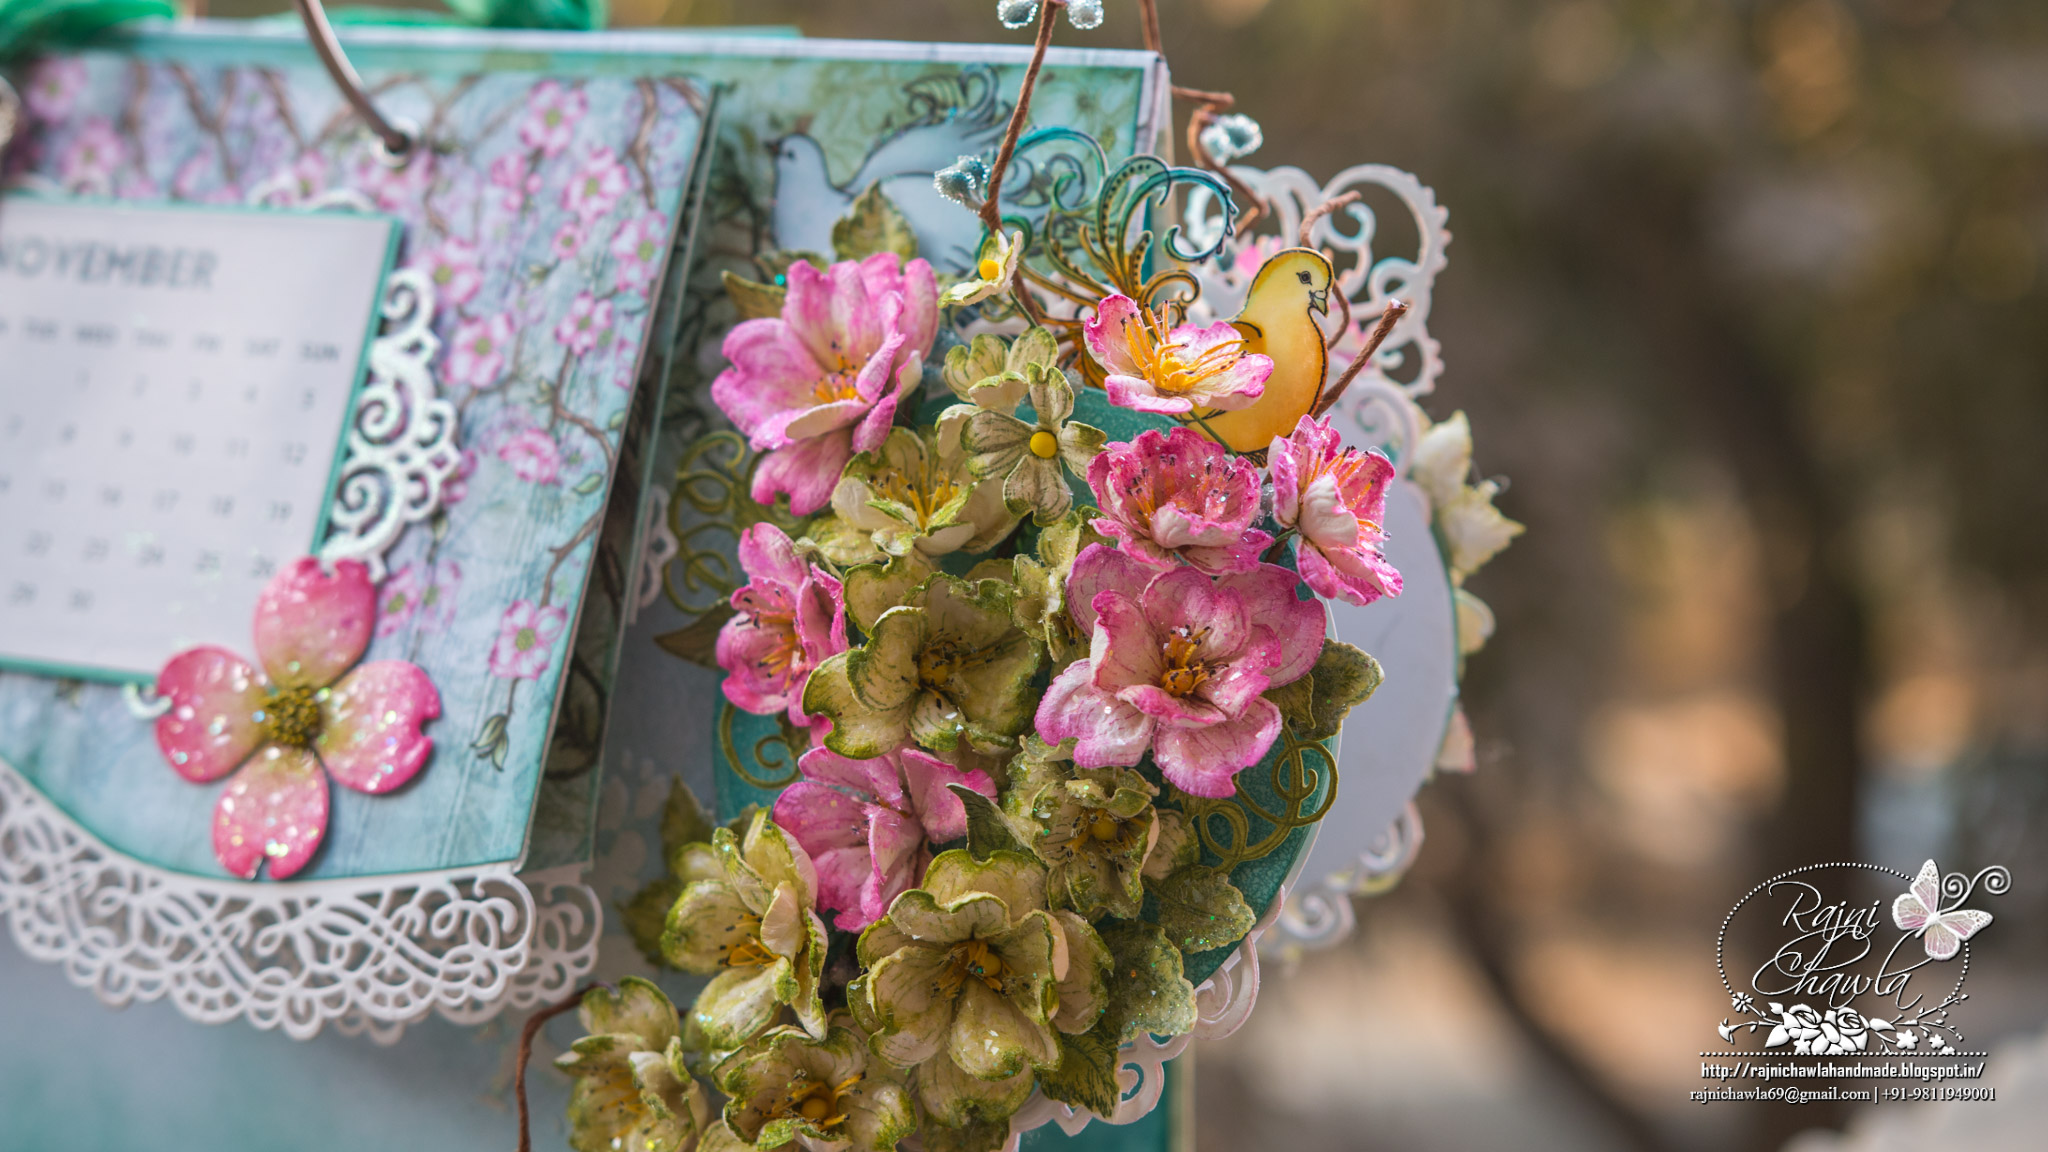
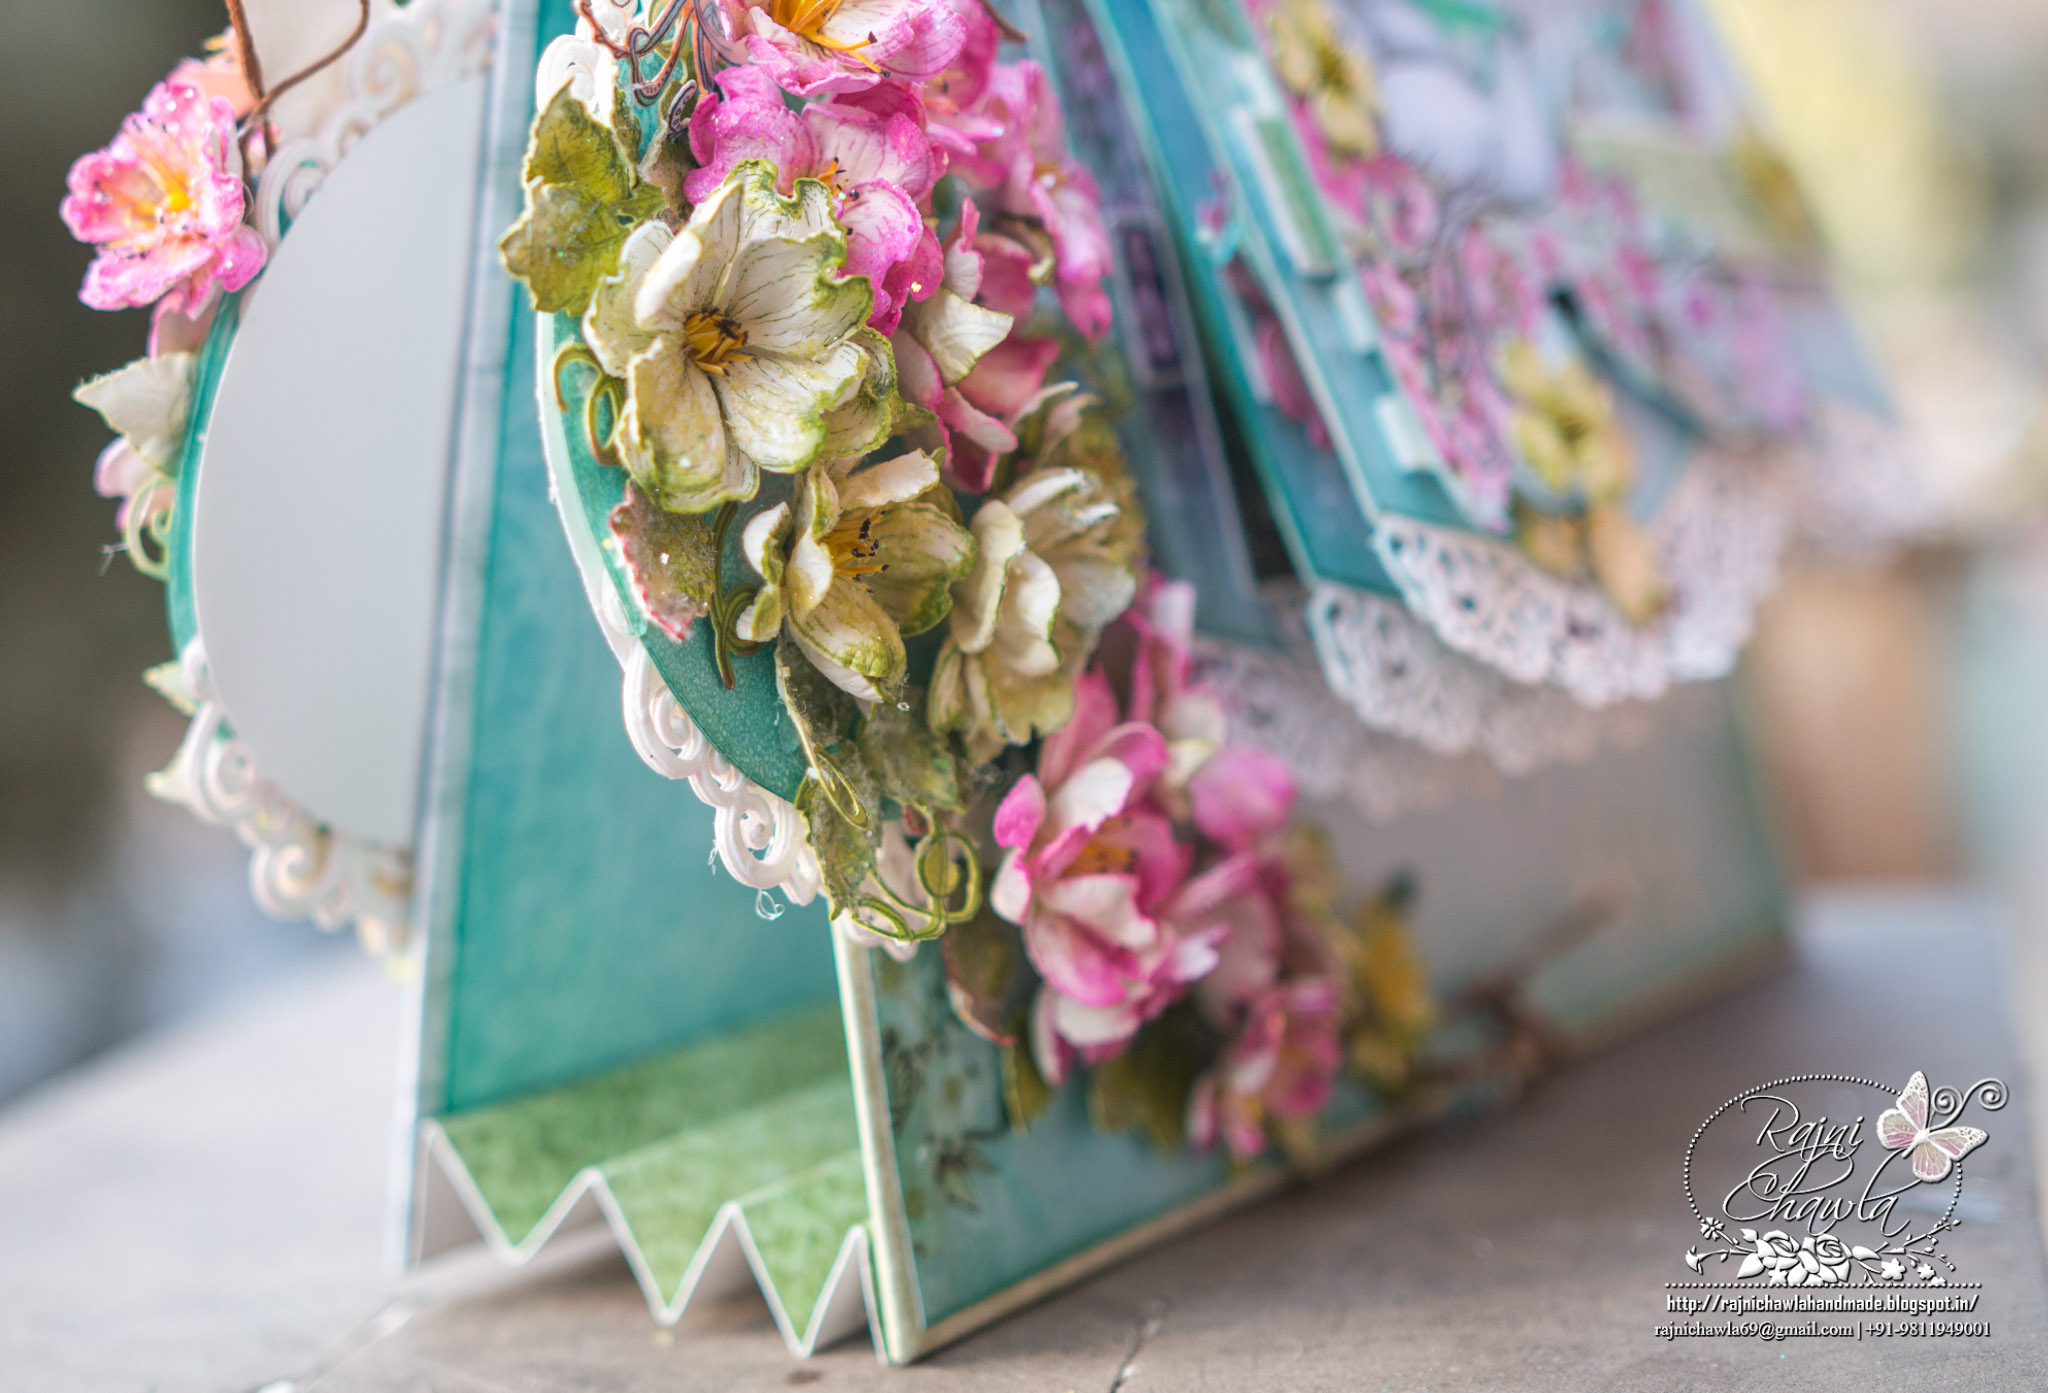
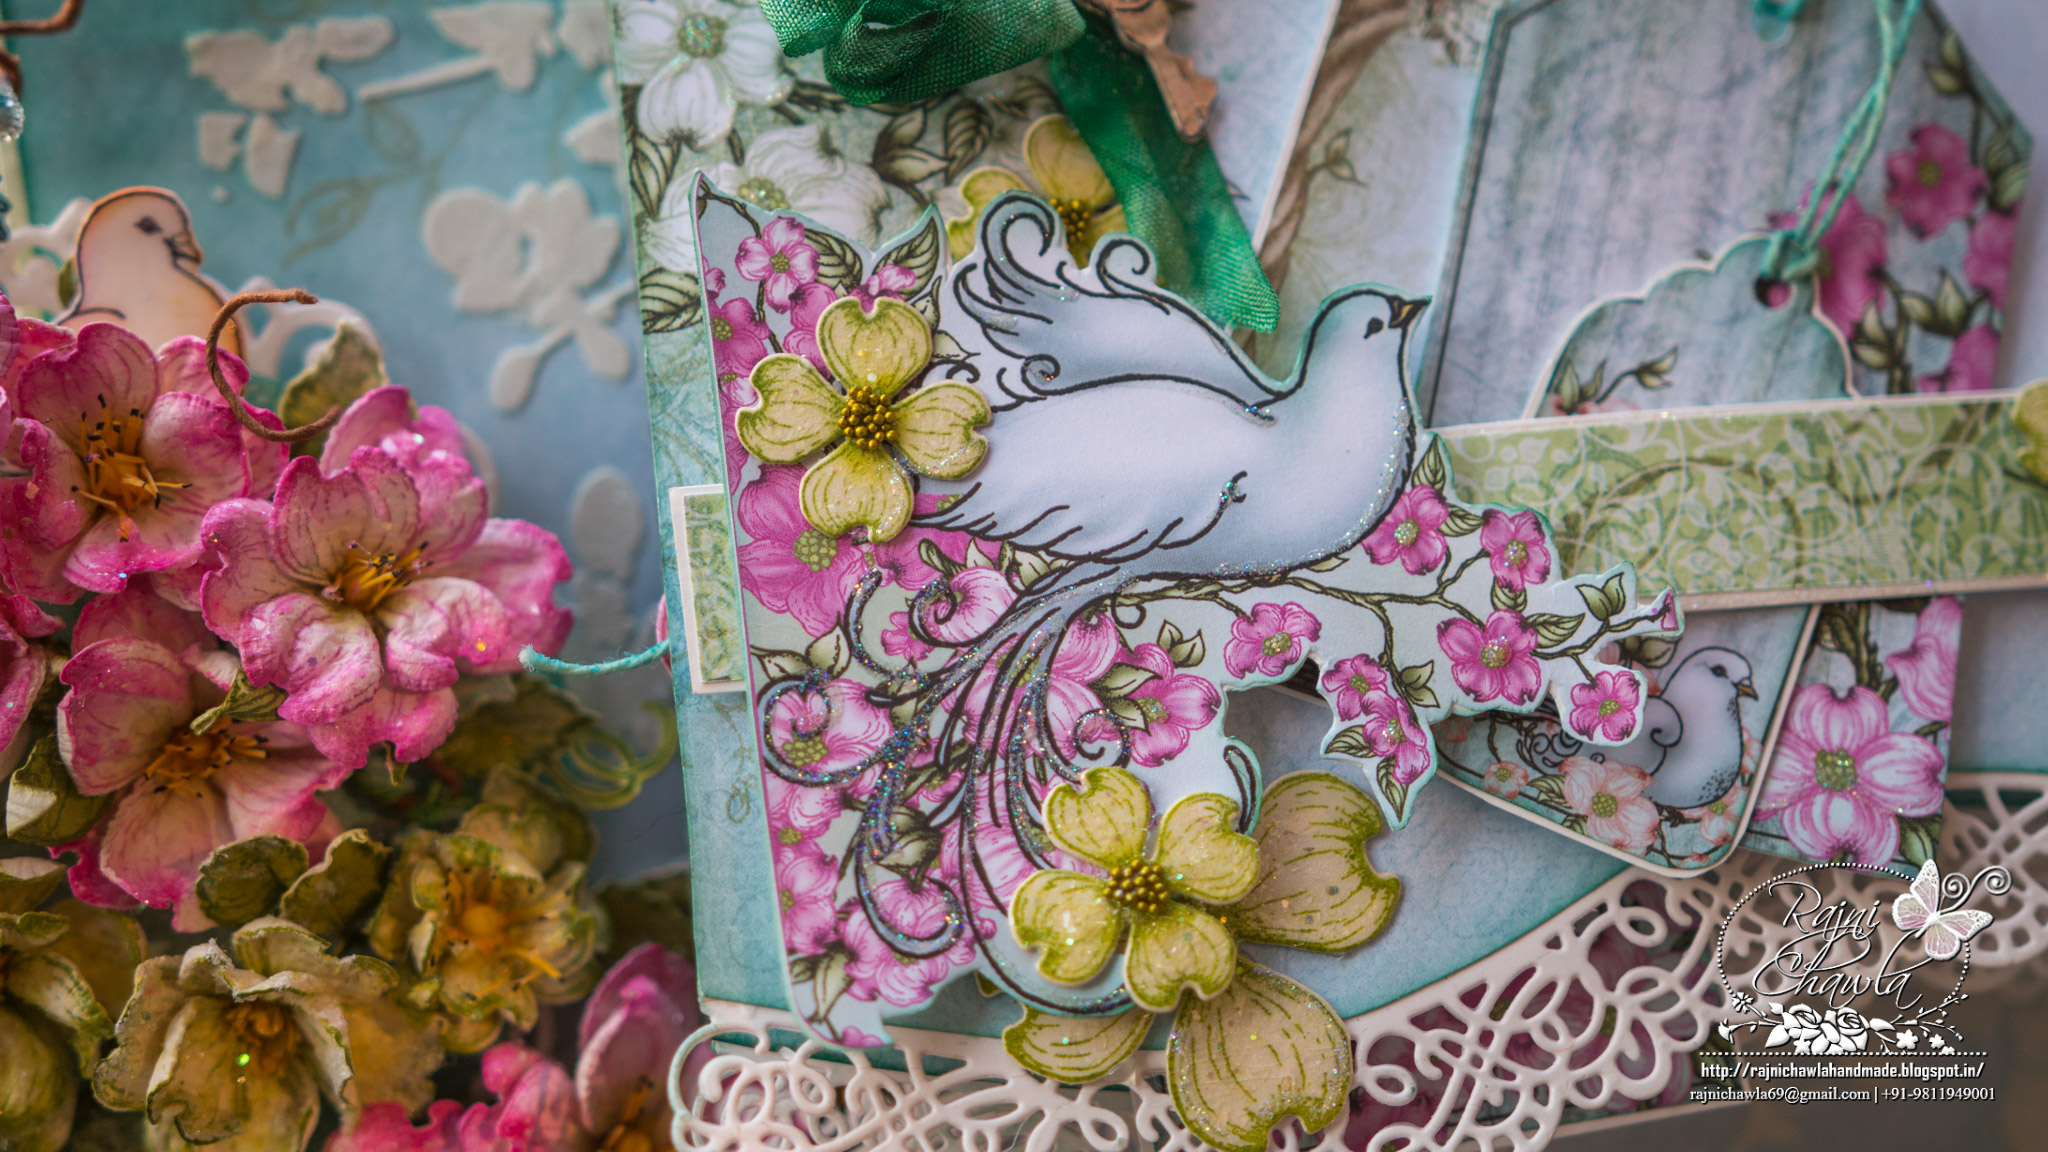
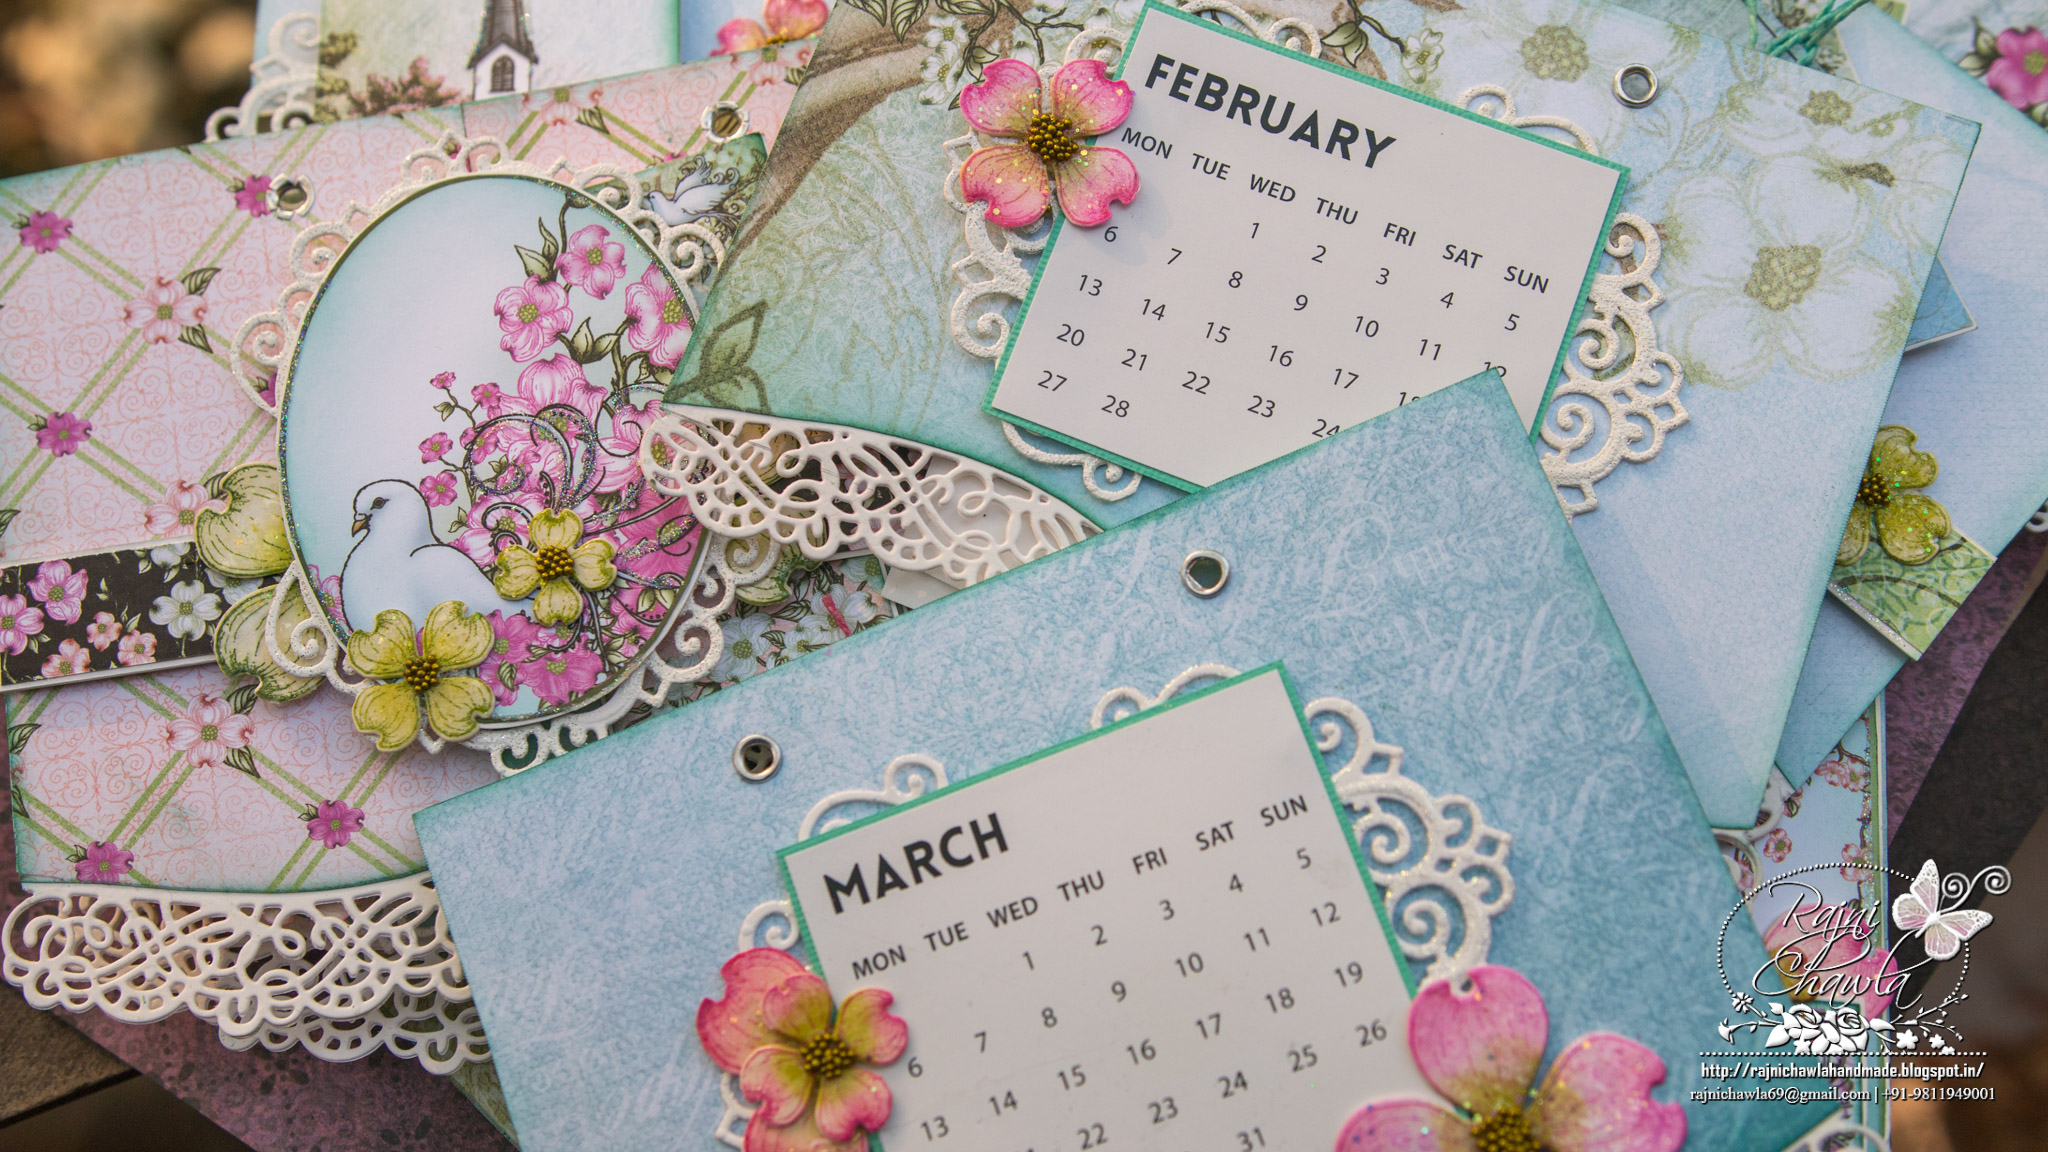
Instructions: For flowers, I have used ColorBox Fluid Chalk Ink Pad – Berrylicious ColorBox Fluid Chalk Ink Pad – Guacamole. For pollens, I have used Memento Dye Ink Pad – Cantaloupe. Leaves are painted using Archival Leaf green and Olive Green. Watch this video https://youtu.be/gI8RqHAt3vE to learn different shaping techniques using the dogwood flowers. The Base of the Calendar: The base of the calendar measures 10 1/2″ by 8 1/2″. Cut 2pcs of black chipboard of the same size. Mat designer paper from Flowering Dogwood Collection, leaving 1/8th of an inch on all sides. Cut one piece of a black card stock and make a hinge of 1 1/2″ x10 1/2″. Score at 3/4″. Join both the chipboards with this hinge on top. To make the calendar stand stable on the desk attach it with a lower hinge. The lower hinge measures 6″ by 10 1/2 “. Score at 3/4″, 1 1/2″, 2 1/4″, 3″, 3 3/4″, 4 1/2″,
5 1/4″. Crease on all the score points and make mountain and peak hinge. Attach the same to the lower part of both the chipboards. Decorate the front and back with texture paste and stencils. Make two holes on both the sides of calendar leaving equal distance for the rings with the help of crop a dile. Cut 24 pages from white card stock of 71/2″ by 6”. On 12 pages tape down the Decorative edge from Fleur Border Basic Die A and run it under die cutting machine. On rest of the 12 pages, tape down Fleur Border Basic die B and cut them through die cutting machine. Once all the pages are cut stick them together back to back using red tacky tape. The project has the calendar on one side and belly bands and flip folds to hold note tags on the back side. Different pages have different belly bands to hold tags. All the pages are decorated with glazed Dogwood flowers, sprinkled with crystal clear glitter. For glazing the flowers, apply Versamark clear ink by dabbing the ink pad and sprinkle clear UTEE. Then melt it using the heat gun. Few of the pages have fussy cut images as decorative elements from the designer paper itself. Once all the pages are done, ring them on the calender base with rings and tie a ribbon bow. Hang metal keys for extra embellishments. For flower bouquet, I have cut 4 circles using Spellbinders Classic circle die and adhered cut outs from Raindrop and Roses die to form the base of the bouquet. For more detailed pictures do visit my site www.rajnichawla.com.
you out did your self on this beauty, so many gorgeous flowers and details!!! You ROCK!
Beautiful calendar 🙂
This is totally a labor of love and you can see the creativity in each piece!
Hi, I think your creativity is astounding! I wanted to ask why you used the designer sunflower paper matted on the base of the calendar that measures 10 1/2 by 8 1/2? I don’t see evidence of this paper in your project via the photos. It looks like the dogwood papers are used throughout this beautiful crafted calendar.
When you use the textured paste, is that all over or just in spots here and there? I don’t know much about paste but you include it a lot in your projects and it fascinates me and scares me. However you make it look so easy.
Thank you so much for your creativity and for sharing! I truly enjoy your craftiness and creations. Liz Ford
Oppsss….so sorry Liz. Because I myself followed and recreated the piece which I made last year with Sunflower Collection, I got confused while making the the notes for the Dogwood Calendar. Since the procedure was all same for the base, I simply copy pasted it from my previous post and forgot to edit the name of the collection I used in my recent calendar. Thanks for correcting me and letting me know about my mistake. I have now edited the post.
Texture paste I use it rendomnly here and there with the stencils. Here in this piece i did stenciling with texture paste on the area which will avtually show after assembelling the whole project. If you sprinkle clear glitters when the paste is still wet it really looks dreamy. I personally love that effects on my projects. Thank you so very much for stopping by and appreciating my efforts 🙂🙂
If you missed looking at the project what I made last year you can click the link here….
http://rajnichawla.com/desk-calendar-cum-album-for-heartfelt-creations/
Hi…love this dreamy calendar, I too have made a calendar but nothing like this…it’s a true wow!
Wow! Your calendar is just gorgeous! Dreamy is an understatement!
Hugs, Marie