Good morning friends!!
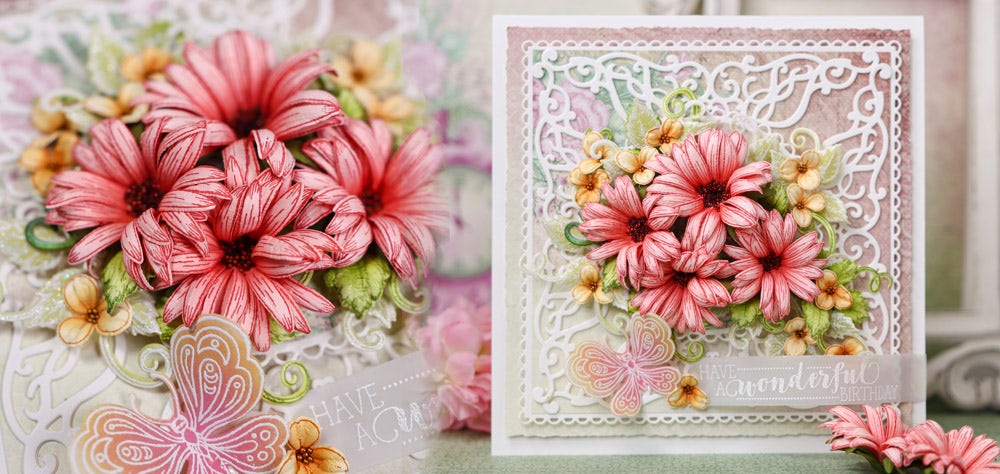
Happy Wednesday!! Once again it’s that day the month when we, designers at Heartfelt Creations debute monthly new collection. The elegant Floral Frames Collection is available for sales.
Here is my very first inspiration using the same.

Supplies From Heartfelt Creations:
HCD1-7385 Rectangular Floral Frame Die
HCPC-3974 Rectangular Floral Frame Cling Stamp Set
HCPC-3976 Curvy Floral Frame Cling Stamp Set
HCD1-7387 Curvy Floral Frame Die
HCD2-7191 Intricate Swirl Frames Die
HCPC-3952 Floral Butterfly Accents Cling Stamp Set
HCPC-3952 Floral Butterfly Accents Cling Stamp Set
HCD1-7193 Leafy Accents Die
HCPC-3835 Leafy Accents Cling Stamp Set
HCPC-3845 Just For You Sentiments Cling Stamp Set
HCPP1-475 Deluxe Flower Shaping Paper Pack of 50 – White
18002 Rajni Chawla’s Vellum Flowerite – 10 Sheets
RACP436 Ranger Archival Ink Pad – Leaf Green
RACP482 Ranger Archival Ink Pad – Olive
RACP993 Ranger Archival Ink Pad – Red Geranium
RACP468 Ranger Archival Ink Pad – Jet Black
RACP412 Ranger Archival Ink Pad – Forget-Me-Not
478594 Zig Clean Color Real Brush Markers – 48 Pack
EP100 Opaque Embossing Powder – White
RAHT Heat It Craft Tool
Other Supplies Used: Smooth White Cardstock, Die Cutting Machine. Funnel Tray, Double-Sided Tape, Glossy Accent, Sharp Scissors, Hero Arts White Pigment Ink.
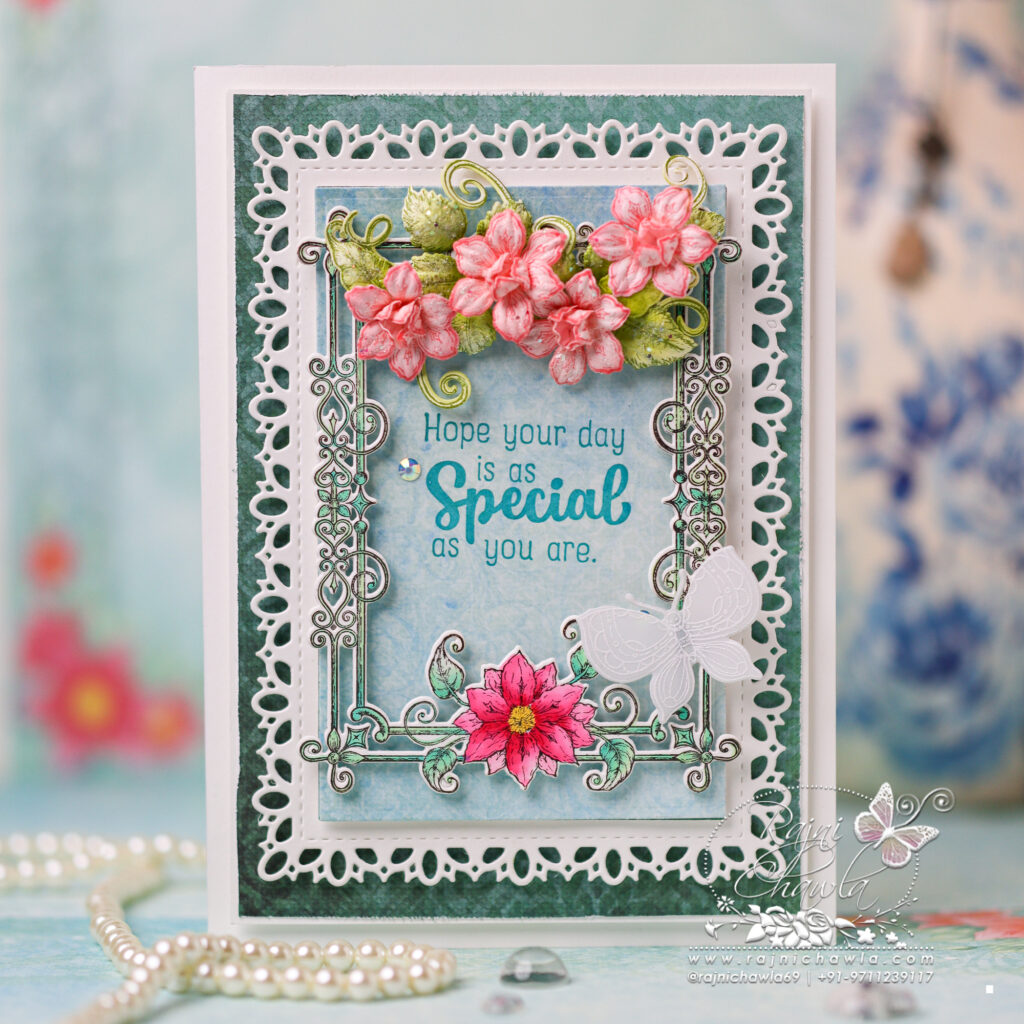
Instructions: The ready top fold card measures 8″ by 6″. To prepare the white card base, cut one piece measuring 8″ by 6″ and the second piece 8 1/2″ by 6″. Score the second piece at 1/2″ on the longer side and glue the first piece on top. For the topmost layer, choose the pattern paper from the paper collection and cut 71/4″ by 5 1/4″. Next, mat the panel on the white cardstock making a delicate border of 1/16″ on all four sides. Layer the panel on the card front using double-sided tape.
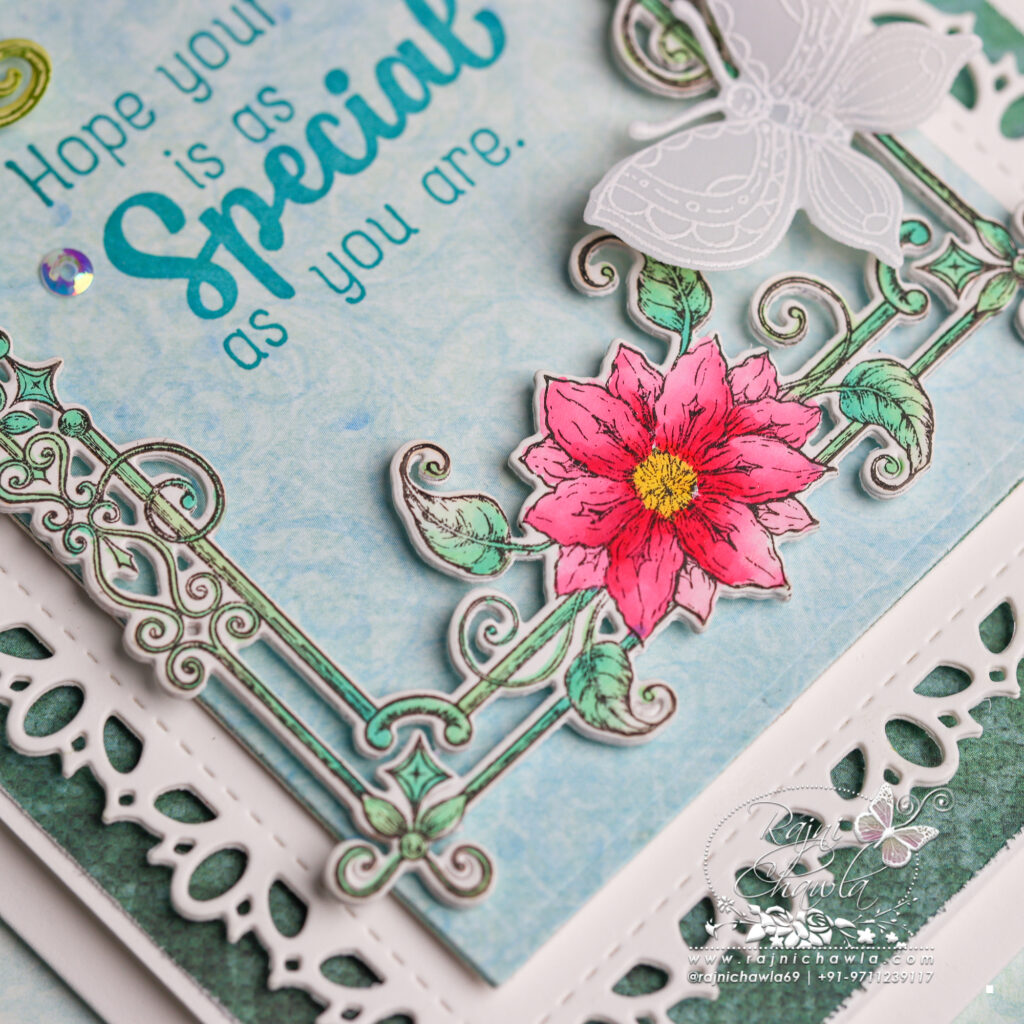
Die-cut two pieces of the fancy frames from white cardstock using Intricate Swirl Frames Die. Stack both the die cuts together using tacky glue to add extra strength. Choose another paper from the same paper collection and cut a piece measuring 5 3/4″ by 3 3/4″ to cover the window. Stamp the sentiment from Just For You Sentiments Cling Stamp Set using Forget me not archival ink. Layer the panel on the frame as shown using a double layer of double-sided tape.
Stamp the frame using Rectangular Floral Frame Cling Stamp Set using jet black archival ink and cut it using its coordinating die. Paint the image using Zig Clean Clear Brush Markers. Layer the frame on the card front using tiny foam dots.
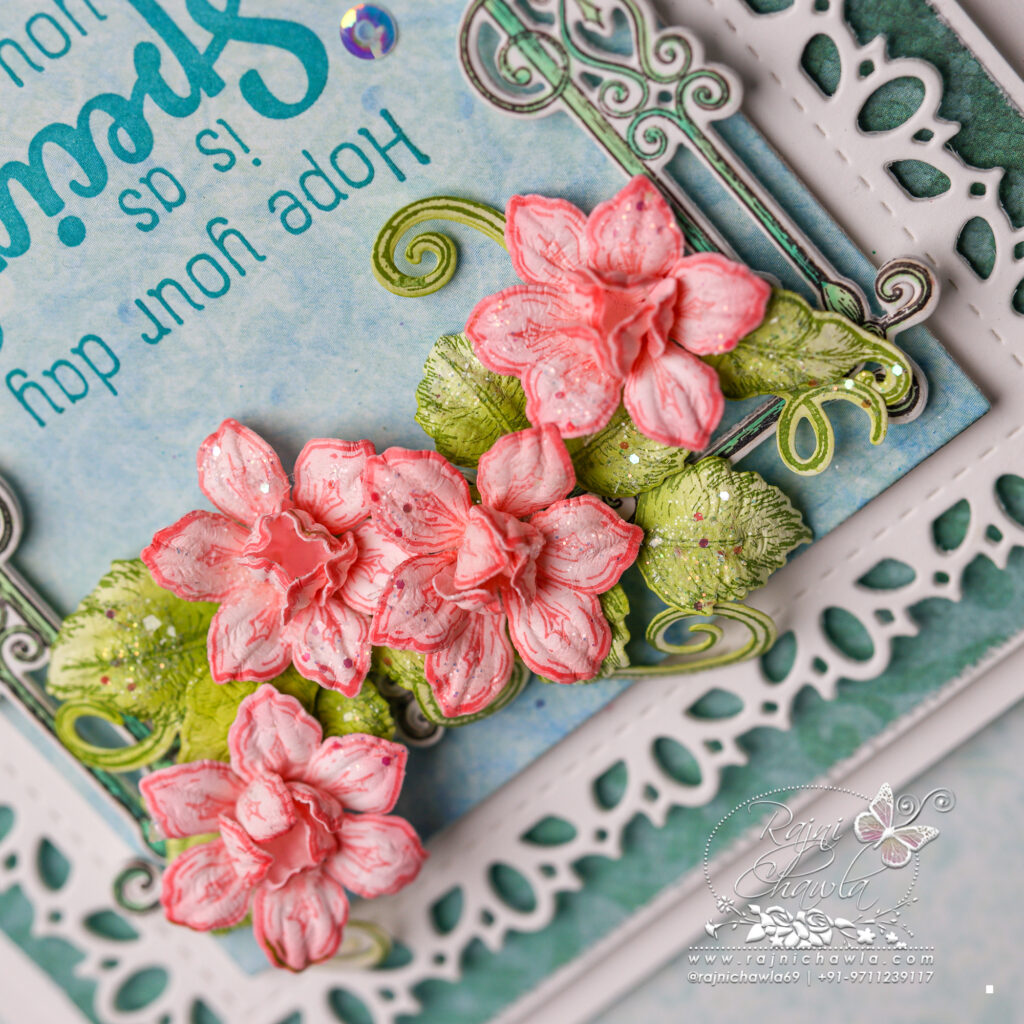
Stamp 4 large and 4 small flowers from Curvy Floral Frame Cling Stamp Set using Pink Peony Archival ink on Deluxe Flower Shaping Paper. Cut the florals using its coordinating die and slightly color them using the same ink. Shape the flowers using the Deluxe Flower Shaping Kit.
Stamp 2 sets of leaves using Leafy Accent stamp and Olive Green Archival ink and cut them using its coordinating die. Color the leaves using the same inks and shape them using a Deluxe Flower Shaping Kit.
Stamp the butterfly image from Small Floral Butterfly Accents Cling Stamp Set with Hero Arts White Pigment Ink on Rajni Chawla’s Vellum Flowerite and sprinkle white heat embossing powder. Dust extras and heat set the image using a heat tool. Cut the butterfly using its coordinating die.
Once, all the elements are ready, assemble the card as shown and complete the card by adding little sparkle using Rajni Chawla’s Crystal Clear powder.