Happy Wednesday!!
Once again it’s that time of the month when we designers debut, the great new launch at Heartfelt Creations.
Floral Banners Collection is on the shelves for sale. Here is my first take on this beautiful collection.

Supplies from Heartfelt Creations:
HCPC-3970 Peony & Sunflower Banner Cling Stamp Set
HCPC-3970 Peony & Sunflower Banner Cling Stamp Set
HCDP1-2133 Floral Banners Paper Collection
HCD1-7367 Simple Centerpiece Die
HCD1-7369 Elegant Hearts Centerpiece Die
HCPC-3906 Small Wild Rose Cling Stamp Set
HCD1-7289 Small Wild Rose Die
HCD1-7193 Leafy Accents Die
HCPC-3835 Leafy Accents Cling Stamp Set
HCPC-3847 Celebrate Love Sentiments Cling Stamp Set
HCGP1-488 Luxe Gold Cardstock
HCST1-401 Deluxe Flower Shaping Kit
PGM15016 Rajni Chawla’s Frosting Powder
ANC811 Tu Tu Pink Prills
ANC821 Hot Mama Prills
478594 Zig Clean Color Real Brush Markers – 48 Pack
18002 Rajni Chawla’s Vellum Flowerite – 10 Sheets
EP100 Opaque Embossing Powder – White
Other Products Used: Smooth white cardstock, Score Board, Die Cutting machine, Tacky glue, Glossy Accent, Foam Tape, Adhesive that dries clear, Hero Arts White Pigment Ink, Distress Oxide Worn Lipstick, Heat Tool, and Embossing Folder.
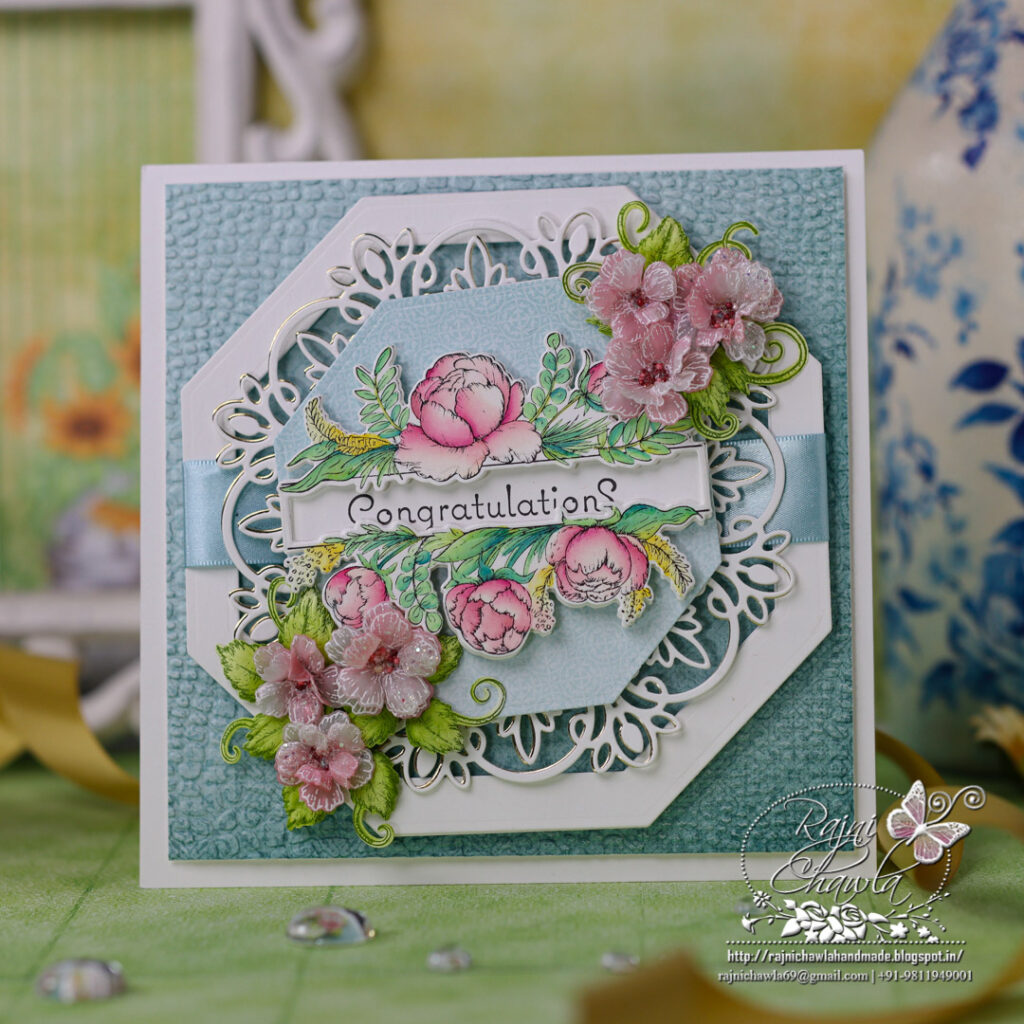
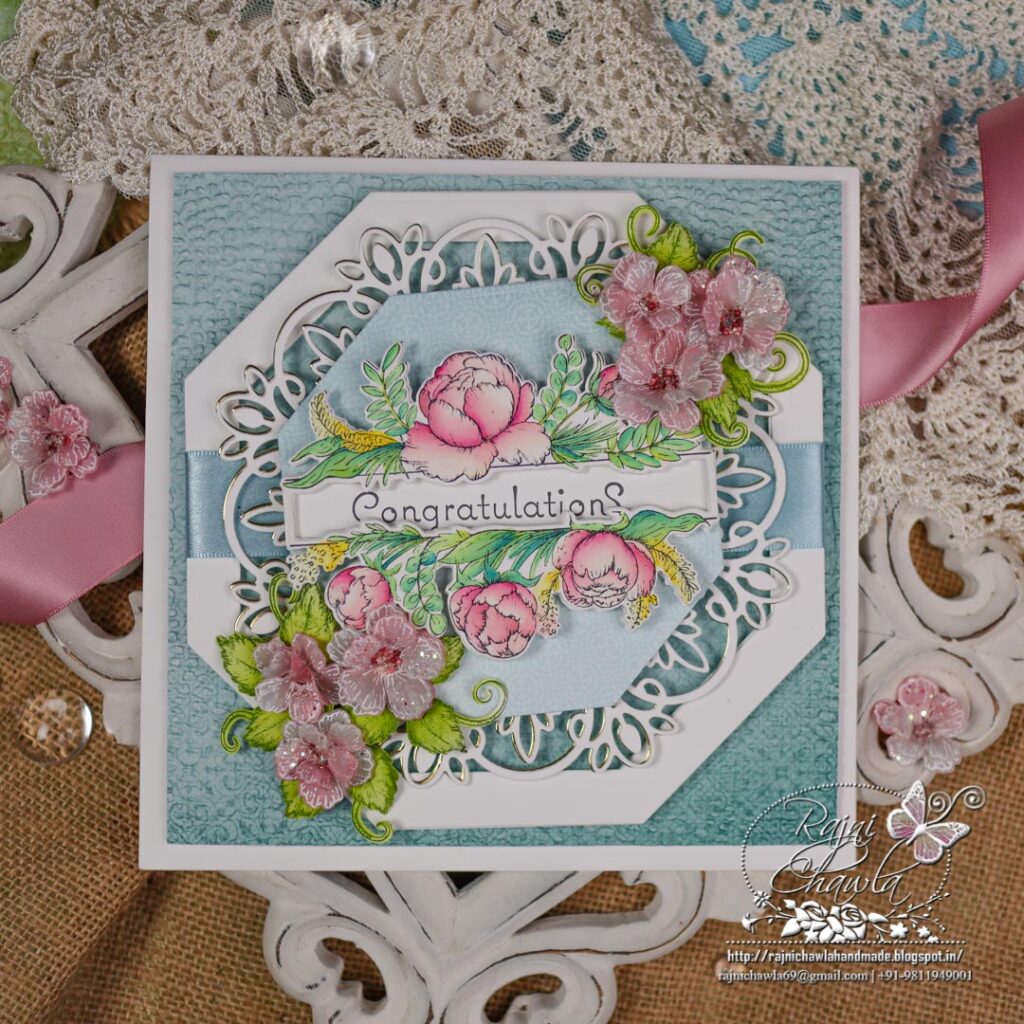
Instructions: The ready top fold card from the smooth white cardstock measures, 7″ by 7″. To prepare the top panel, choose the light color plainer paper from the designer paper collection and cut it to size measuring 6 3/4″ by 6 3/4 ″. Dry emboss it using an embossing folder and layer the embossed panel on the card front using foam tapes.
Using Elegant Hearts Centerpiece Die cut one piece each in white and Luxe gold cardstock. Glue them together keeping the gold one at the back a little off-center creating a shadow. Next, take the first and the third largest die from the Simple Centerpiece die set and cut a frame from white cardstock.
Layer the frame using foam dots on the card panel as shown. Next layer the centerpiece die-cut on top giving it a double layer of foam tape.
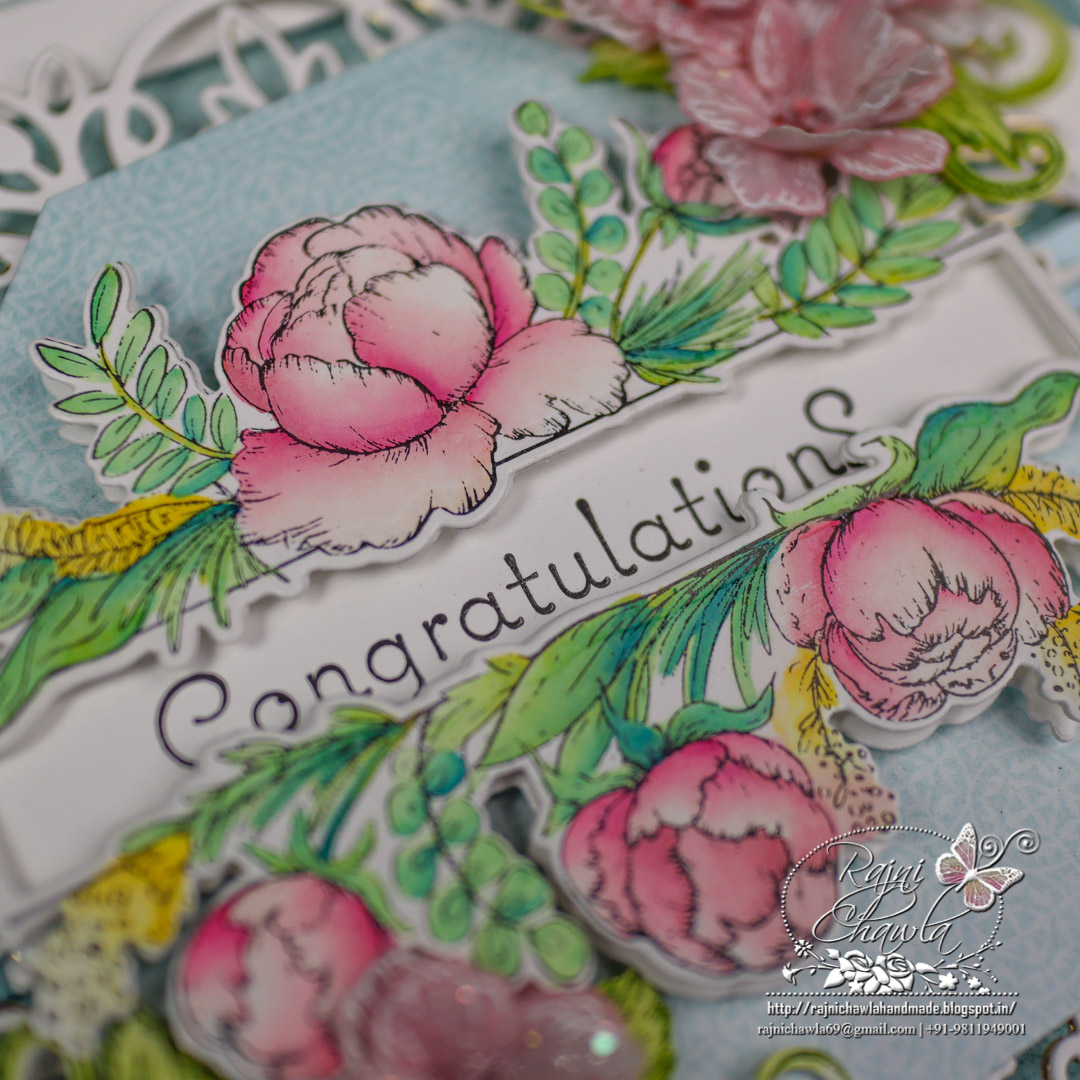
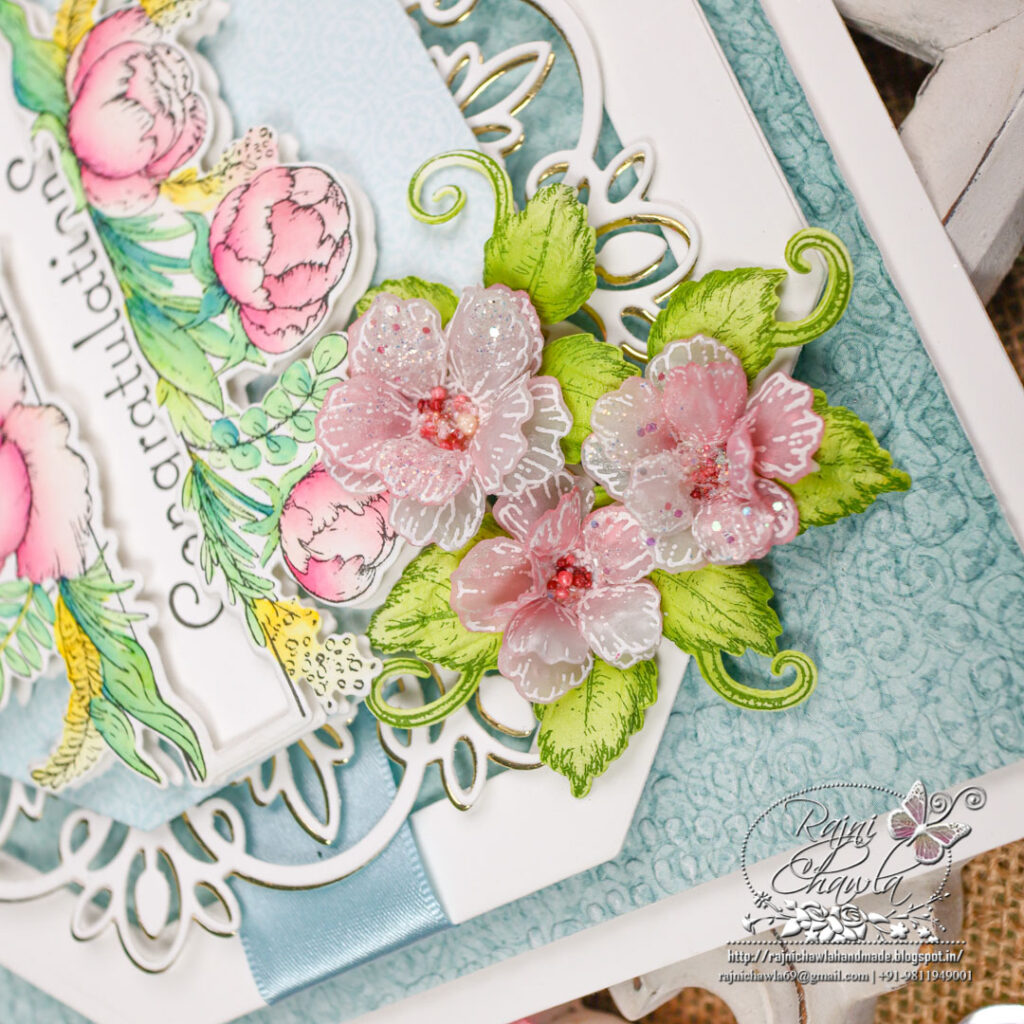
Stamp the image from the Peony & Sunflower Banner Cling Stamp Set on white cardstock using black archival ink and paint the image using Zig Clean Clear Brush Markers. Die-cut the image using its coordinating dies, securing the sentiment window die. Cut a cover die for the same and stamp the sentiment using black archival ink. Layer the colored banner with an open window as shown and finally layer it on the card front.
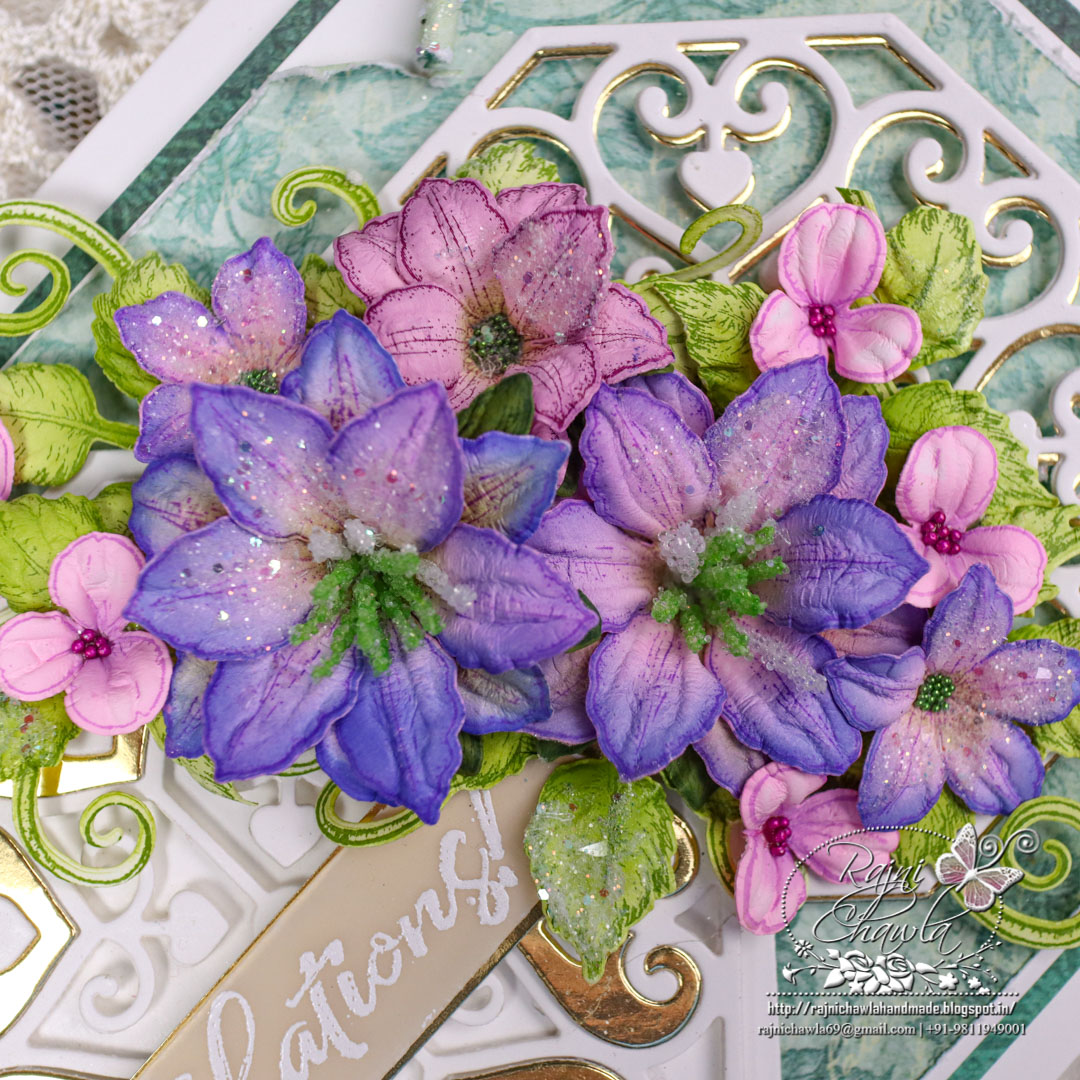
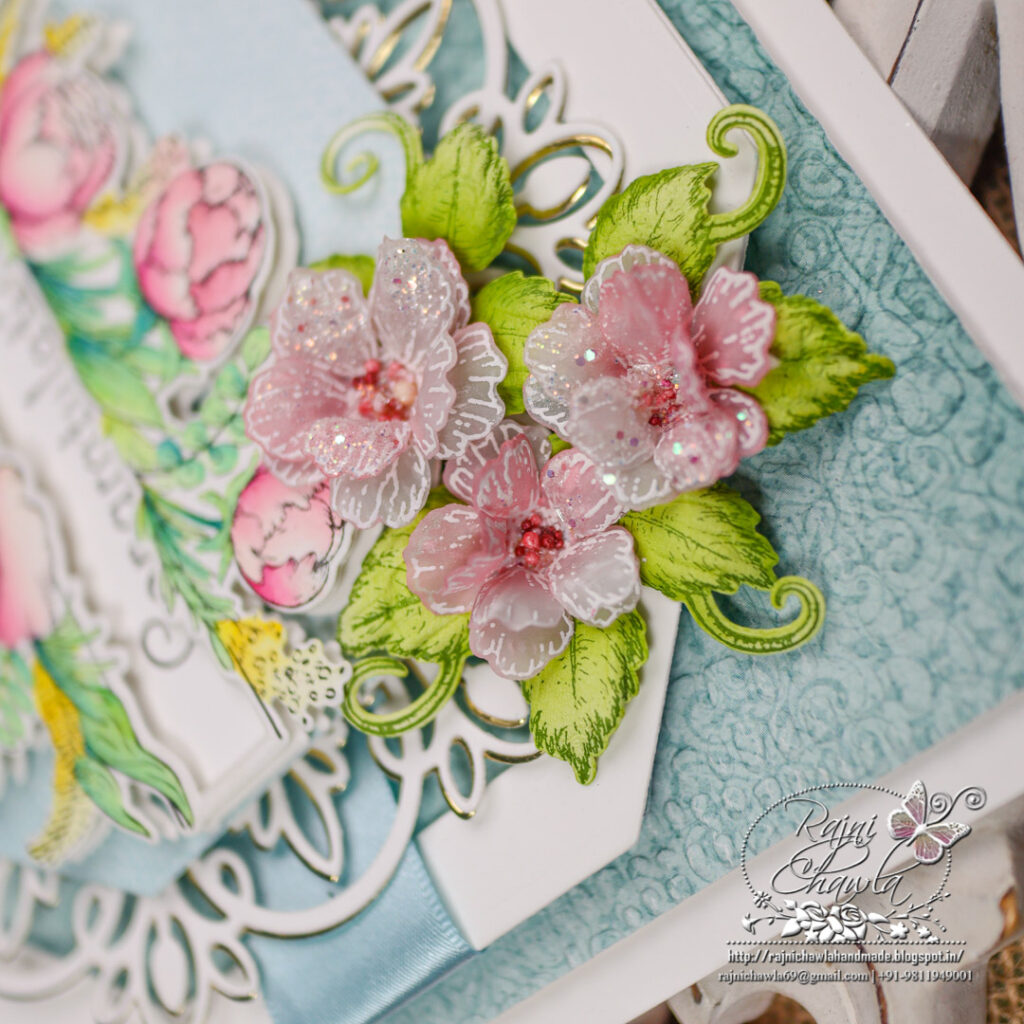
Stamp a couple of smaller floral images from Small Wild Rose. Next, heat set the images and cut them using their coordinating dies. Color the Roses using Worn Lipstick distress oxide ink. Shape the roses in their coordinating mold and flower shaping kit. Add prills to the flower centers.
Stamp Leafy foliage from Leafy Accent stamp set with Olive green on flower-making cardstock and cut them using its coordinating die set. Paint the leaves using Leaf Green Archival ink and shape them using golf groove tools. Once all the elements are ready, assemble small clusters of flowers as shown and finish the card by adding sparkles.