Hey Friends,
Happy Wednesday! How are you spending the first days of November…..are you taking time to create something beautiful today? How about getting started on some cheery and fun cards that you will love creating? If you feel stuck and want some ideas to get you started, you are in the perfect spot! Each Wednesday we designers at Heartfelt Creations, bring you the completely new inspiration that allows you to jump-start your creativity and inspire you to create something beautiful!

HCD1-7367 Simple Centerpiece Die
HCD1-7369 Elegant Hearts Centerpiece Die
HCDP1-2132 Seasonal Wreath Paper Collection
HCPC-3954 Clematis Cling Stamp Set
HCD1-7355 Clematis Die
HCPC-3911 Wisteria Petals Cling Stamp Set
HCD1-7295 Wisteria Petals Die
HCD1-7193 Leafy Accents Die
HCPC-3835 Leafy Accents Cling Stamp Set
HCPC-3952 Floral Butterfly Accents Cling Stamp Set
HCD1-7353 Floral Butterfly Accents Die
HCPC-3847 Celebrate Love Sentiments Cling Stamp Set
HCGP1-488 Luxe Gold Cardstock
HCST1-401 Deluxe Flower Shaping Kit
HCPP1-468 Deluxe Flower Shaping Paper Pack of 25 – White
HCS1-459-4 Rock Candy Stamens-Small
18002 Rajni Chawla’s Vellum Flowerite – 10 Sheets
RACP985 Ranger Archival Ink Pad – Cactus Flower
RACP436 Ranger Archival Ink Pad – Leaf Green
RACP962 Ranger Archival Ink Pad – Fern Green
RACP614 Ranger Archival Ink Pad – Magenta Hue
RACP632 Ranger Archival Ink Pad – Buttercup
RACP494 Ranger Archival Ink Pad – Majestic Violet
359760 Embossing Powder – Gold
Other Products Used: Smooth white cardstock, Score Board, Die Cutting machine, Tacky glue, Glossy Accent, Foam Tape, Adhesive that dries clear, Versafine ink.
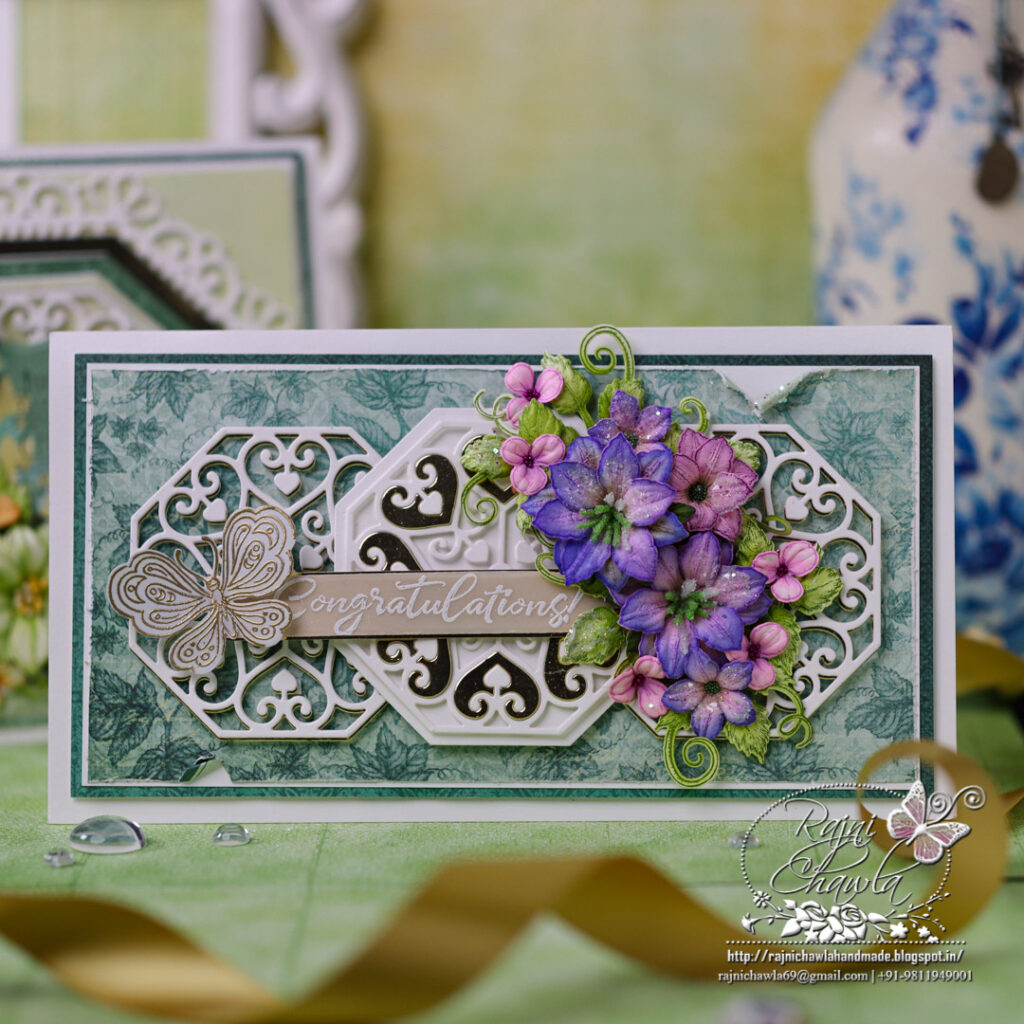
Instructions: The ready top fold card from the smooth white cardstock measures, 5″ by 8 1/2″. To prepare the top panel, choose the light green paper from the designer paper collection and cut it to size measuring 41/2″ by 8″. Distress all the sides using sharp scissors and mat it directly on the white cardstock measuring 1/8″ larger. Next, layer it with one layer of foam tape on coordinating paper from the same paper collection. Finally, layer the prepared panel with one layer of foam tape on the ready card base.
Using Elegant Hearts Centerpiece Die cut 3 pieces of the center element from white cardstock and 2 pieces using Luxe Gold Cardstock. Glue the gold one behind the white ones, creating a soft gold shadow. To the remaining white element, cut the coordinating solid octagon and glue them together as shown. To this add a bit of inlay work with the scrap pieces of gold. Arrange the three elements on the card front, creating dimensions using foam tape.
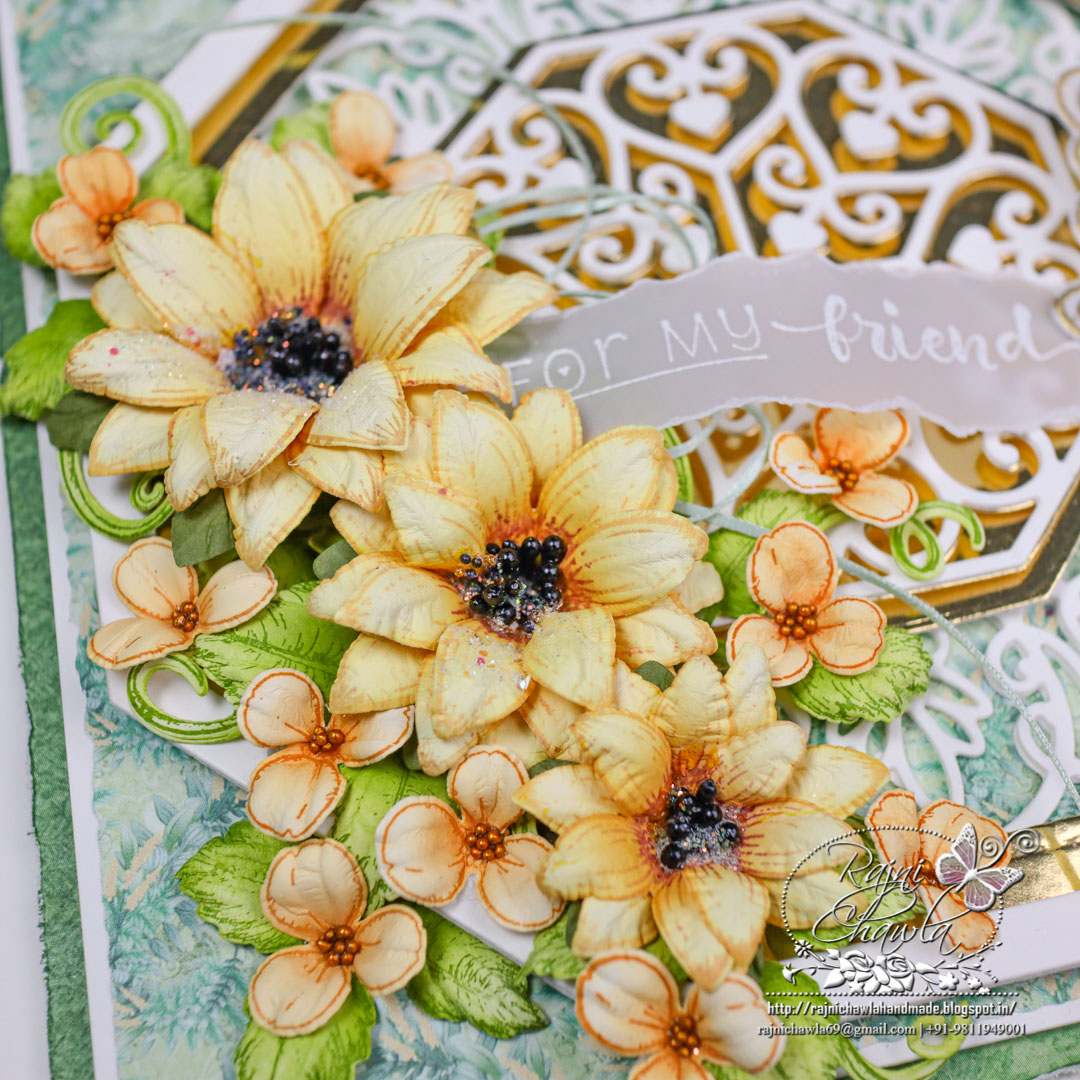
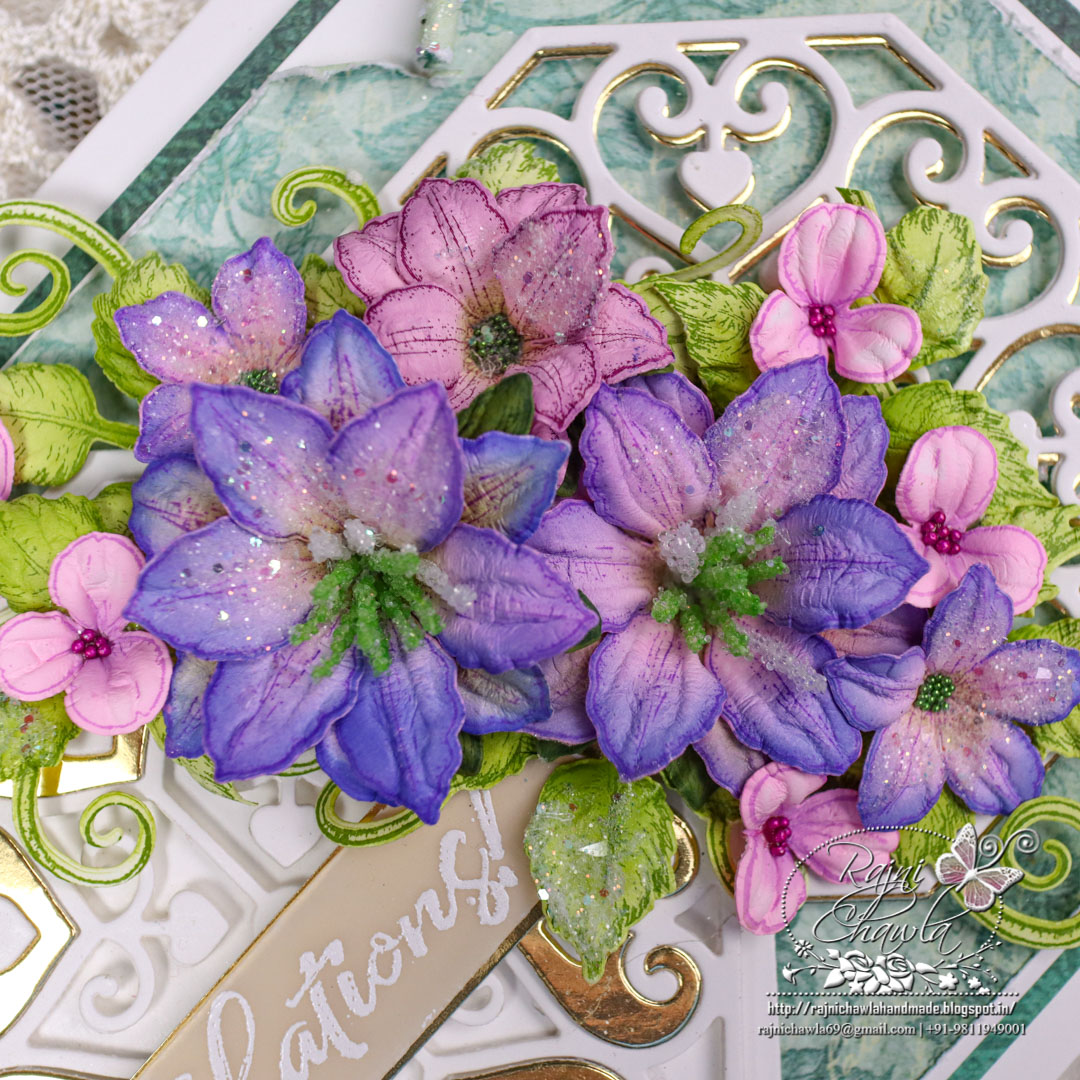
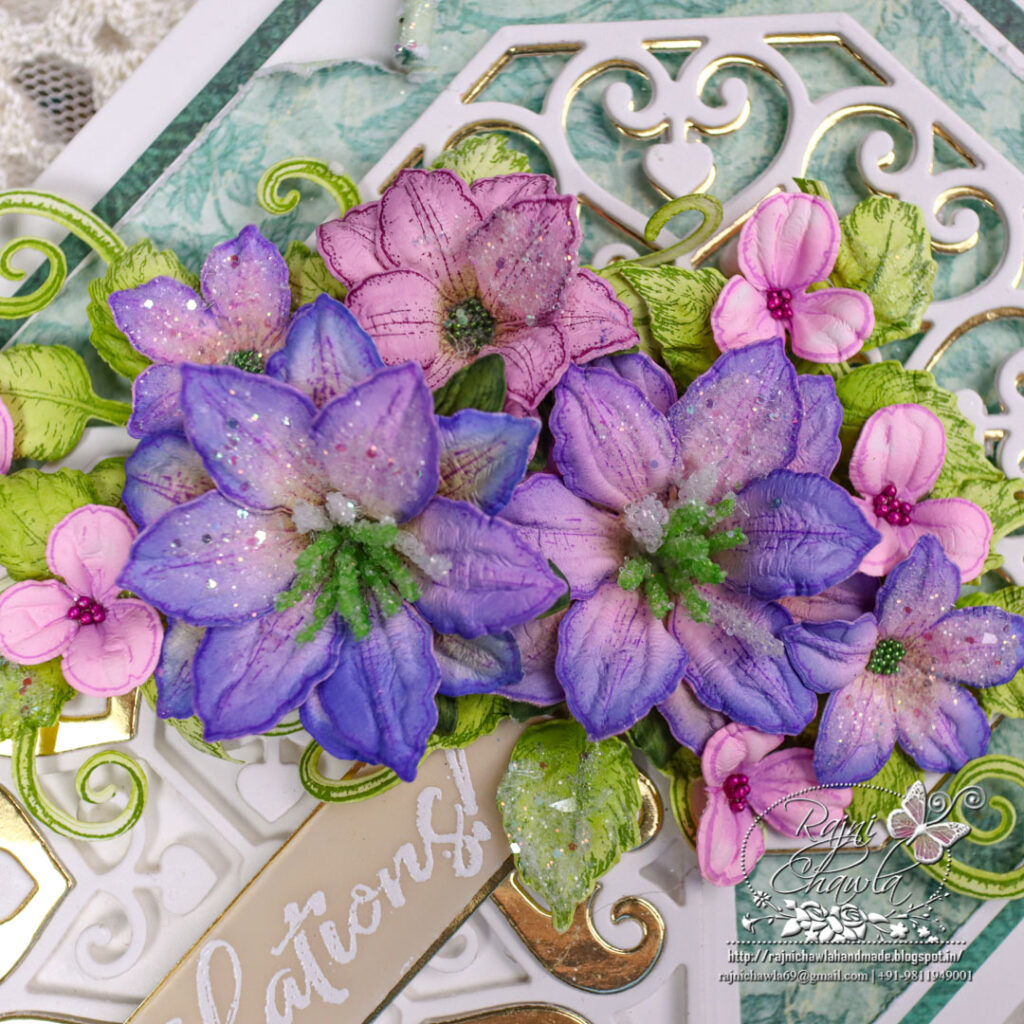
Stamp the florals with Majestic Violet on flower-making paper using Clematis Cling Stamp Set. Cut the florals using its coordinating die set and color the flowers using Magenta Hue and highlight them using Majestic Violet Archival inks. Spritz water and shape the flowers using golf groove tools. Prepare 3 large flowers of 2 petals each and 5-6 filler flowers using the one smallest petal each. Prepare 2 large flowers and add small rock candy stamens. Also, prepare medium and small flowers. To these add flower center pearls.
Cascading Wisterias are first stamped with Cactus Flower Archival ink, cut with its coordinating die, and then colored using the same ink. Once all colored these are shaped using Deluxe Flower Shaping Kit and add glitter balls to the centers.
Using Celebrate Love Sentiments Cling Stamp Set, stamp the sentiment with white pigment ink on vellum cardstock and sprinkle white heat embossing powder. Dust extras and heat set it using a heat gun. Following the same procedure, stamp the butterfly on vellum using versa mark ink and gold heat emboss the butterfly using Floral Butterfly Accent stamp. Cut the butterfly using its coordinating die.
For foliage, Stamp the images from Leafy Accent stamp set with Olive green archival ink and paint them using Leaf green Archival ink. Cut the foliage using its coordinating die. Shape the leaves using a groove golf tool.
Once all the elements are ready, add heat embossed sentiment, add glitters, and complete the card by assembling a small floral bouquet as shown.