Happy Wednesday!!
Once again, it’s that time of the month when Heartfelt Creations debut their new monthly collection. The beautiful Feathery Floral Collection is up on shelves for sales.
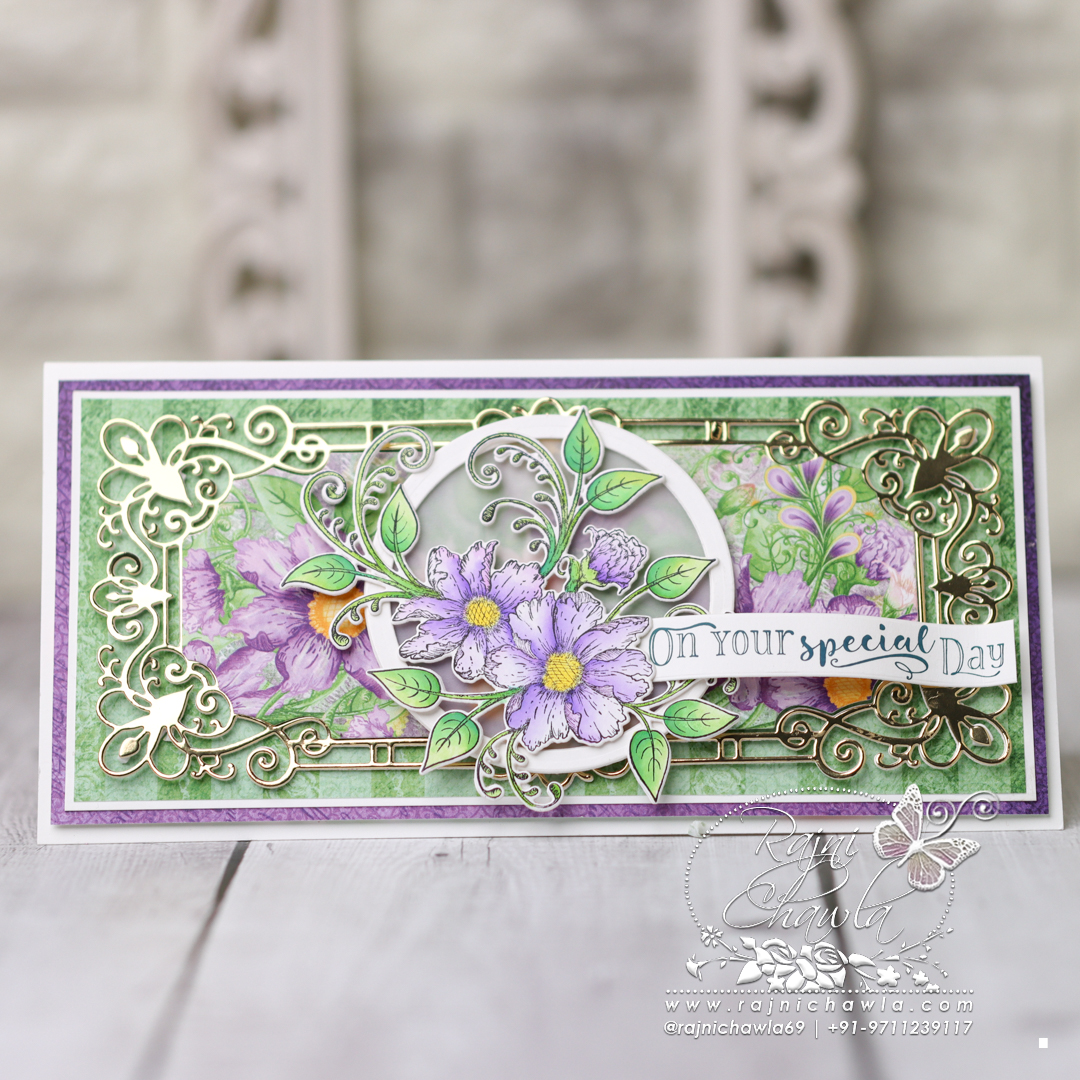
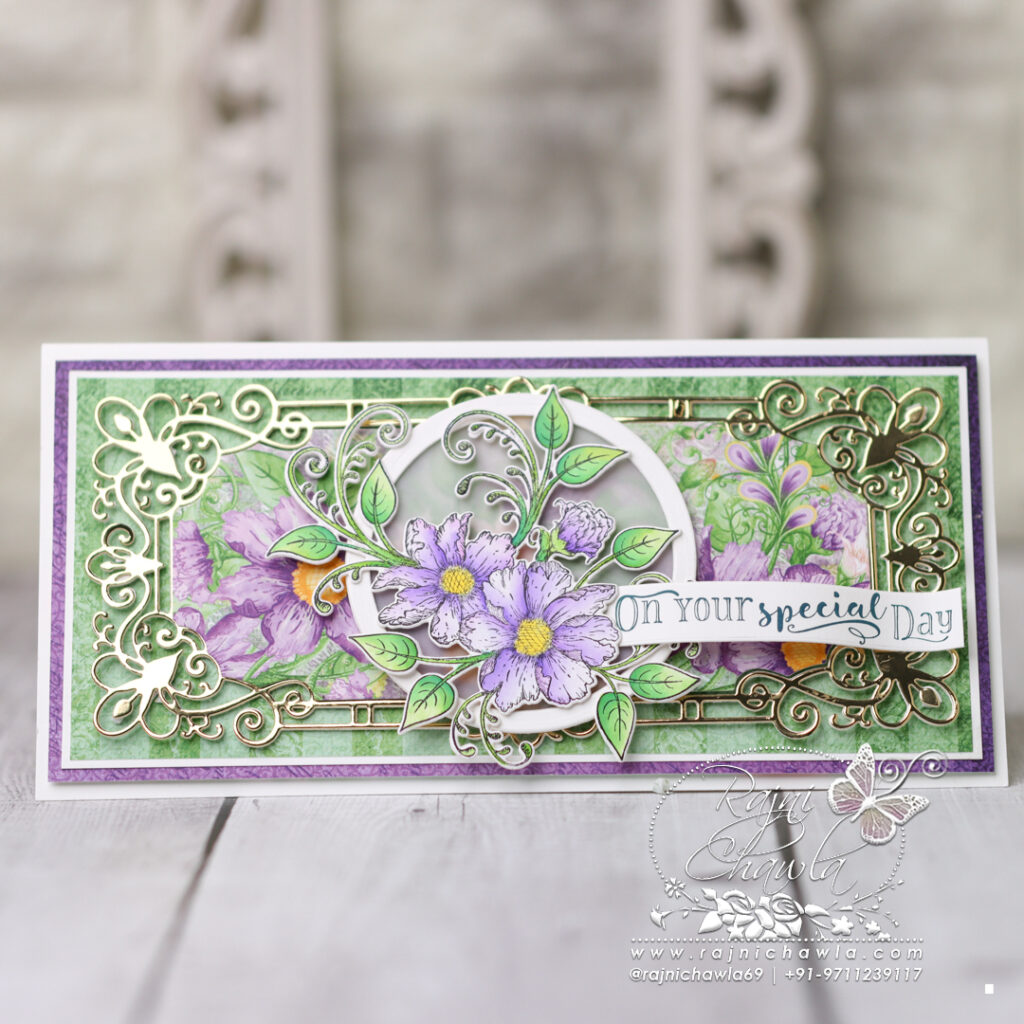
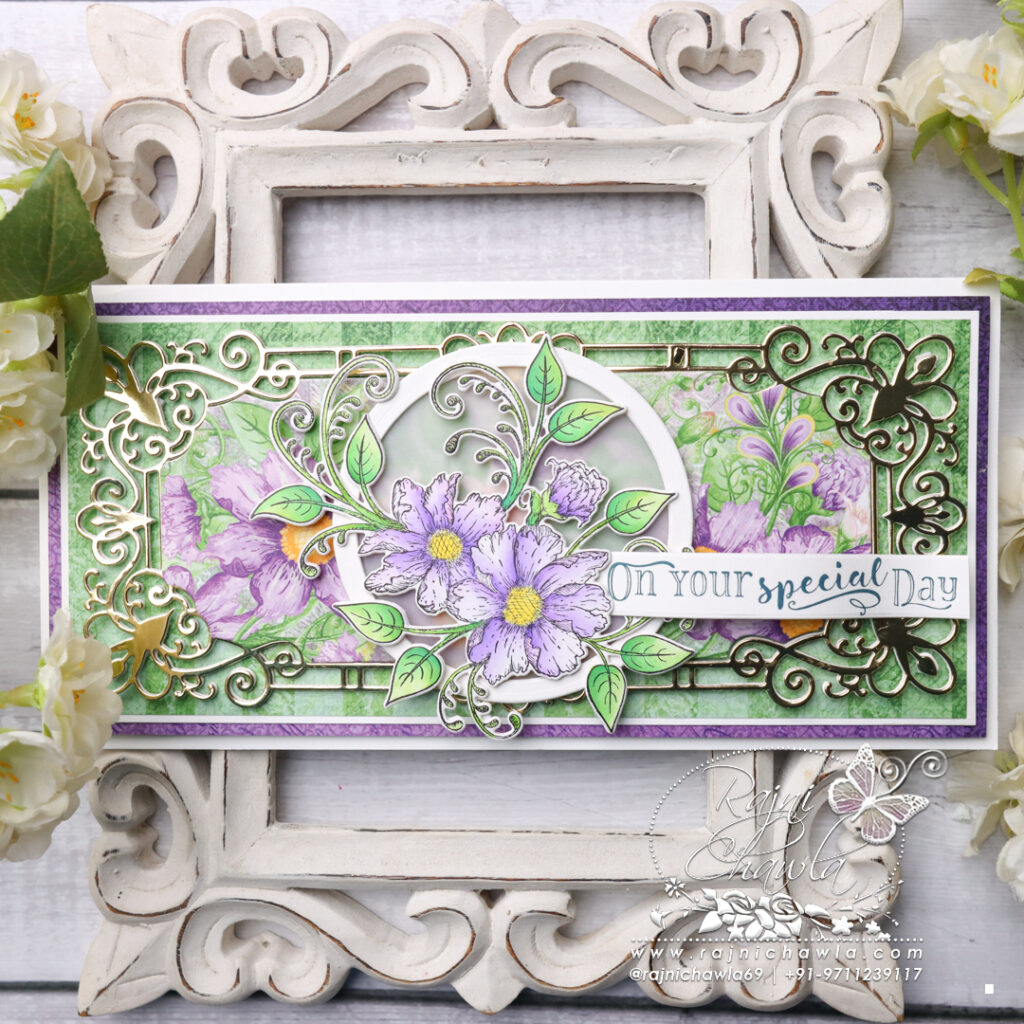
Here is my very first card using the new collection.
Supplies from Heartfelt Creations:
HCDP1-2149 Feathery Florals Paper Collection
HCD1-7453 Feathery Florals Die
HCPC-31017 Feathery Florals Cling Stamp Set
HCD3-7447 Slim Elegant Rectangle Die
HCD1-7155 Circle Basics Large Die
HCPC-3847 Celebrate Love Sentiments Cling Stamp Set
HCGP1-488 Luxe Gold Cardstock
478594 Zig Clean Color Real Brush Markers – 48 Pack
RACP468 Ranger Archival Ink Pad – Jet Black
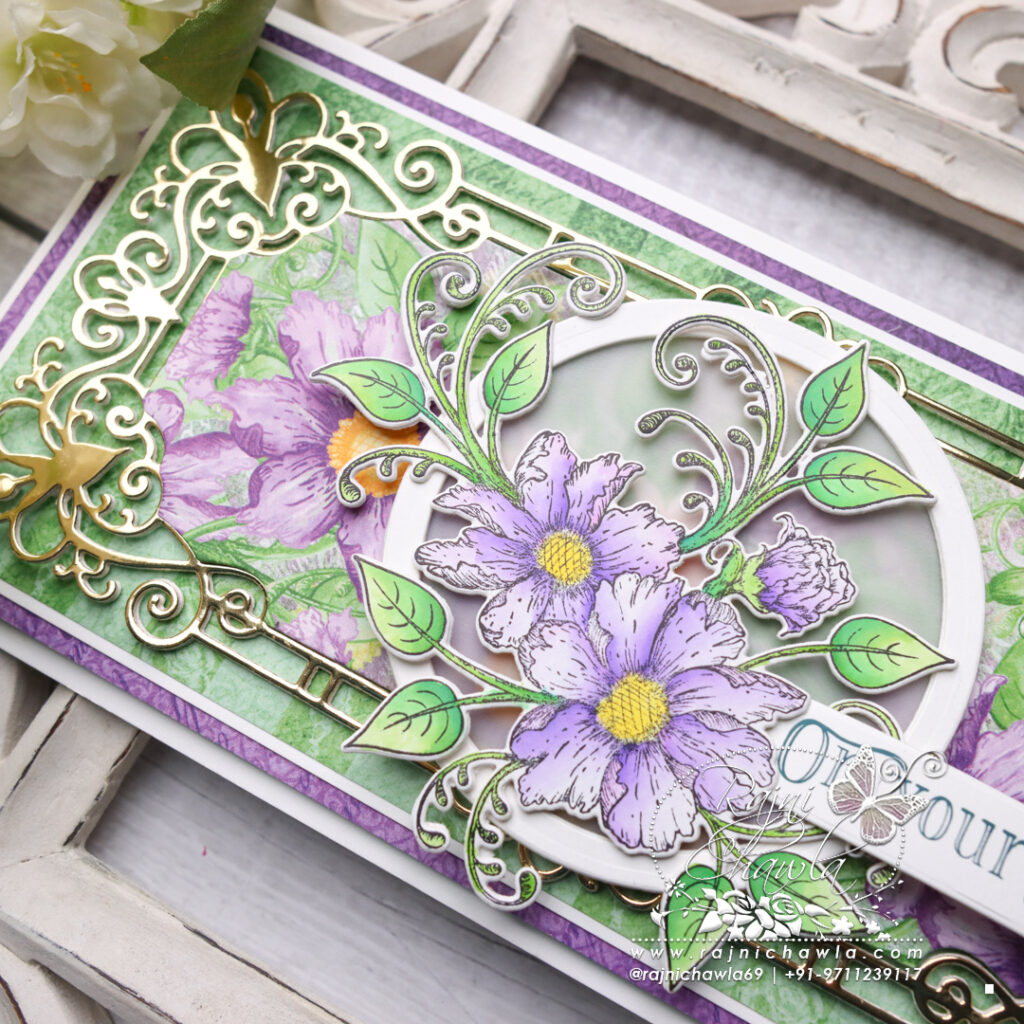
Instructions: The ready top-fold slimline card from smooth cardstock measures 9 1/2″ by 4 1/2″. To prepare the card base, cut the paper measuring 9 1/2″ by 9 ” and score at 4 1/2″ on 9″ length and crease well.
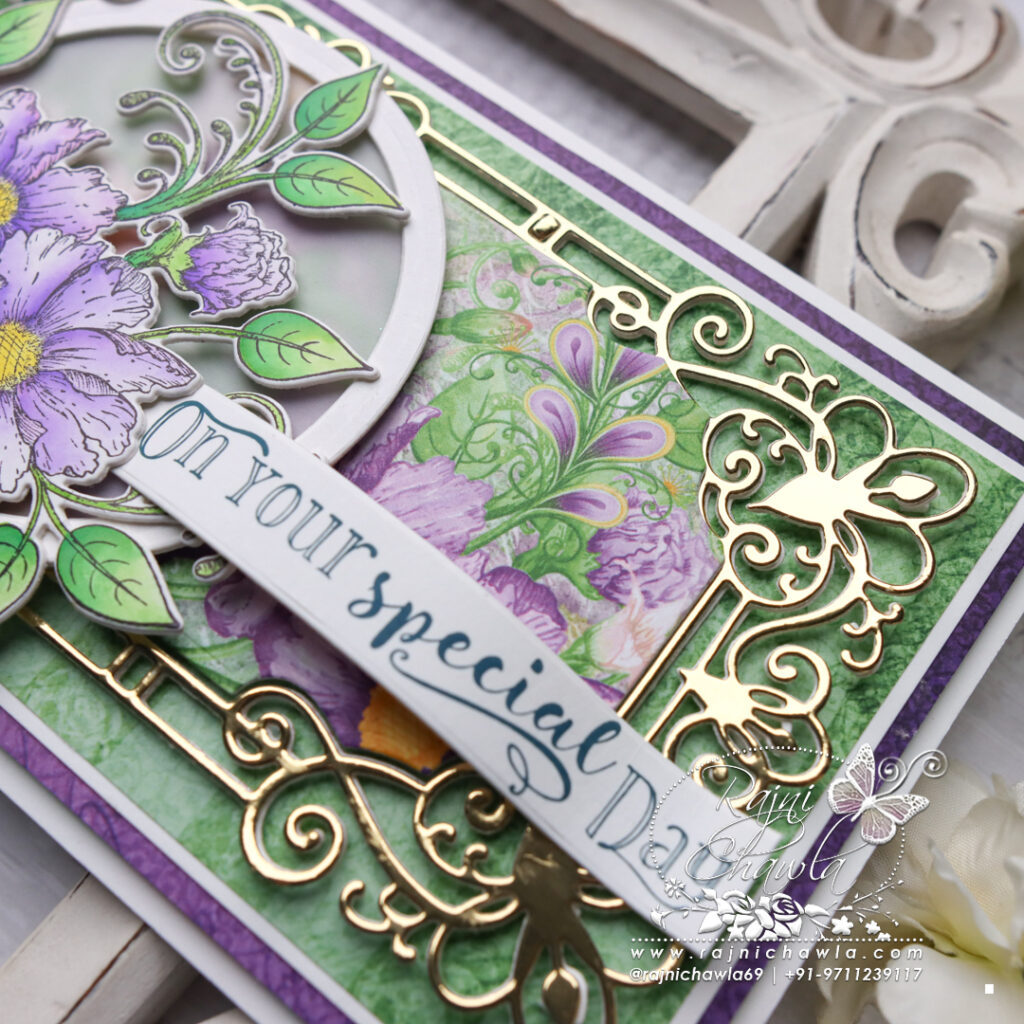
For the card front, choose the pattern paper from the Feathery Floral Collection and cut measuring 9″ by 4″, and frame it with a panel cut from Luxe Gold cardstock creating a delicate border of 1/16″ on all four sides. Layer the panel on the ready card front using dimensional tapes.
Next, cut one each of white and gold die-cut using HCD3-7447 Slim Elegant Rectangle Die. Glue golden die cut on the bottom a little off-center to create the shadow. Layer this die cut on the card front using tiny foam dots. Choose the pattern paper from the designer paper collection and cut the center solid piece. Layer this panel using foam dots in the open window space.
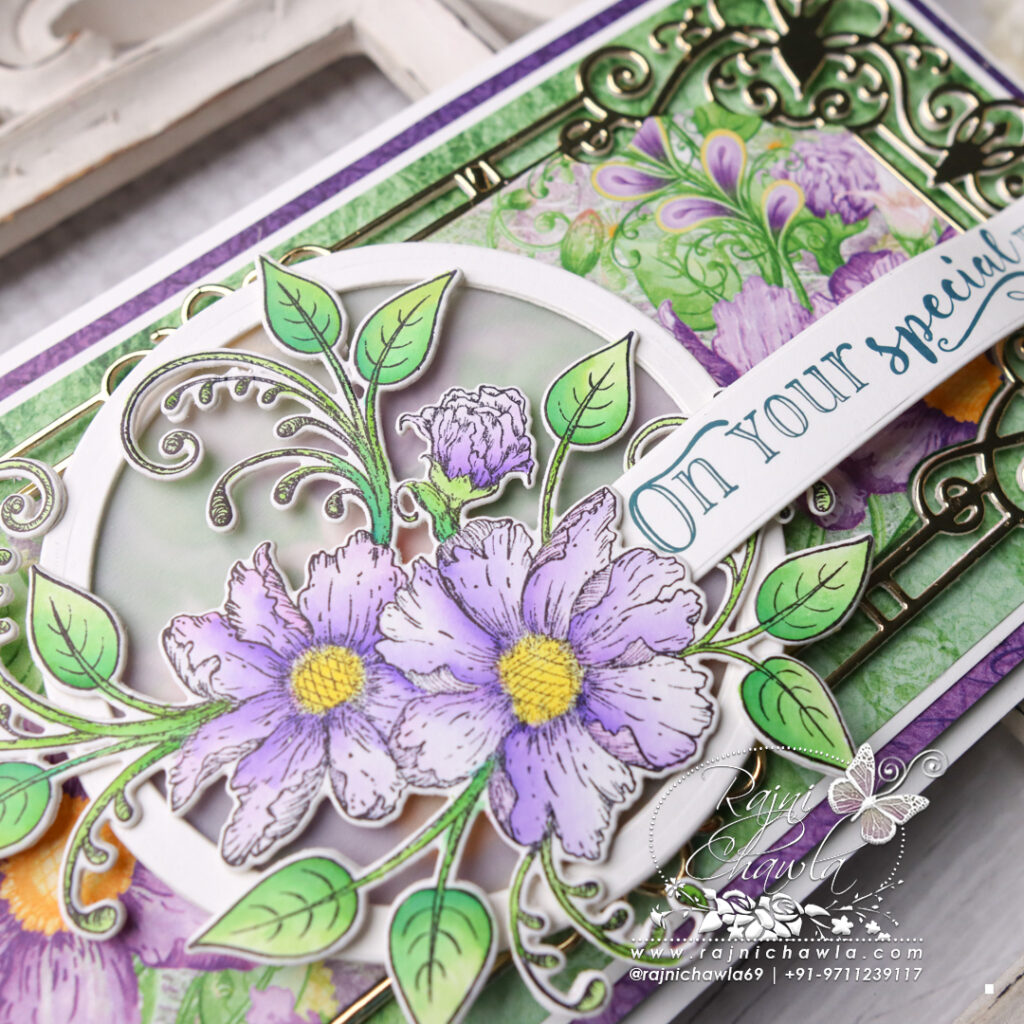
Next, Cut a frame out of white cardstock using the 3rd and 4th die from the outside of the HCD1-7155 Circle Basics Large Die set and layer it on the solid piece of vellum circle cut using the 4th die from the same die set. Layer it on the card front as shown.
Stamp the image from HCPC-31017 Feathery Florals Cling Stamp Set with black archival ink on smooth white cardstock and paint it using Zig Clean Clear Brush Markers. Once the painting is done, cut the image using its coordinating die set and glue 2 extra die cuts on the bottom for extra strength. Once the floral element is ready, adhere it as a main focal image on the card front and complete the card by adding a stamped sentiment from the HCPC-3847 Celebrate Love Sentiments Cling Stamp Set.