Hello Friends!!
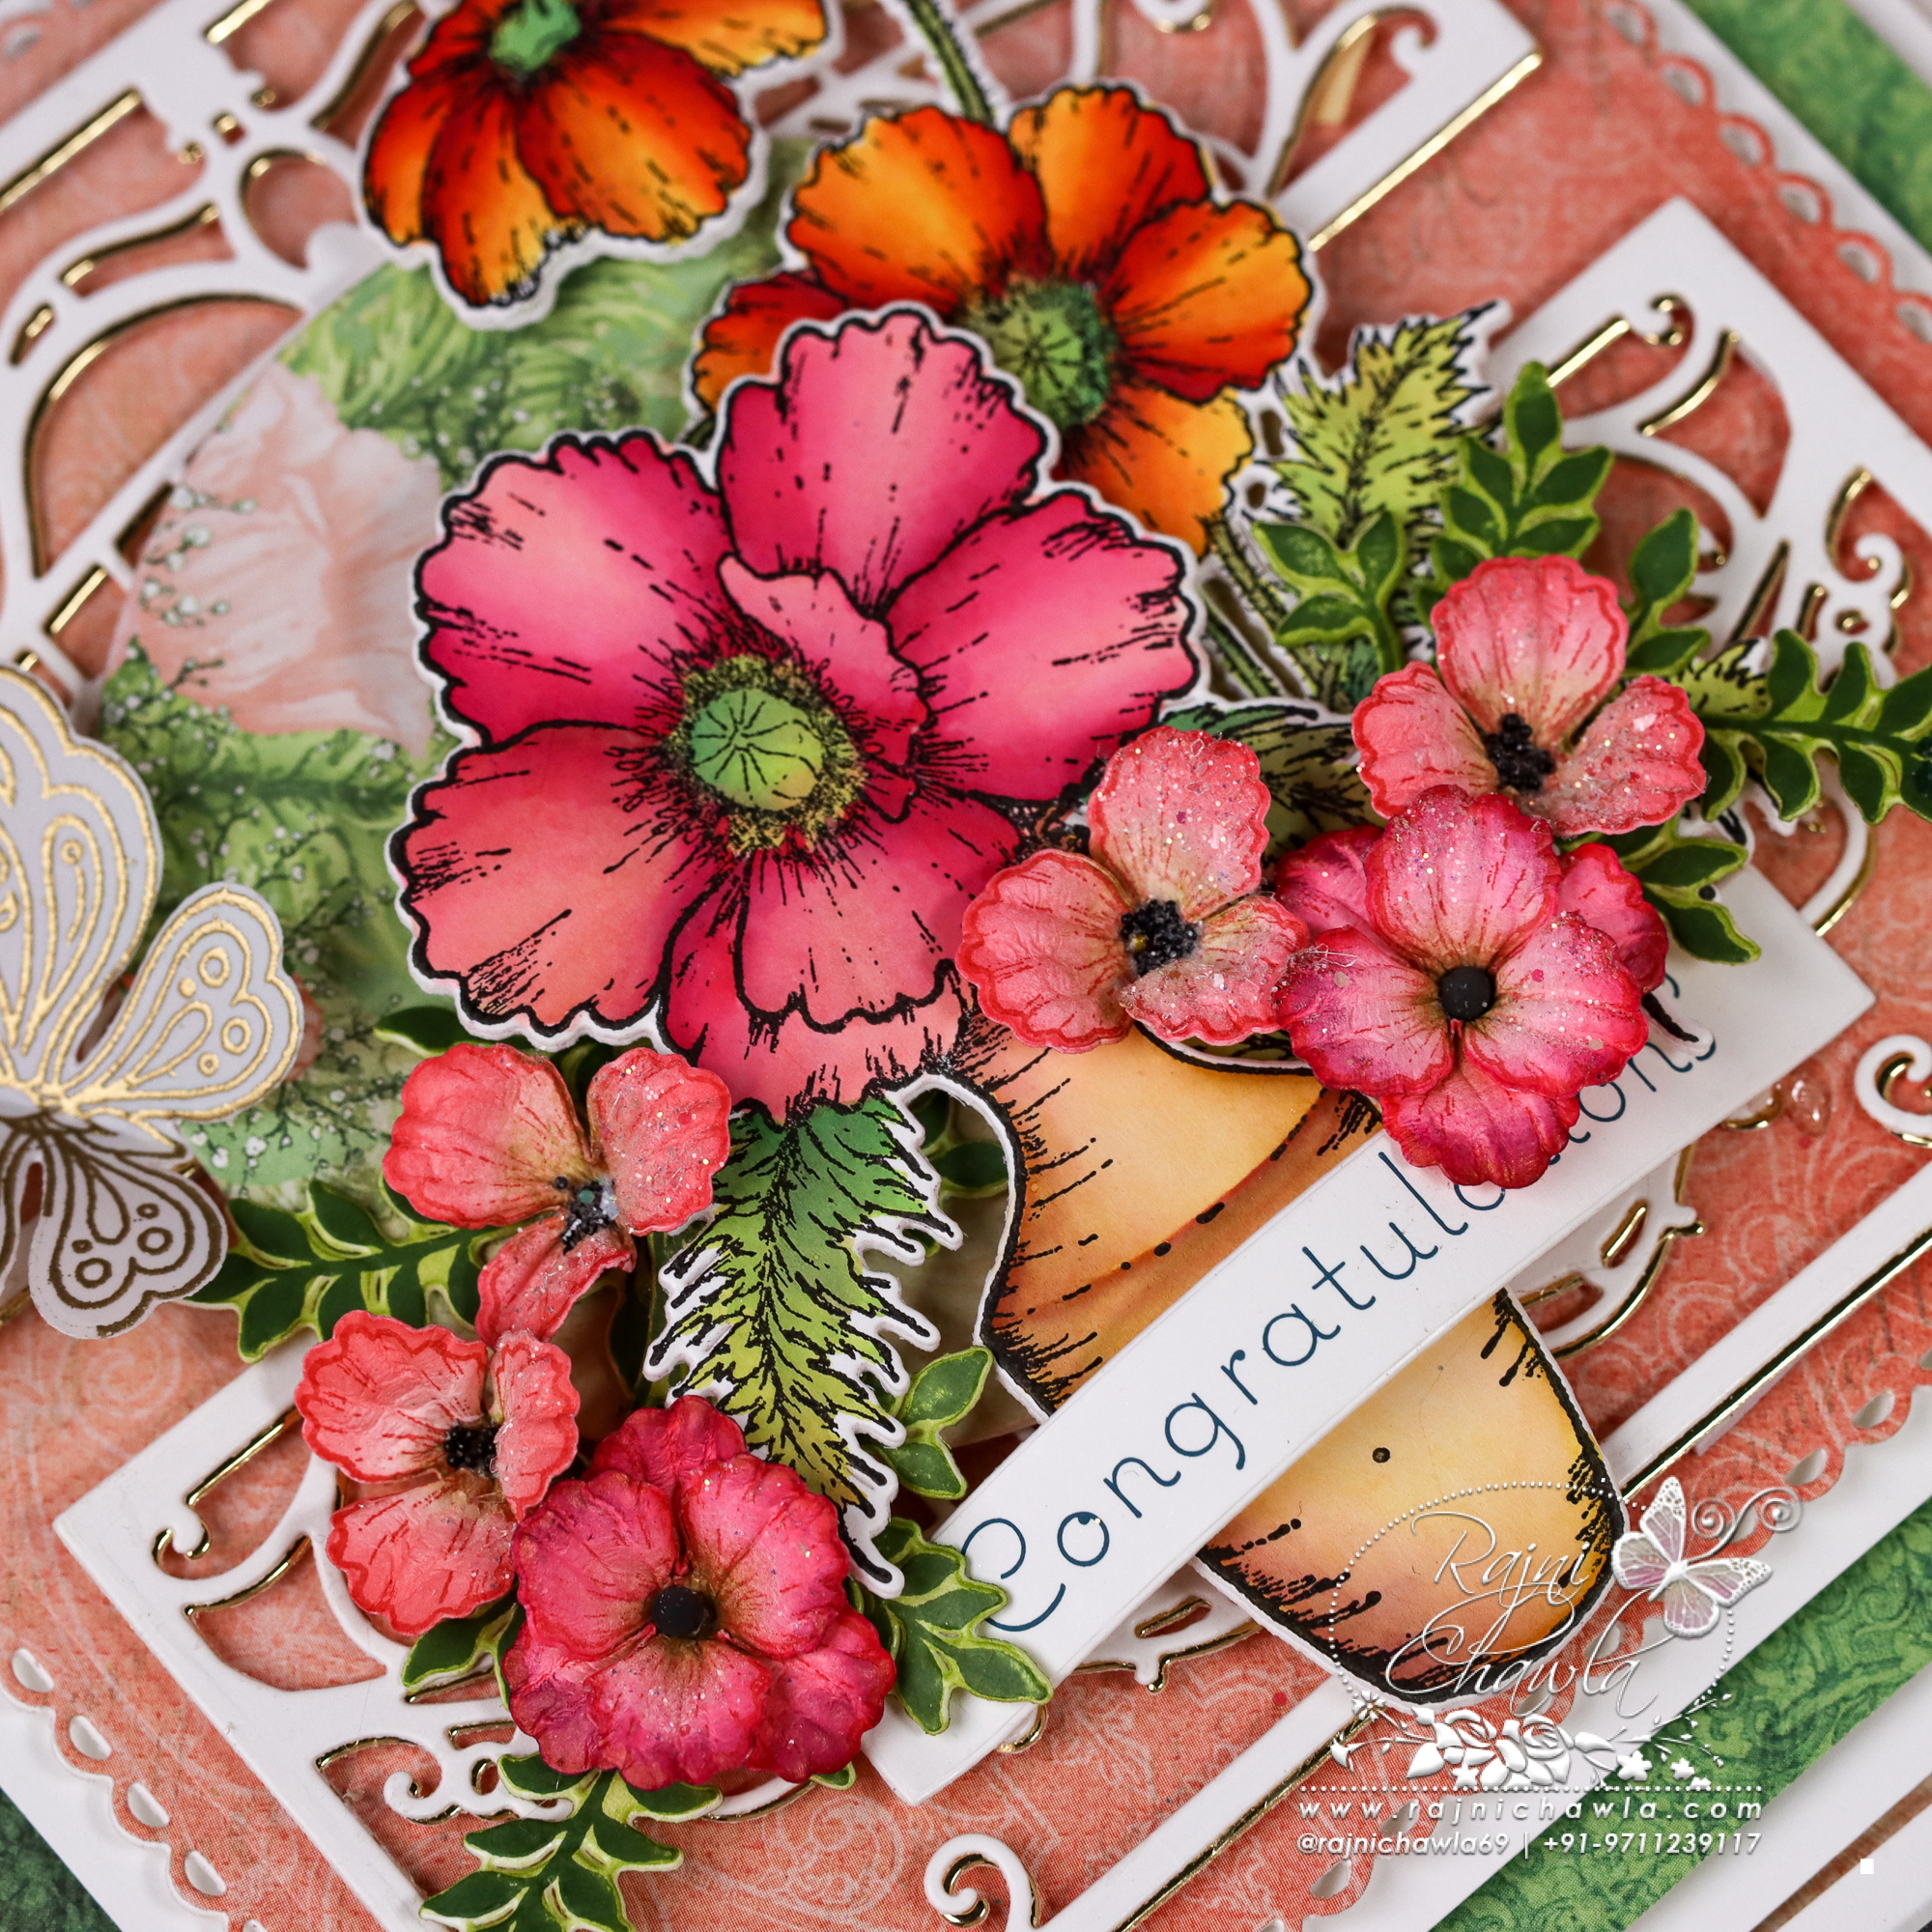
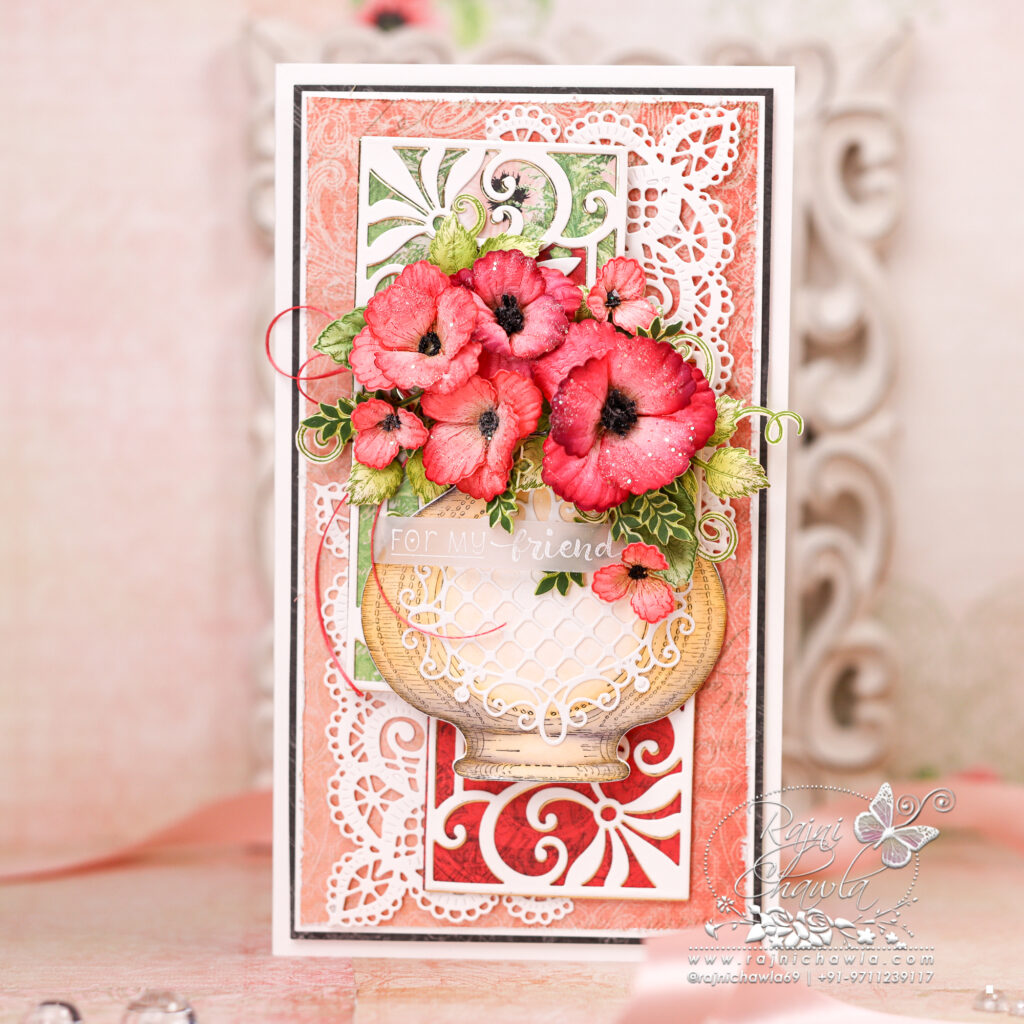
Happy Wednesday!! Continuing with Wild Poppy Collection I have this card to inspire you. It was so much fun creating bright and cheerful cards using Wild Poppies.
List Of Supplies From Heartfelt Creations
HCD1-7397 French Gate Die
HCD2-7192 Eyelet Lace Frames Die
HCPC-3982 Classic Floral Vase Cling Stamp Set
HCD1-7393 Classic Floral Vase Die
HCD1-7404 Wild Poppy Die
HCPC-3986 Wild Poppy Cling Stamp Set
HCDP1-2139 Wild Poppy Paper Collection
HCPC-3845 Just For You Sentiments Cling Stamp Set
HCS1-459-4 Rock Candy Stamens-Small
HCPP1-475 Deluxe Flower Shaping Paper Pack of 50 – White
HCGP1-488 Luxe Gold Cardstock
Zig Clean Color Real Brush Markers – 48 Pack 478594
RACP482 Ranger Archival Ink Pad – Olive
RACP436 Ranger Archival Ink Pad – Leaf Green
RACP468 Ranger Archival Ink Pad – Jet Black
409311 Color In Watercolor Brush – Fine
PGM15015 Rajni Chawla’s Crystal Clear
RACP994 Ranger Archival Ink Pad – Mulberry
PGM15015 Rajni Chawla’s Crystal Clear
Ranger Archival Ink Pad – Mulberry RACP994
Ranger Archival Ink Pad – Red Geranium RACP993
Instructions: The slimline card from smooth white cardstock measures 8 1/2″ X 4 1/2″. Choose the black paper from the paper collection and cut measuring 8″ X 4″ to make the first layer of the card. Glue it on the card front. cut another paper that is orange in color measuring 73/” by 3 3/4 ‘, distress the edges, and add a white mat, a little larger to create a delicate border all around.
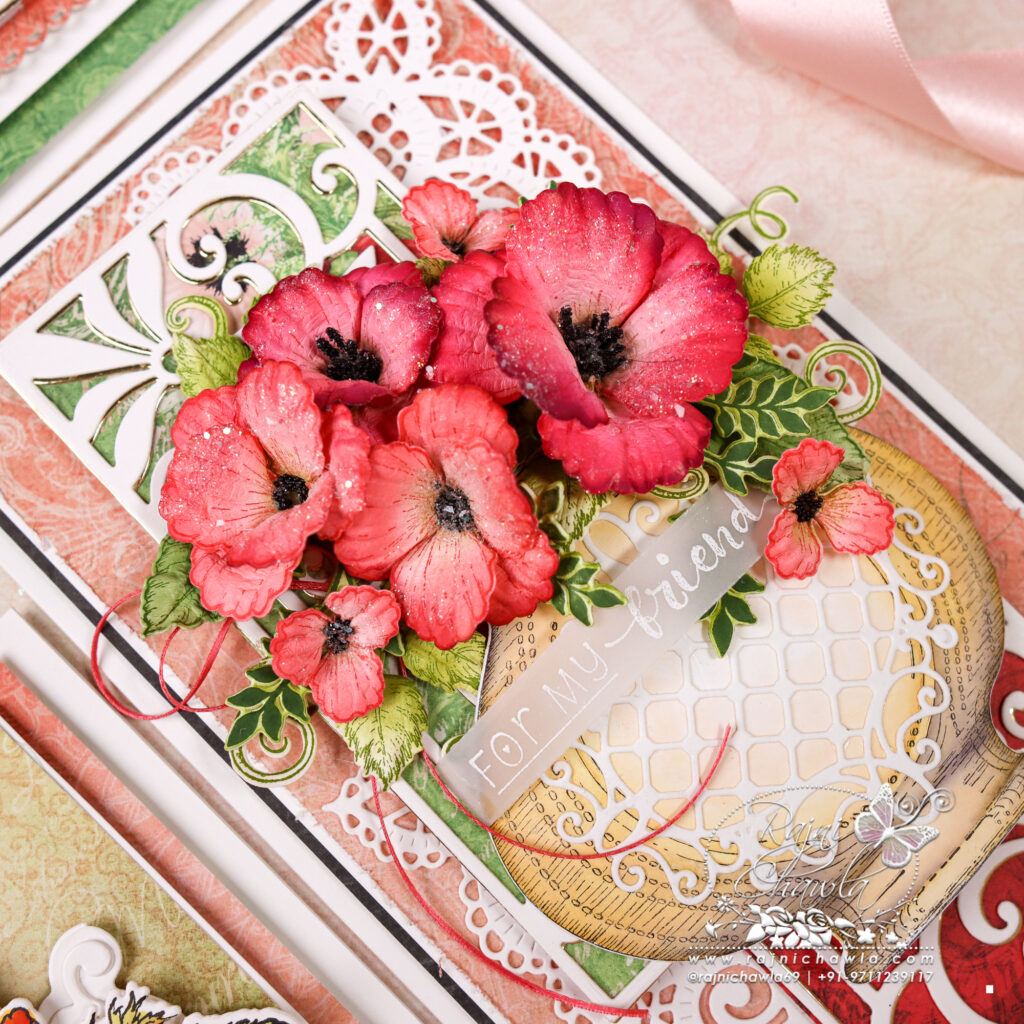
Cut 2 pieces each white and gold die cuts using French Gate Die and glue the gold one to create shadows. Add pattern papers behind the die cuts and layer them as shown on the card front. Chop a white die-cut into two and cover the area using Eyelet Lacy Frame die.
Stamp the image from the Classic Floral Vase stamp set and color it using Zig Clean Clear Brush Markers. Cut it using its coordinating die. Cut the lacy die from the same set and glue it on the vase. Shape the vase with hands and layer it on the card front as shown.
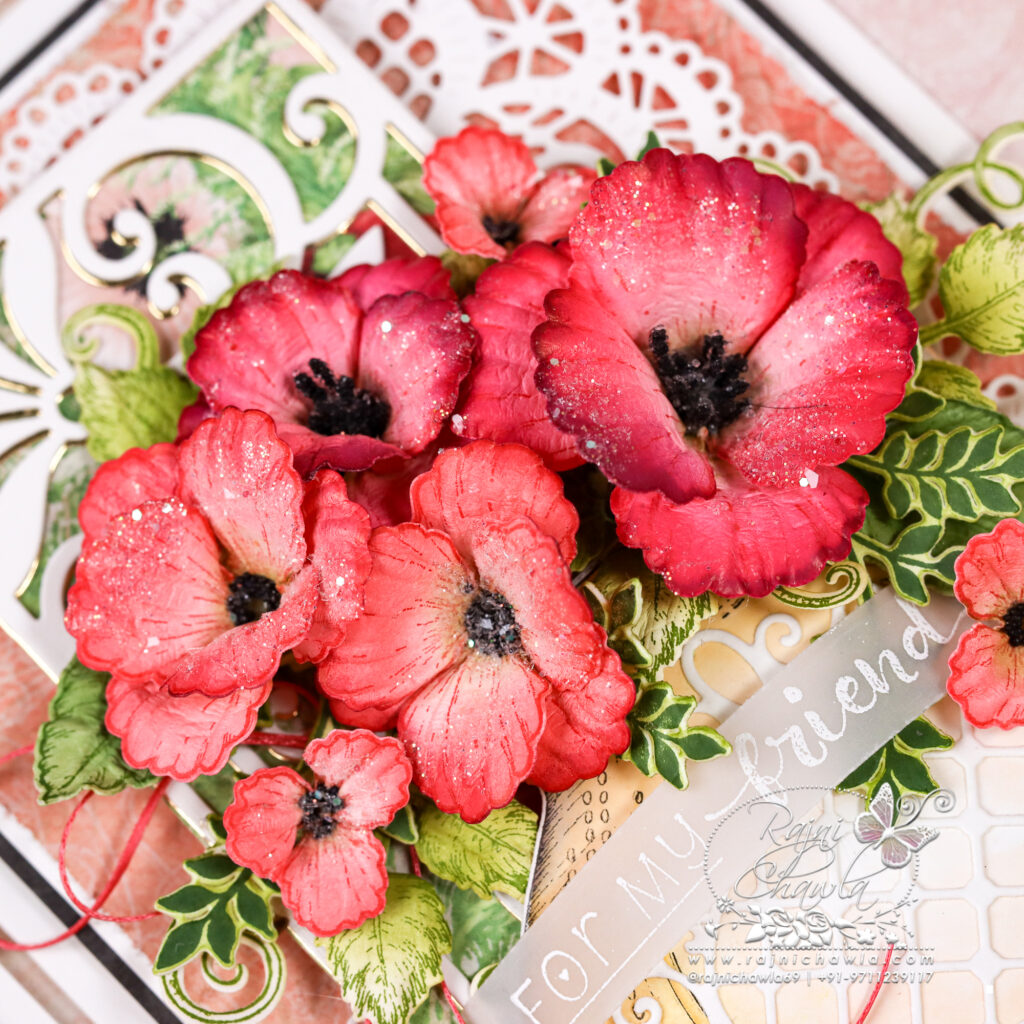
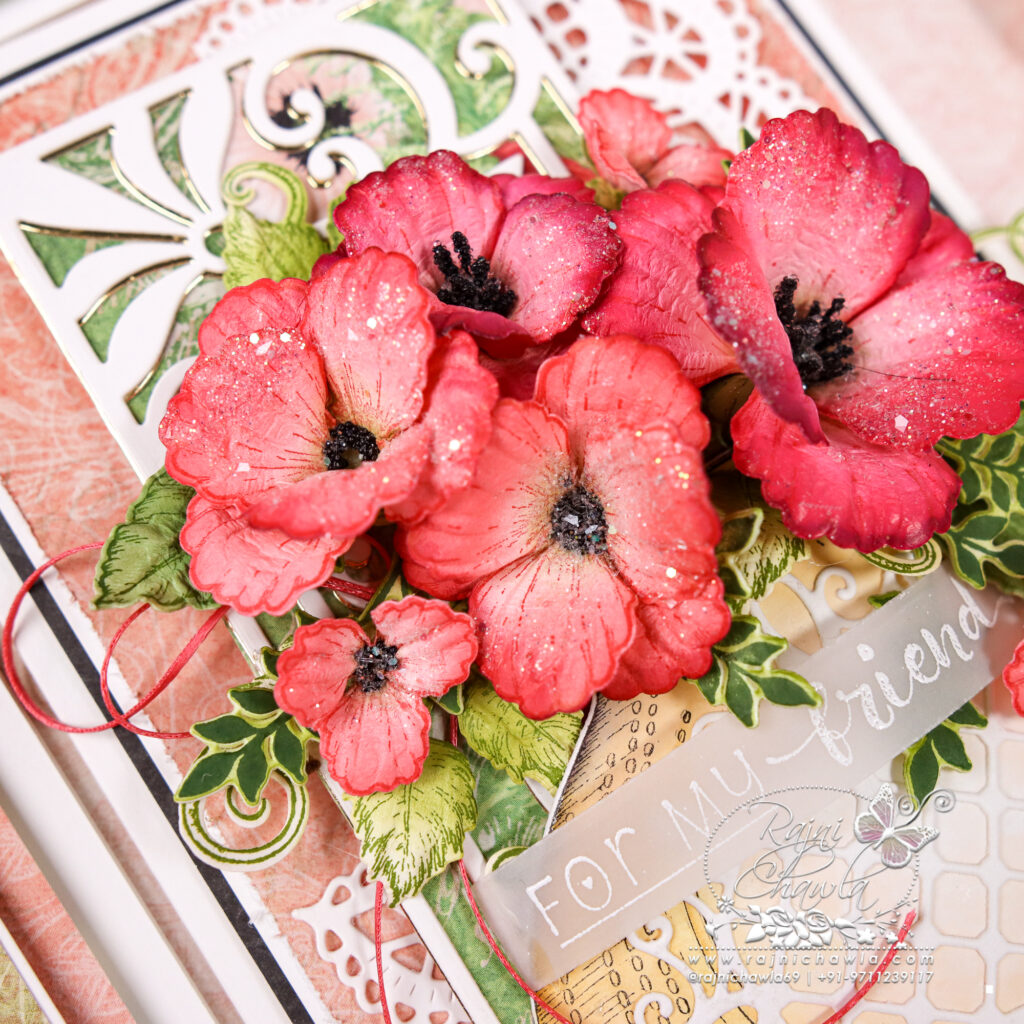
For Poppies, stamp multiple images from the Poppy stamp set using Carnation red archival ink on Deluxe Flower shaping paper. Cut the images using its coordinating dies. Paint the flowers using Geranium red and highlight the petals using Mulberry ink. Shape the flowers using the Deluxe flower shaping kit. Prick the centers and add Rock Candy pollens. Glitter the flowers with Rajni Chawl’s Crystal Clear powder.
Stamp 3-4 pieces of foliage stems from Holly Berry spray stamp set with Olive green and cut them using its coordinating die. Ink them using Leaf green ink for more interest.
Stamp 4 sets of leaves using Leafy Accent stamp and Olive Green Archival ink and cut them using its coordinating die. Color the leaves using the same inks and shape them using a deluxe flower shaping kit.
White heat emboss the sentiment from Special Birthday Sentiments Cling Stamp Set on a stripe of Rajni Chawla’s Vellum cardstock and shape a little with your fingers. Adhere it on the right side bottom corner.
Once all the elements are ready, assemble a small bouquet of flowers in the center and complete the card with white heat embossed vellum sentiment.