Happy Wednesday!!
It’s been long that I have been not much active in sharing my work. There were lots going on at my end the past few months. I was mentally and emotionally occupied with my family responsibilities as a single parent. Both my kids got engaged in the same month and then my dog Google expired after struggling many health issues for a month….and the preparations for my daughter’s marriage. Coming back to my regular crafting routine took me a lot of time. We still have a wedding planned of my son. I am trying my level best to come back to my crafty routine.
Anyways….enough with my personal talks!! I have this beautiful card to share as a Wednesday inspiration using Heartfelt Creations supplies.

Products from Heartfelt Creations:
HCD1-7329 Large Floral Urn Die
HCPC-3931 Large Floral Urn Cling Stamp Set
HCD1-7331 Floral Shoppe Fillers Die
HCPC-3933 Floral Shoppe Fillers Cling Stamp Set
HCDP1-2122 Floral Shoppe Paper Collection
HCD1-7257 Wild Aster Die
HCD2-7328 Lattice Swirl Gateway Die
HCD1-7315 Small Garden Zinnia Die
HCPC-3924 Small Garden Zinnia Cling Stamp Set
HCCB1-495 5″ x 7″ Gateway Fold Card – White
HCGP1-488 Luxe Gold Cardstock
EP100 Opaque Embossing Powder – White
RAHT Heat It Craft Tool
18002 Rajni Chawla’s Vellum Flowerite – 10 Sheets
DMCT4185 Groove Golf Tool Set
HCST1-401 Deluxe Flower Shaping Kit
ANC830 Blue Suede Shoes Prills
HCPP1-468 Deluxe Flower Shaping Paper Pack of 25 – White
RACP436 Ranger Archival Ink Pad – Leaf Green
RACP482 Ranger Archival Ink Pad – Olive
RACP607 Ranger Archival Ink Pad – French Ultramarine
Other Products Used: Smooth White Cardstock, Die-cutting machine, Score Board, Sharp Scissors, Double-sided tape, Distress ink Rusty Hinge, Vellum Cardstock, Hero Arts White Pigment Ink, Funnel Tray, Distress Oxide Antique Linen.
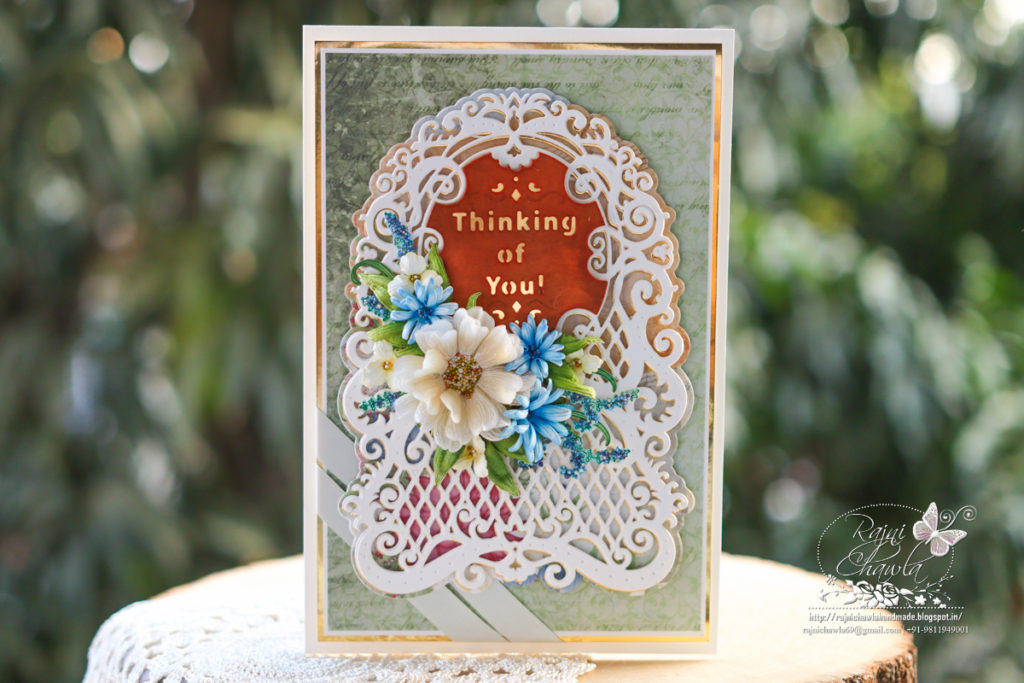
Instructions: The ready card base from smooth white cardstock measures, 5 1/2″ by 8 1/2″. Choose the designer paper from Floral Shoppe Paper Collection and cut to size measuring 4 3/4″ by 7 3/4″ and glue it on the white cardstock creating a sleek border of 1/16″ on all the sides. Next layer the card panel on Gold Luxe cardstock creating another border of 1/16th of an inch on all the sides and adhere to the satin ribbon on the bottom left side corner as shown. Finally, layer the panel on the ready card base.
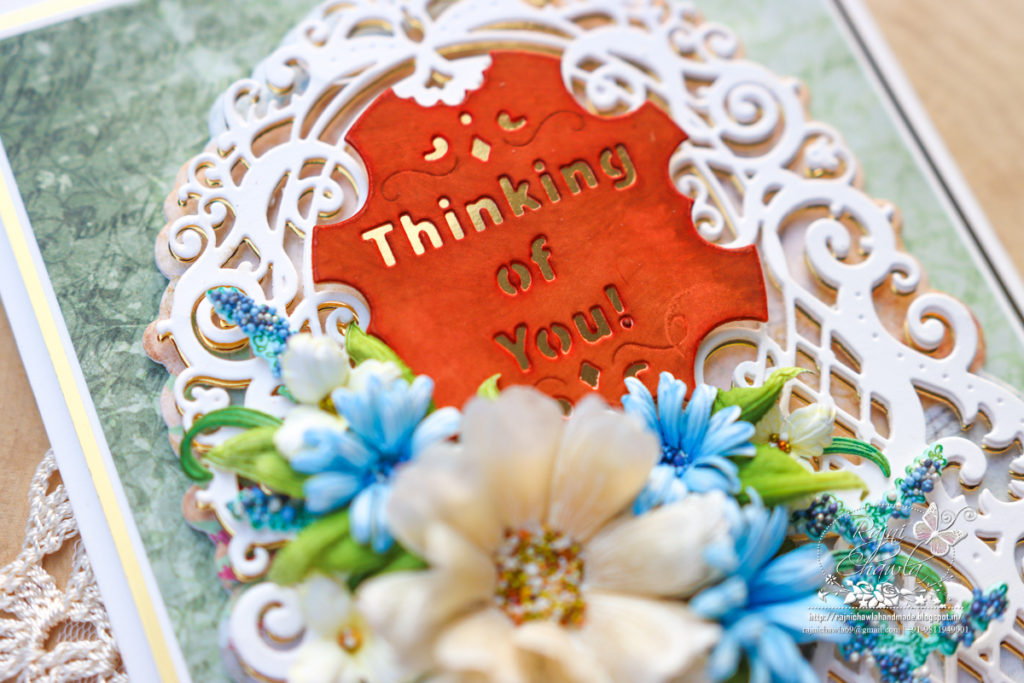
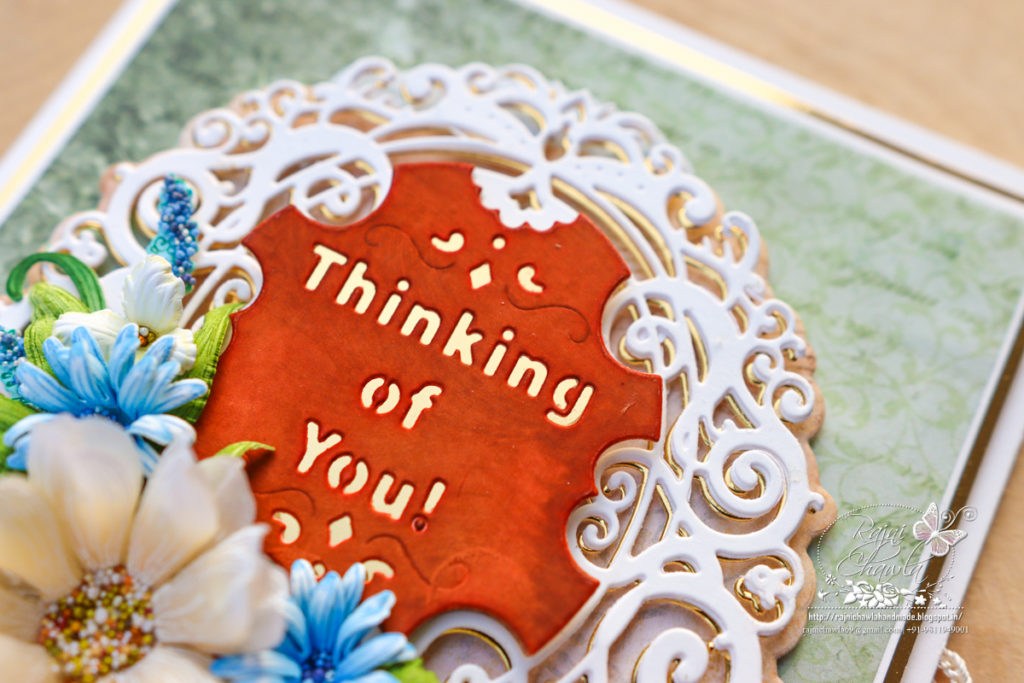
Cut one white die and one gold cut from Lattice Swirl Gateway Die. Glue the gold die cut behind the white one little off-center to create the shadow and layer it on the ready card panel. Cut an extra white sentiment banner from the same die in white and ink it using Rusty Hinge Distress Ink. Add a gold matting to highlight the sentiment and layer it as shown.
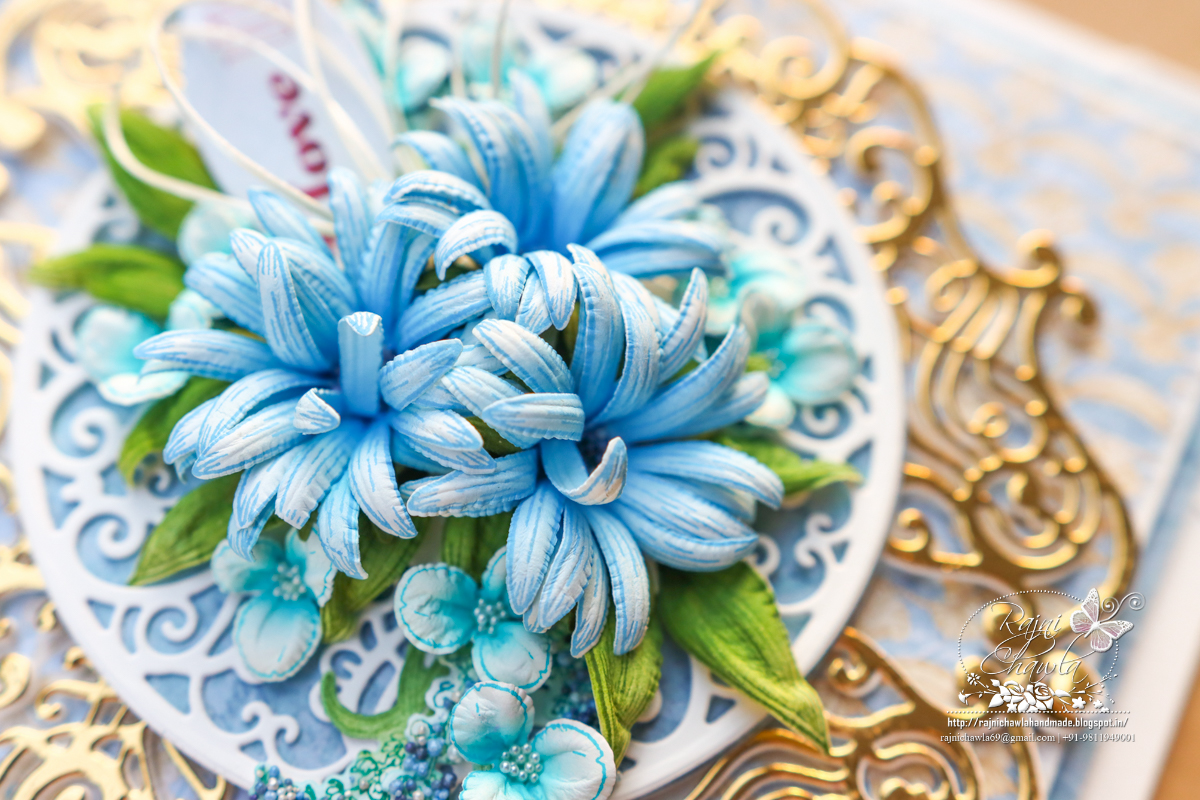
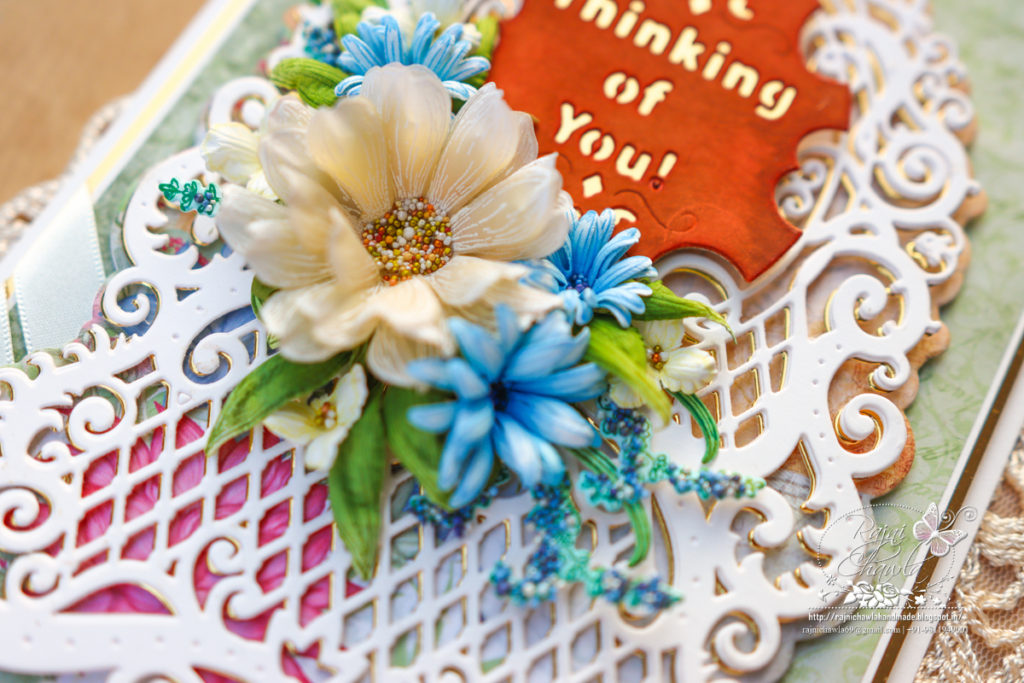
For the Vellum Zinnia flower, stamp 3 petals of the largest flower from Small Zinnia Stamp set on vellum cardstock using white pigment ink. Sprinkle white heat embossing powder and dust extras in the funnel tray and heat set the images. Cor the flower centers using Antique Linen Distress Oxide and cut the petals using it’s coordinating die. Shape the petals on needle tool, form the flower, and add prills to the center.
For Blue Asters, Stamp a couple of petals from Wild Aster Cling Stamp Set using French Ultramarine Archival Ink and cut them using its coordinating die. Color the petals using the same ink and shape them using golf groove tools. Create 3 medium-sized Asters. Complete the flowers by adding the prills in the centers,
For the leaves, stamp the leaves from Large Floral Urn Cling Stamp Set using Olive green Archival ink on Deluxe Flower Shaping Paper, paint them using Leaf Green and Olive Green, and cut them using its coordinating die set. Shape the leaves using Golf Groove Tools. Stamp tiny flowers from the same stamp set using Sunflower Archival ink and color the centers with the same ink. Cut the flowers with its coordinating die set and shape them using Golf Groove tools. Add prills to their centers and discard the stem.
For the foliage, stamp couple of images from Floral Shoppe Fillers Cling Stamp Set using French Ultramarine blue, Leaf Green and Olive Green Archival ink and cut the using its coordinating die set. Shape them a little with the ball tool and add dab little glue that dries clear. Sprinkle Blue Suede Shoes Prills and dust extras in the funnel tray.
Once all the elements are ready, assemble the card as shown.