


Good morning, friends!!
Happy Wednesday! Today is the day the Rustic Sunflower Collection becomes available to everyone!
Do you feel limited by your flower sizes and selection and find yourself wanting to create a variety of flower sizes quickly and easily but don’t know where to get started? Maximize your creativity with the versatility of the Rustic Sunflower Collection! From beginner to advanced, it’s an essential set to showcase your flower shaping skills! Layer them up for a full and impressive dimensional flower, or make a stunning bouquet with single-layer flowers! The variety of flowers complete with the 3D flower shaping mold create endless possibilities!

Supplies from Heartfelt Creations
HCD1-7364 Rustic Sunflower Die
HCD1-7365 Rustic Sunflower Can & Freezer Die
HCPC-3962 Rustic Sunflower Cling Stamp Set
HCPC-3963 Rustic Sunflower Can & Freezer Cling Stamp Set
HCDP1-2131 Rustic Sunflower Paper Collection
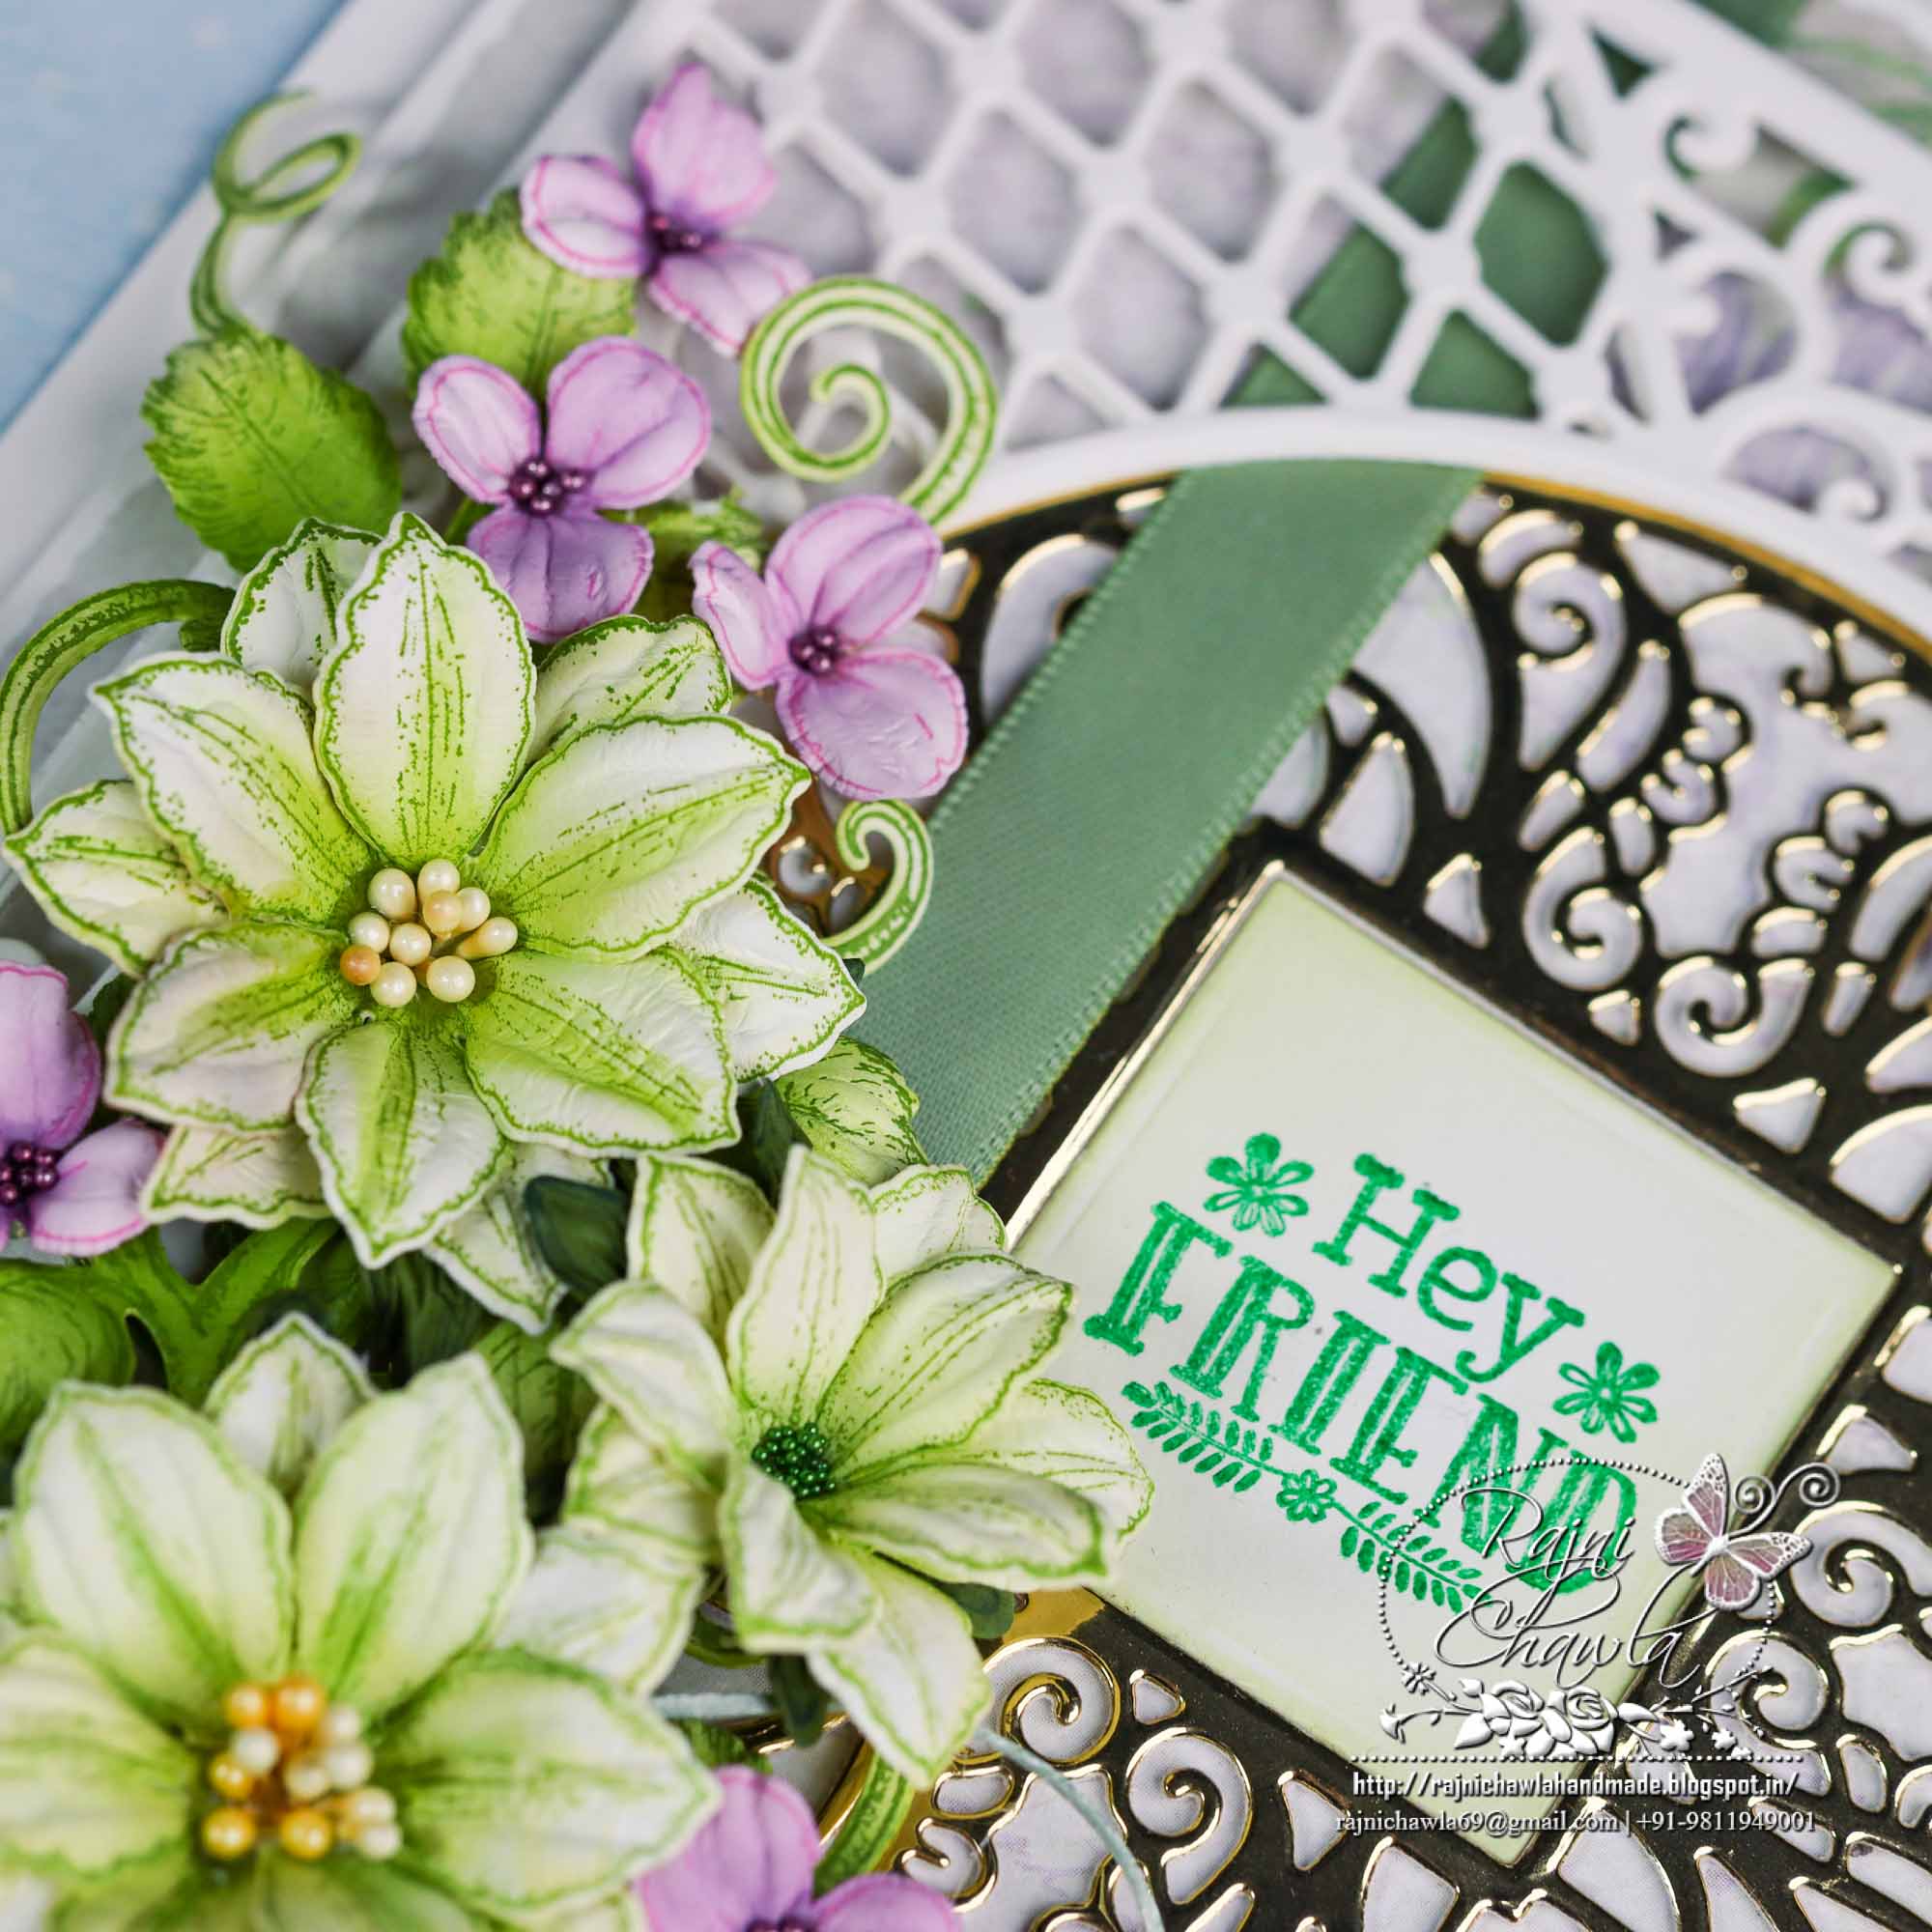
HCPC-3911 Wisteria Petals Cling Stamp Set
HCD1-7295 Wisteria Petals Die
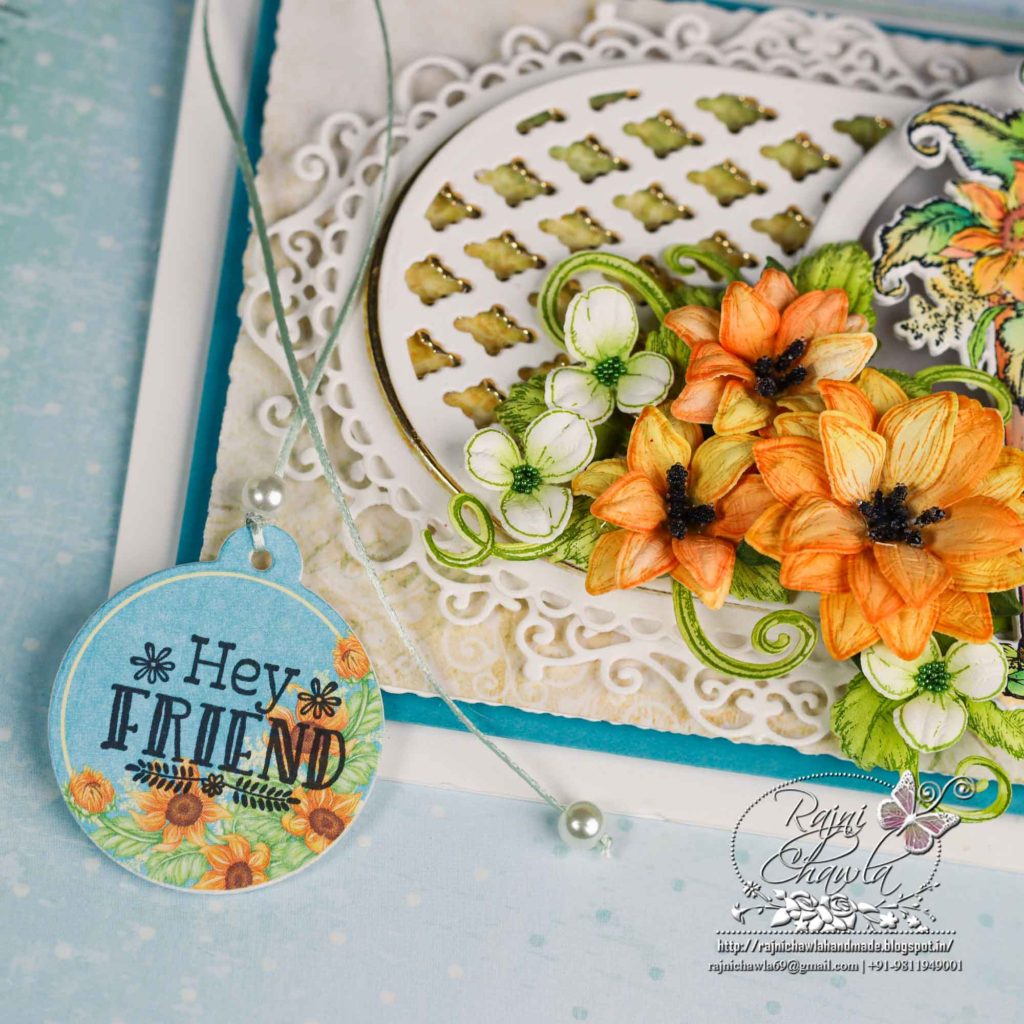
HCD1-7203 Ornamental Tags Die
HCD2-7339 Regal Lattice Gateway Die
HCD1-7305 Ornate Ovals Die
HCD1-7155 Circle Basics Large Die
HCPC-3844 For My Friend Sentiments Cling Stamp Set
HCD1-7193 Leafy Accents Die
HCPC-3835 Leafy Accents Cling Stamp Set
HCGP1-488 Luxe Gold Cardstock
HCS1-459-4 Rock Candy Stamens-Small
18002 Rajni Chawla’s Vellum Flowerite – 10 Sheets
HCPP1-475 Deluxe Flower Shaping Paper Pack of 50 – White
18002 Rajni Chawla’s Vellum Flowerite – 10 Sheets
RACP436 Ranger Archival Ink Pad – Leaf Green
RACP482 Ranger Archival Ink Pad – Olive
RACP487 Ranger Archival Ink Pad – Bright Tangelo
RACP005 Ranger Archival Ink Pad – Sunflower
RACP468 Ranger Archival Ink Pad – Jet Black
409311 Color In Watercolor Brush – Fine
478594 Zig Clean Color Real Brush Markers – 48 Pack
Other Supplies used: Smooth White Cardstock, Die Cutting Machine, Sharp Scissors, Scoreboard, Double-sided tape, Satin twine, Pearls, and Adhesive.
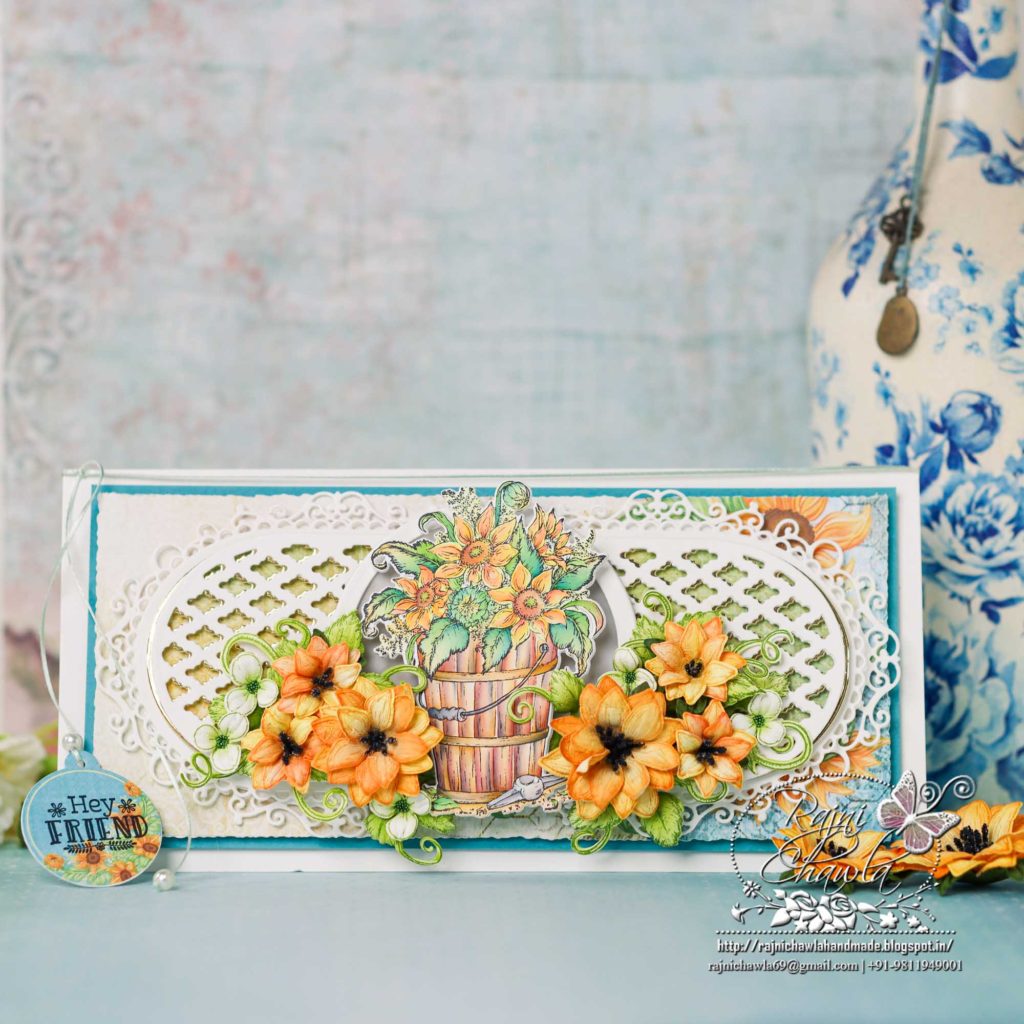
Instructions: The ready top fold slimline card measures, 9 1/2″ by 4 1/2″ To prepare the card base, cut a smooth white cardstock measuring 9″ by 91/2″ and score at 4 1/2″ on 9 ” length. Crease well. Choose the pattern paper from the designer paper collection and chop it to 4″ X 9″ using a deckled edge paper trimmer. Layer the panel on coordinating teal cardstock making a border of 1/16″ on all sides.
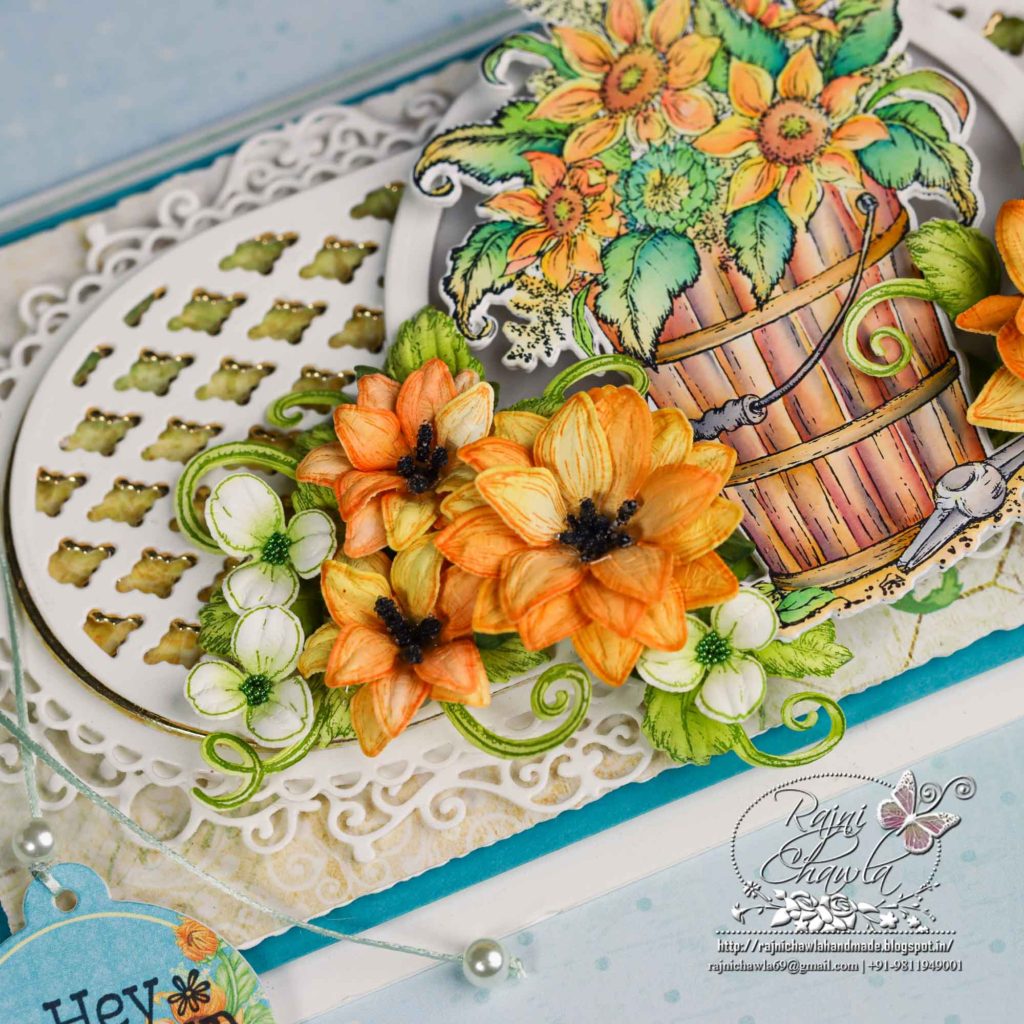
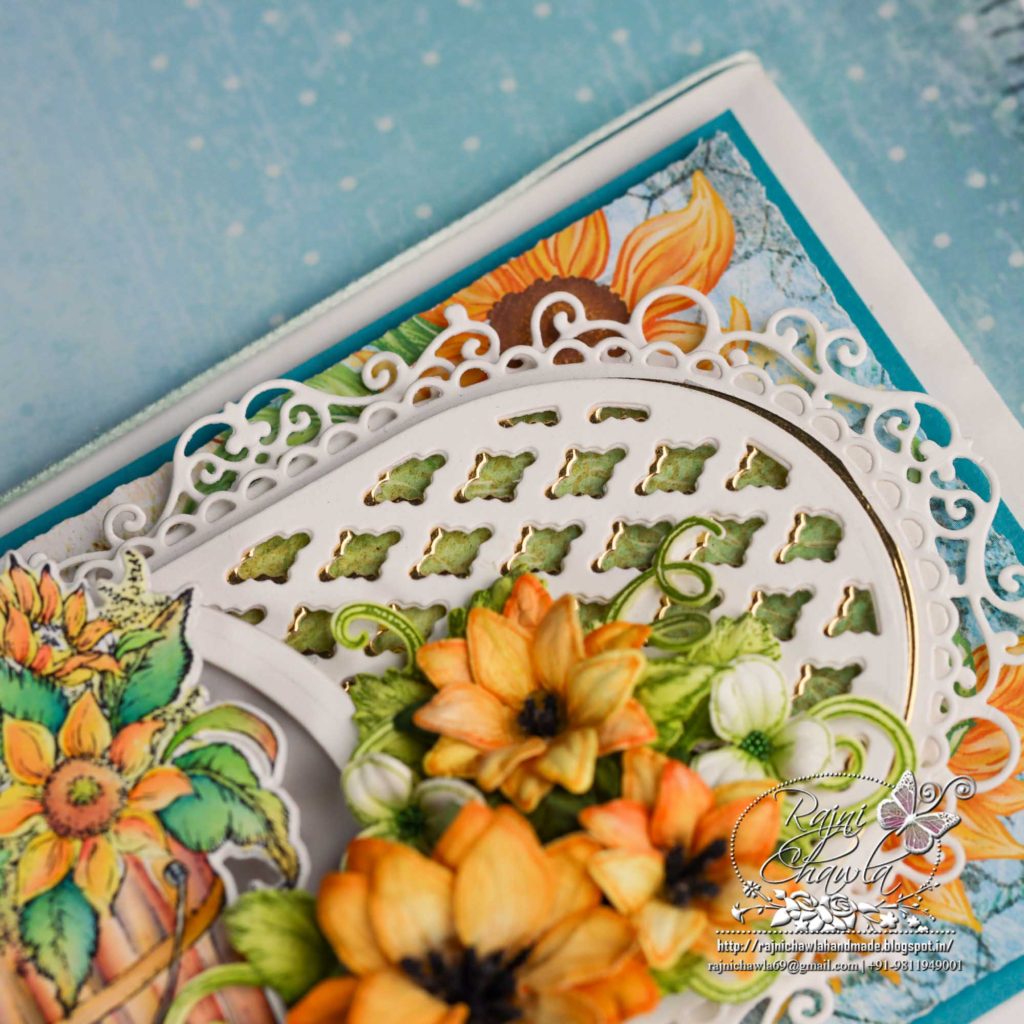
Cut 2 pieces of windows from Regal Lattice Gateway Die in white and Luxe gold each. Adhere the gold one behind the white creating a shadow. Next, choose the pattern paper from the collection and add backing to the windows. Chop the bottom of both the windows by 1/2″ so that once these are put on the card base they fit to create the card front for the ready card panel. Cut 2 pieces of eyelet frame Gateway Die from white cardstock and make them sit behind the windows showcasing the eyelet border on all its 3 sides. Next, cut 2 pieces from Ornate Oval die in white and adhere them behind the ready windows. Chop extras. Finally, layer the ready windows on the card front using foam dots as shown.
Also, cut 2 pieces of circle frames using Circle Basics Large Die and glue them together. Cut a solid circle using vellum cardstock and glue it behind the window. Layer this circle in the center hiding the joint of the gateway window.
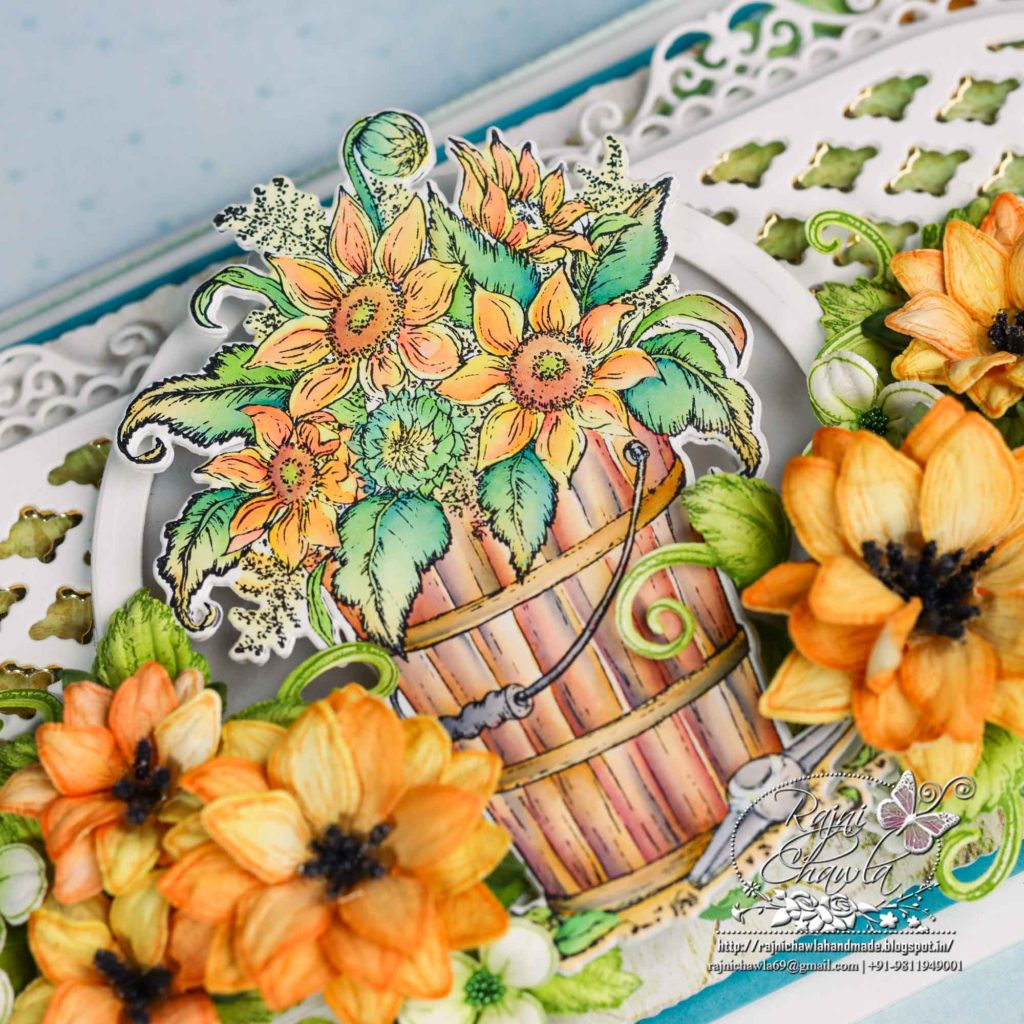
Next, stamp the image from Rustic Sunflower Can & Freezer stamp set with black archival ink and paint it using Zig Markers. Once done with all the coloring, cut the images using its coordinating die set.
For Sunflowers, stamp multiple images of flower petals using Sunflower Archival ink and cut these using its coordinating dies. Paint the flower petals using Sunflower ink and Orange Tangelo Archival inks and shape them using a Deluxe flower shaping kit. Prepare 2 large and 4 medium-sized flowers. Prick the holes in the center and secure the pollens with a heat tool. Stamp one size smaller petal from the same set using Library green/ Cobalt Blue archival ink on green color cardstock and cut them using coordinating dies. Using the crushing technique, create calyx and complete the flower by securing them behind each flower for the complete flower look.
Stamp 3-4 sets of leaves using Leafy Accent stamp and Olive Green Archival ink and cut them using its coordinating die. Color the leaves using the same inks and shape them using a deluxe flower shaping kit and add glittered pearls using the glossy accent.
Stamp, color and cut few wisteria flowers using Leaf GreenFlower Archival ink and shape them using a flower shaping kit. Add flower pollens using a glossy accent and use these flowers as fillers.
Once, all the elements are ready, assemble the card as shown and complete the card by adding a sentiment tag hanging on its spine.
Stunning card as always my friend! your sunflowers are gorgeous!