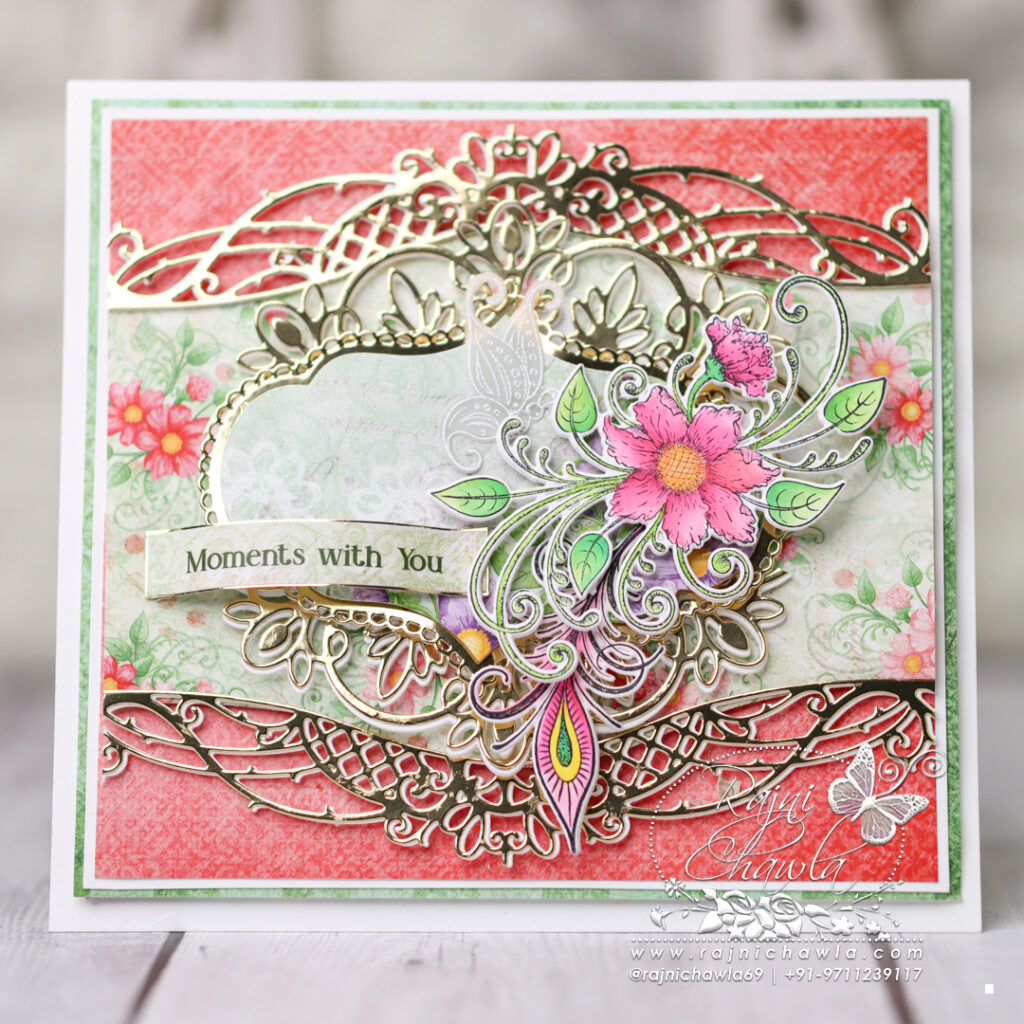
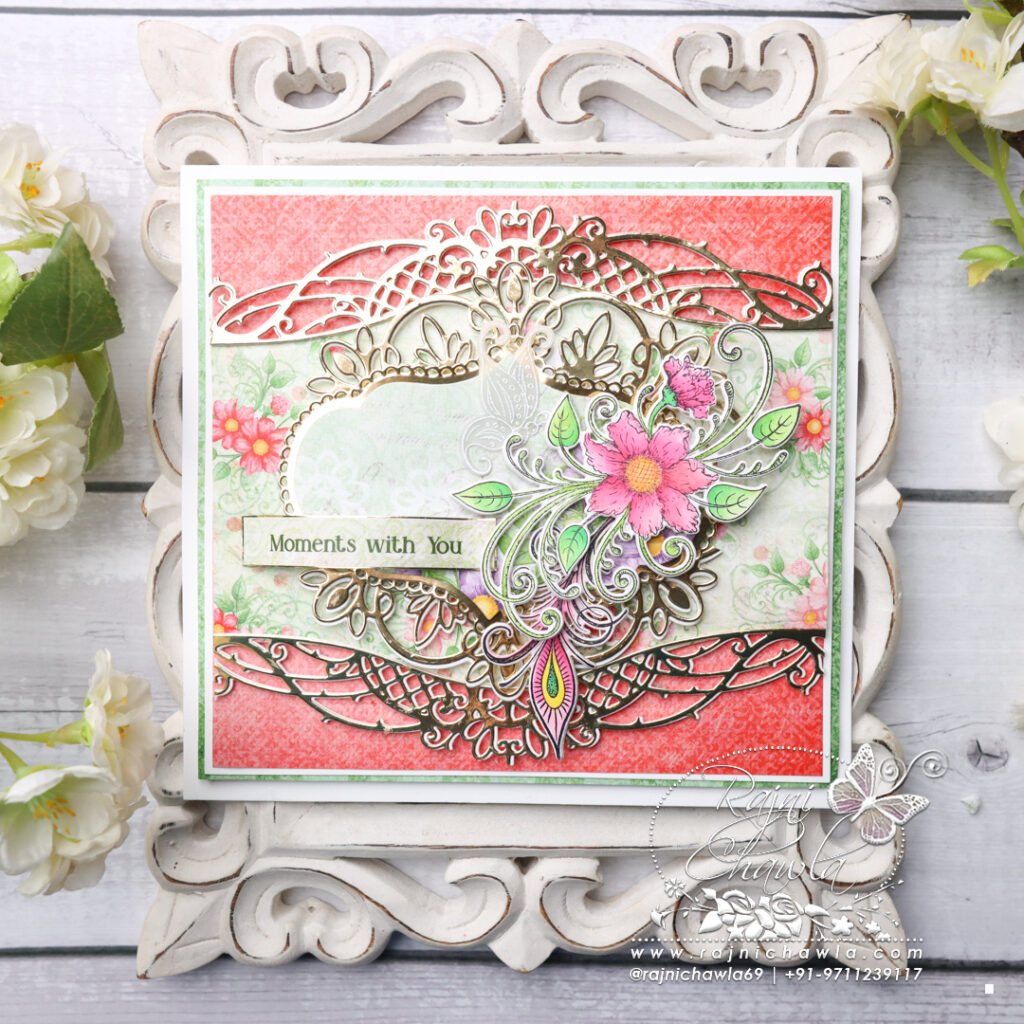
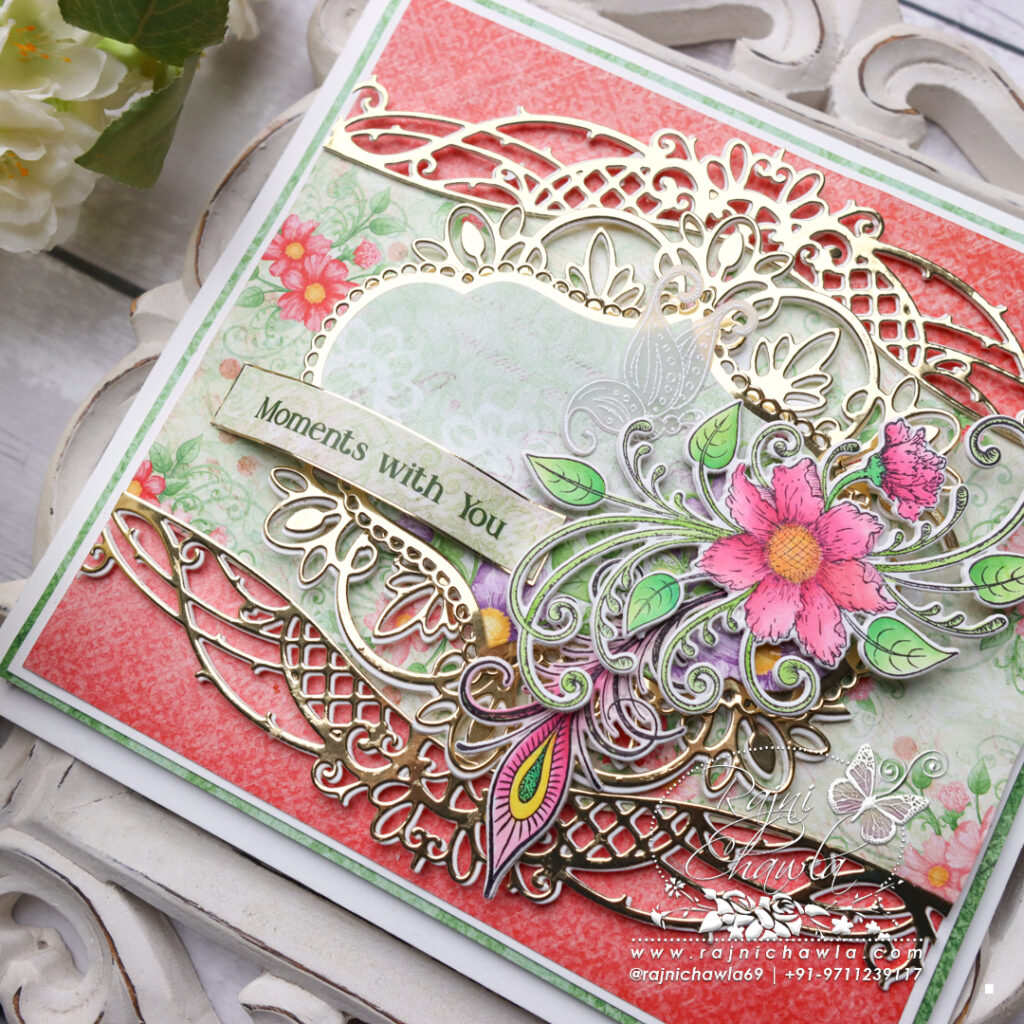
Welcome back to the blog. Here again, I share the weekly inspiration using Heartfelt Creations products. I am in love with the lacy slimline borders, Heartfelt has launched. Today I created a card front using the curvy accent die set twice.
List of supplies from Heartfelt Creations:
HCD3-7442 Curvy Decorative Border Die
HCD1-7370 Simply Elegant Centerpiece Die
HCD1-7202 Album Tags and Accents Die
HCD1-7453 Feathery Florals Die
HCPC-31017 Feathery Florals Cling Stamp Set
HCD1-7455 Floral Feathers Die
HCPC-31019 Floral Feathers Cling Stamp Set
HCDP1-2149 Feathery Florals Paper Collection
HCGP1-488 Luxe Gold Cardstock
478594 Zig Clean Color Real Brush Markers – 48 Pack
RACP468 Ranger Archival Ink Pad – Jet Black
Instructions:
The ready top-fold card from smooth white cardstock measures, 6 1/2″ by 6 1/2″. To prepare the card base, cut 2 pieces of white cardstock measuring, 6 1/2″ by 7″ and 6 1/2″ by 6 1/2″. Take a 6 1/2″ by 7″ cardstock panel and score at 1/2″ on 7″ length and crease well. This will make a hinge on the panel to secure another 6 1/2″ by 6 1/2″ panel.
Next, choose a light plainer paper from the designer paper collection and chop 6″ by 6″. Choose another coordinating paper and chop measuring 5 3/4″ by 5 3/4″. Layer the panels as shown on the ready card base.
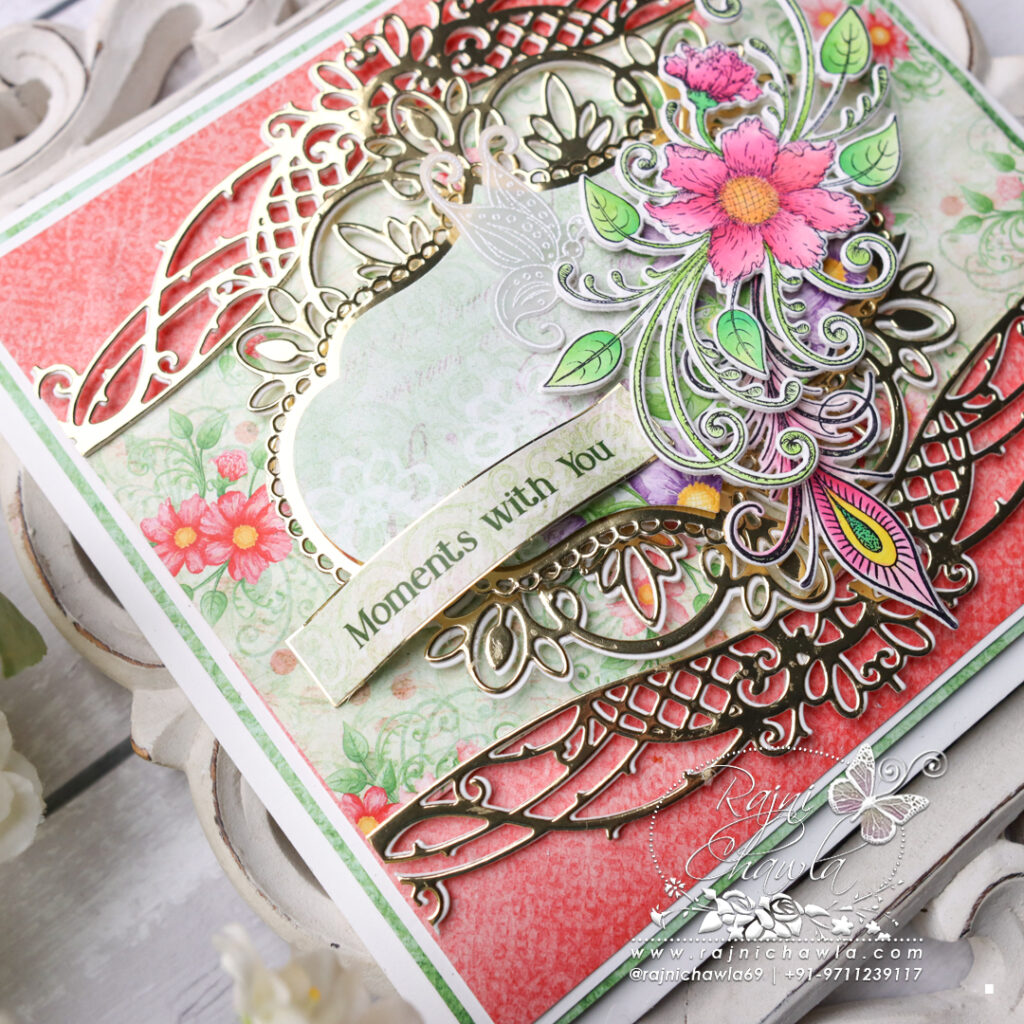
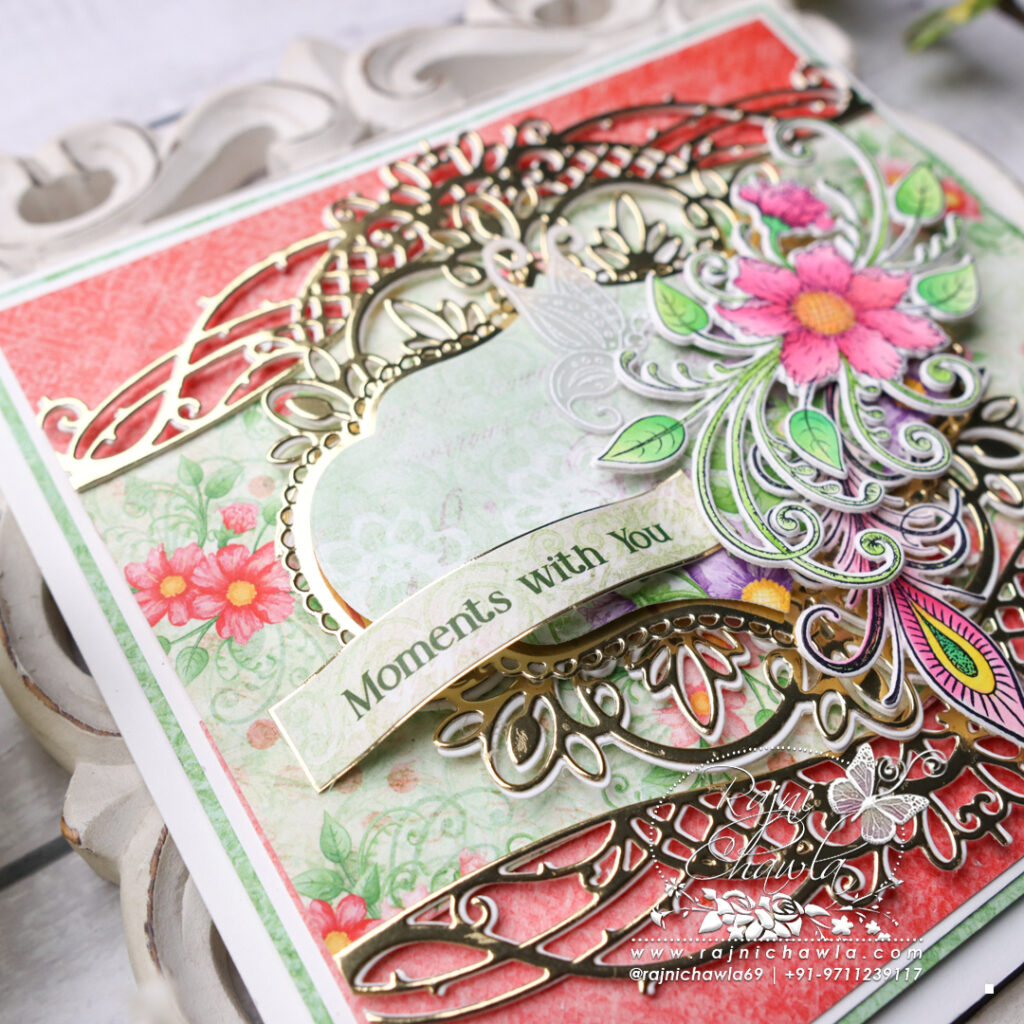
Choose floral paper from the same designer paper collection and cut measuring 3 1/2″ by 5 3/4″. Cut the top and the bottom edges using a basic curve die from the Curvy Decorative Border Die set. Next, cut 2 each from white and luxe gold cardstock using the same die set. Glue the gold die on top of the white and prepare 2 lacy borders. Adhere these lacy borders on the top and the bottom edges as shown and layer the panel on the ready card front.
Cut a tag from luxe gold cardstock using Album Tags and Accents Die and mat a solid tag from the designer paper collection. Prepare a die cut using the Simply Elegant Centerpiece Die set, chop it, and adhere it under the top and the bottom edges of the tag, peeking out a little on both edges.
Stamp the required images from the Floral Feathers Cling Stamp Set and Feathery Florals Cling Stamp Set with black archival ink on smooth white cardstock and paint them using Zig Clean Clear Brush Markers. Cut the painted images using their coordinating dies. Adhere an extra die cut to add strength to the painted images.
Once all the elements are ready, layer the painted images on the right side of the tag and complete the card with a sentiment strip from the same collection.