


Good Morning Friends….
It’s a new release day at Heartfelt Creations. We, designers are showcasing our work using Butterfly Dreams Coollection. Soft breezes blow carrying the sweet scent of flowers through the air, while the summer sunshine fills your heart with warmth! There’s no grander place to leave your cares and worries behind than a beautiful garden! It’s the perfect place to lose yourself in a daydream as you’re surrounded by bountiful blooms playing host to a kaleidoscope of butterflies! What is it about butterflies that evoke so many feelings of joy, memories of loved ones gone before us, and the gentle reminder that the trials of life can transform us into something beautiful! Join us in celebrating the beauty of life with the new Butterfly Dreams Collection by Heartfelt Creations! Lose yourself in a bright and happy hued paper collection filled with vivid pinks, blazing oranges, soft blues and soothing teals, boasting dynamic imagery of beautifully illustrated butterflies and divine florals encompassed in whimsical swirls and beautiful brocades! Several sizes of artfully illustrated premade card fronts, and elegant scrapbook pages set the perfect scene for hand shaped and embellished butterflies, along with your favorite dimensional flowers! Three fanciful cling stamp sets with coordinating dies lend themselves perfectly to adding a touch of elegance and grace to your one of a kind paper creations with delightfully scripted sentiments, stylish butterfly borders, detailed decorative dies, and several fascinating butterfly illustrations! So close your eyes, allow yourself to relax, and come along with us as we escape to a place filled with Butterfly Dreams!
Heartfelt Creations supplies used:
HCD1-7177 Butterfly Dreams Border Die
HCD1-7179 Butterfly Kisses Decorative Die
HCPC-3823 Butterfly Dreams Border Cling Stamp Set
HCPC-3825 Butterfly Kisses Cling Stamp Set
HCDP1-289 Butterfly Dreams Paper Collection
HCD1-7120 Fleur Border Basics Die
HCD1-7154 Eyelet Circle & Basics Small Die
HCD1-745 Luggage and Tags Die
HCD1-7170 Lush Lilac Die
HCPC-3816 Lush Lilac Cling Stamp Set
HCFB1-466 3D Lush Lilac Shaping Mold
RACP985 Ranger Archival Ink Pad – Cactus Flower
RACP524 Ranger Archival Ink Pad – Vibrant Fuchsia
RACP494 Ranger Archival Ink Pad – Majestic Violet
RACP436 Ranger Archival Ink Pad – Leaf Green
RACP962 Ranger Archival Ink Pad – Fern Green
PGM15015 Rajni Chawla’s Crystal Clear
HCDA2-450 Stack and Store Daubers-Pack of 30
159723 Designer Dries Clear Adhesive
HCST1-401 Deluxe Flower Shaping Kit
Other Products Used: Smooth White Cardstock, Foam Dots, Distress ink Warm Lipstick, Glossy Accent, Zig Clean Clear Brush Markers, twine.
Videos Referred: For more tips on creating with the Butterfly Dreams collection, watch the tutorial at https://youtu.be/uCKKJfAQFHA.
For more tips on creating with the border dies & foldout cards, watch the tutorial at https://youtu.be/wxX94X84kUo.
For more tips on creating with the Lush Lilac collection, watch the tutorial at https://youtu.be/KDbdzC0MnAI.
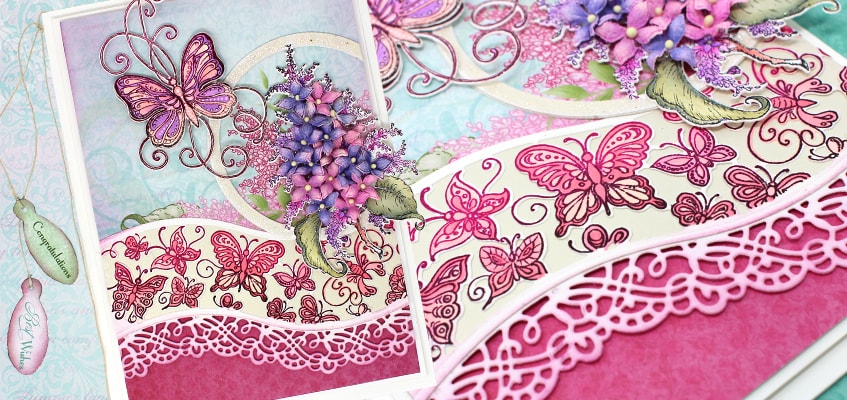
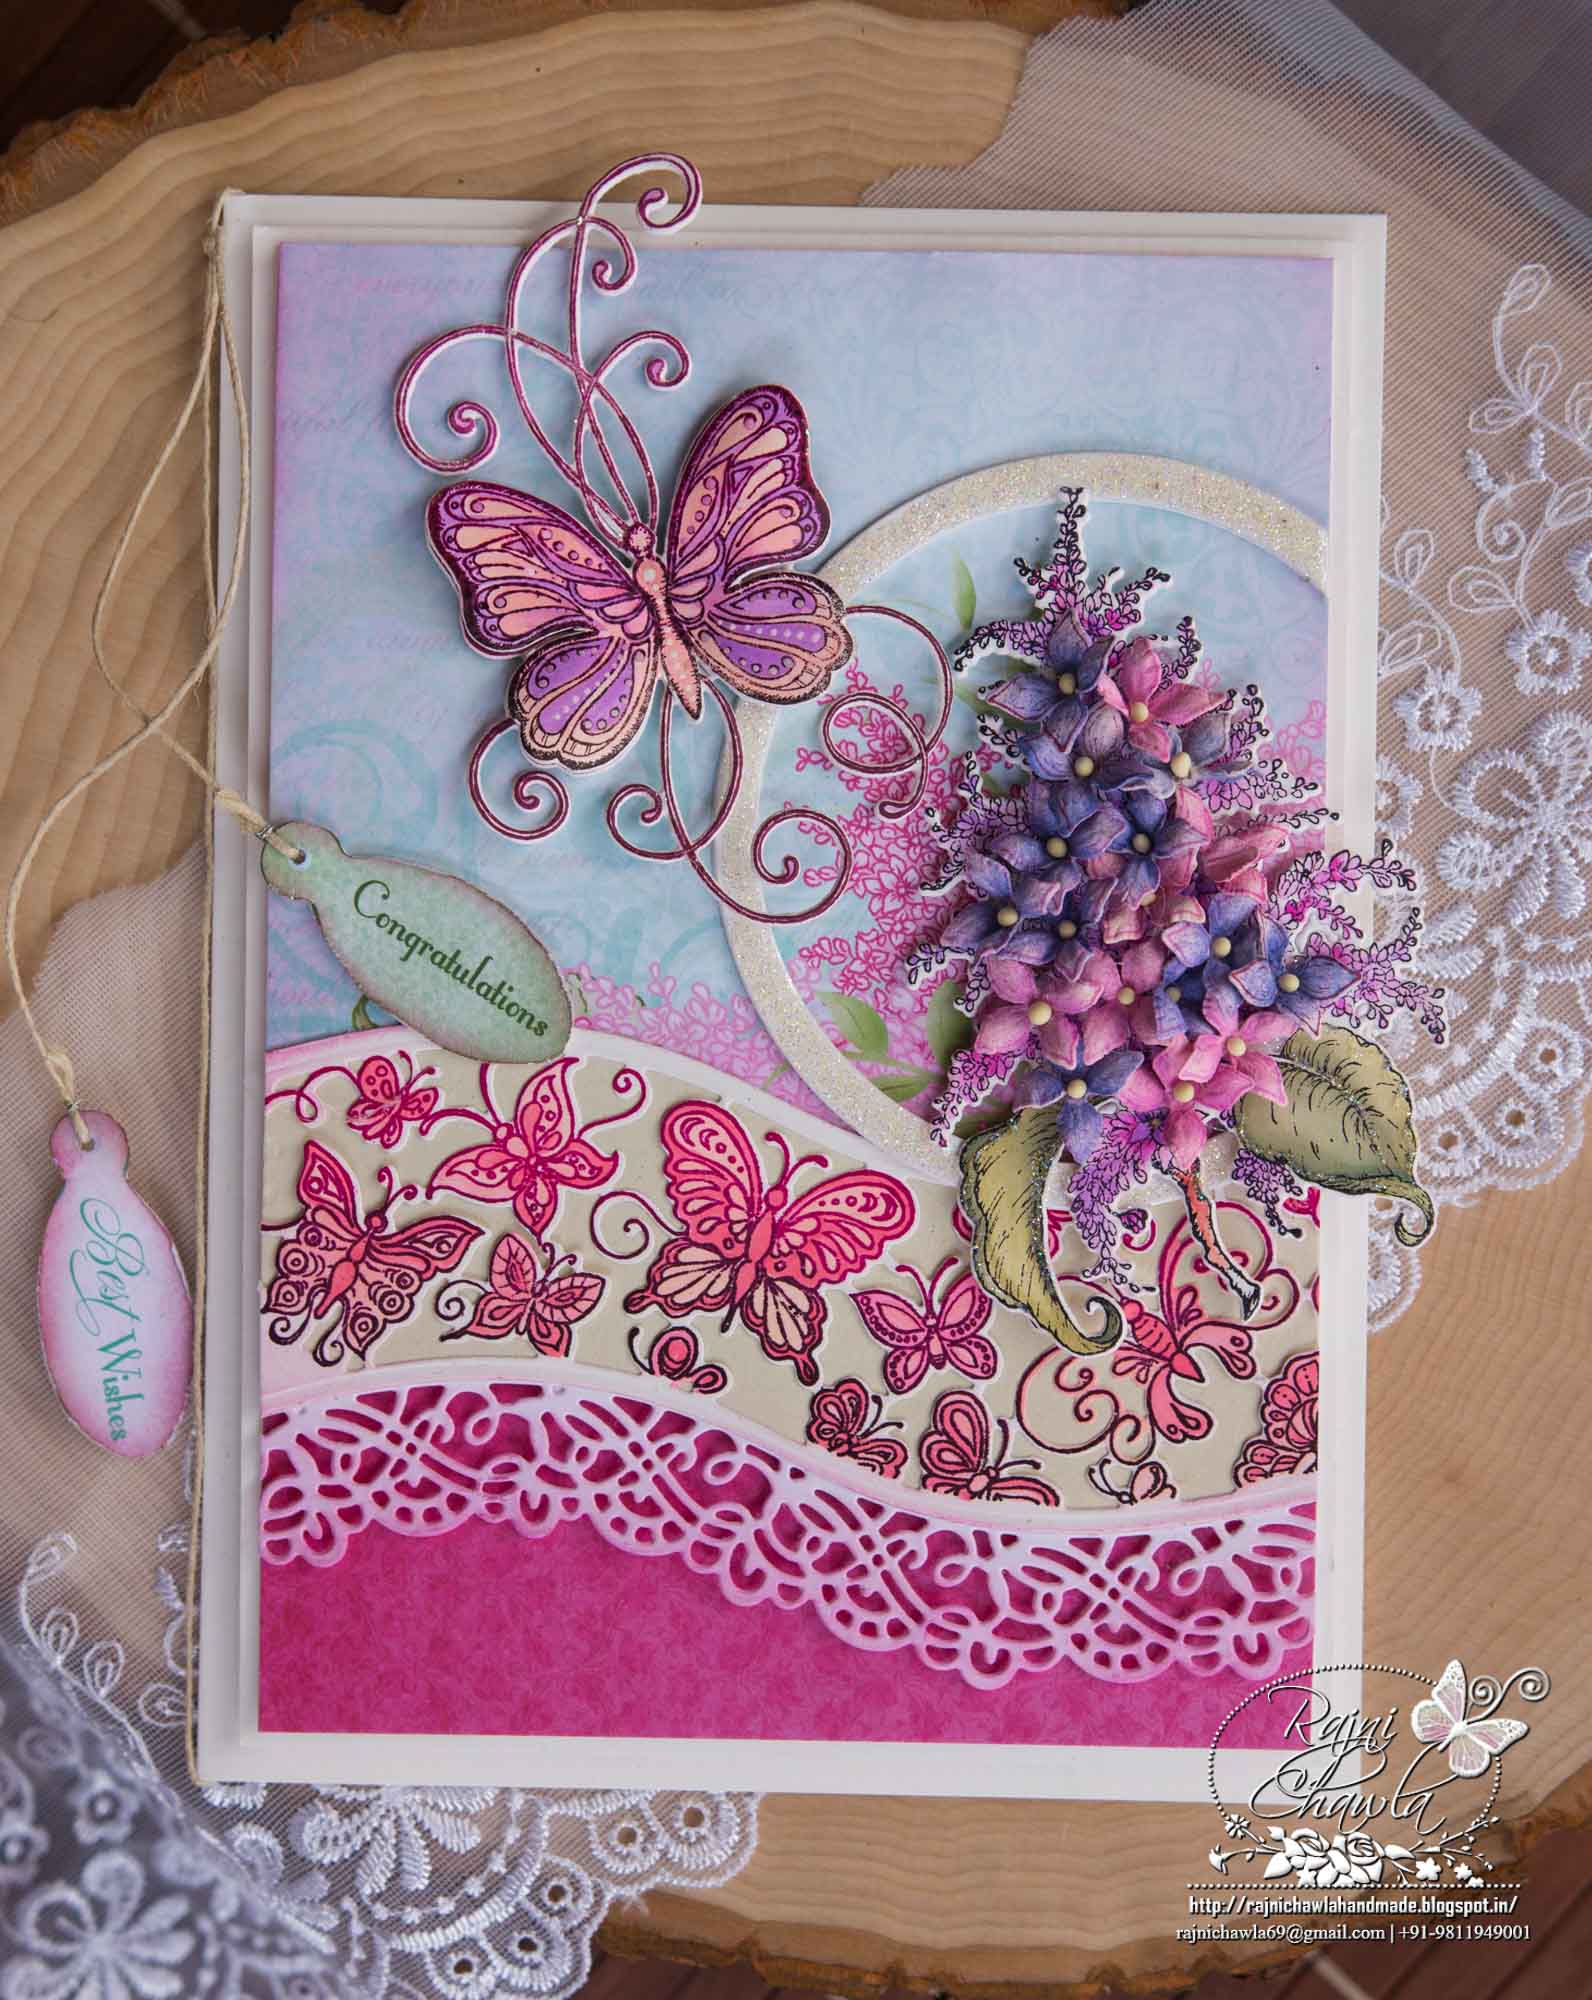
Instructions: The ready side fold card base measures 6″ X7 1/2″. Cut another piece of white cardstock measuring 5 3/4″ X 7 1/4″ layer it on the card base. Choose a dark pink paper from the designer paper collection and cut to size 5 1/2″ by 7″. For the topmost layer of the card, choose a pattern from the designer paper collection with Lush Lilac bouquet. Cut it to 5 1/2″ X7″ and cut the lower edge with Fleur Border Die and adhere a white decorative die cut from the back.
Stamp a border from Butterfly Border Cling Stamp Set with Black Archival Ink, Color that using Zig Clean Clear Brush Markers and cut that using its coordinating die as well as Fleur Border Die. Once cut, adhere a soft golden pearl sheet behind the same and stick it to the ready top panel.
For Lush Lilac Bouquet, stamp an image of Larger Lilacs bunches with black archival and cut it using its coordinating die. Paint the image using Zig Clean Clear Brush Markers. Keep one image painted and glue few shaped lilacs. To create shaped Lilacs, Stamp with Plum ink and cut the florals from Lush Lilac Cling Stamp Set and die set and color them using Magenta Hue and Cactus Flower Archival inks. Shape them using Lush Lilac Mold and arrange them on the painted image.
For Butterfly, Stamp 2 images from Butterfly Kisses Decorative Cling Stamp Set with black archival and color one image using Zig Clean Clear Brush Markers. Shape it a little using Deluxe Flower Shaping Kit. Color the second image with Warm Lipstick with a sponge dauber and layer the shaped butterfly on top with the help of glue dots. Add some sparkle to the butterfly by sponging dries clear adhesive and sprinkle Crystal Clear Powder.
Using second and third die of the Eyelet Circle & Basics Small Die, cut 3 frames from white cardstock, Stack them together and glue it on the right side of the top panel. Cut the extra frame that is hanging out from the card. Glitter the frame using Glossy Accent and Crystal Clear Powder.
Once all the elements are ready, assemble the card as shown and complete the card by adding sentiment tags from the paper Collection.
Another lovely creation. I would love to live close enough to come visit your craft space. Maybe some of your creativity would rub off!
You are amazing Rajni! This is absolutely gorgeous as always!
Wow – just gorgeous!!!