Happy Wednesday!!
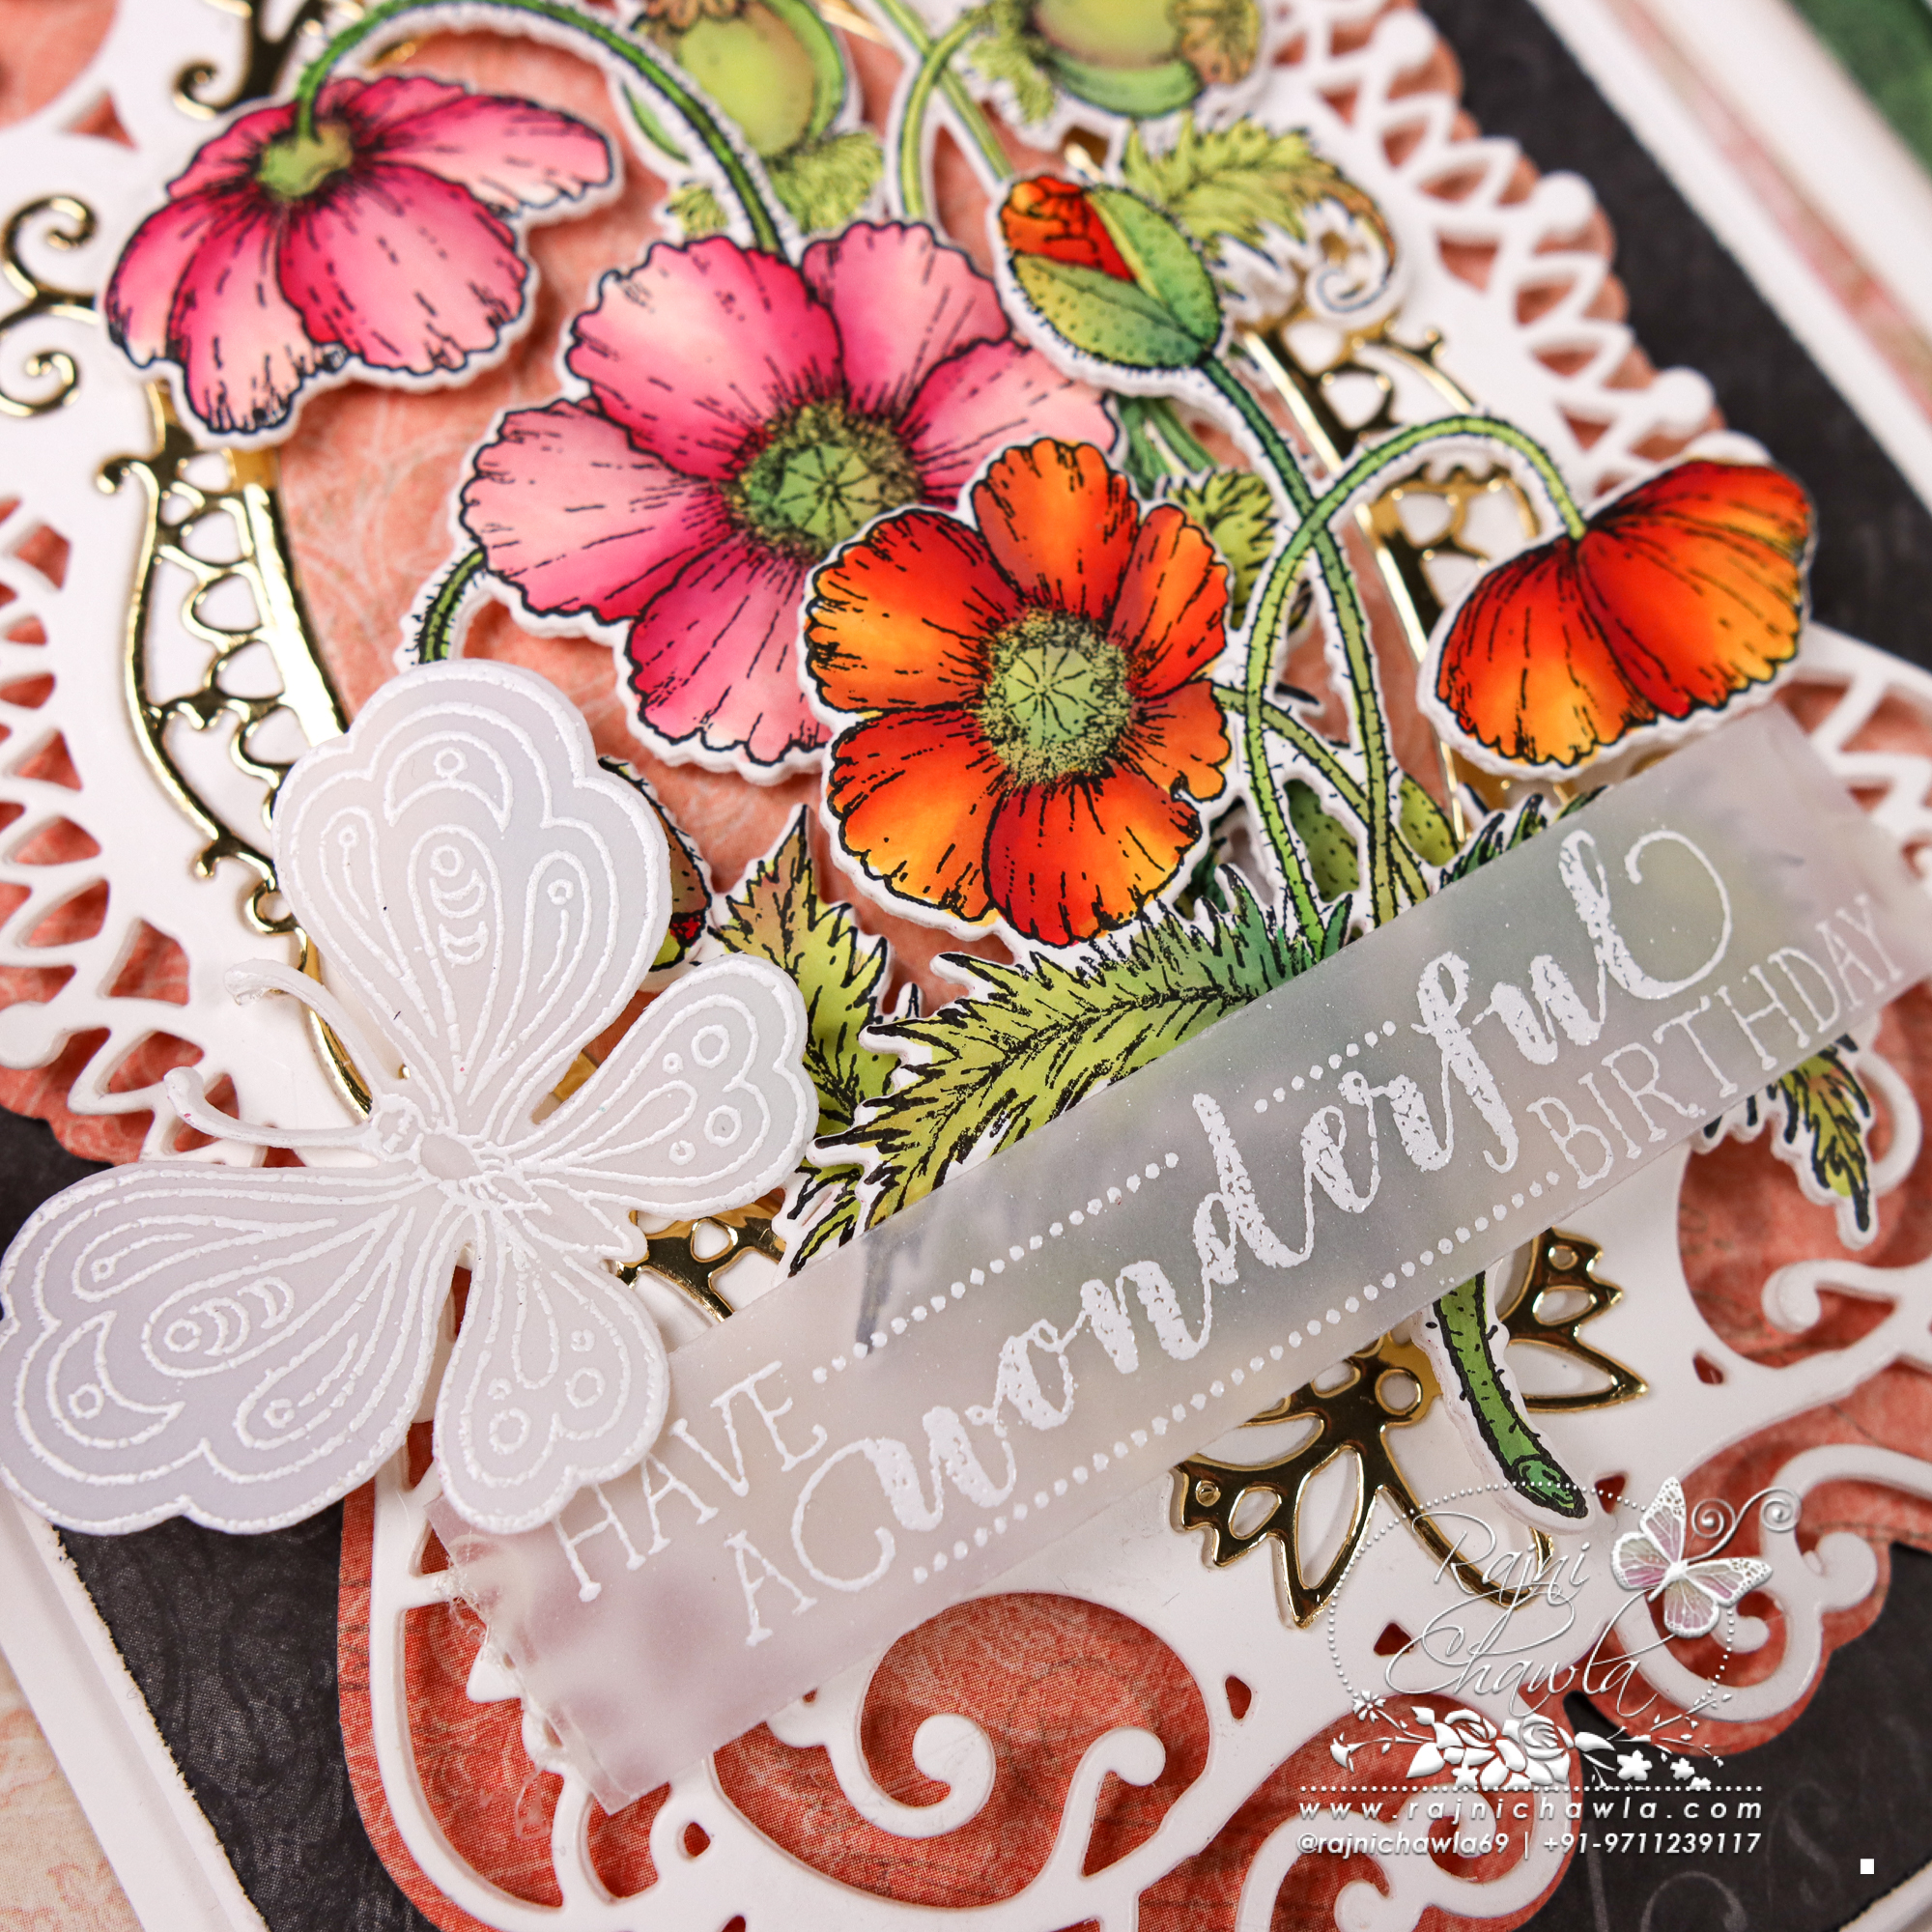
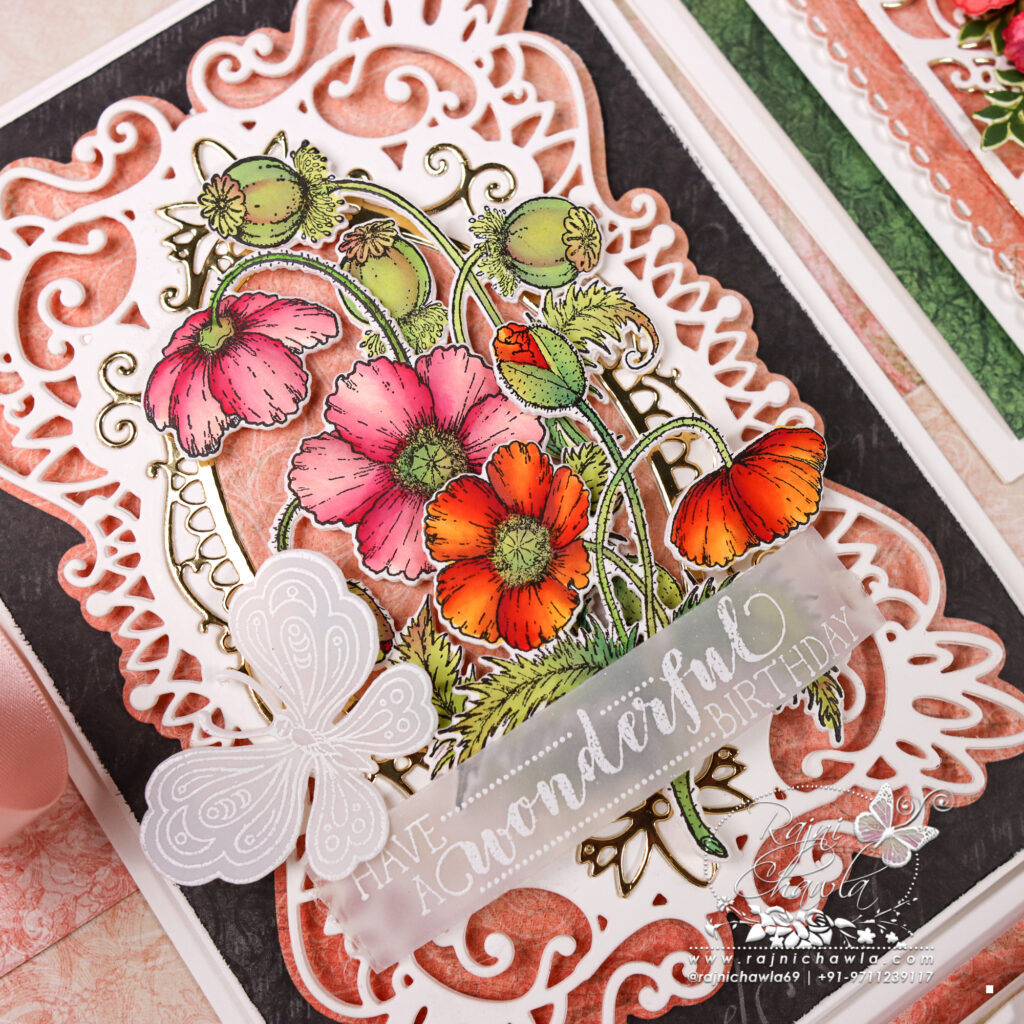
Welcome to my blog, my friends. It’s an inspiration Wednesday with Heartfelt Creations. Continuing with Wild Poppy Collection, I have this beautiful card to share. The beautiful and detailed Poppy illustrations were so much fun to color. To keep the focus on handpainted flowers, I kept the sentiment and butterflies very settled and simple using white heat embossing vellum.
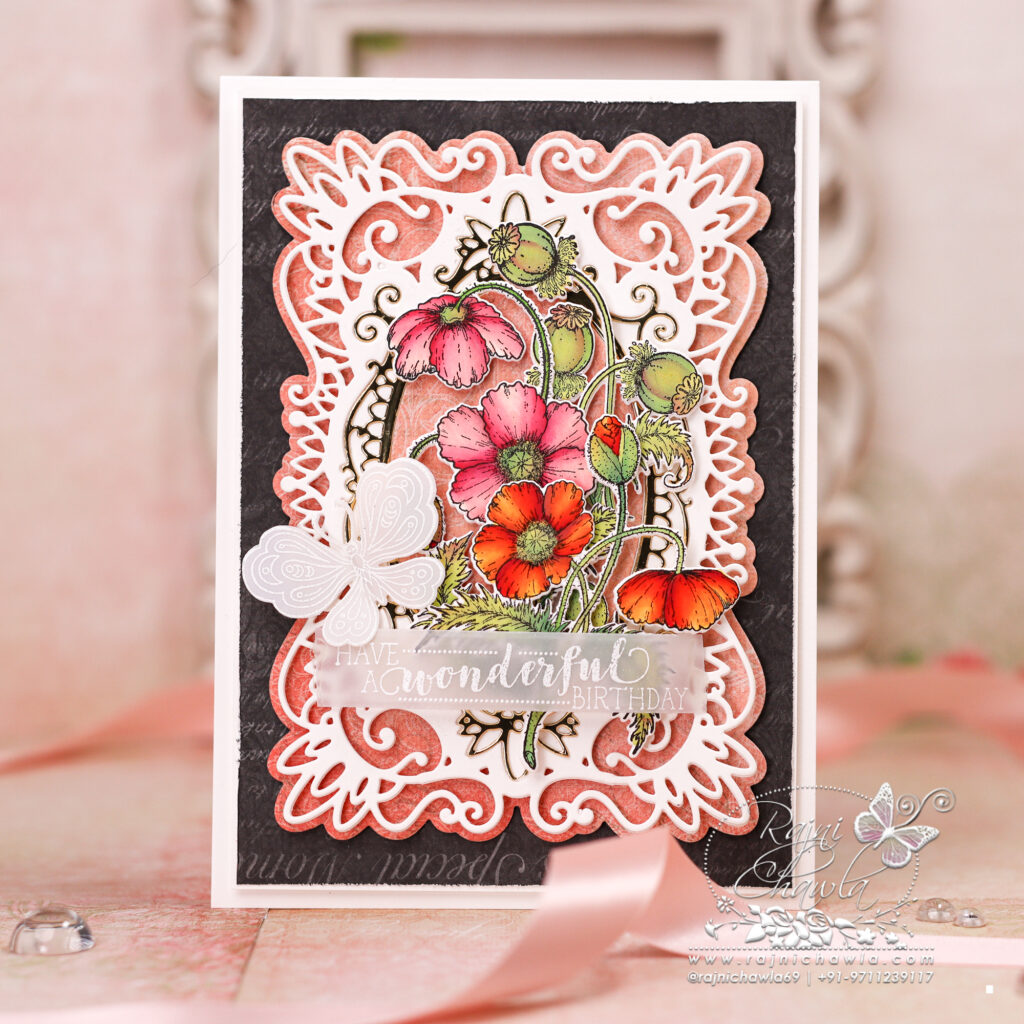

The ready top fold card measures 8″ by 6″. To prepare the white card base, cut one piece measuring 8″ by 6″ and the second piece 8 1/2″ by 6″. Score the second piece at 1/2″ on the longer side and glue the first piece on top. For the topmost layer, choose the pattern paper from the paper collection and cut 71/4″ by 5 1/4″, and distress the edges using sharp scissors. Next, glue the panel on white cardstock making the border of 1/16″ on all the sides. Add dimensions using foam tapes.
Diecut one of each fancy frame from Gold cardstock and the white cardstock using Royal Elegance Frames Die. Glue them together creating a golden shadow behind the white one. Layer the frame on the card panel as shown.
On a smooth white cardstock, stamp the required images from Wild Poppy Accents Cling Stamp Set Wild Poppy Bouquet Cling Stamp Se, using jet black archival ink. Paint all the images with Zig Clean Clear Brush markers. once painted, cut the images using its coordinating dies.
Stamp the butterfly image from Small Floral Butterfly Accents Cling Stamp Set with Versafine on Rajni Chawla’s Vellum Flowerite and sprinkle white heat embossing powder. Dust extras and heat set the image using a heat tool. Cut the butterfly using its coordinating die. Also, stamp the sentiment with white pigment ink on vellum cardstock and then white heat emboss it.
Once all the elements are ready, assemble the card as shown.