


Happy Wednesday!!
If you find yourself in a creative rut or you need elegant inspiration to get started on your next project, you are at the right place! I have this beautiful framed Zinnias for you.


List of supplies ffrom Heartfelt Creations:
HCD1-7315 Small Garden Zinnia Die
HCPC-3924 Small Garden Zinnia Cling Stamp Set
HCDP1-2119 Summer’s Garden Paper Collection
HCD1-7295 Wisteria Petals Die
HCPC-3911 Wisteria Petals Cling Stamp Set
HCD2-7191 Intricate Swirl Frames Die
HCD1-7263 Swirly Accent Spray Die
HCD1-7155 Circle Basics Large Die
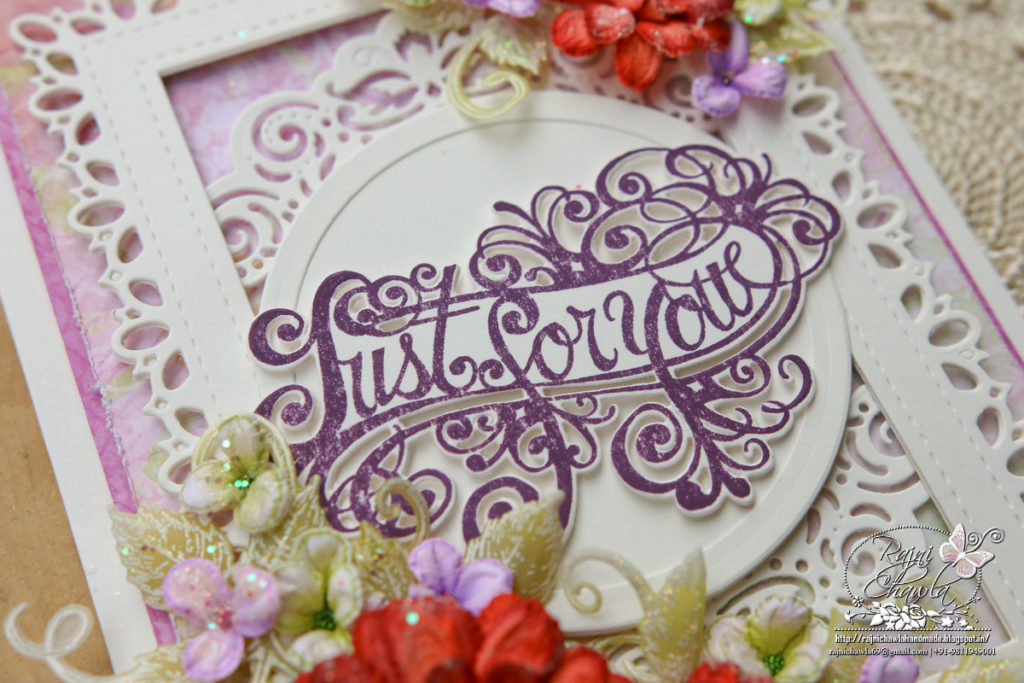
HCD1-7321 Ornate Just for You Die
HCPC-3936 Ornate Just for You Cling Stamp Set
HCD1-7193 Leafy Accents Die
HCPC-3835 Leafy Accents Cling Stamp Set
18002 Rajni Chawla’s Vellum Flowerite – 10 Sheets
PGM15015 Rajni Chawla’s Crystal Clear
RACP985 Ranger Archival Ink Pad – Cactus Flower
RACP239 Ranger Archival Ink Pad – Monarch Orange
RACP499 Ranger Archival Ink Pad – Plum
RACP614 Ranger Archival Ink Pad – Magenta Hue
RACP005 Ranger Archival Ink Pad – Sunflower
Other Supplies Used: White Heat Embossing Powder from Rangers, Hero Arts WDie Cutting Machine, Score Board, Foam tapes, Hot glue, Smooth White Cardstock
Instructions: The ready top fold card from smooth card stock measures 6″ by 8″. To prepare the card front, choose 2 coordinating papers( dark pink and soft pink) from the designer paper collection and cut dark pink paper measuring 5 1/2″ by 7 1/2″. Distress all the sides with sharp scissors. Cut soft pink paper a little smaller than the dark pink one and distress it too. Layer both the papers using foam tapes and finally layer them on the ready card panel.
Cut a frame using Intricate Swirl Frames Die and mat 2 die cuts from Swirly Accent Spray Die from the backside. Layer the ready frame on the card front. Next cut a white solid circle die cut from Circle Basics die and glue a frame around it. Layer the circle in the center as shown using double-sided tapes.
Stamp the sentiment from Elegant Especially for You Cling Stamp Set on white cardstock using Plum Archival ink and cut it using it’s coordinating die. Glue 2 extra die cuts to add extra strength to the sentiment and shape it a little. Finally, glue the prepared sentiment on the card front as shown.
For the foliage, stamp Leafy Accent stamp set using white pigment ink on vellum cardstock, sprinkle white heat embossing powder, and dust extras. Heat set the stamped images using a heat gun and cut them using it’s coordinating die set. Color them using Peeled Paint Distress Oxide and shape them using needle tool.
For Zinnia Flowers, stamp a couple of images from the Small Zinnia stamp set with Monarch Orange and cut them using it’s coordinating die. Color the centers using Sunflower Yellow and rest of the flower petals using Monarch orange with a light hand and highlight them a little using Plum archival ink. Shape them using shaping tools. To make the flower centers, color one small petal completely with yellow and snip the petals very thin and roll them between your fingers. Form 1 medium-size flowers and 2 small flowers.
Once all the elements are ready, assemble a small bouquet with the help of hot glue and complete the card by adding some glitter.
This is stunning as always Rajni!