


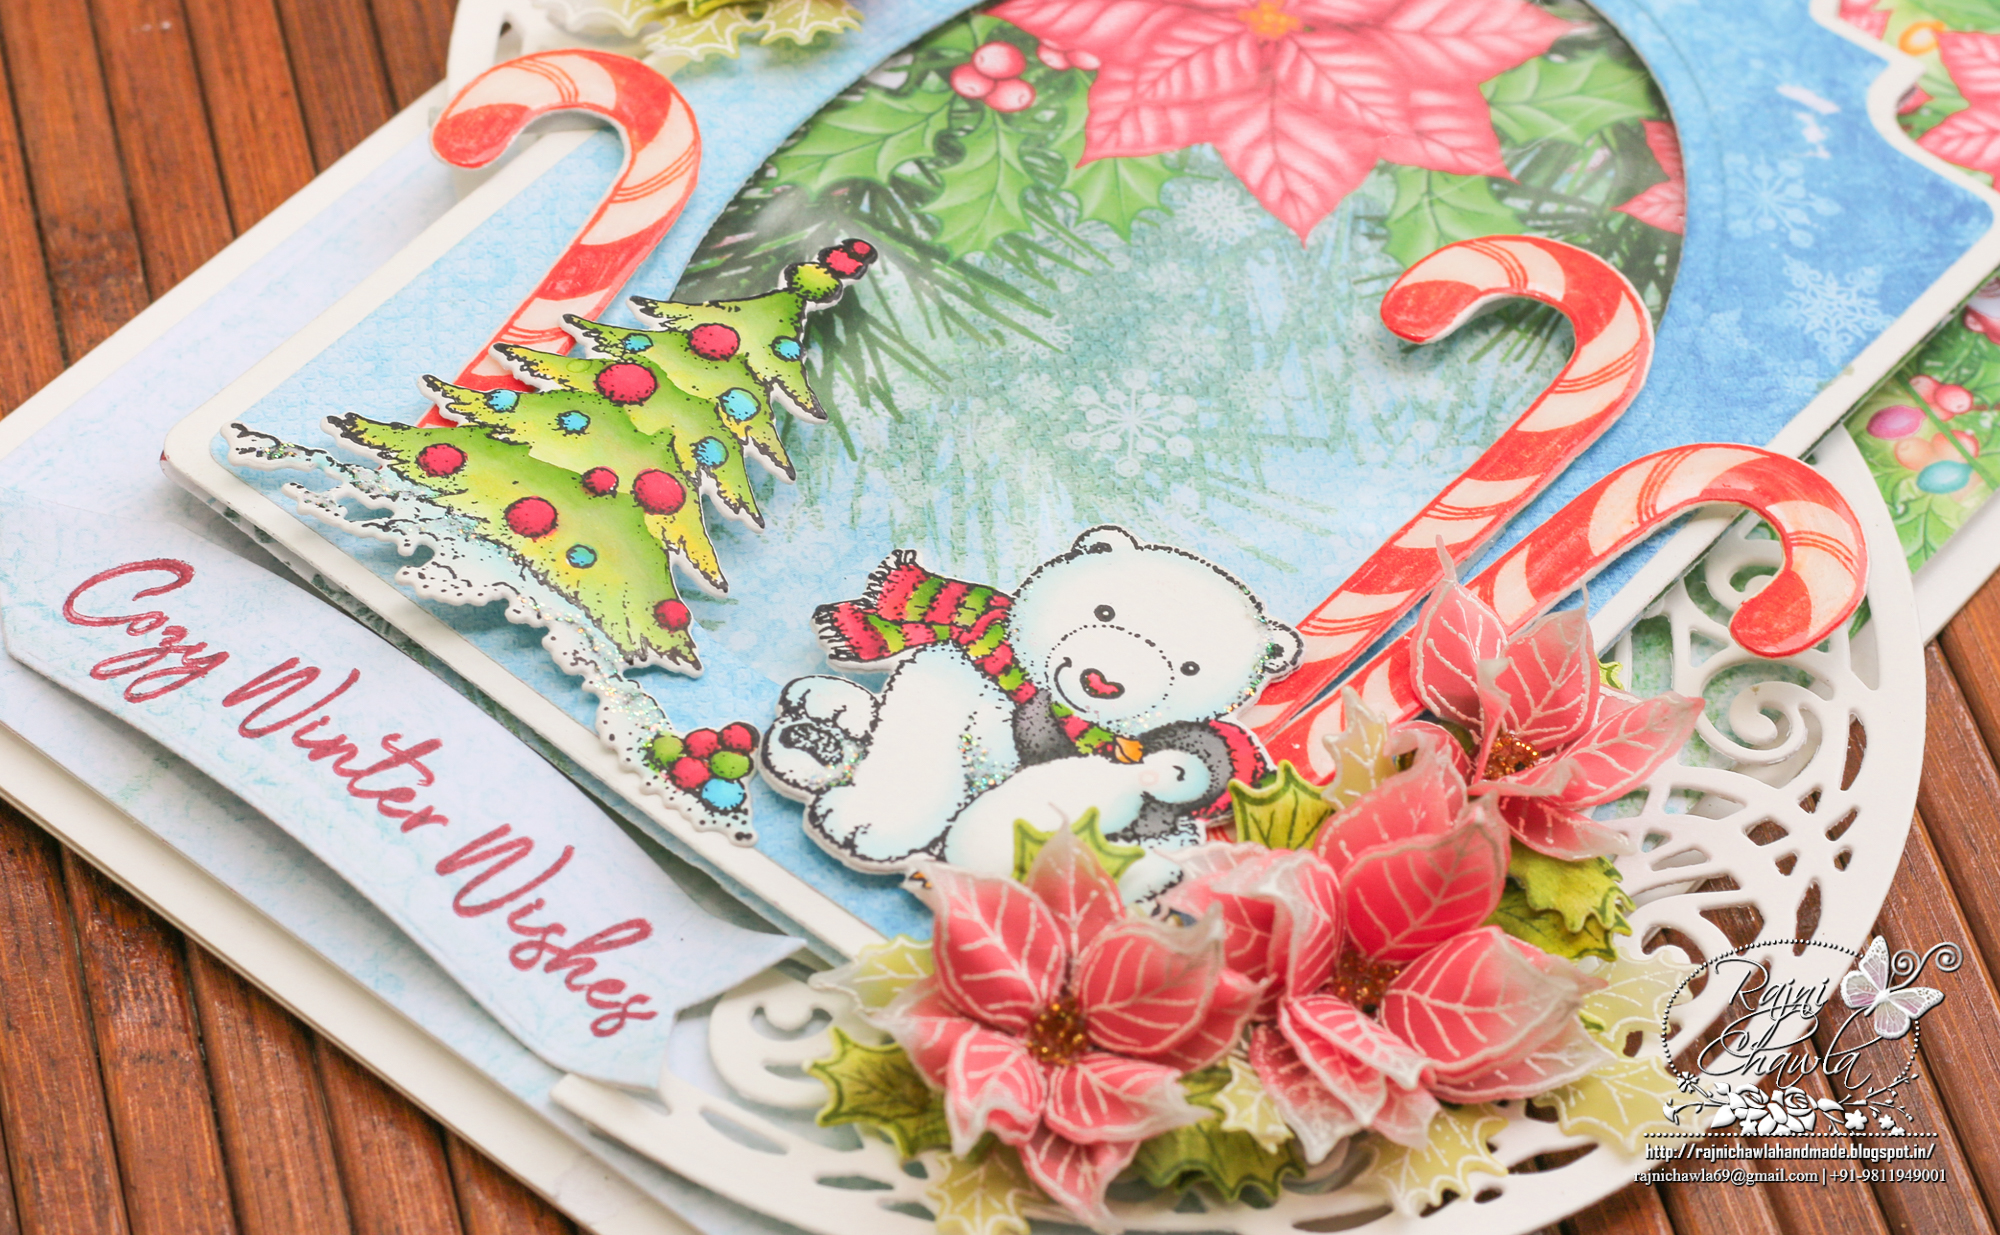
Good Morning All….
It’s a Wednesday inspiration with the Heartfelt Creations new release, Wild Aster Collection.
Warm summer breezes have begun to cool, and daylight hours have started to shorten…tall grasses rustle in the wind preparing to make their way to seed and leaves slowly begin their tumble to the ground to insulate the earth for the cooler upcoming season. As summer begins to fade, and the bright hues of heat-loving florals dim, it is then that the graceful aster takes the limelight and becomes the crowning glory of the autumn season, lending it one last burst of color with their blends of pretty purples, pleasing pinks, and blazing blues! Join us as we bid summer farewell and celebrate the arrival of the autumn season with the Wild Aster Collection from Heartfelt Creations! Take a walk among the last perennial wildflowers of the waning summer season as you delve into a paper collection draped in light and airy asters hued in vibrant fuchsias and pretty purples, all accented with glorious greens, precious pinks, and tranquil creams. Enjoy alluring backgrounds filled with dainty lace-like accents, grand vintage style stripes, and beautiful brocades, all ready to set the stage for captivating aster arrangements! A lovely assembling of cling stamp sets filled with pleasing aster illustrations unites to create pretty wildflower sprays and elegant bouquets, while a stunning collection of beautifully illustrated aster petal images, when paired with the corresponding dies, join together harmoniously to create light, airy, dimensional aster flowers perfect for creating elegant autumn-inspired floral clusters! So, grab your sweater and join us for one last walk through the garden as we take in the simplicity and beauty of the glorious wild aster!

Supplies from Heartfelt Creations:
HCD1-7257 Wild Aster Die
HCD1-7258 Wild Aster Spray Die
HCD1-7259 Wild Aster Scroll & Cluster Die
HCPC-3887 Wild Aster Cling Stamp Set
HCPC-3888 Wild Aster Spray Cling Stamp Set
HCPC-3889 Wild Aster Scroll & Cluster Cling Stamp Set
HCDP1-2106 Wild Aster Paper Collection
HCD1-7154 Eyelet Circle & Basics Small Die
HCD1-7144 Decorative Medallion Die
HCD1-7193 Leafy Accents Die
HCPC-3835 Leafy Accents Cling Stamp Set
HCFB1-467 3D Leafy Accents Shaping Mold
HCD1-7215 Floral Fashionista Die
HCPC-3855 Floral Fashionista Cling Stamp Set
HCPC-3824 Fluttering Butterfly Cling Stamp Set
HCD1-7177 Butterfly Dreams Border Die
18002 Rajni Chawla’s Vellum Flowerite – 10 Sheets
HCPP1-475 Deluxe Flower Shaping Paper Pack of 50 – White
RACP499 Ranger Archival Ink Pad – Plum
RACP614 Ranger Archival Ink Pad – Magenta Hue
RACP985 Ranger Archival Ink Pad – Cactus Flower
RACP482 Ranger Archival Ink Pad – Olive
RACP468 Ranger Archival Ink Pad – Jet Black
RAHT Heat It Craft Tool
HCST1-401 Deluxe Flower Shaping Kit
PGM15016 Rajni Chawla’s Frosting Powder
HCDA2-450 Stack and Store Daubers-Pack of 30
RACP436 Ranger Archival Ink Pad – Leaf Green
478455 Zig Clean Color Real Brush Markers – 36 Pack
409311 Color In Watercolor Brush – Fine
ANC818 Go Man Go Prills
159723 Designer Dries Clear Adhesive
Other Products Used: Smooth White Cardstock, Golden Mirror Sheet, Superfine white heat embossing Powder by Get Inspired, Hero Arts White Pigment Ink, Foam Dots, Score Board, Die Cutting Machine.
Videos Referred:
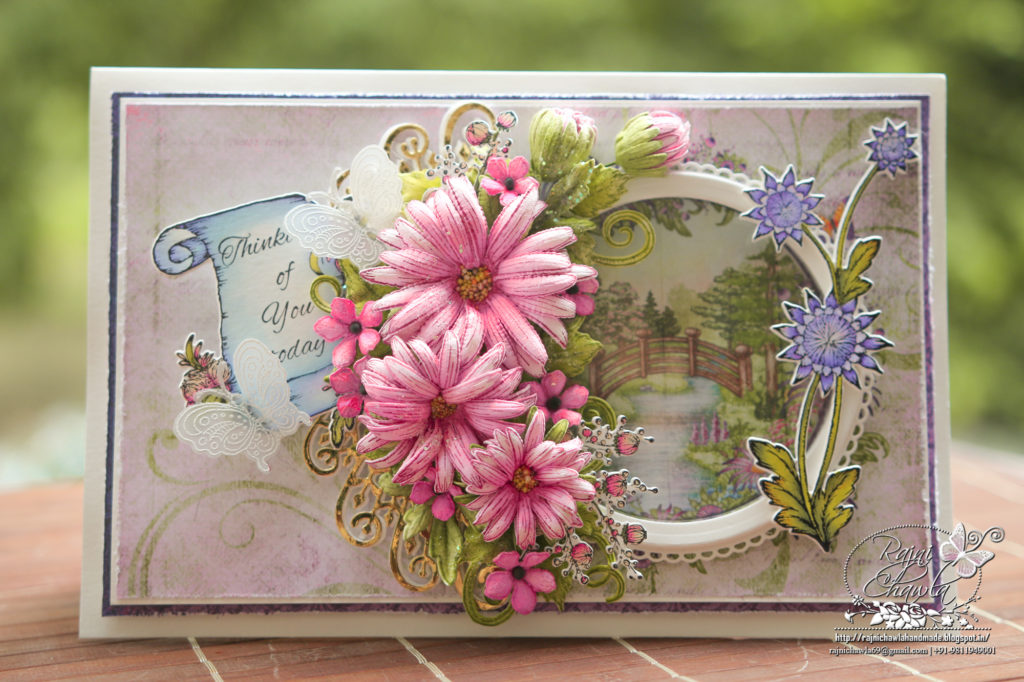
Instructions: The ready top fold card base from smooth white cardstock measures 8 1/2″ by 5 1/2″. To prepare the top panel, choose the paper from the paper collection and cut measuring 8 1/4″ BY 5 1/4″. Adhere white cardstock making a border of 1/16″ on all sides. Further, add an extra layer of deep purple paper from the same collection making a border of 1/16′ on all sides. Finally, layer the panel on the ready card base.
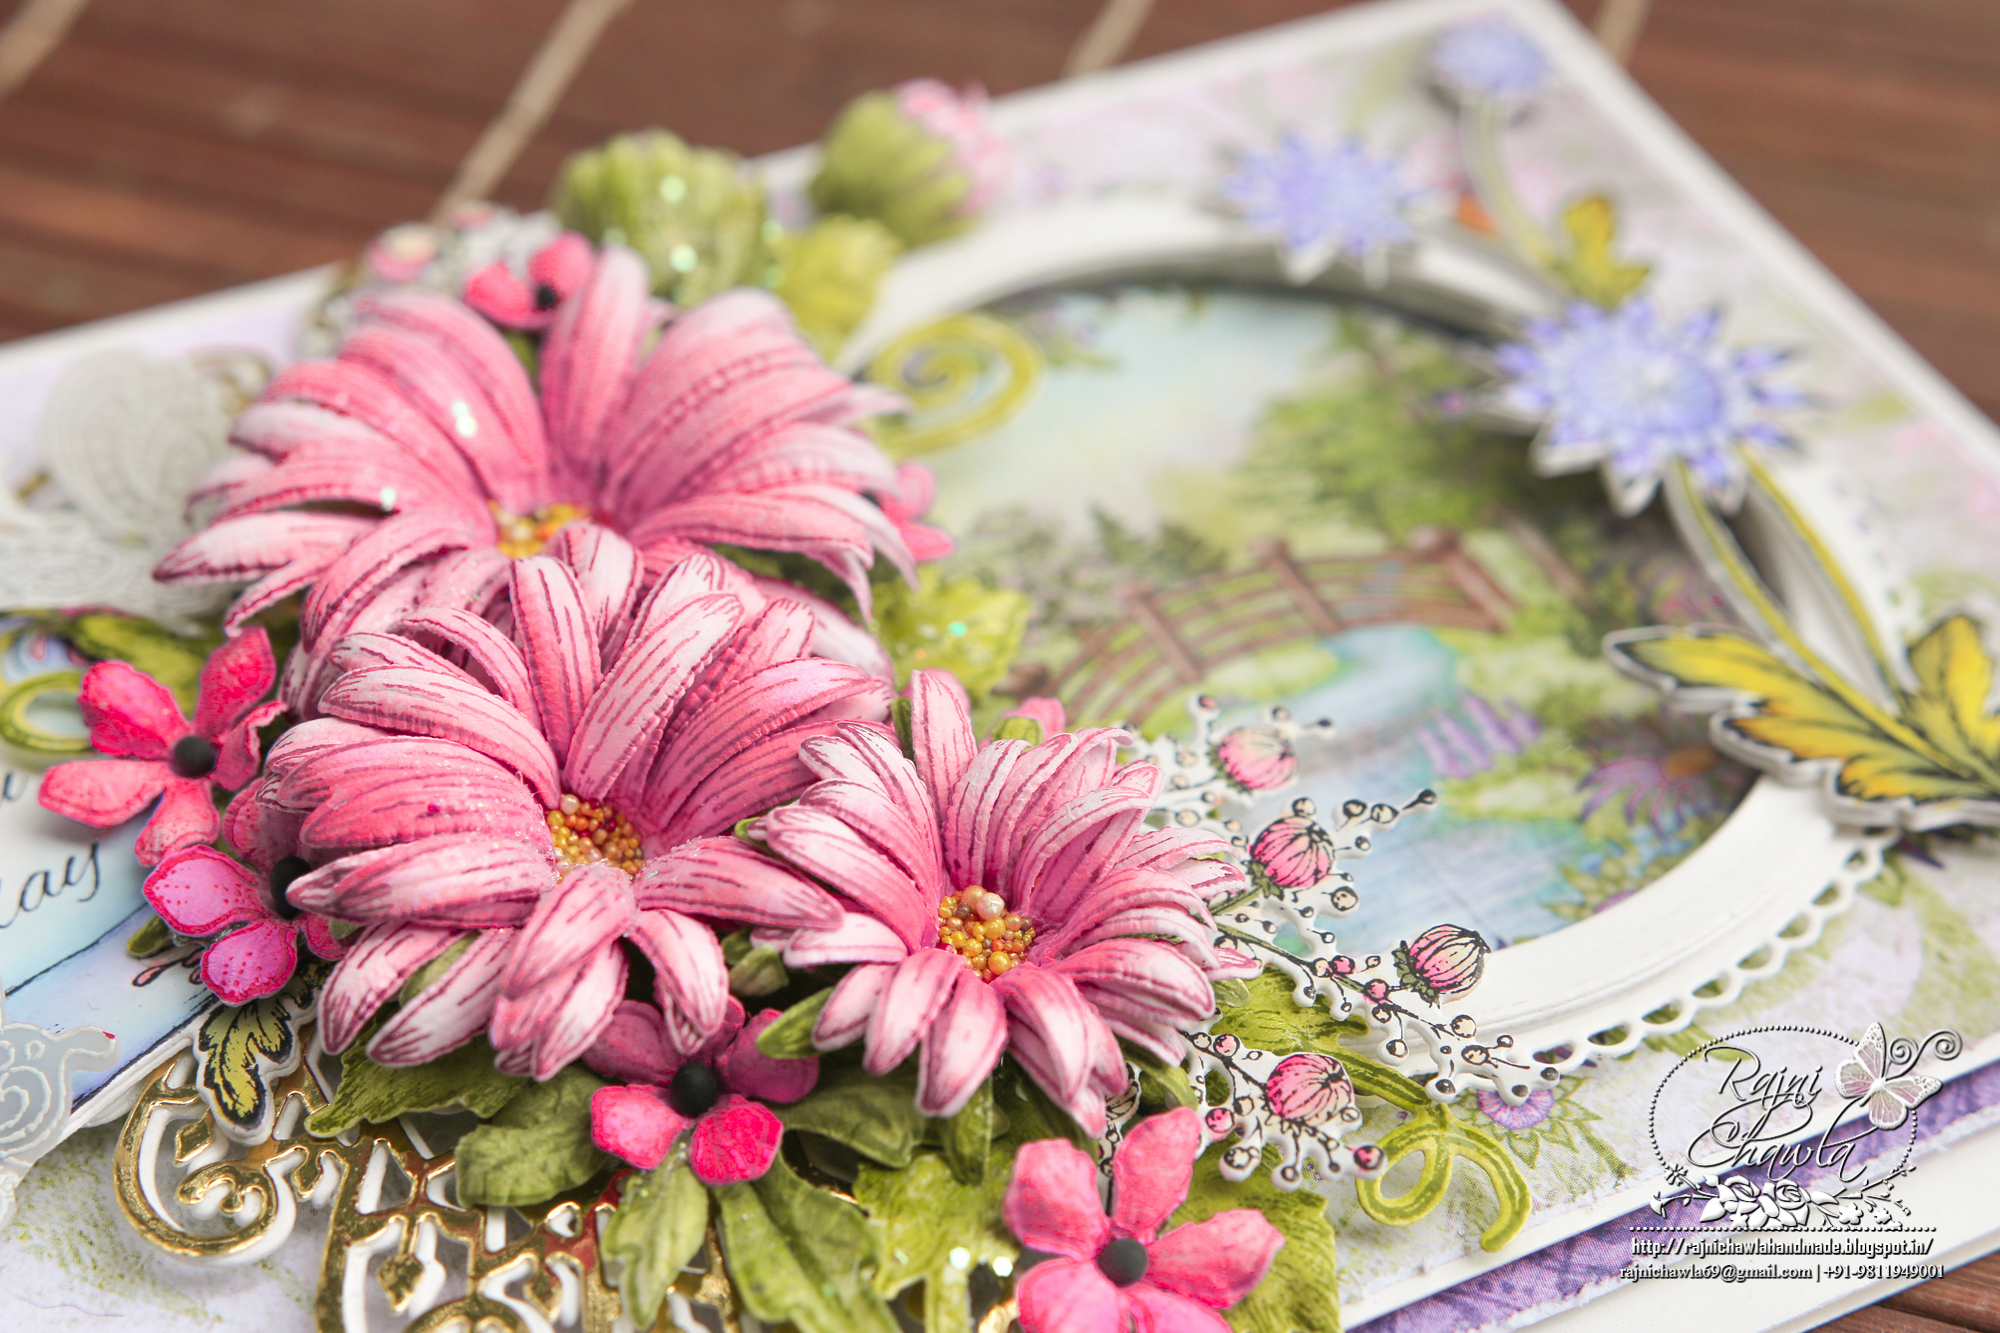
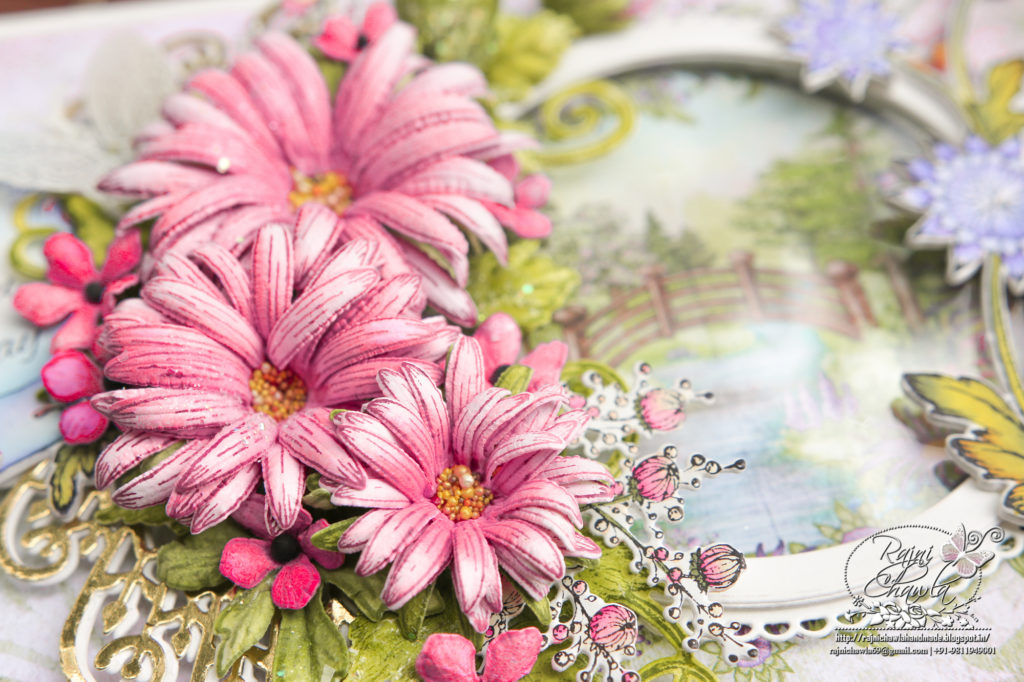
To create the focal window image, choose a scenic paper from the paper collection and keep aside. Cut 4 frames using outer 2 dies from Circle Basic Large Die Set and stack 3 die cuts neatly with an adhesive that dries clear. To the remaining one frame, adhere clear cardstock/Acetate Sheet cut using the outer die from the same die set. Adhere this to the stacked frames. Also cut a frame using outer 2 dies from Eyelet Circle & Basics Small Die Set and adhere to the already prepared window. Adhere the scenic paper behind the window and cut extras. You can also use the Circle Basic Large die if you want and glue the ready window on the ready card panel as shown.
Cut 2 die cuts from Decorative Medallion Die set using white cardstock and one die cut using the same die from golden mirror card stock. Stack all the die cuts keeping golden one on the top. Further, layer the Madallion as shown.
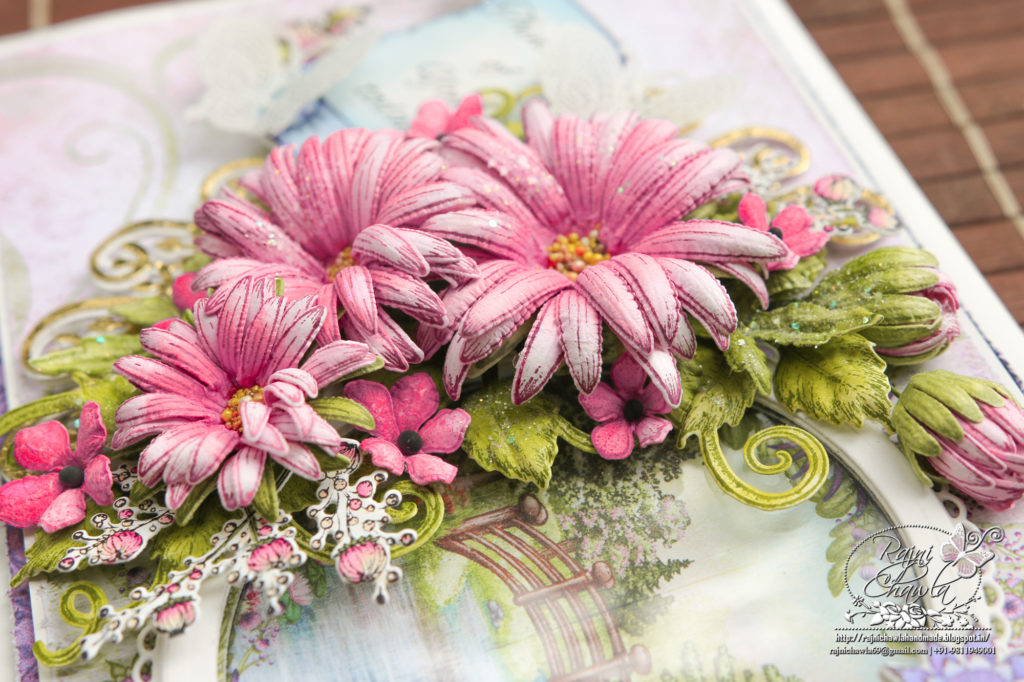
For the flowers, Stamp multiple images of mixed florals from Wild Aster Cling Stamp Set on Deluxe flower shaping paper using Plum Archival Ink and cut them using their coordinating dies. Color the flowers using Magenta Hue and shape them using Deluxe Flower Shaping Kit. Prepare one large, 1 medium and 1 small flower. Also, prepare 2 buds by shaping the flowers inwards and adding an extra layer of green sepals created using the same flower and die set. For green leaves and sepals, I have used Olive Green Archival ink for stamping and Leaf Green ink for coloring. Also stamp, cut, color and shape green leafy accents using Leafy Accents Bundles. Assemble a small bouquet of Wild Aster Florals around the window as shown using hot glue. Add glitter to add extra sparkle to the flowers.
Stamp the images from Wild Aster Cling Stamp Set and Wild Aster Spray Cling Stamp Set on white cardstock using black Archival Ink and paint them using Zig Clean Clear Brush Markers. Once done with the coloring cut the images using their coordinating dies. Stack extra die cuts for extra strength as the flower image will be hanging out on the window.
Stamp the Butterfly Dreams Border on Papericious Vellum using Hero Arts white pigment ink and sprinkle white heat embossing powder. Dust extras and heat set it using the heating tool. Cut the butterflies using its coordinating die. The butterfly required is then further trimmed off from the border and attached using tacky glue on the ready card as an extra accent.
Hi Ma’m..
That’s so beautiful.. 😍..
Totally inspired !!
Anther beauty Rajni! Your asters are gorgeous and I just love your scenic window!