Good Morning All…
Awarm welcome to my blog again!!
Today, Snowy Pines Collection becomes available to everyone! Do you find yourself excited and anticipating the fun and warm feelings of creating Christmas cards each year? But left feeling disappointed? This year, create classic wintery scenes the quick and easy way! Capture the feelings of comfort and joy in a card with a peaceful snowy cabin, festive pine cones, and the songs of winter birds! Send warm Holiday wishes, and share some peace and goodwill! Make a beautiful Christmas card for everyone on your list with the Snowy Pines Collection!

Supplies from Heartfelt Creations:
HCD1-7303 Snowy Pine Cardinals Die
HCPC -3918 Snowy Pine Cardinals Cling Stamp Set
HCDP1-2117 Snowy Pines Paper Collection
HCPC-3881 Christmas Poinsettia & Holly Cling Stamp Set
HCD1-7249 Christmas Poinsettia & Holly Die
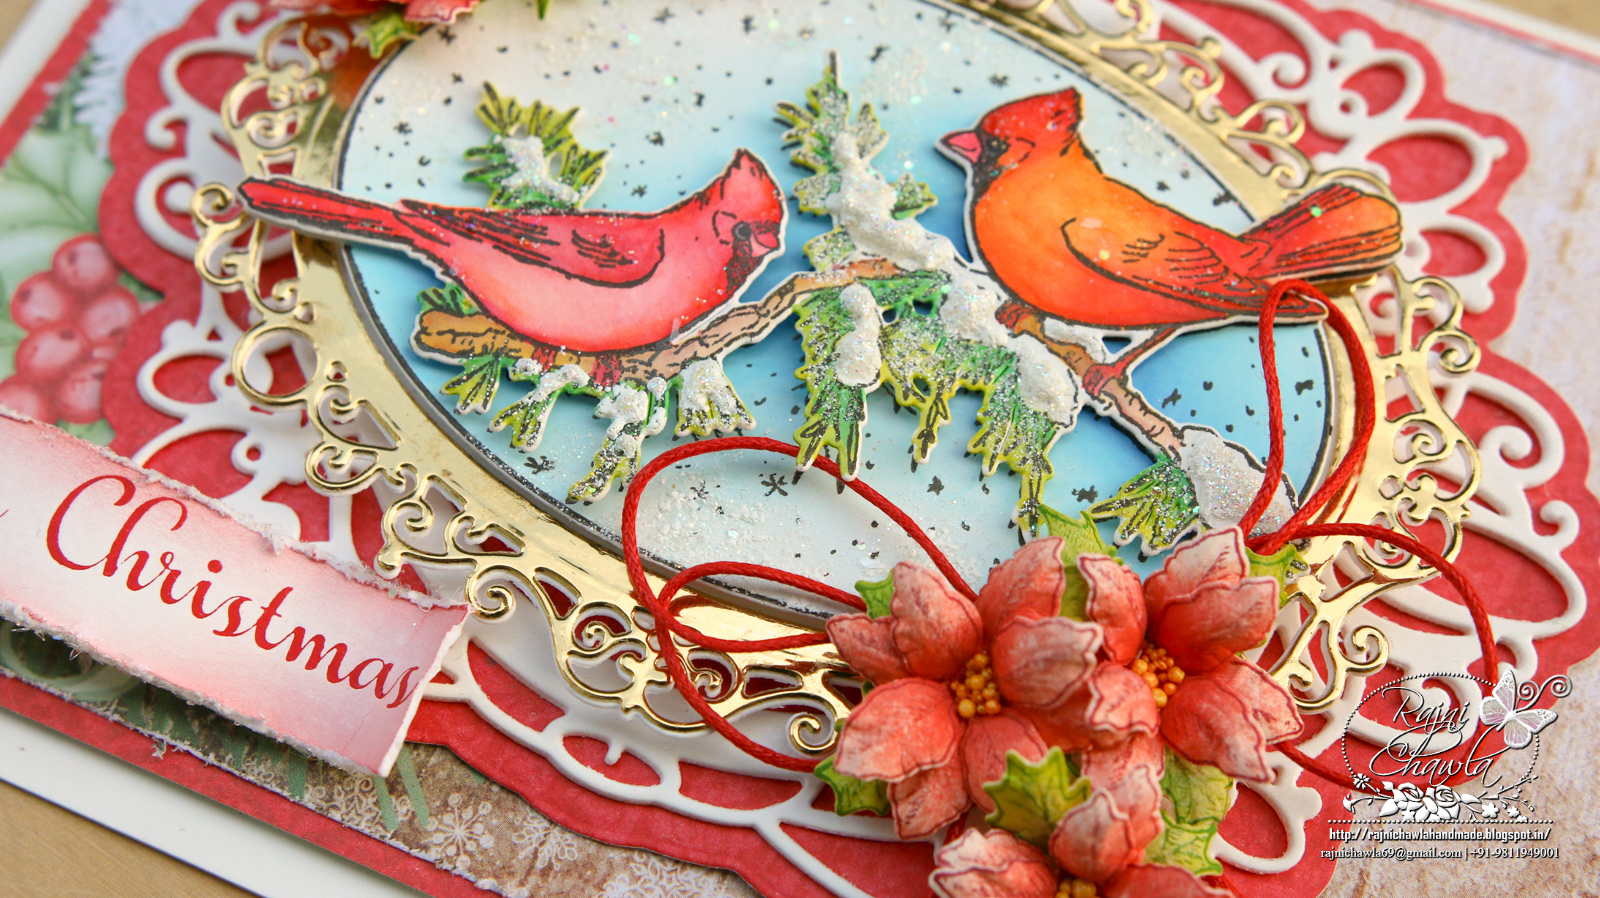
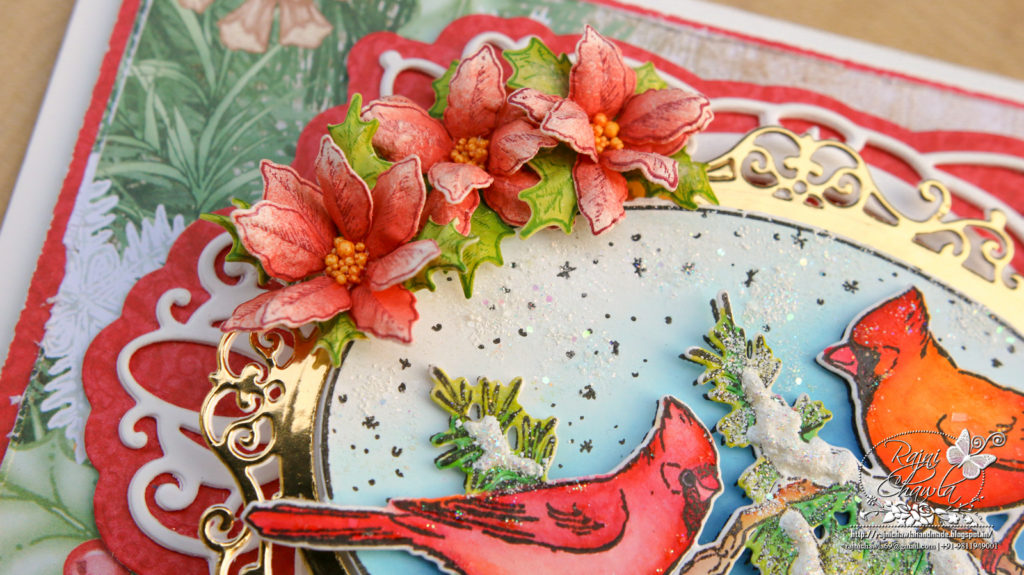
HCD2-7306 Decorative Circle Frames Die
HCD1-7305 Ornate Ovals Die
HCPC-3882 Candlelit Poinsettia Cling Stamp Set
HCGP1-488 Luxe Gold Cardstock
HCST1-401 Deluxe Flower Shaping Kit
478455 Zig Clean Color Real Brush Markers – 36 Pack
HCPP1-475 Deluxe Flower Shaping Paper Pack of 50 – White
TSSZ22 StazOn Ink Pad – Black Cherry
ANC804 Heart of Gold Prills
RACP468 Ranger Archival Ink Pad – Jet Black
RACP436 Ranger Archival Ink Pad – Leaf Green
RACP499 Ranger Archival Ink Pad – Plum
RACP993 Ranger Archival Ink Pad – Red Geranium
RACP482 Ranger Archival Ink Pad – Olive
PGM15016 Rajni Chawla’s Frosting Powder
ANC818 Go Man Go Prills
Other Products Used: Score Board, Die Cutting Machine, Red Color Twine, Sharp Scissors, Smooth White Cardstock, Adhesive that dries clear, Double-sided tapes, Funnel Tray, Heat Tool.
Videos Referred: For more tips on creating with the Snowy Pines Collection watch the tutorial at https://youtu.be/nVtKVcgg530.
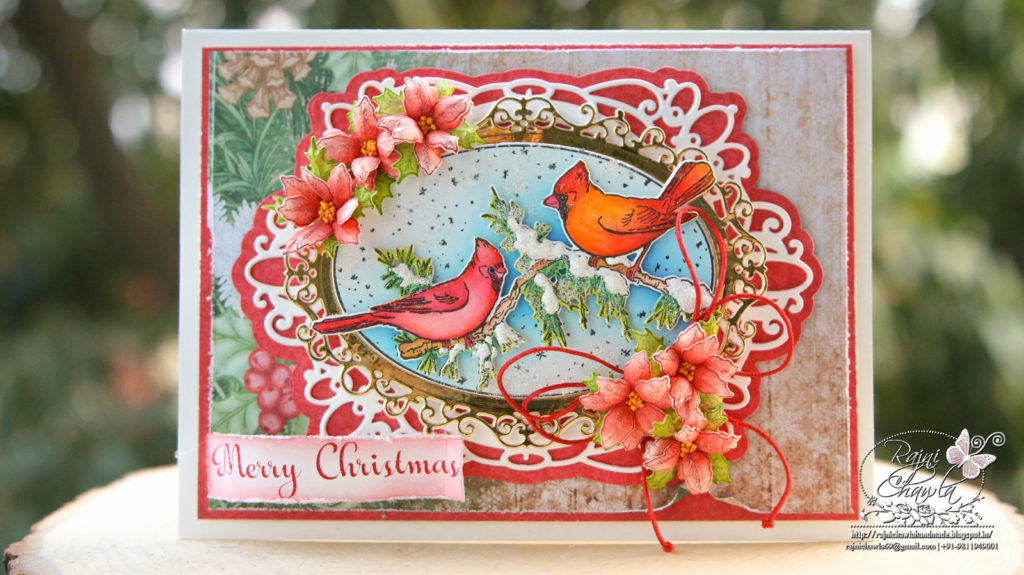
Instructions: The ready top fold card from white card stock measures 7 1/2″ by 5 1/4″. To prepare the card base, cut a smooth white cardstock measuring 7 1/2″ by 10 1/2″. Score the longer side at 5 1/4″. Crease and fold the card neatly. Choose the paper from the designer paper collection and create the first mat, a little smaller to the card base. Distress all the sides using sharp scissors.
Cut 2 die cuts from white cardstock using Majestic Swirl Frames Die and glue them together for extra strength, to create the main focal point for the card.
Cut the shadow die from the same die set from a red color sheet from the designer paper collection and layer it on the base of white die cuts. Next using, Ornate Ovals Die, cut 2 die cuts, one from white and one from gold Luxe cardstock. Glue both the die-cuts together to add some extra strength. Laye r all the die cuts as shown using double-sided tapes.
Stamp two images from Snowy Pine Cardinals Cling Stamp Set, on white cardstock, using black archival ink and color the cardinals and the background separately, using Zig markers, Next cut the painted image using its coordinating die. Layer the cardinals on the background using double-sided tape. To add snowy effects, use adhesive that dries white and sprinkles Rajni Chawla’s Frosting Powder.
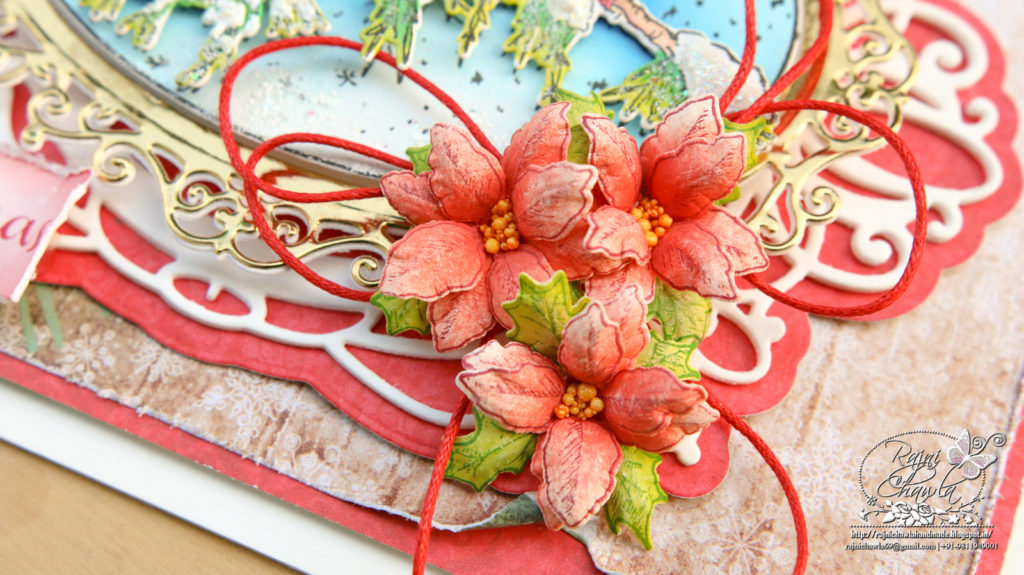
For Poinsettias, stamp the florals from Candlelit Poinsettia Cling Stamp Set, using Archival Ink Plum, and leaves using Olive Green. Cut them using their coordinating dies. Color the flowers using Red Geranium and leaves using Leaf Green. Mist them with water and shape them using Deluxe Flower Shaping Kit. Add prills to the centers.
Once all the elements are ready, assemble the card as shown. Stamp the sentiment from Candlelit Poinsettia Cling Stamp Set using Black Cherry ink pad and finish the card. Add Rajni Chawla’s frosting powder for extra interest.