Good morning all!!
Welcome back to my blog.
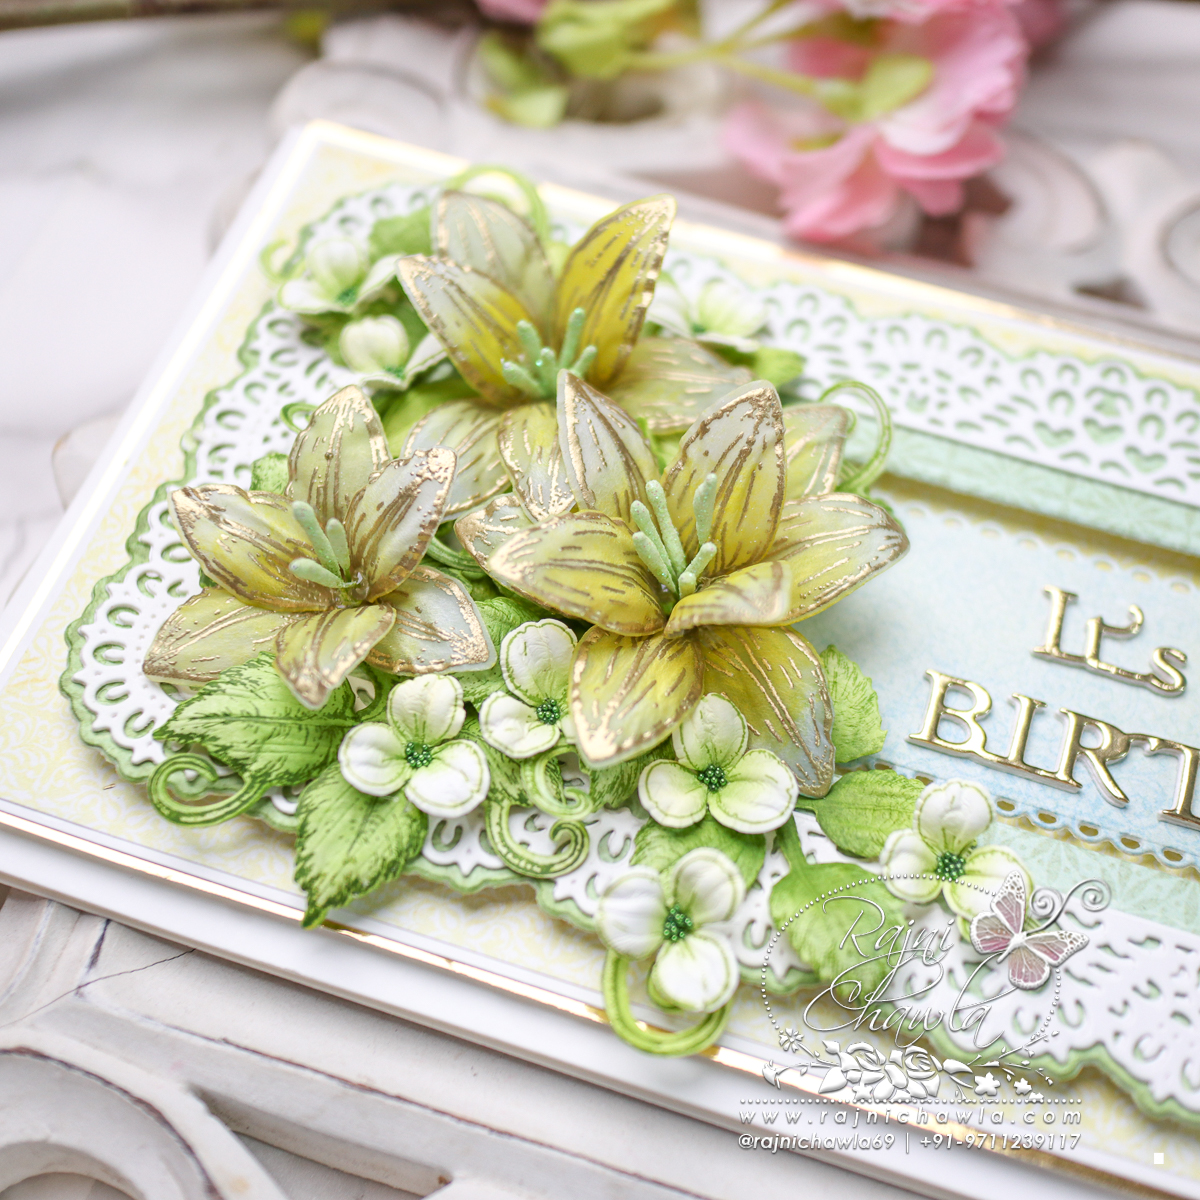
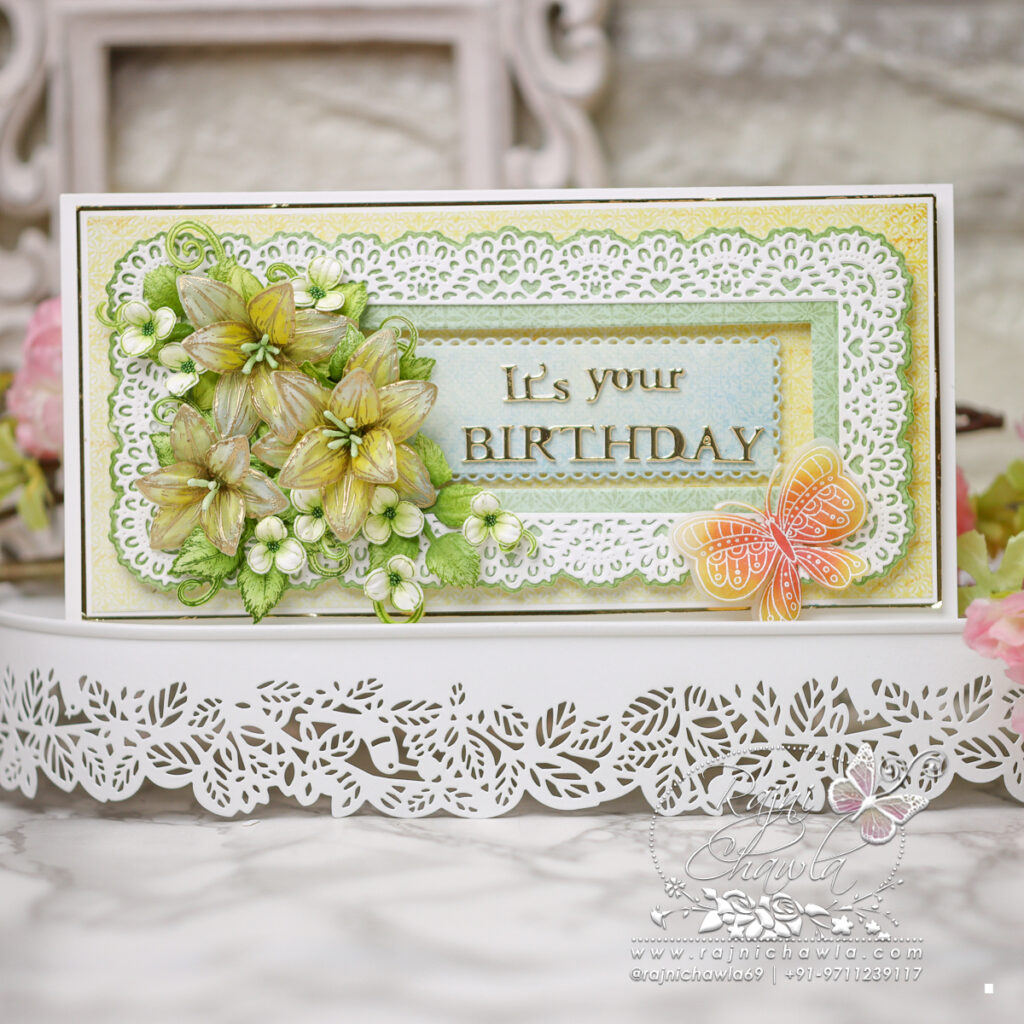
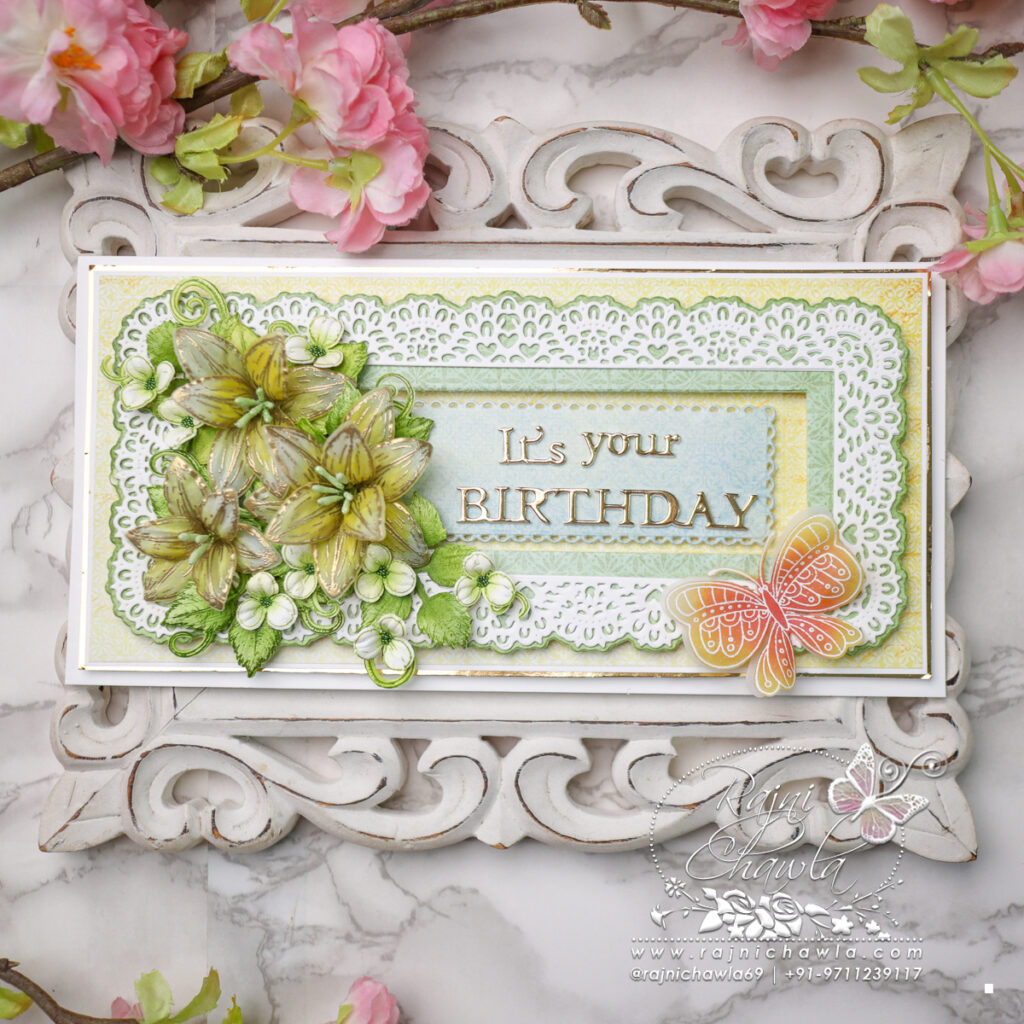
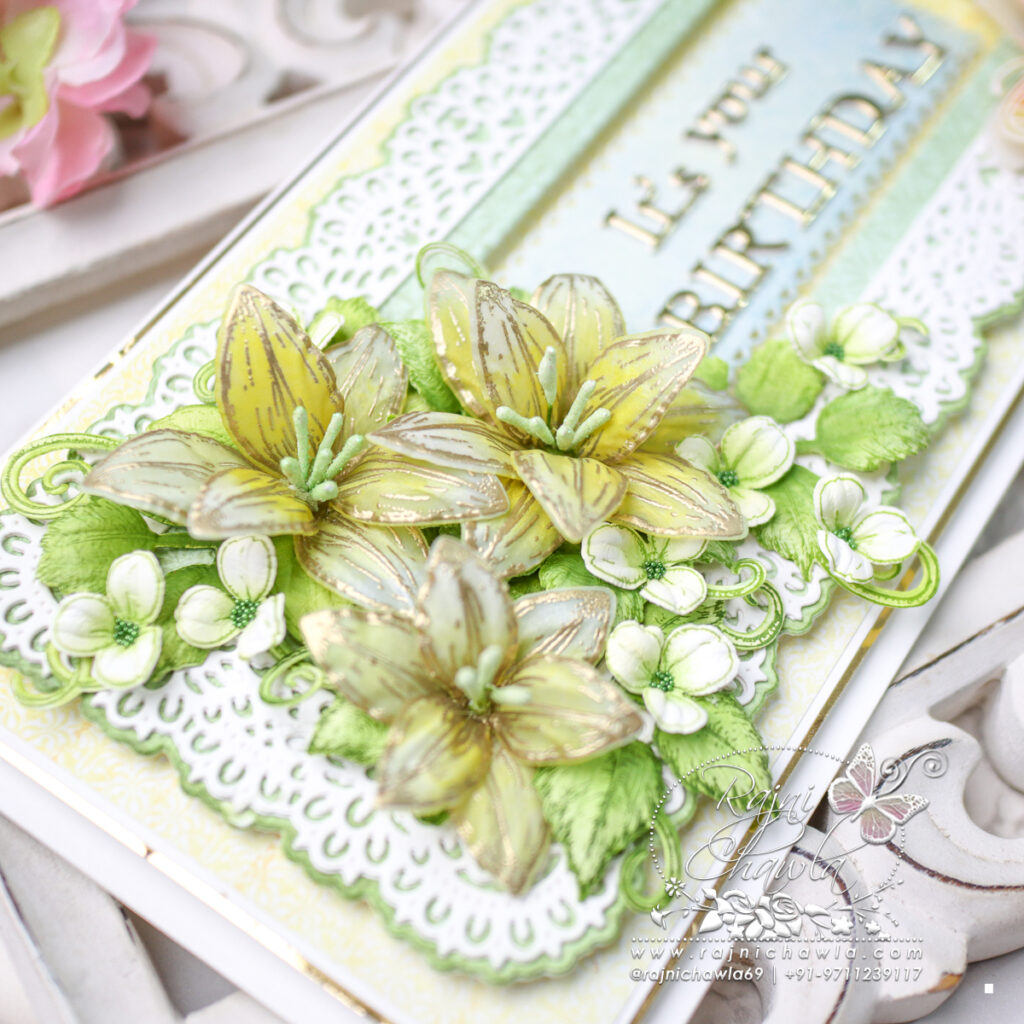
Here is my second inspiration for the day using Slim Decorative Rectangle Dies.

Products from Heartfelt Creations:
HCD1-7439 Garden Lily Die
HCDP1-2147 Garden Lily Paper Collection
HCS1-499 Petite Pollen Stamens – Medium
HCPC-3953 Small Floral Butterfly Cling Stamp Set
HCD1-7354 Small Floral Butterfly Die
HCPC-3911 Wisteria Petals Cling Stamp Set
HCD1-7295 Wisteria Petals Die
HCD1-7193 Leafy Accents Die
HCPC-3835 Leafy Accents Cling Stamp Set
HCGP1-488 Luxe Gold Cardstock
HCPP1-475 Deluxe Flower Shaping Paper Pack of 50 – White
HCST1-401 Deluxe Flower Shaping Kit
RACP482 Ranger Archival Ink Pad – Olive
RACP436 Ranger Archival Ink Pad – Leaf Green
RACP468 Ranger Archival Ink Pad – Jet Black
Other Products Used: Die Cutting Machine, Score Board, Bone Folder, Smooth White Cardstock, Scissors, Smooth White Cardstock, Double Sided Tape, Flower Seeds, Glossy Accent, Tacky Glue, Hero Arts White Pigment Ink. Funnel Tray, Versamark Ink, Distress oxide Wild Honey, Fired Brick, and Heat Gun
Instructions: The ready top-fold slimline card from smooth cardstock measures 9 1/2″ by 4 1/2″. To prepare the card base, cut the paper measuring 9 1/2″ by 9 ” and score at 4 1/2″ on 9″ length and crease well.
For the card front, choose the pattern paper from the Garden Lily collection and cut measuring 9″ by 4″ and frame it with a panel cut from Luxe Gold cardstock, creating a delicate border of 1/16″ on all four sides. Layer the panel on the ready card front using dimensional tapes.
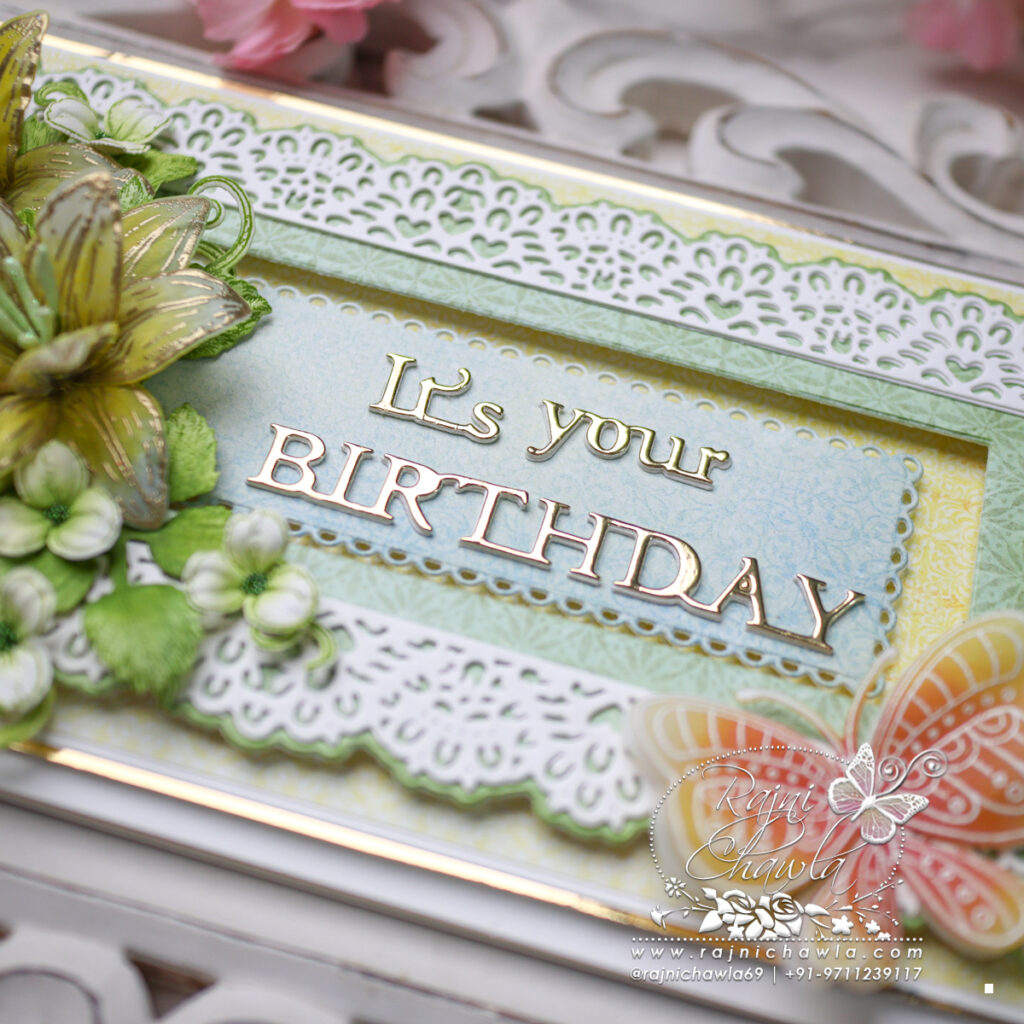
To decorate the card front, choose the paper from the designer paper collection and cut a window frame using the dies from the HCD3-7449 Slim Eyelet Heart Rectangle Die. Next, cut a white lacy frame using the same die set and glue it directly to the solid area of the window frame. Layer this frame on the card front using dimensional tape.
Choose another coordinating paper and cut the smaller eyelet banner that fits inside the window, using the same die set. Also, cut the sentiment twice in white and once with Luxe gold cardstock. Stack all the words from the sentiments together keeping the gold on the top. Glue this sentiment on the smaller banner strip a little on the right-hand corner leaving enough space for the floral bouquet on the left side.
For yellow-golden vellum Lilies, Stamp the flowers on Vellum Flowerette cardstock using Hero Arts Versamark ink and sprinkle golden heat embossing powder. Dust extras in the funnel tray and heat set the flower petals. Cut the petals using its coordinating die. Color the petals using Mustard Seed distress Oxide and shape them using flower shaping tools. Form the flowers and prick the center to add Petite Pollen Stamens – Medium. Prepare 1 medium flower of 3 petals and 2 small flowers of 2 petals each. Also, white heat emboss the butterfly from Small Floral Butterfly Cling Stamp Set in the same way and cut it using its coordinating die. Color it using Wild Honey and Fired Brick Distress Oxide. Shape the butterfly a little with a needle tool for extra dimensions.
Stamp, color, and cut a few Wisteria flowers using Orange Blossom Archival ink, color them in the center using the same ink and shape them using a flower shaping kit. Add flower beads using a glossy accent and use these flowers as fillers.
Stamp 2 sets of leaves using Leafy Accent stamp and Olive Green Archival ink and cut them using its coordinating die. Color the leaves using the same inks and shape them using a deluxe flower shaping kit. Once, all the elements are ready, assemble the card as shown.