


Good Morning Friends…
It’s time again for new release. Heartfelt Creations has launched another Chrismas collection, Merry and Bright, for the year 2018.
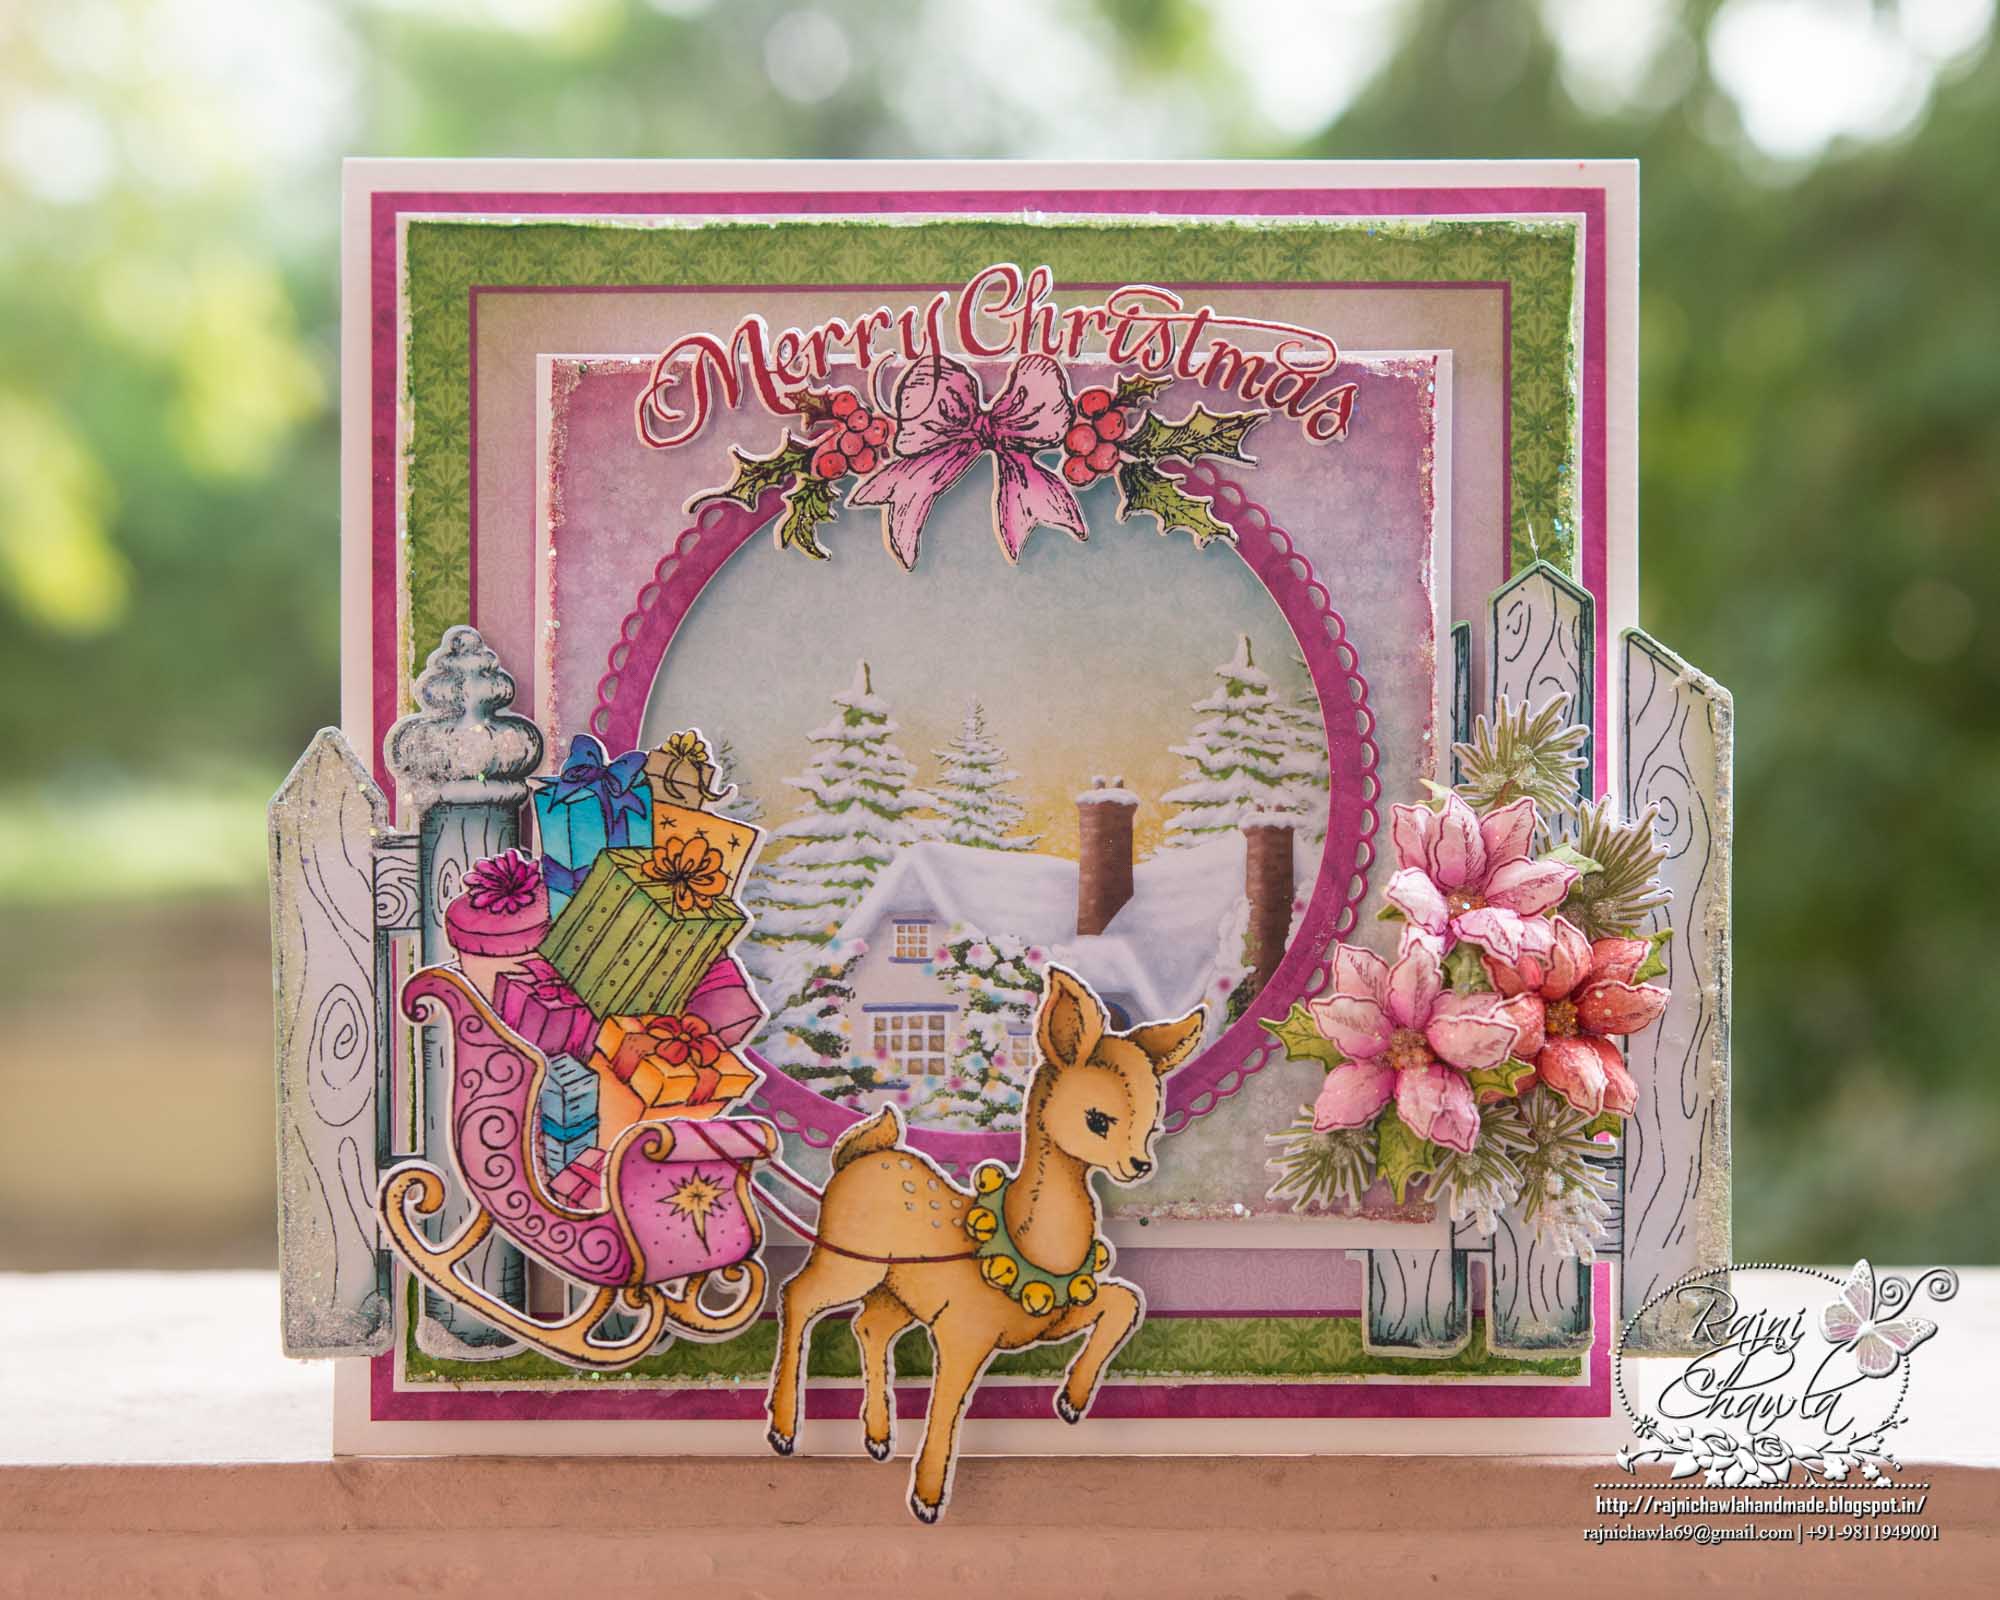
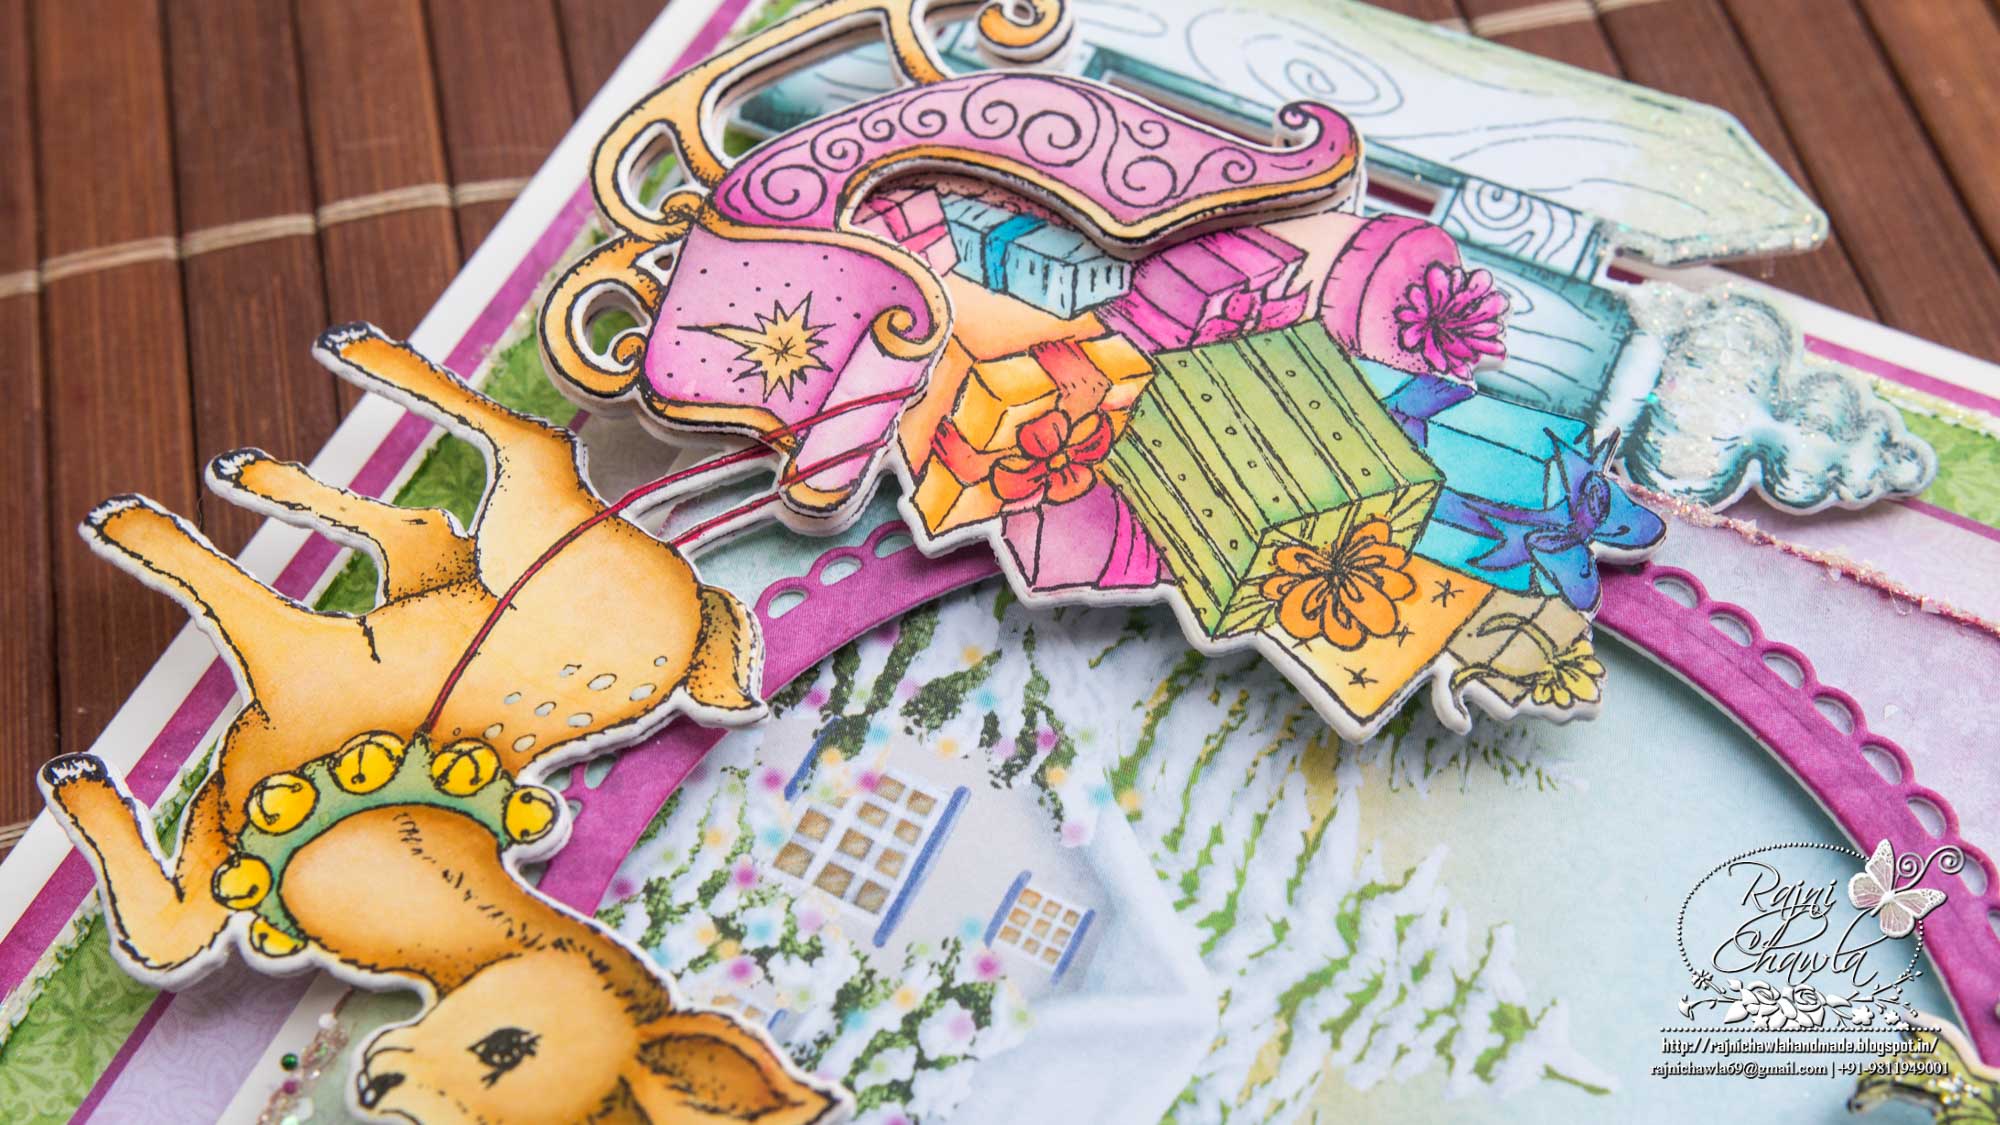
Glistening winter scenes filled with freshly fallen snow, pine boughs draped with shiny holiday ornaments, and prancing reindeer delivering sleighs filled with handpicked gifts for friends and loved ones are delightful imaginings that send our imaginations dancing with delight in the anticipation of the holiday season! Spread a little Christmas joy and happiness featuring these warmhearted inspirations with the new Merry and Bright Collection from Heartfelt Creations! Share cheerful Yuletide greetings and well wishes with a fun and cutesy paper collection overflowing with precious outdoor scenes of cozy snow laden cottages, beautiful birds nestled in delightfully decorated pines, and pleasing decorative holiday arrangements! Brimming with delicate snowflake accents, gorgeous floral clusters, charming polka dots and beautiful brocade patterns all encompassed in a non-traditional color palette of frosty blues, tantalizing teals, magnificent purples, and pretty pinks, this paper collection is one that will surely have your holiday projects standing out from all the others received this holiday season! A sweet and desirable assembling of cling stamp sets paired with the coordinating dies culminates a perfect assortment of illustrations including beautiful evergreen groves, rustic snow-covered foliage accents, diminutive Christmas baubles and an elegant vase ideal for assembling your own decorative centerpieces! The perfect accents for creating delightful holiday-themed dimensional embellishments for all of your Yuletide projects.
PS: To show the layering details. I have to click the card upside down.
Supplies from Heartfelt Creations:
HCD1-7194 Merry Little Christmas Die
HCPC-3836 Merry Little Christmas Cling Stamp Set
HCD1-7196 Merry and Bright Accents Die
HCPC-3838 Merry and Bright Accents Cling Stamp Set
HCDP1-293 Merry and Bright Paper Collection
HCD1-7186 Silent Night Scroll Die
HCPC-3833 Silent Night Scroll Cling Stamp Set
HCD1-7105 Festive Gate Die
HCPC-3746 Festive Gate Cling Stamp Set
HCD1-7176 Poinsettia & Holly Clusters Die
HCPC-3822 Poinsettia & Holly Clusters Cling Stamp Set
HCFB1-463 3D Poinsettia Shaping Mold
HCD1-7154 Eyelet Circle & Basics Small Die
RACP499 Ranger Archival Ink Pad – Plum
RACP436 Ranger Archival Ink Pad – Leaf Green
RACP962 Ranger Archival Ink Pad – Fern Green
RACP614 Ranger Archival Ink Pad – Magenta Hue
RACP468 Ranger Archival Ink Pad – Jet Black
RACP461 Ranger Archival Ink Pad – Vermillion
PGM15016 Rajni Chawla’s Frosting Powder
PGM15015 Rajni Chawla’s Crystal Clear
HCDA2-450 Stack and Store Daubers-Pack of 30
ANC818 Go Man Go Prills
159723 Designer Dries Clear Adhesive
HCST1-401 Deluxe Flower Shaping Kit
Other Products Used: Smooth white cardstock, Zig Clean Clear Brush Markers, Foam tapes, Paper distressing tool or a sharp scissors.
Videos Referred: For more tips on creating with the Merry and Bright collection, watch the tutorial at https://youtu.be/6bgO6epBuBI.
For more tips on creating with the flower shaping molds, watch the tutorial at https://www.youtube.com/watch?time_continue=6&v=FSdPL7nXvQE
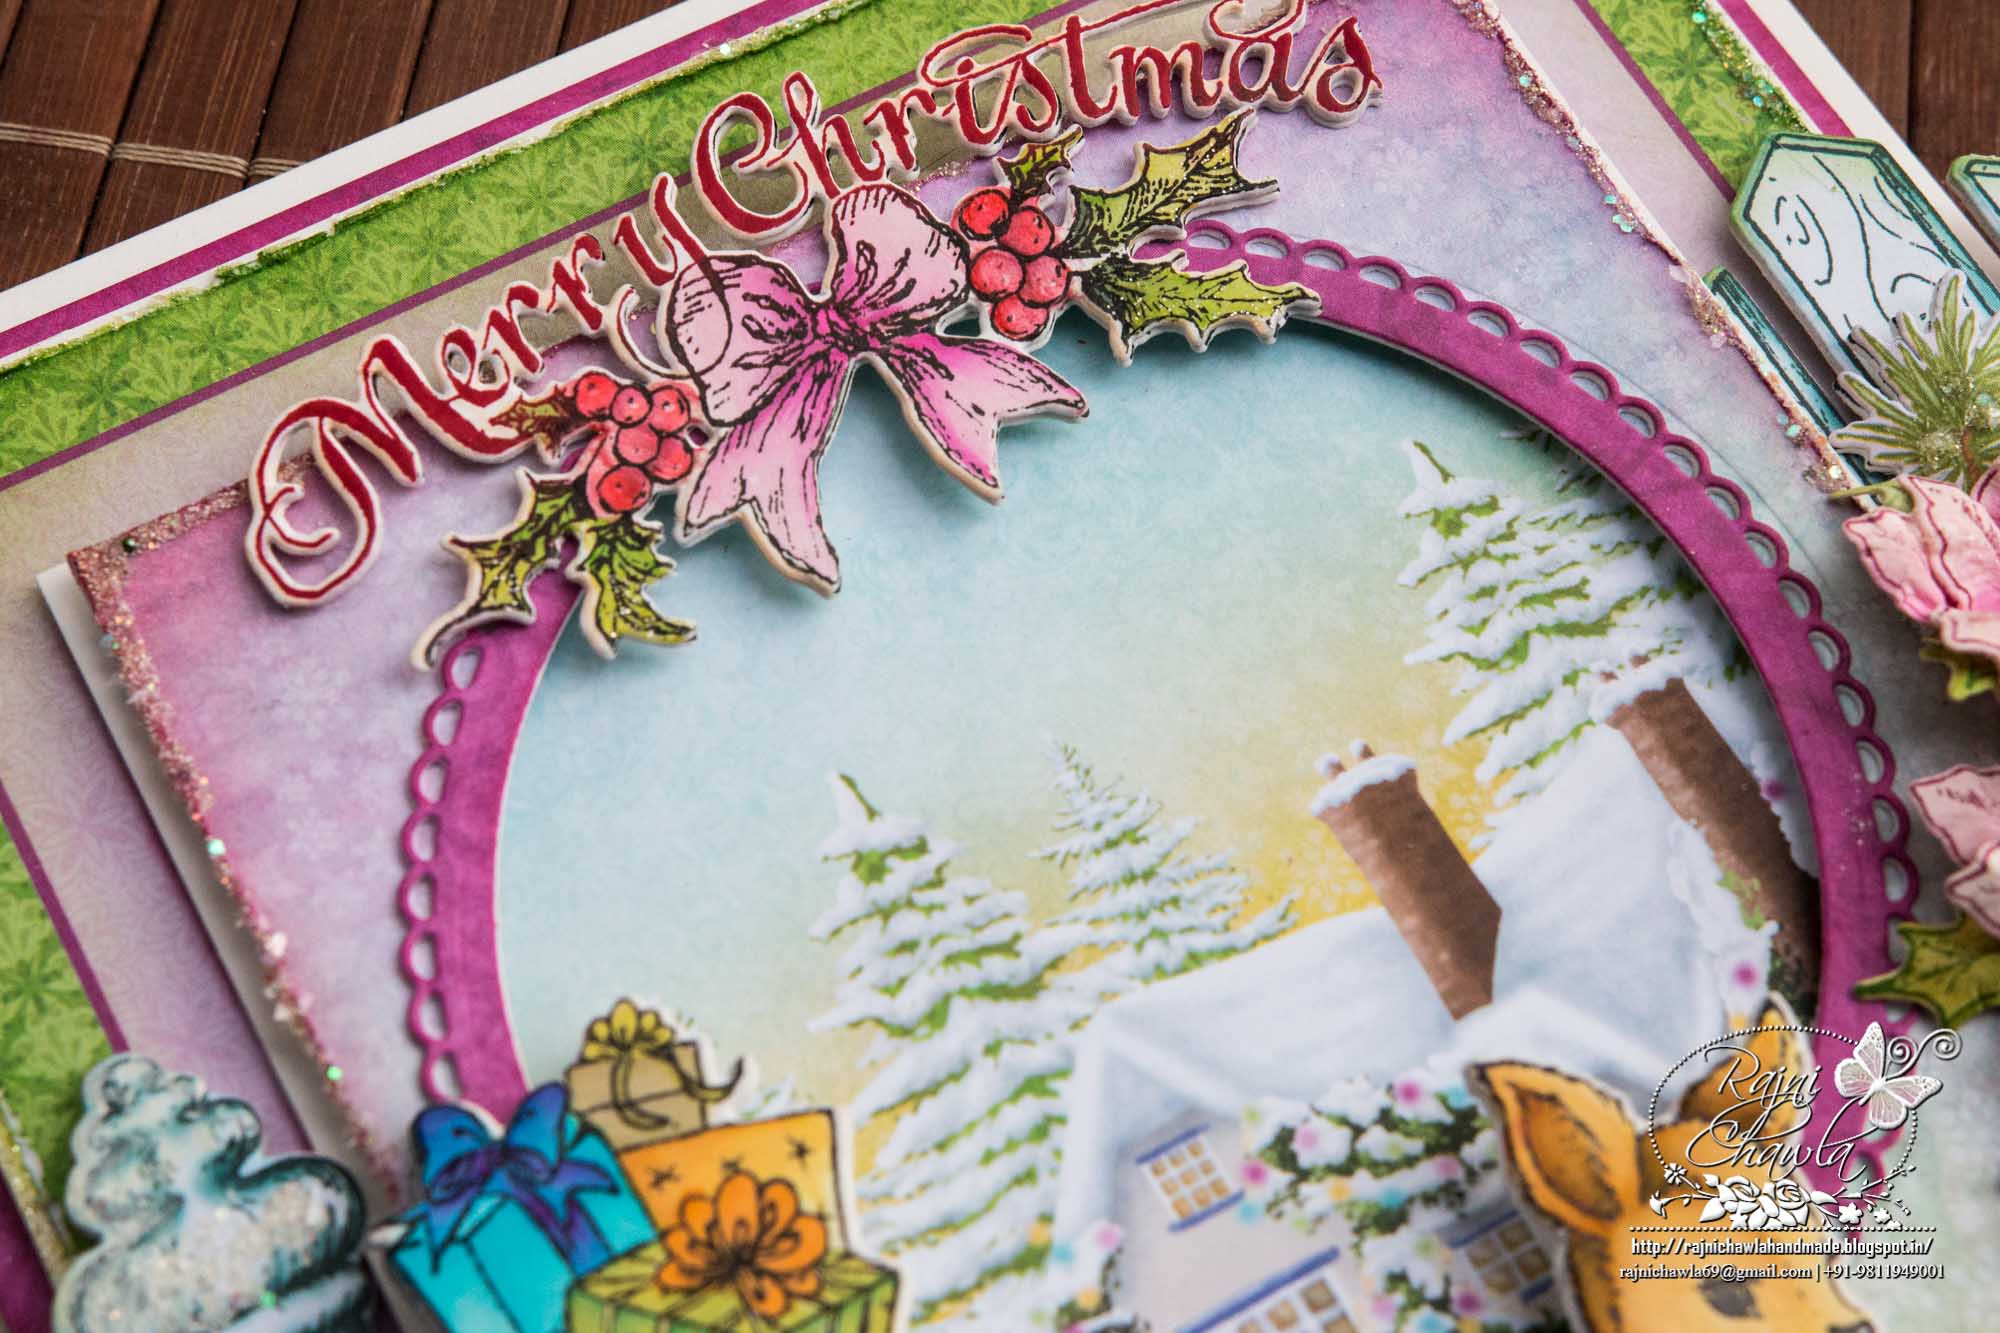
Instructions: To start, create a top fold card using smooth white cardstock that measures, 7″ by 7″. For the top panel, choose a 6″ by 6″ card base from the designer paper collection. Cut apart the center panel with the help of a paper cutter and distress all the sides with a paper distressing tool or sharp scissors. With the help of Eyelet Circle & Basics, Small Die cut the center window. Place a scenic paper from the collection behind the window. Layer the panel on a white cardstock, 1/16th of an inch larger on all sides. Also cut a frame using from a dark pink paper by stacking outer 2 dies from Eyelet Circle & Basics Small Die set. Adhere this frame around the window. Create another mat using left out a piece of 6″ by 6″ panel, distress the edges and layer it on a white cardstock. Further layer the panel on the final layer of dark pink cardstock. All the layers are larger by 1/16th”.
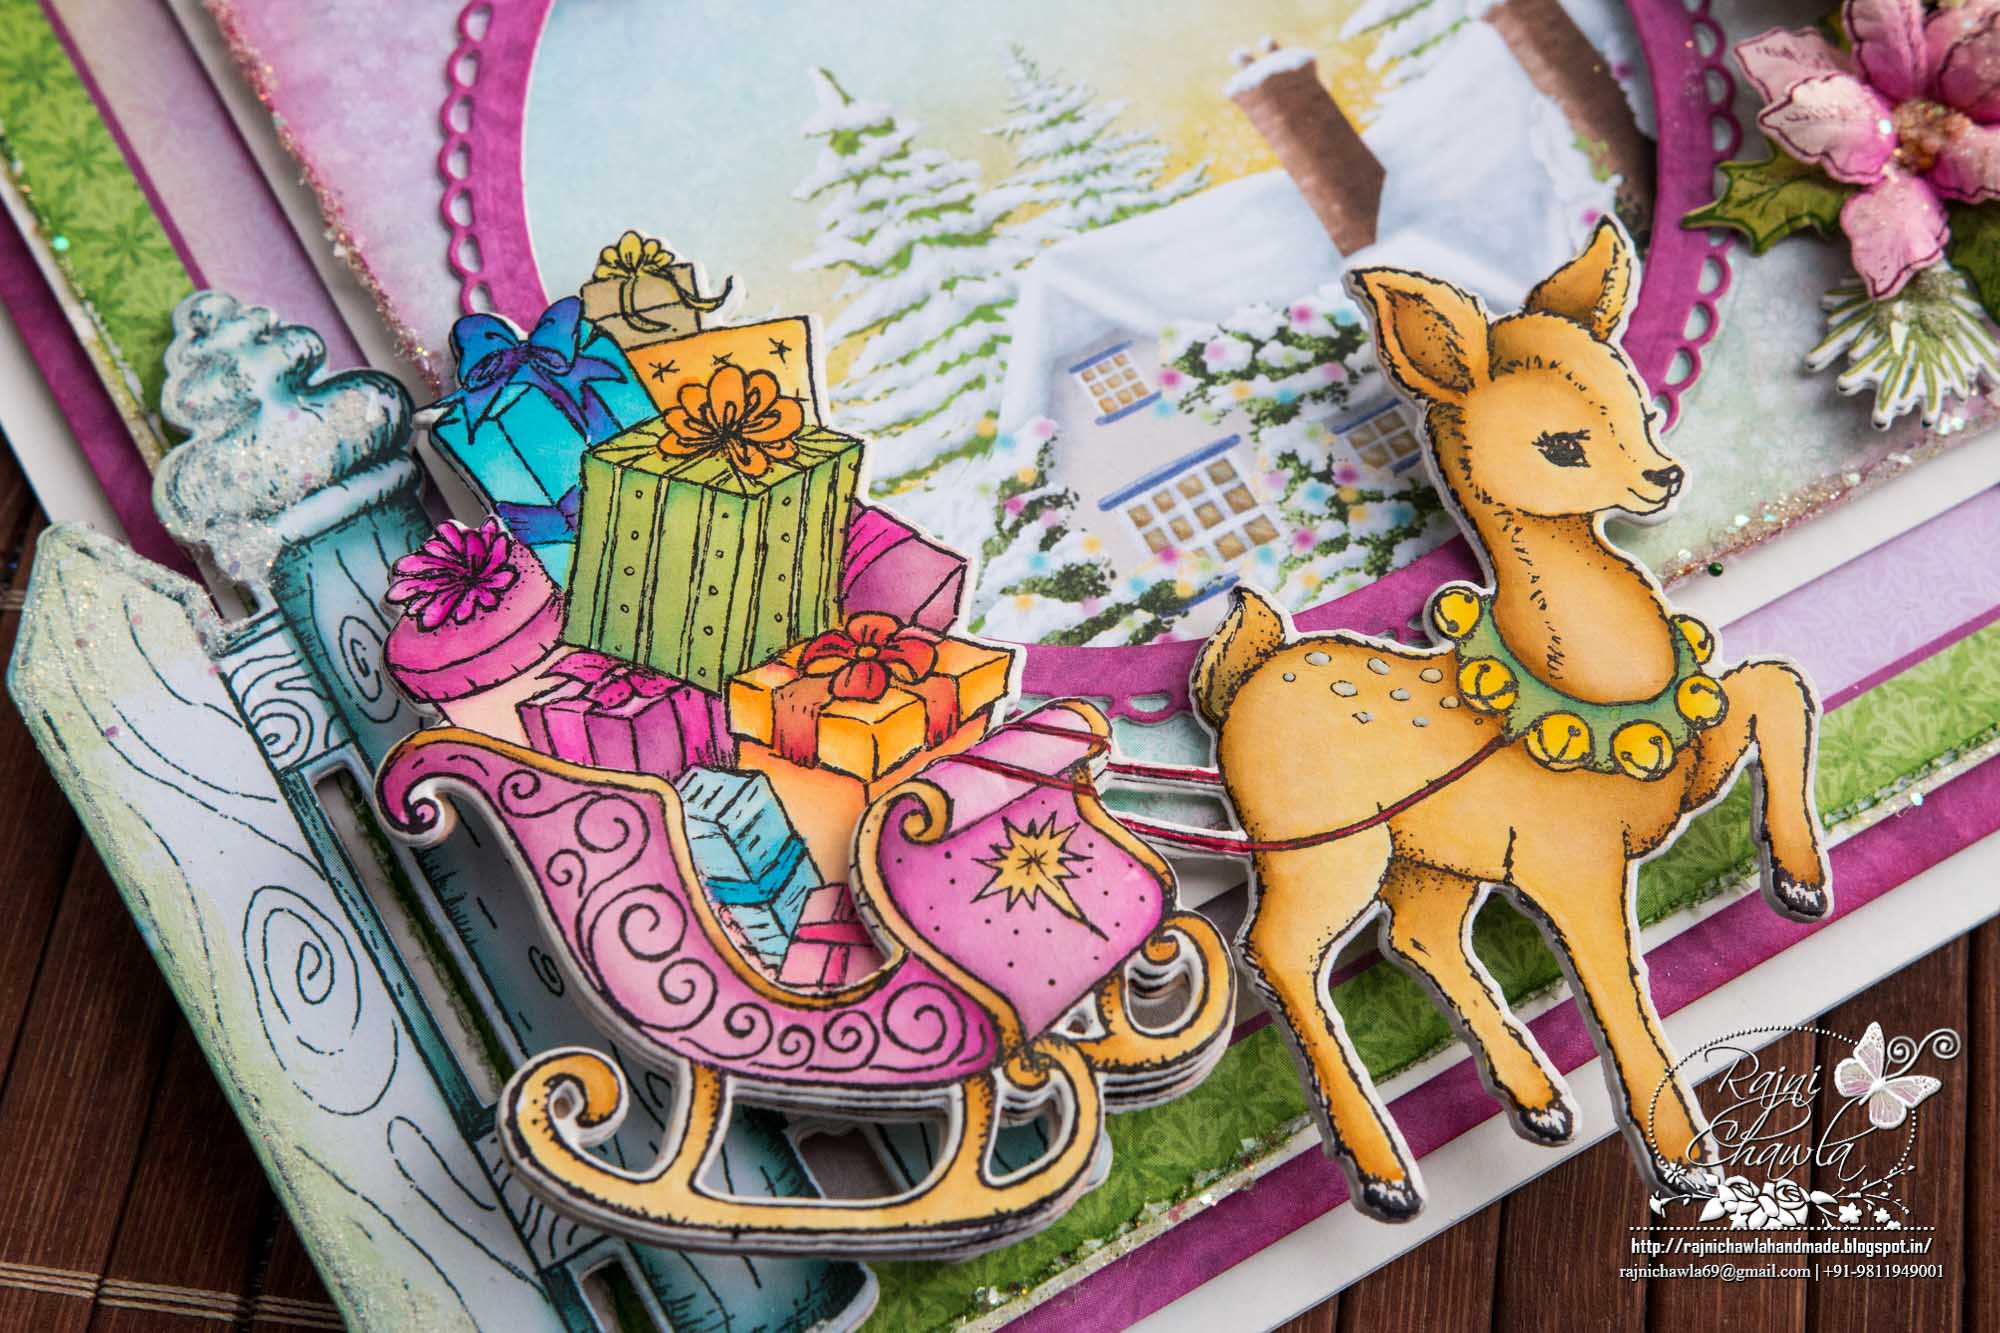
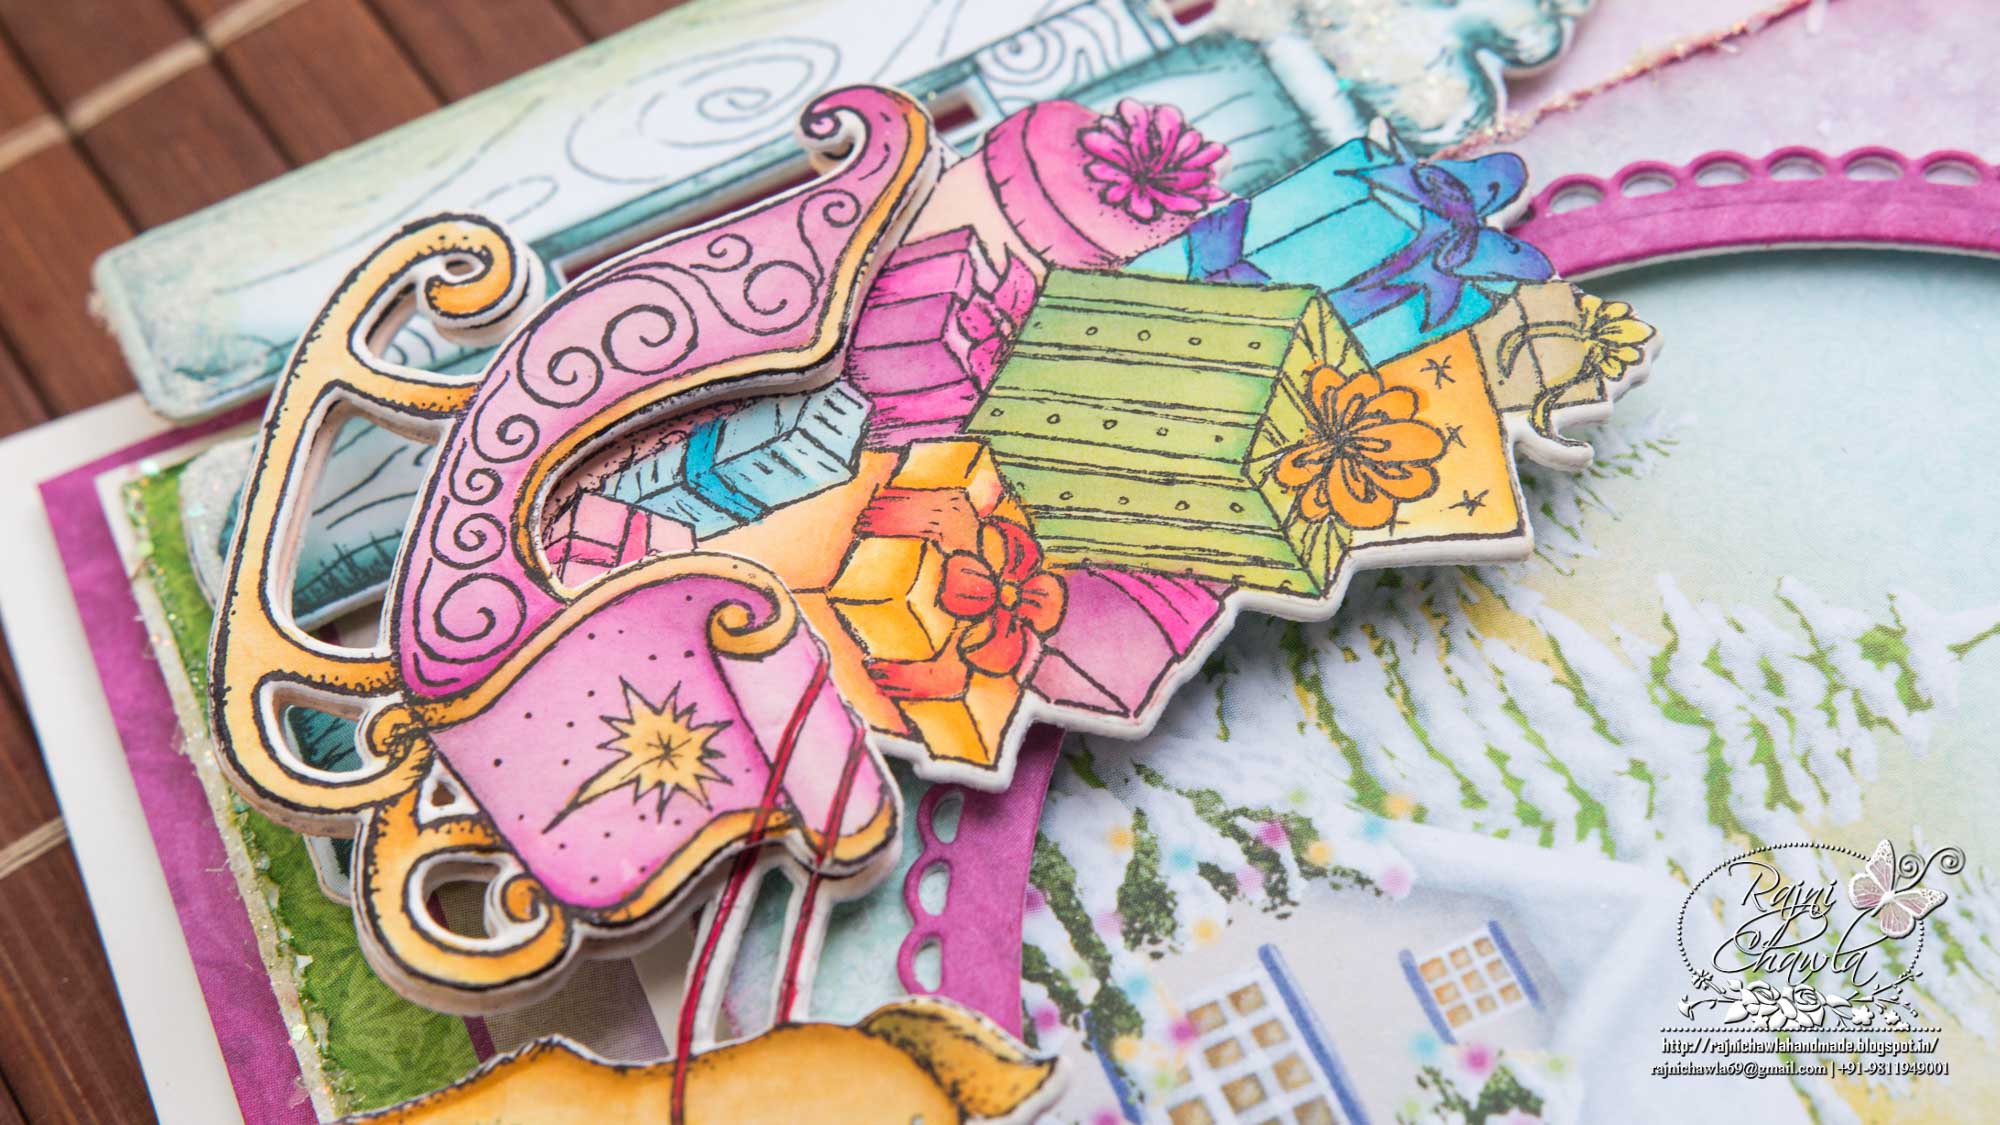
Stamp two images from Merry Little Christmas Cling Stamp Set with black archival ink and color the images with Zig Markers. To create the dimensional image, the images are colored partially. Stack few extra die cuts behind the image to give more dimensions and sturdiness to the element. Also, stamp and cut images from Silent Night Scroll Cling Stamp Set and Festive Gate Stamp Set and color them using Zig Markers.
For Poinsettias, stamp the images from Poinsettia & Holly Clusters Cling Stamp Set, using Plum Archival, color them using Magenta Hue and Vermillion and cut them using their coordinating dies. Once cut and painted, shape them using Poinsettia Shaping Mold and add prills to their centers. The pine leaves are stamped with Archival Fern Green and painted with Leaf Green archival ink. Once all the elements are ready assemble the card as shown and glitter the edges randomly to add an extra accent to the card.
Another absolutely gorgeous creation Rajni! Love it!
Absolutely gorgeous!
Another beautiful card!!