Good Morning Friends!!
Once again it’s that time of the month when we designers at Heartfelt Creations showcase their newest launch. If you love making handmade flowers, Hollyhock Garden Collection is definitely for you. I have two cards to showcase in two separate blog posts, today. You can find one card here.

List of Supplies from Heartfelt Creations:
HCD1-7417 Hollyhock Petals & Leaves Die
HCD1-7418 Hollyhock Stem & Blooms Die
HCD1-7419 Hollyhock Fence Die
HCPC-3999 Hollyhock Petals & Leaves Cling Stamp Set
HCPC-31000 Hollyhock Stem & Blooms Cling Stamp Set
HCPC-31001 Hollyhock Fence Cling Stamp Set
HCDP1-2143 Hollyhock Garden Paper Collection
HCFB1-5012 3D Hollyhock Shaping Mold
HCD2-7384 Fancy Classic Rectangle Frame Die
HCD2-7381 Fancy Classic Oval Frame Die
HCGP1-488 Luxe Gold Cardstock
HCPP1-475 Deluxe Flower Shaping Paper Pack of 50 – White
HCST1-401 Deluxe Flower Shaping Kit
3D1844 3-D Crystal Lacquer 4 oz
RACP482 Ranger Archival Ink Pad – Olive
RACP663 Ranger Archival Ink Pad – Tea Rose
RACP436 Ranger Archival Ink Pad – Leaf Green
RACP993 Ranger Archival Ink Pad – Red Geranium
HCPC-3847 Celebrate Love Sentiments Cling Stamp Set
Other Supplies Used: Smooth White Cardstock, Funnel Tray, Die Cutting Machine, Score Board, Paper Trimmer, Tweezers, Glossy Accent
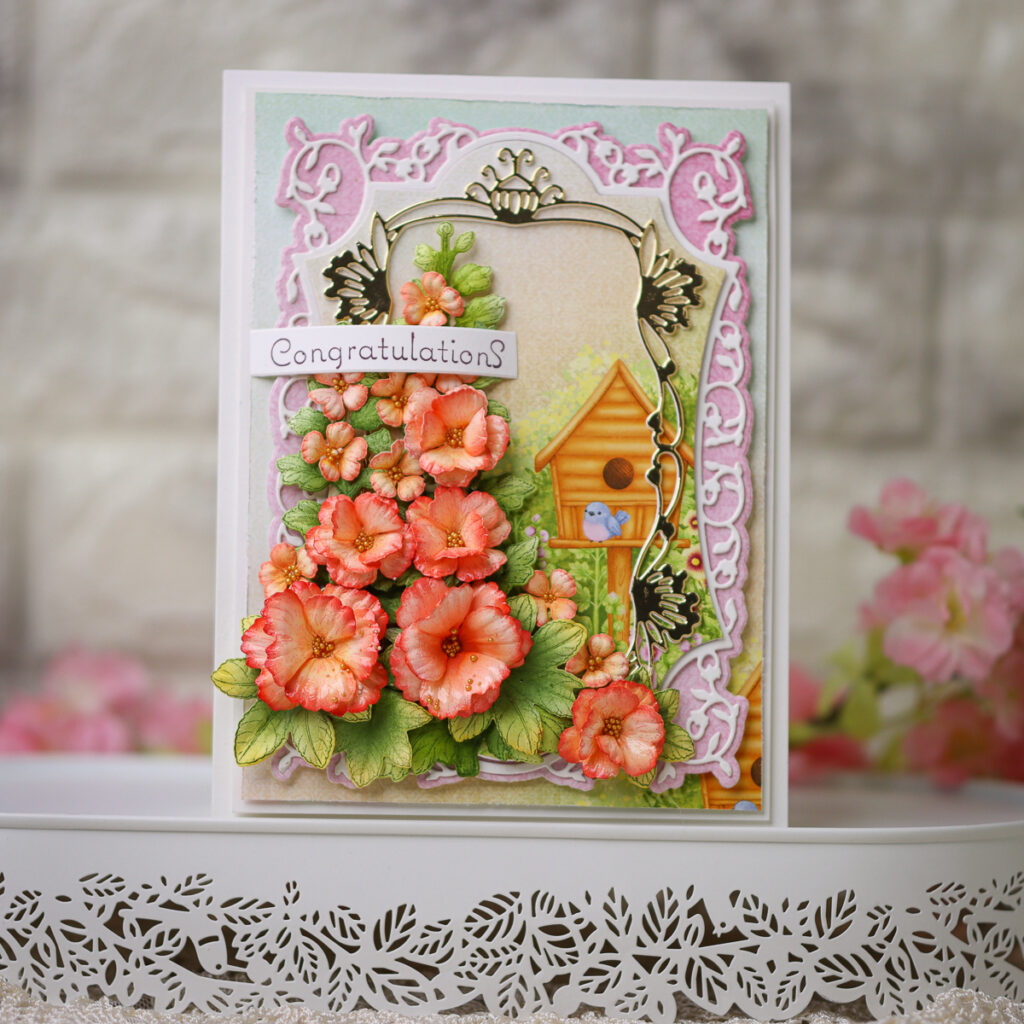
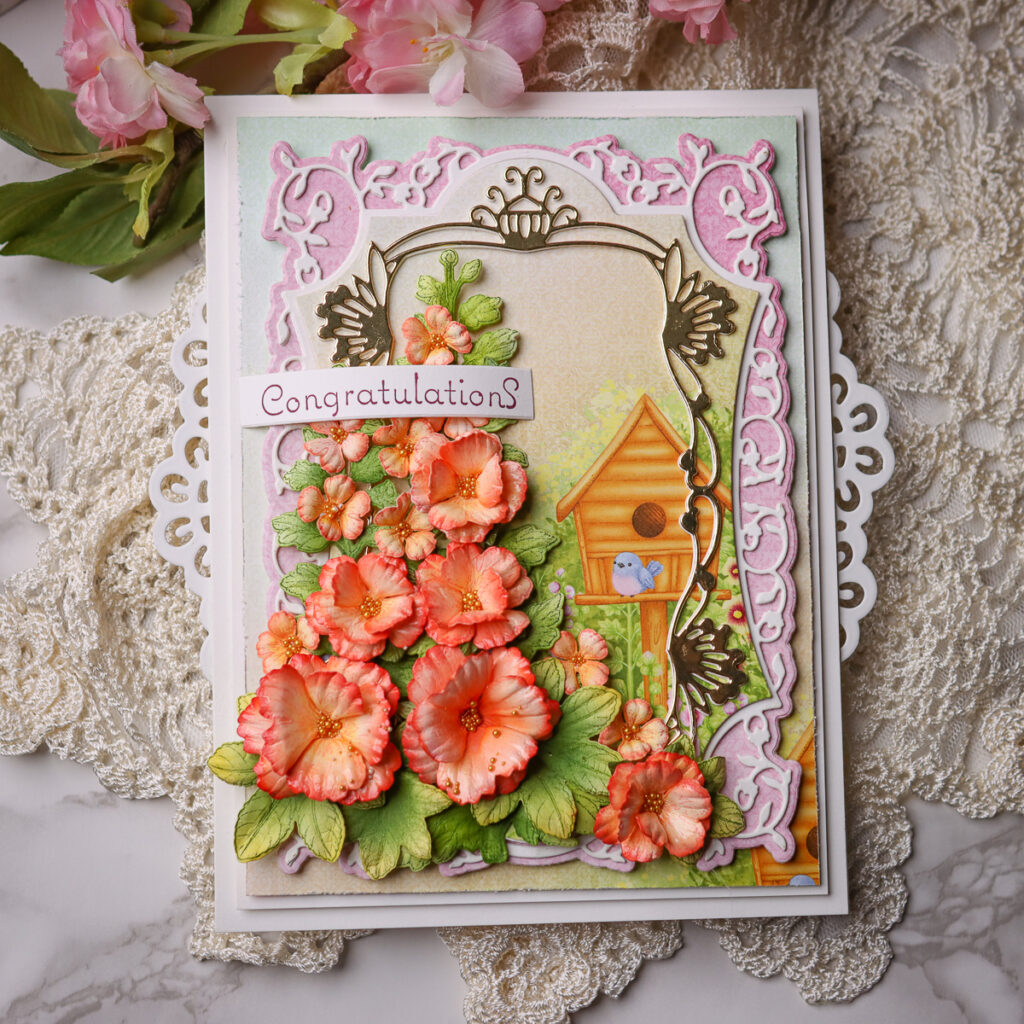
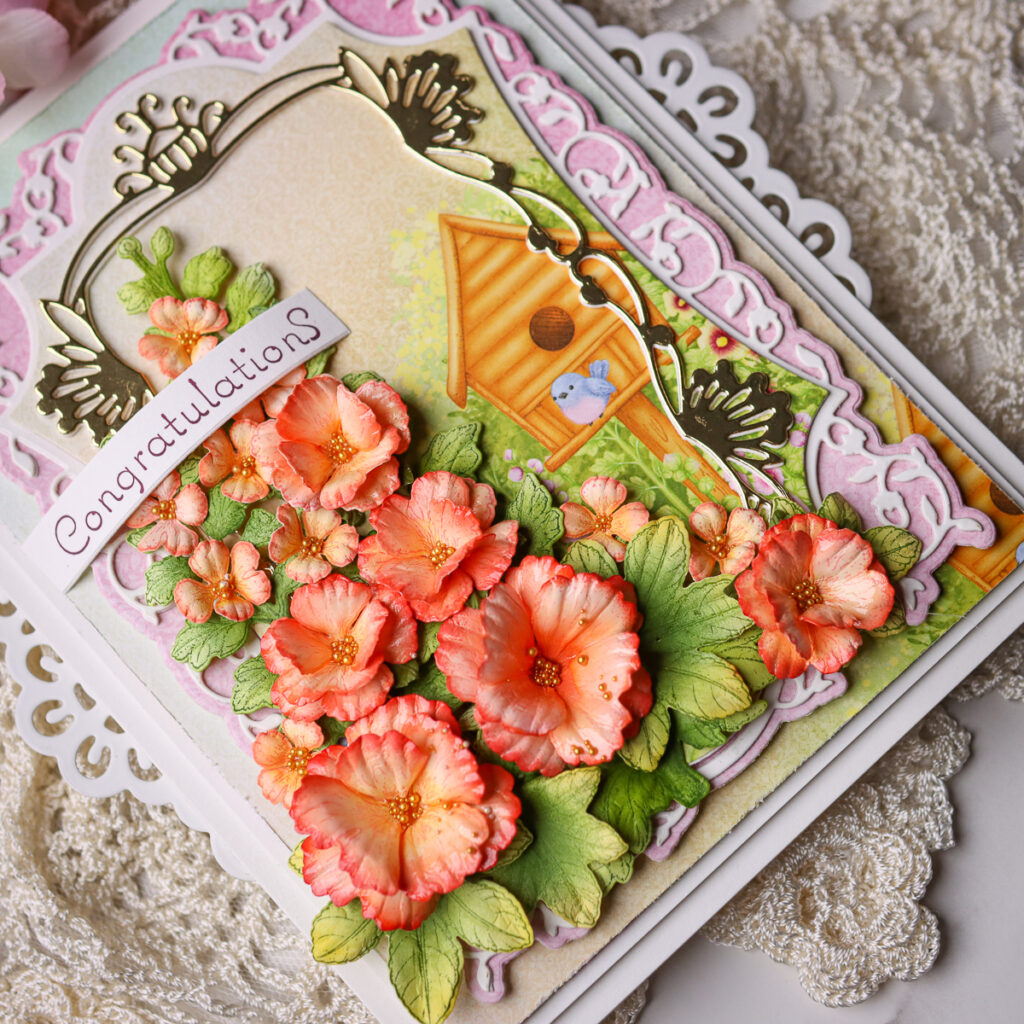
The ready side-fold card measures, 6″ by 8″. Cut a smooth white cardstock measuring 12″ by 8″ and score it at 6″ on the longer side. Crease and score it well using a bone folder.
Choose a pattern paper from the designer paper collection and cut measuring 5 1/2″ by 7 1/2″. Mat it on the white cardstock creating a delicate white border of 1/16″ on all sides. Layer the panel on the card base using foam dots.
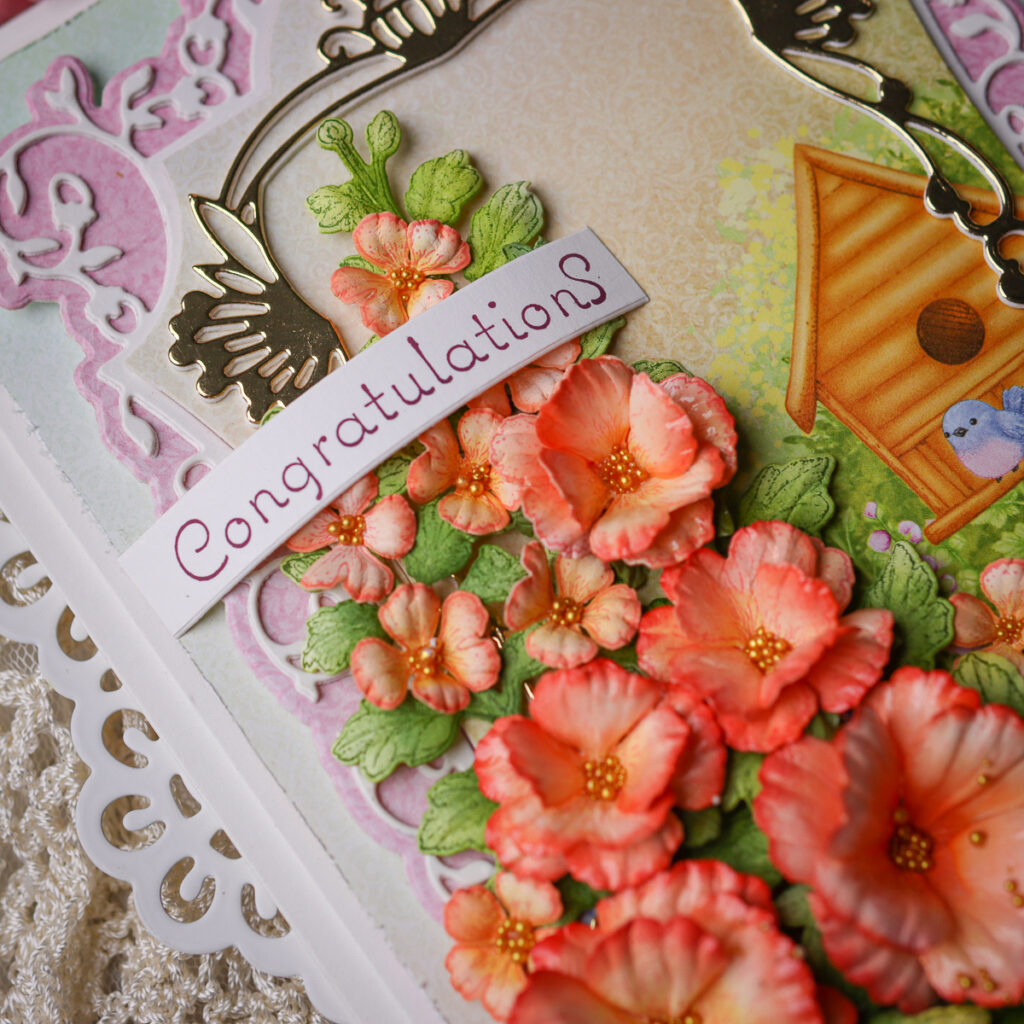
Cut one shadow from white cardstock, and 2 pieces of die-cuts from smooth white cardstock using Fancy Classic Rectangle Frame Die. Stack and glue both die-cut frames together. Next, glue the frames on the ready card panel as shown. Next, choose the paper from the designer’s paper collection and cut the second solid panel. Layer it using foam dots on the card front. Cut the smaller fancy frame in white and gold cardstock and glue them together keeping the gold one on the top.
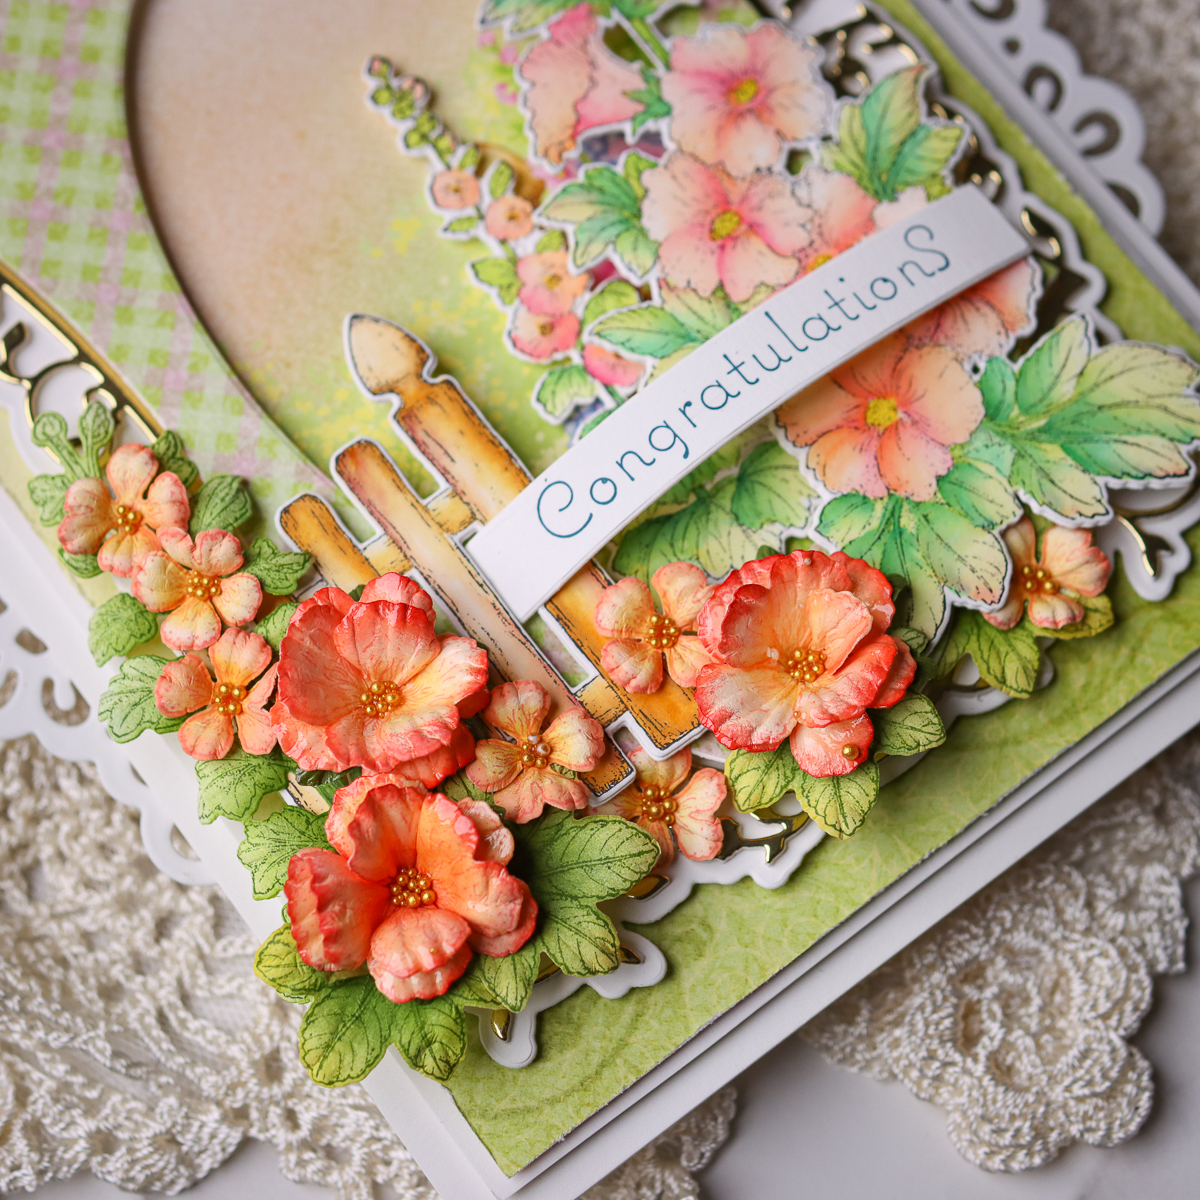
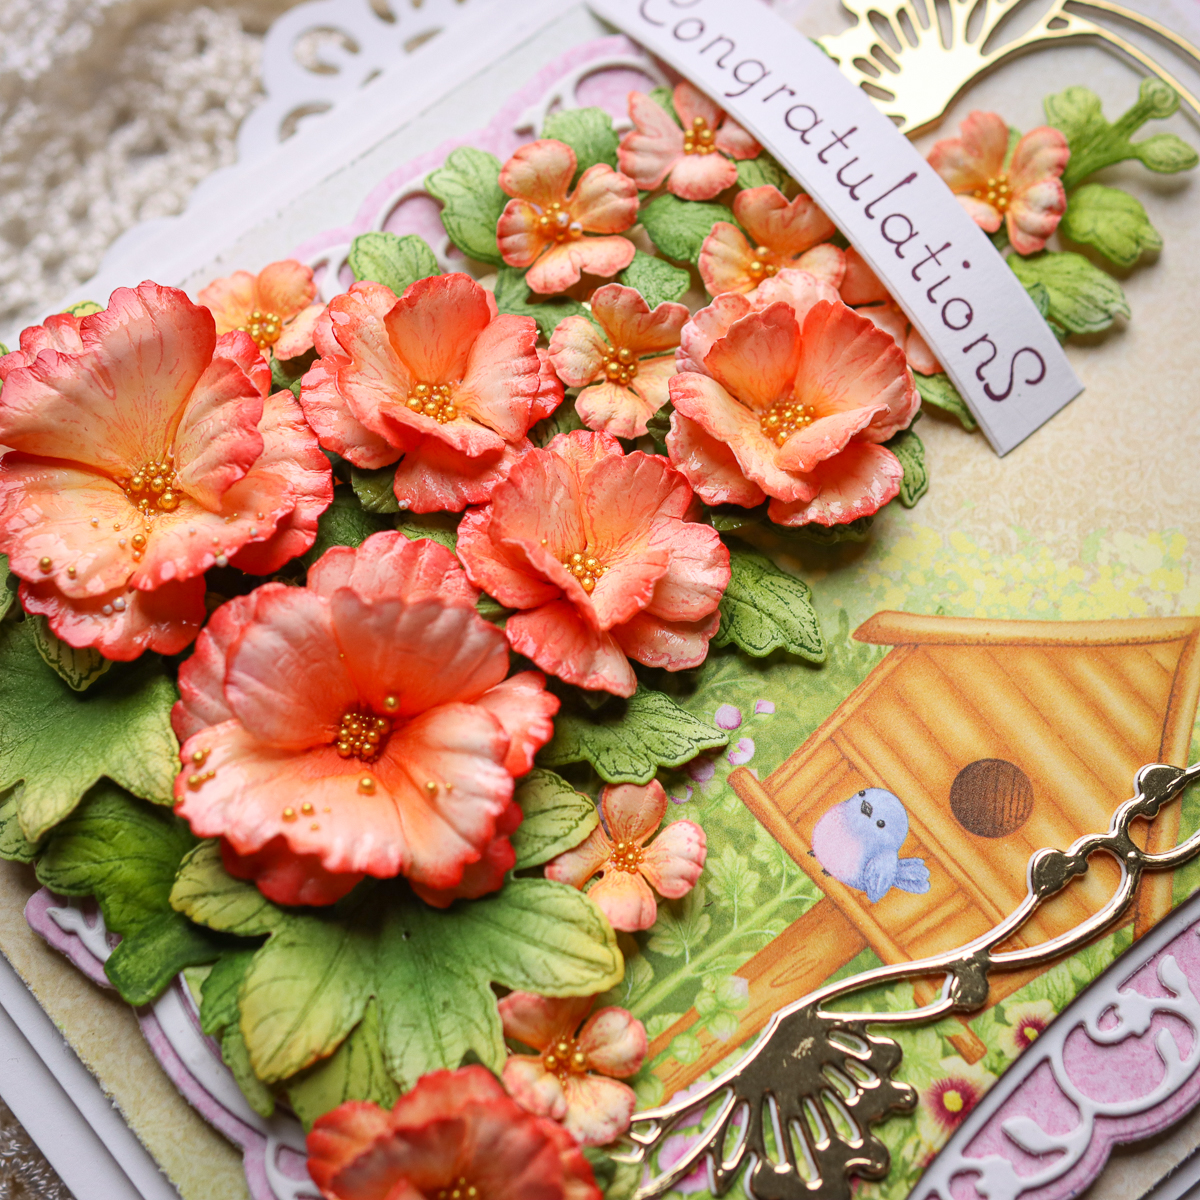
For Hollyhock flowers, stamp a couple of medium and small flowers using Tea Rose on flower shaping paper and cut the flowers using its coordinating dies. Color the flowers using the same ink and add highlights using Red Geranium archival ink. Shape the flower using its coordinating mold and then add a few more strokes using the flower shaping kit. Once done, press the centers and add glitter balls. Finally, brush a thin layer of crystal lacquer on the flowers and keep them from drying.
Stamp, color and cut the foliage fromHollyhock Stem & Blooms Cling Stamp Set and color them using Leaf Green and highlight them using Olive green.
Once all the elements are ready, assemble the card as shown and complete it by adding a sentiment from Celebrate Love Sentiment Cling Stamp Set.