Have you been feeling bored with “basic” card making? Looking for a fresh new take on your floral cards? Go from basic to Wow with the New Floral Shoppe Collection! Create stunning shaped cards with the Large Floral Urn, and fill it with a beautiful floral display that will leave your friends awestruck! If you’ve been looking for a new way to create an elegant floral bouquet, look no further than the Floral Shoppe! Regardless of your skill level, your shaped cards will be bursting with florals and beauty, demanding the attention they deserve! Click play now to be inspired to create your very own floral masterpiece!
Here is my first take on this collection.

Products from Heartfelt Creations:
HCD1-7329 Large Floral Urn Die
HCPC-3931 Large Floral Urn Cling Stamp Set
HCD1-7331 Floral Shoppe Fillers Die
HCPC-3933 Floral Shoppe Fillers Cling Stamp Set
HCDP1-2122 Floral Shoppe Paper Collection
HCD1-7257 Wild Aster Die
HCD1-7315 Small Garden Zinnia Die
HCD1-7314 Large Garden Zinnia Die
HCPC-3923 Large Garden Zinnia Cling Stamp Set
HCPC-3924 Small Garden Zinnia Cling Stamp Set
HCD1-7263 Swirly Accent Spray Die
478594 Zig Clean Color Real Brush Markers – 48 Pack
EP100 Opaque Embossing Powder – White
DMCT4185 Groove Golf Tool Set
HCST1-401 Deluxe Flower Shaping Kit
RAHT Heat It Craft Tool
ANC830 Blue Suede Shoes Prills
ANC809 Lemon Chiffon Prills
18002 Rajni Chawla’s Vellum Flowerite – 10 Sheets
HCPP1-468 Deluxe Flower Shaping Paper Pack of 25 – White
RACP005 Ranger Archival Ink Pad – Sunflower
RACP436 Ranger Archival Ink Pad – Leaf Green
RACP482 Ranger Archival Ink Pad – Olive
RACP607 Ranger Archival Ink Pad – French Ultramarine
RACP468 Ranger Archival Ink Pad – Jet Black
Other Products Used: Smooth White Cardstock, Die-cutting machine, Score Board, Sharp Scissors, Antique Linen Distress Oxide, Hero Arts White Pigment Ink, Funnel Tray, Glossy Accent, Double sides tape.
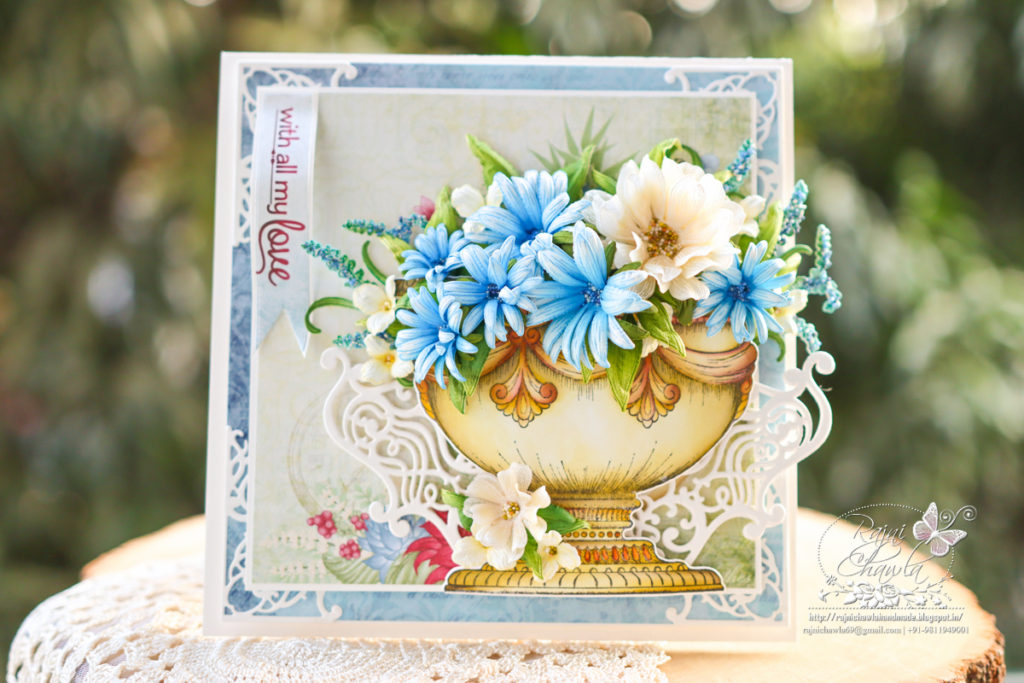
Instructions: The ready top fold card from smooth white cardstock measures, 7″ by 7″ Take one piece of cardstock measuring 7″ by 7 1/2″ and score at half inches, crease the scoreline and burnish. Cut another piece of cardstock measuring 7″ by 7″ and glue it on the creased scoreline to make a top fold card.
To prepare the first layer of the card front, Choose the paper from the Floral Shoppe Paper Collection and cut 6 1/2″ by 6 1/2″. Mat the designer paper on a white piece of cardstock, creating a border of 1/16″ on all the sides. Glue white die-cut corners on all the four corners cut using Swirly Accent Spray Die. Layer the panel on the ready card base as shown.
For the topmost layer, Choose another paper from the same collection and cut measuring 6″ by 6″. Mat the same on the white cardstock, creating a border of 1/16″ on all the sides. Layer the panel on the ready card base.
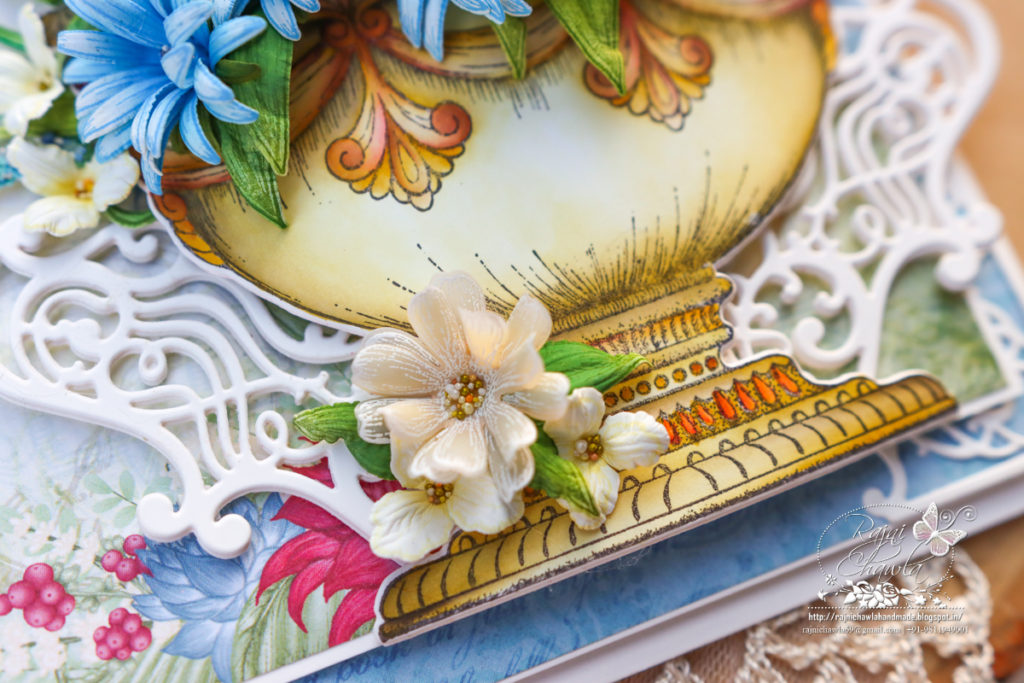
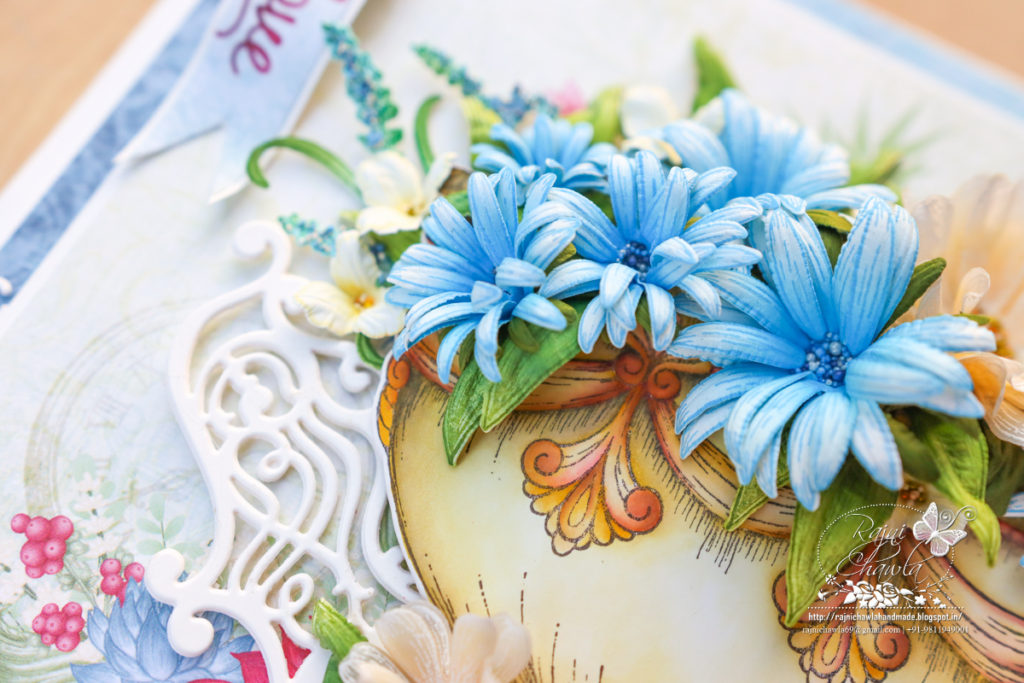
Stamp the Urn from Large Floral Urn Cling Stamp Set using black Archival Ink and cut the image using its coordinating die. Paint the image using Zig Clean Clear Brush Markers. Glue an extra die cut behind the image to add extra strength to the image. Shape the painted Urn with your hands and layer it on the card base as shown. Glue a white die cut from Swirly Accent Spray Die on the bottom of the urn as shown.
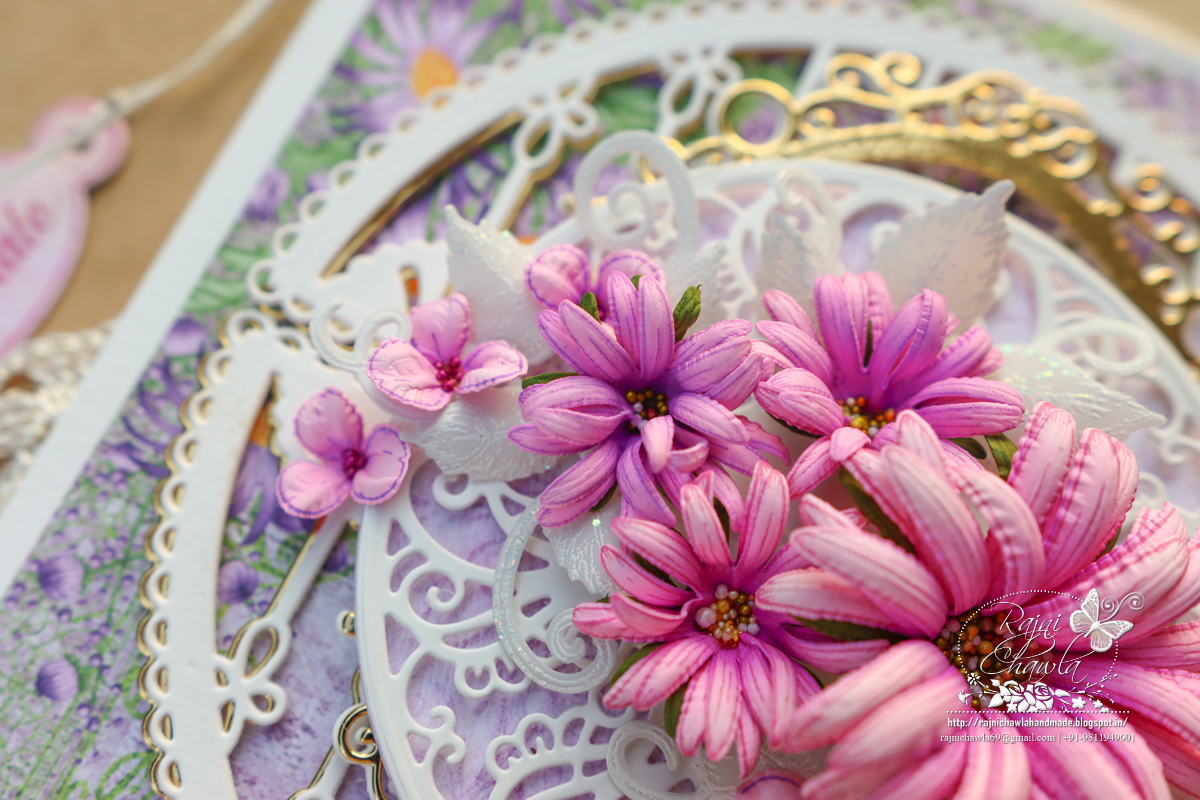
For vellum Zinnias, white heat emboss the smallest 3 petals from the Large Garden Zinnia Stamp set and 2 smallest petals from the Small Garden Zinnia Stamp set and cut them using their coordinating die set. Color the Zinnias using Antique Linen Distress Oxide and shape them using a needle tool. glue the petals to form one large and one small Zinnia flower. Put a drop of Glossy Accent to the flower center and add prills to complete the Zinnias.
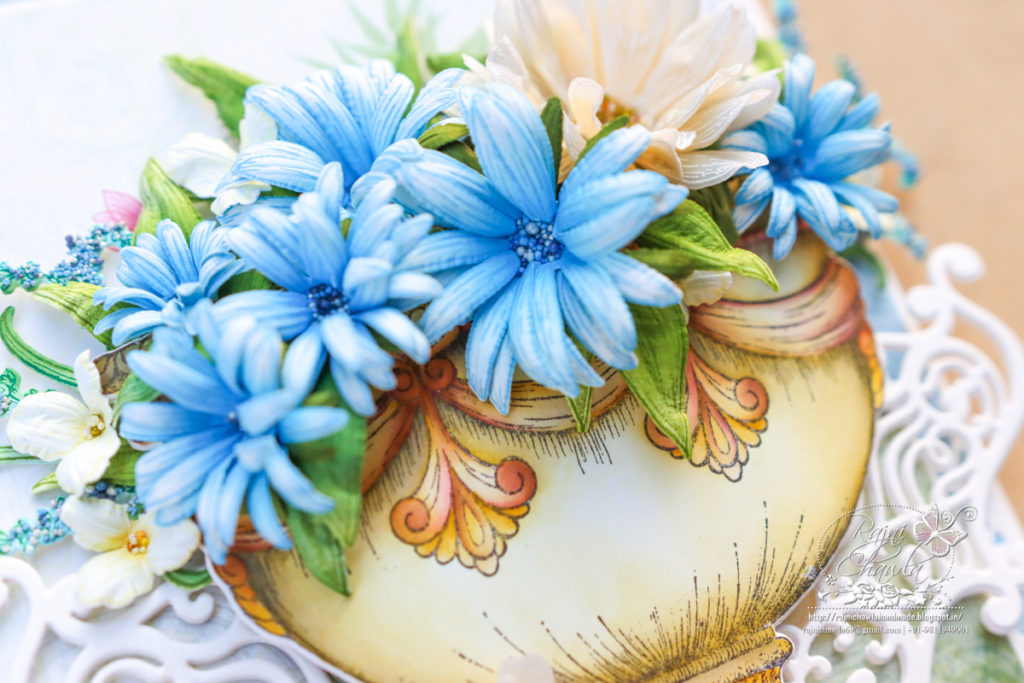
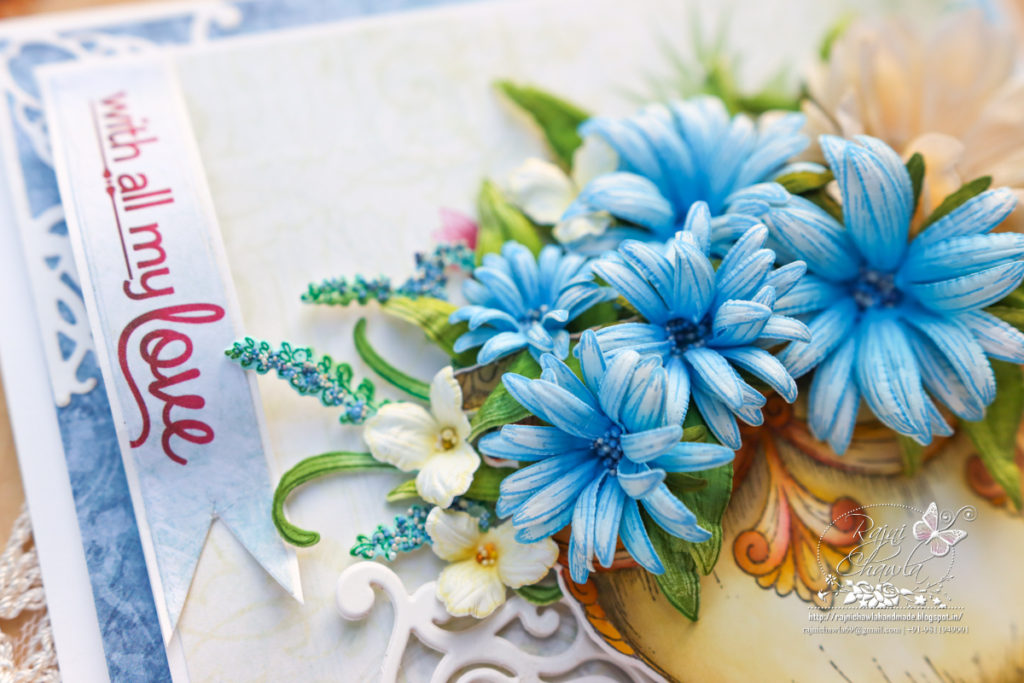
For Blue Asters, Stamp a couple of petals from Wild Aster Cling Stamp Set using French Ultramarine Archival Ink and cut them using its coordinating die. Color the petals using the same ink and shape them using golf groove tools. Create one large, 3 medium, and one small-sized Aster. Complete the flowers by adding the prills in the centers,
For the leaves, stamp the leaves from Large Floral Urn Cling Stamp Set using Olive green Archival ink on Deluxe Flower Shaping Paper, paint them using Leaf Green and Olive Green, and cut them using its coordinating die set. Shape the leaves using Golf Groove Tools. Stamp tiny flowers from the same stamp set using Sunflower Archival ink and color the centers with the same ink. Cut the flowers with its coordinating die set and shape them using Golf Groove tools. Add prills to their centers and discard the stem.
For the leaves, stamp the leaves from Large Floral Urn Cling Stamp Set using Olive green Archival ink on Deluxe Flower Shaping Paper, paint them using Leaf Green and Olive Green, and cut them using its coordinating die set. Shape the leaves using Golf Groove Tools. Stamp tiny flowers from the same stamp set using Sunflower Archival ink and color the centers with the same ink. Cut the flowers with its coordinating die set and shape them using Golf Groove tools. Add prills to their centers and discard the stem.
Once all the elements are ready, assemble the card as shown and finish the card by adding the sentiment banner cut from the same paper collection.