Happy Black Friday!!
Hope you all had a wonderful Thanksgiving Day with your family and friends.
Here is my second card for the day, using ne Black Friday releases by Heartfelt Creations.


Supplies from Heartfelt Creations:
HCD2-7383 Simply Classic Rectangle Frame Die
HCD1-7193 Leafy Accents Die
HCPC-3835 Leafy Accents Cling Stamp Set
HCPC-3887 Wild Aster Cling Stamp Set
HCD1-7257 Wild Aster Die
HCPC-3952 Floral Butterfly Accents Cling Stamp Set
HCD1-7353 Floral Butterfly Accents Die
HCD1-7170 Lush Lilac Die
HCPC-3816 Lush Lilac Cling Stamp Set
HCPC-3847 Celebrate Love Sentiments Cling Stamp Set
HCGP1-488 Luxe Gold Cardstock
HCST1-401 Deluxe Flower Shaping Kit
18002 Rajni Chawla’s Vellum Flowerite – 10 Sheets
EP100 Opaque Embossing Powder – White
PGM15016 Rajni Chawla’s Frosting Powder
RACP607 Ranger Archival Ink Pad – French Ultramarine
RACP436 Ranger Archival Ink Pad – Leaf Green
RACP962 Ranger Archival Ink Pad – Fern Green
RACP656 Ranger Archival Ink Pad – Sky Blue
Other Products Used: Smooth white cardstock, Score Board, Die Cutting machine, Tacky glue, Glossy Accent, Foam Tape, Adhesive that dries clear, 2 shades of Smokey Grey cardstocks and Peeled paint Distress Oxide.
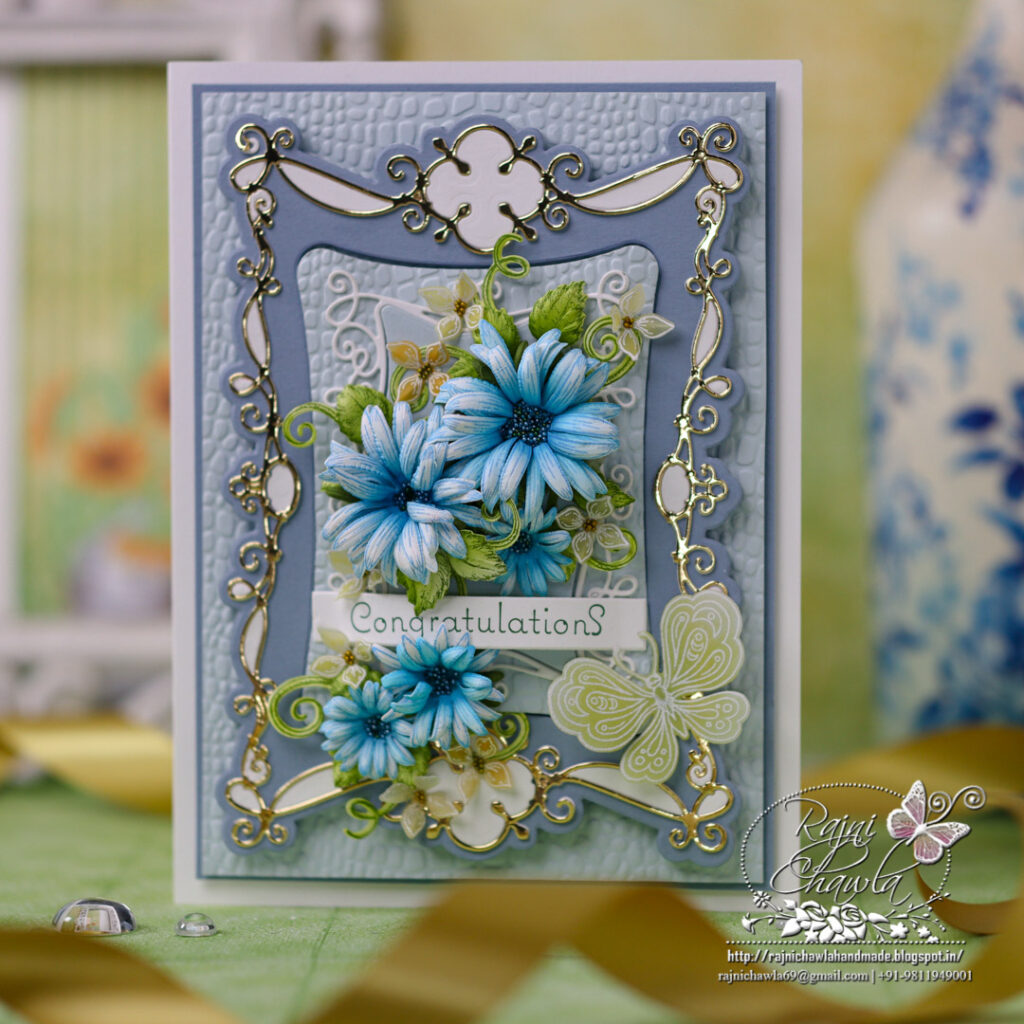
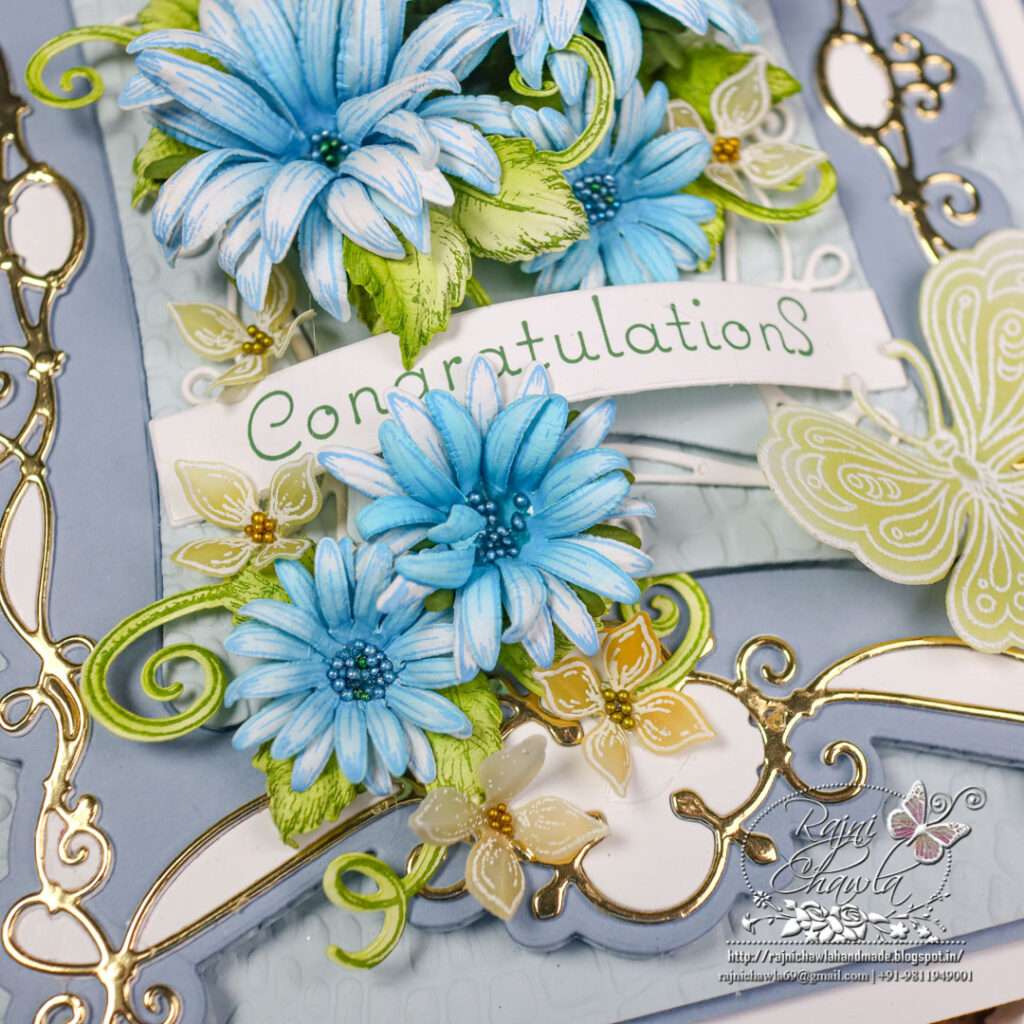
Instructions: The ready top fold card measures 8″ by 6″. To prepare the white card base, cut one piece measuring 8″ by 6″ and the second piece 8 1/2″ by 6″. Score the second piece at 1/2″ on the longer side and glue the first piece on top. For the topmost layer, choose the darker tone of grey cardstock paper and cut 71/4″ by 5 1/4″. Next, cut a light grey color card panel 1/16″ smaller on all the sides. Dry emboss it through the embossing folder and layer it on the card front using foam tapes.
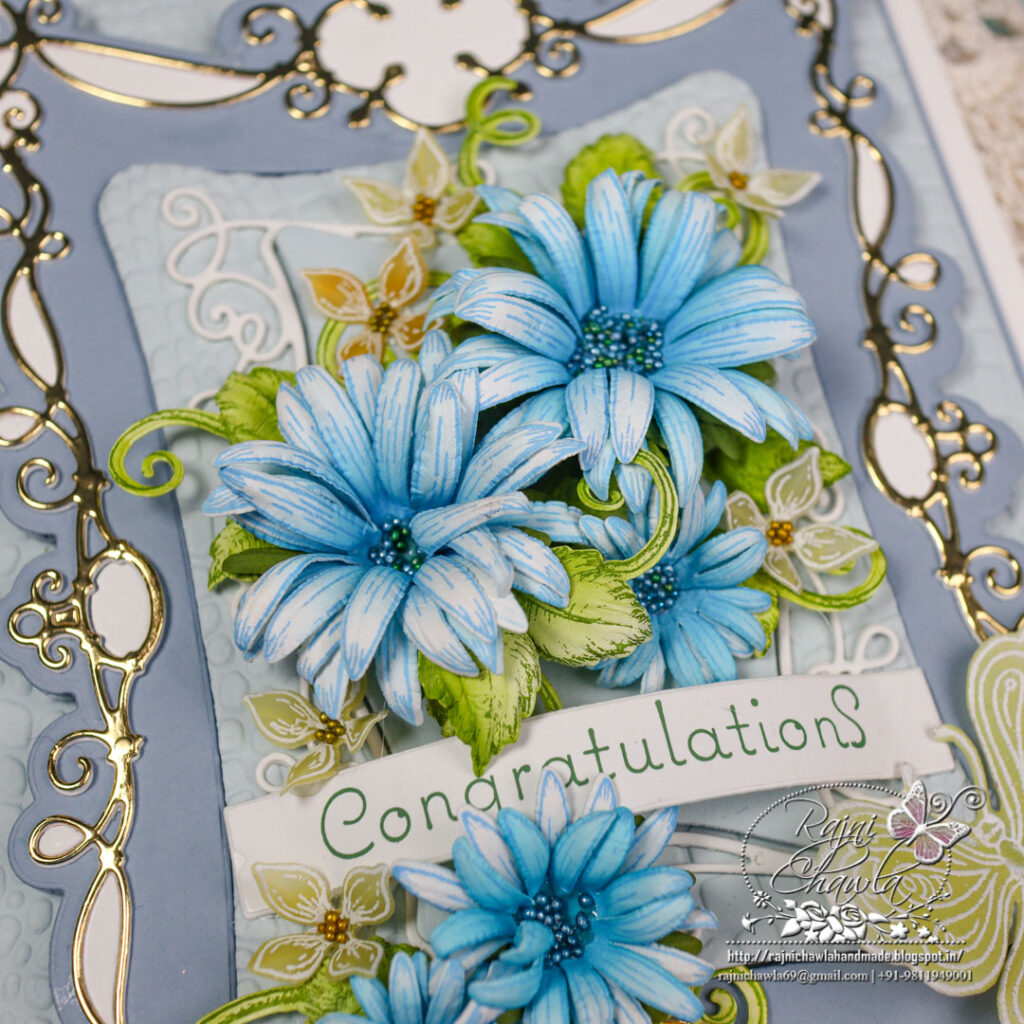
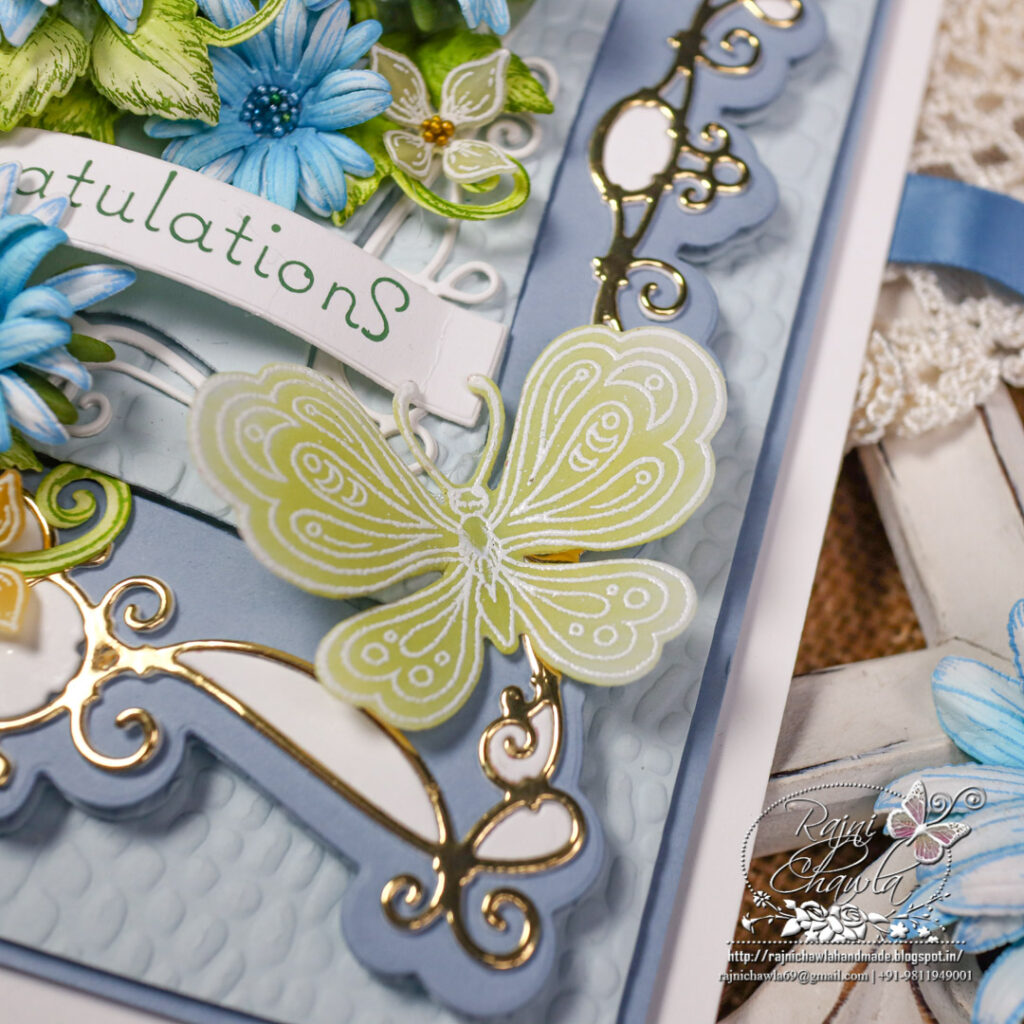
Cut the outer delicate frame one each from white and Luxe Gold cardstock using Simply Classic Rectangle Frame Die. Glue the white one behind the gold to add strength. Adhere the ready frame on the solid cover die-cut, cut using the same die from dark grey cardstock. Inlay the leftover white die cuts back into the frame for the extra accent. Cut the center solid label from light grey cardstock and dry emboss it using an embossing folder. Layer it as shown. Adhere the smaller white frame with an adhesive that dries clear.
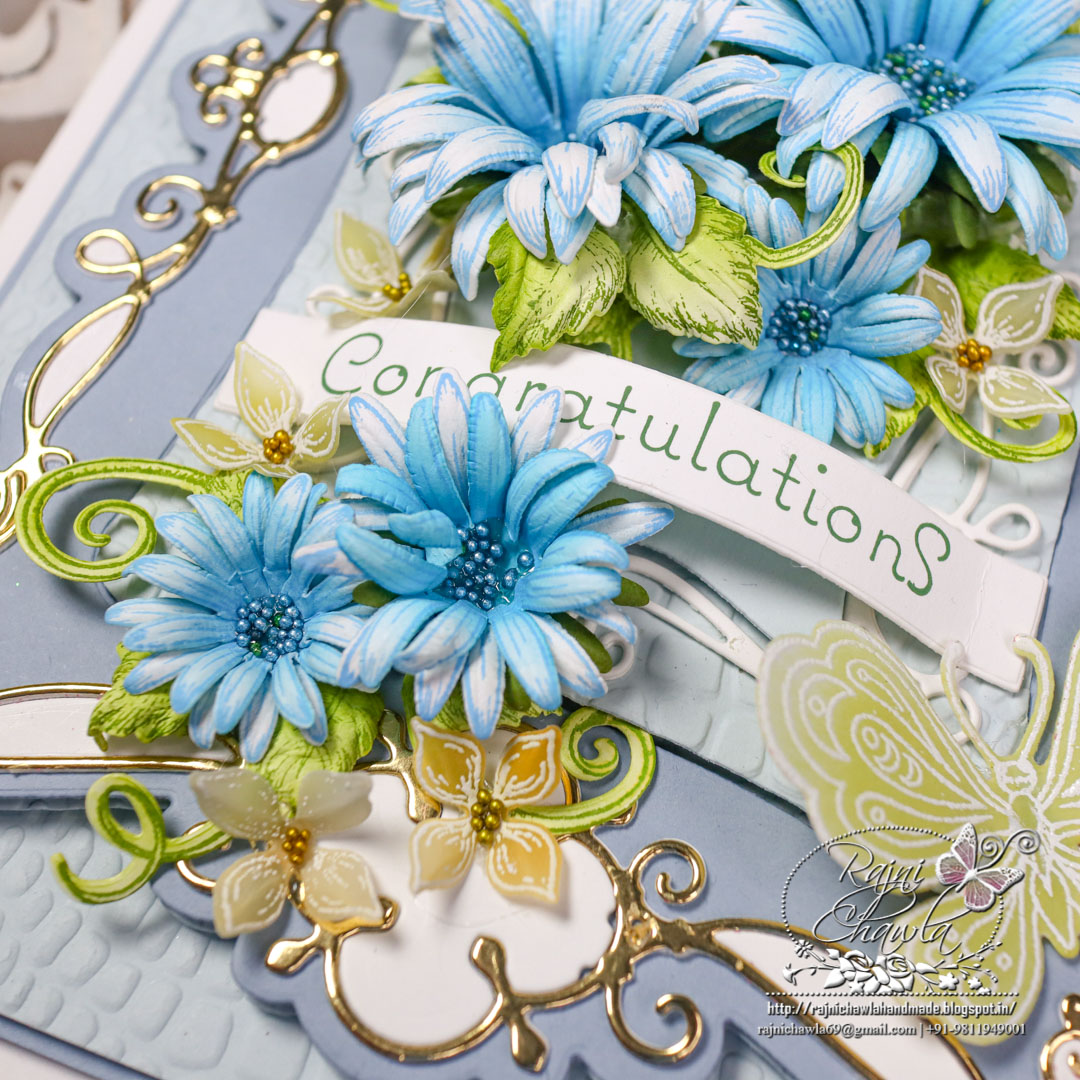
For Blue Asters, Stamp a couple of petals from Wild Aster Cling Stamp Set using French Ultramarine Archival Ink and cut them using its coordinating die. Color the petals using the same ink and shape them using golf groove tools. Create one large, 3 medium, and one small-sized Aster. Complete the flowers by adding the prills in the centers.
For foliage, Stamp the images from Leafy Accent stamp set with Olive green archival ink and paint them using Leaf green Archival ink. Cut the foliage using its coordinating die. Shape the leaves using a groove golf tool.
Stamp the butterfly from Floral Butterfly Accents Cling Stamp Set on vellum using Hero Arts white pigment ink and heat emboss the butterfly using Floral Butterfly Accent stamp. Cut the butterfly using its coordinating die. Also, stamp a few florals from Lush Lilac on Vellum cardstock using Hero Arts white pigment ink, sprinkle white heat embossing powder, and dust extra. Next, heat set the images and cut them using its coordinating die.
Color the florals using Mustered seed distress oxide.
Take a strip of cardstock and stamp the sentiment using Olive Green archival ink. Shape the stripe slightly and glue both ends using hot glue. Assemble small flower clusters around the sentiment strip and complete the card by adding sparkle to the flowers.