Hello, my dear friends!!
Have you heard there is something NEW and EXCITING happening today? Do you love to maximize your creativity with slimline dies? Designed to create quick and easy layered cards, decorative accent pieces, or embellishments on any of your favorite paper crafting projects! From beginners to advanced crafters, the Slim Star Lattice Rectangle Die gives you professional-looking results the quick and EZ way… PLUS it coordinates with the Black Friday dies!
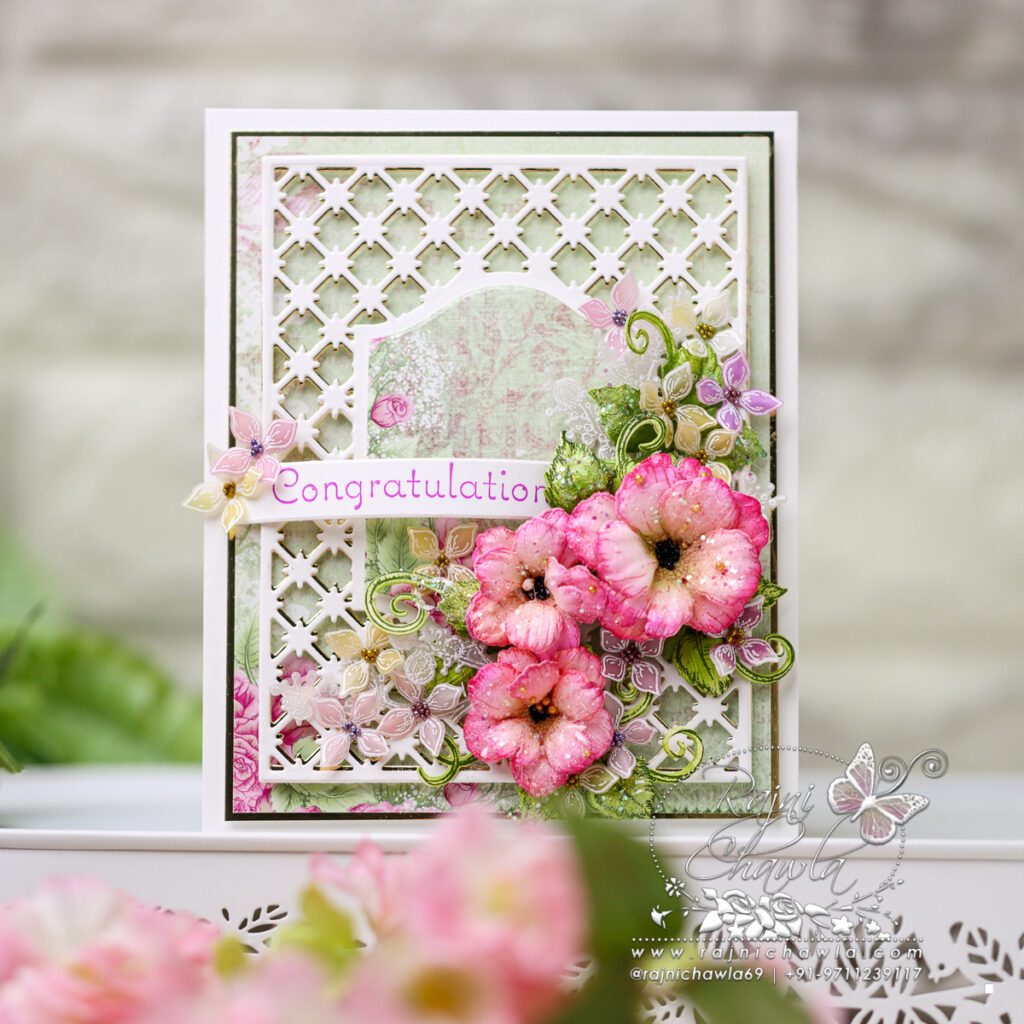
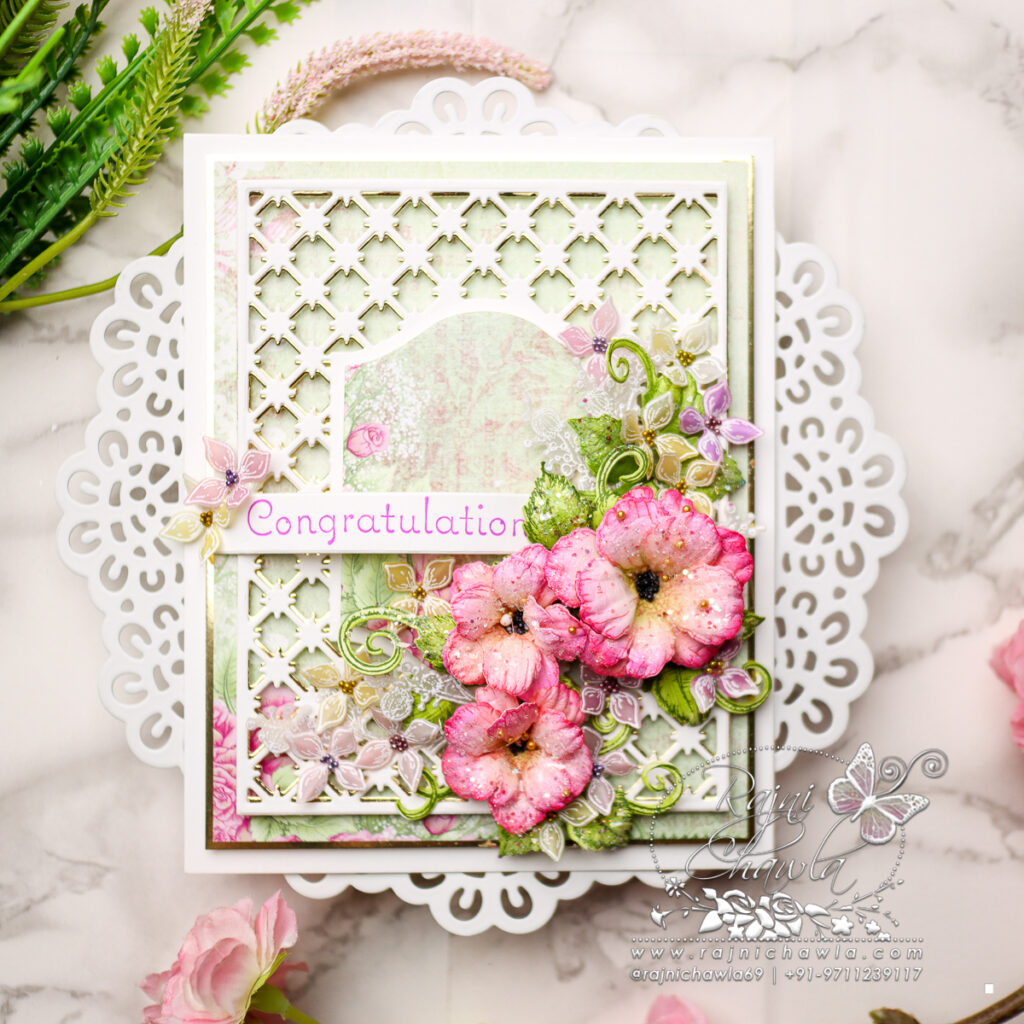
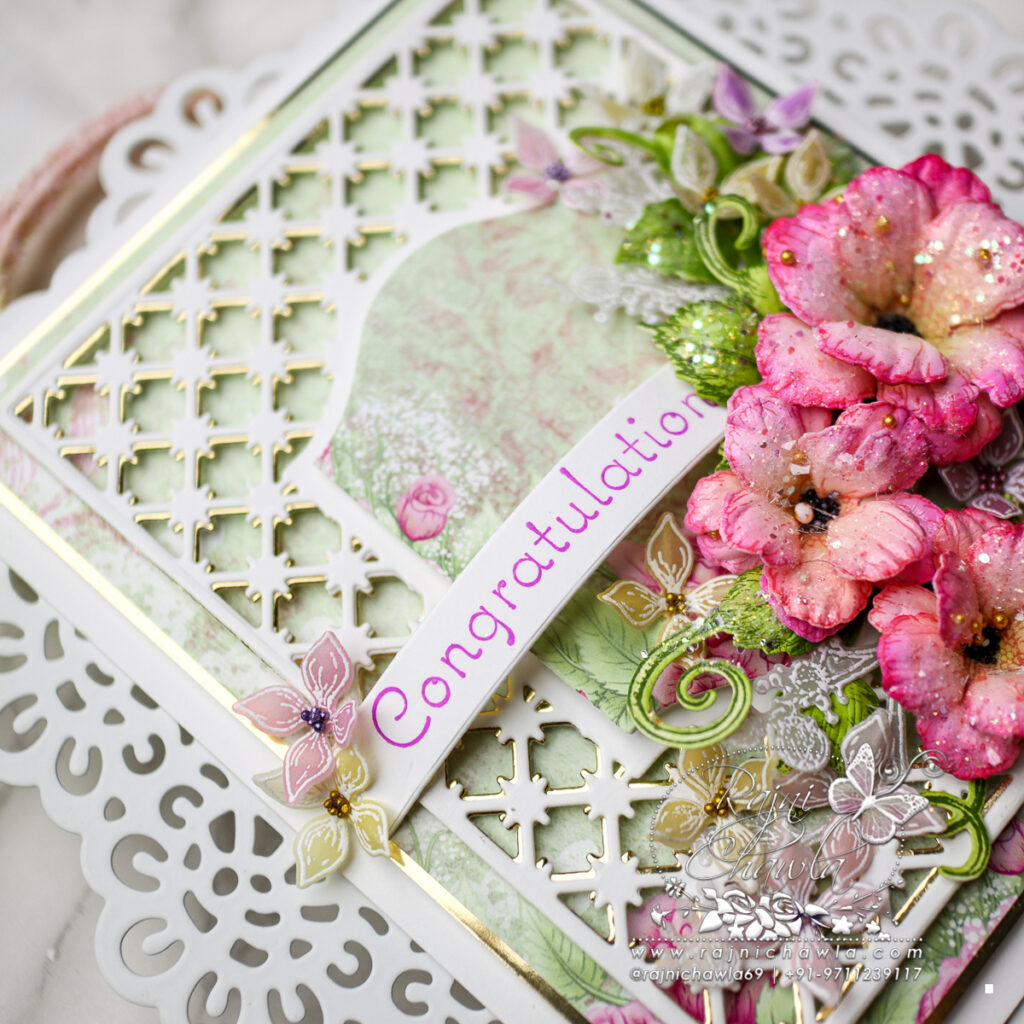
Here is a card 3 That I created using Slim Star Lattice Rectangle Die.
Supplies from Heartfelt Creations:
HCD3-7445 Slim Star Lattice Rectangle Die
HCPC-3888 Wild Aster Spray Cling Stamp Set
HCD1-7258 Wild Aster Spray Die
HCD1-7170 Lush Lilac Die
HCPC-3816 Lush Lilac Cling Stamp Set
HCD1-7289 Small Wild Rose Die
HCPC-3906 Small Wild Rose Cling Stamp Set
HCD1-7193 Leafy Accents Die
HCPC-3835 Leafy Accents Cling Stamp Set
HCPC-3847 Celebrate Love Sentiments Cling Stamp Set
HCDP1-2143 Hollyhock Garden Paper Collection
HCGP1-488 Luxe Gold Cardstock
HCST1-401 Deluxe Flower Shaping Kit
HCPP1-475 Deluxe Flower Shaping Paper Pack of 50 – White
18002 Rajni Chawla’s Vellum Flowerite – 10 Sheets
RAHT Heat It Craft Tool
HCDA2-450 Stack and Store Daubers-Pack of 30
Other Products Used: Smooth white cardstock, White heat embossing powder, Hero Arts White Pigment Ink, Funnel Tray, Score Board, Die Cutting Machine, Funnel Tray, Foam dots, Distress oxides Seedless Preserves, Carved Pumpkin, and Twisted Citron.
Instructions: The ready side-fold card from smooth white cardstock measures 4 1/4″ by 5 1/2 “. To prepare the card cut the smooth white cardstock measuring 8 1/2″ by 5 1/2”. On the 8 1/2″ side, score at 4 1/4″ and crease well.
Choose the paper from the designer paper collection and cut a piece measuring 3 3/4″ by 5″. Mat the Luxe gold cardstock behind the panel creating a delicate border of 1/8″ on all sides and layer the panel on the card front.
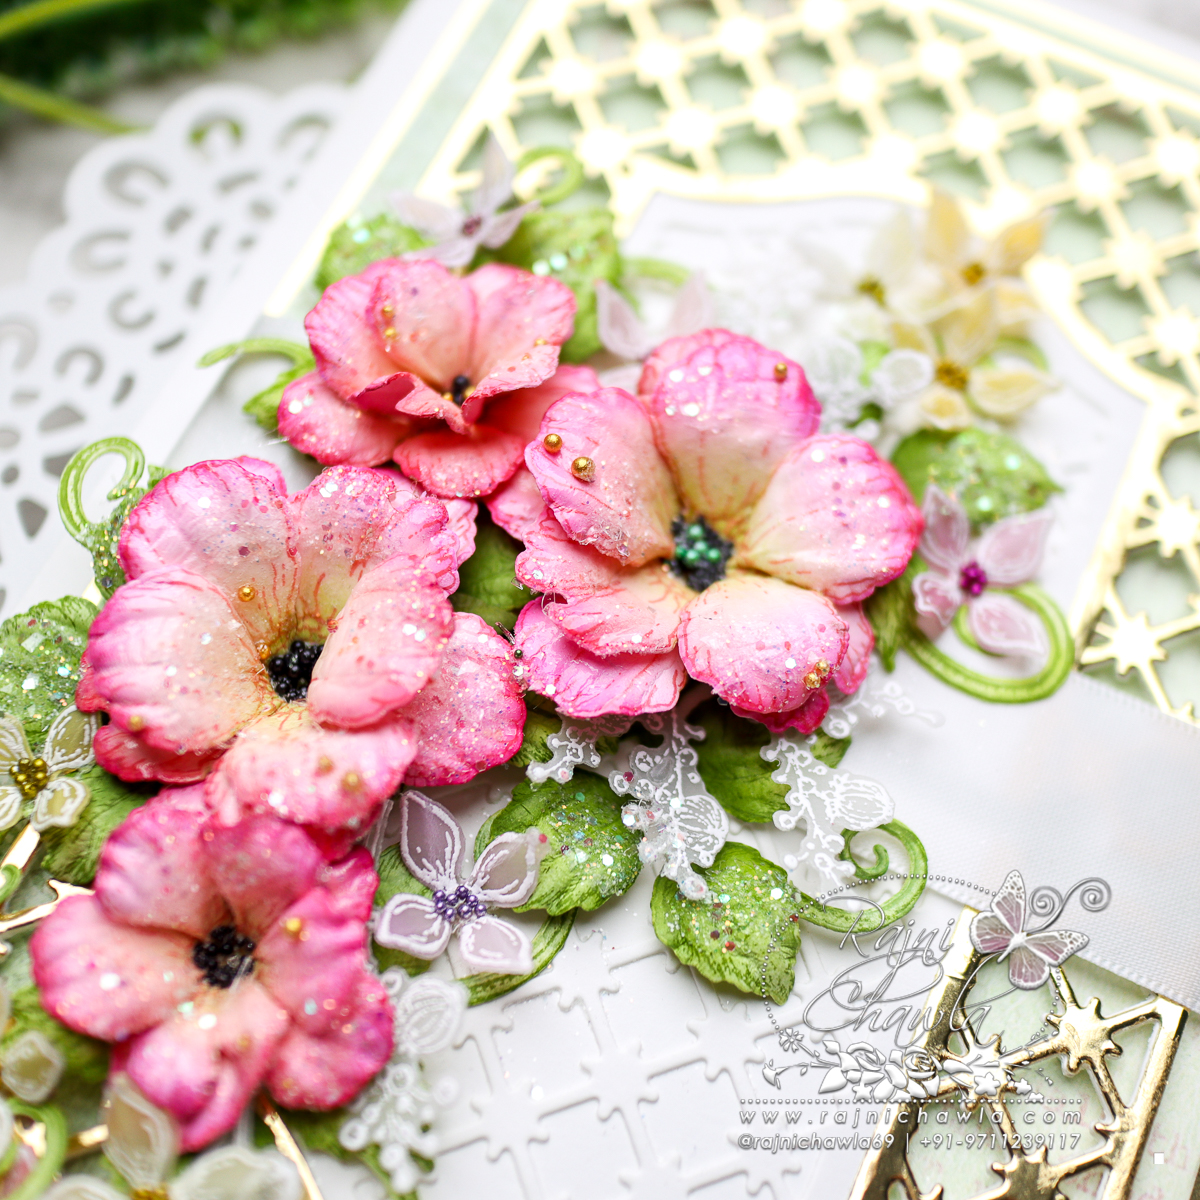
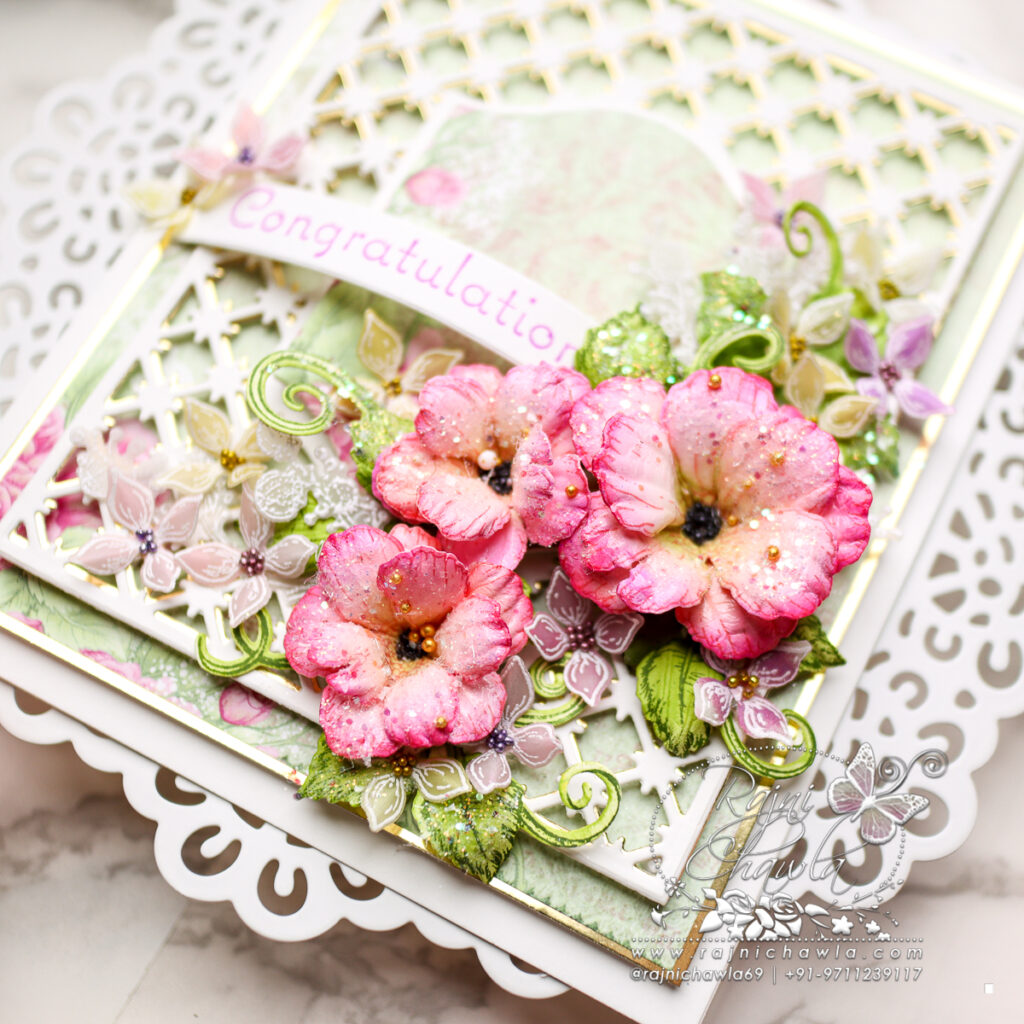
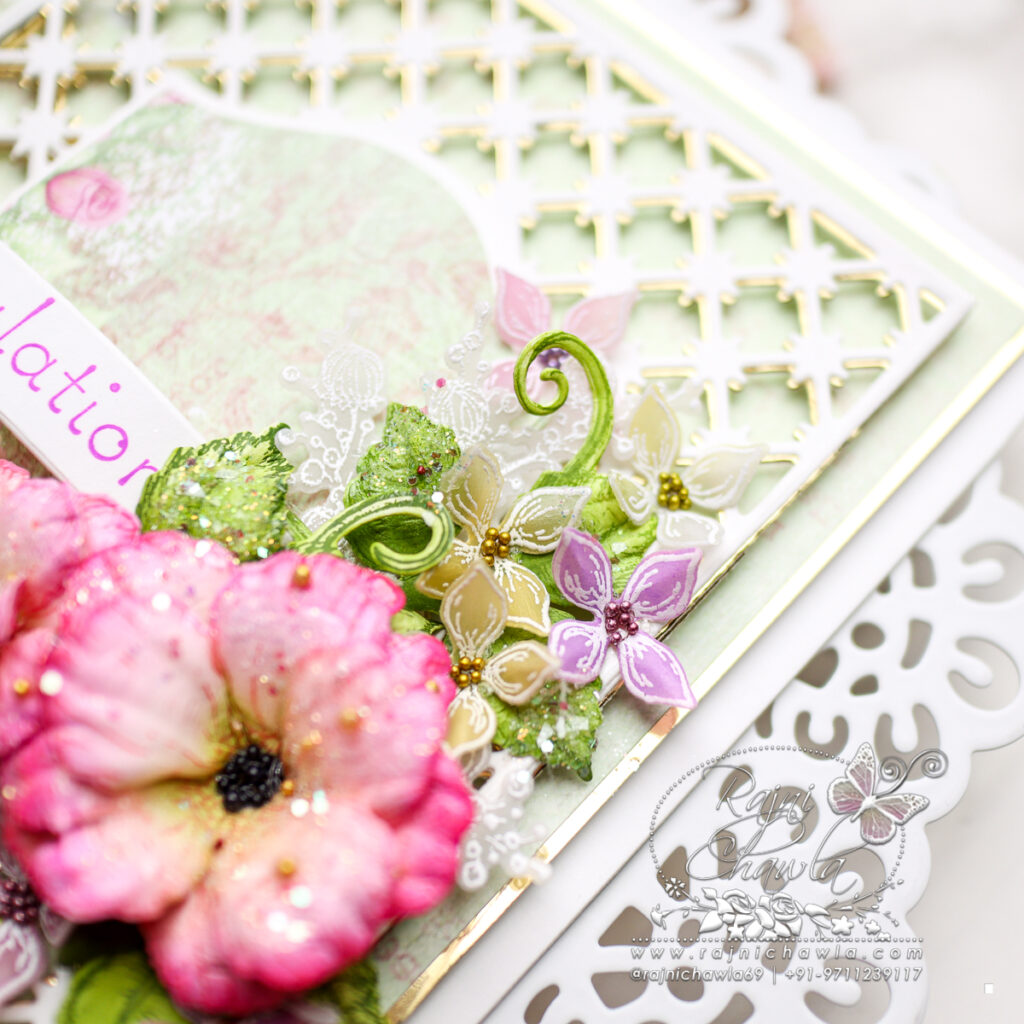
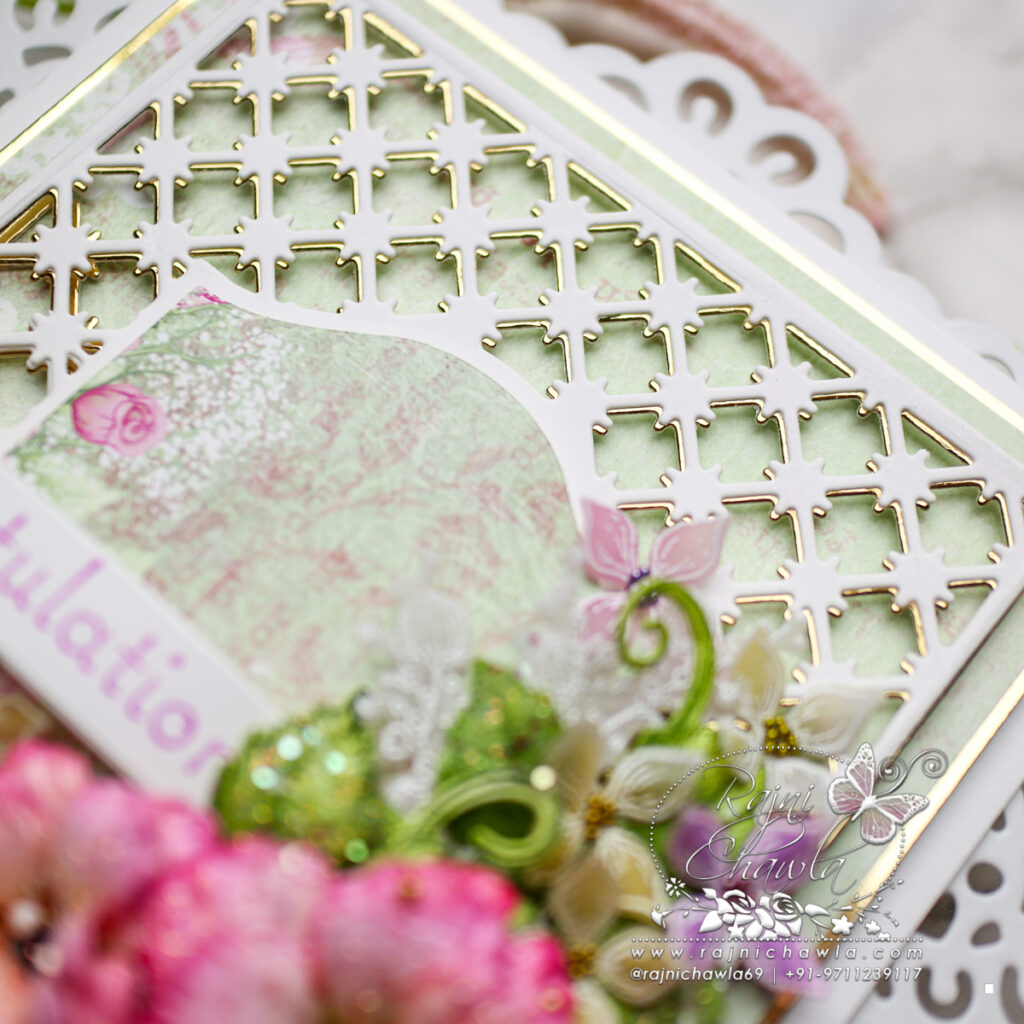
Next, cut the outer main lacy background die in gold and white cardstock. Glue the gold die cut on the back side to give a delicate shadow. From the center cut the die cut in a way to form the backdrop measuring 5′ long. Next using the partial die cutting technique and the smallest inside die of the same set, cut the center solid tag from the designer paper. Layer the tag as shown, using dimensional tape.
For the wild roses, stamp the flower petals with Magenta Hue archival ink using the Small Wild Rose Stamp set and cut them using its coordinating dies. Ink the flower centers using Leaf Green and color the flowers using Magenta Hue. Shape the flowers using a Deluxe flower shaping kit. Once the shaping is done, assemble a few flowers using ball tools from the shaping kit and add matching seed beads to the flower centers. Apply a layer of crystal lacquer on the flowers and dust Rajni Chawla’s Crystal Clear Powder.
Stamp 2 sets of leaves using Leafy Accent stamp and Olive Green Archival ink and cut them using its coordinating die. Color the leaves using the same inks and shape them using a deluxe flower shaping kit.
Stamp the tiny flowers using Lush Lilac Cling Stamp Set with white pigment ink on Vellum, sprinkle white heat embossing powder, and dust extras in the funnel tray and heat set. Color the flowers using Distress Oxide Seedless Preserves, Carved Pumpkin, and Twisted Citron distress oxide inks. Die cut all the flowers using its coordinating die. Shape the flowers using a needle tool, press the centers, and add glitter balls. Once all the elements are ready, prepare a small bouquet of flowers on the left side corner and complete the card by adding a sentiment strip.