


Good Morning All….
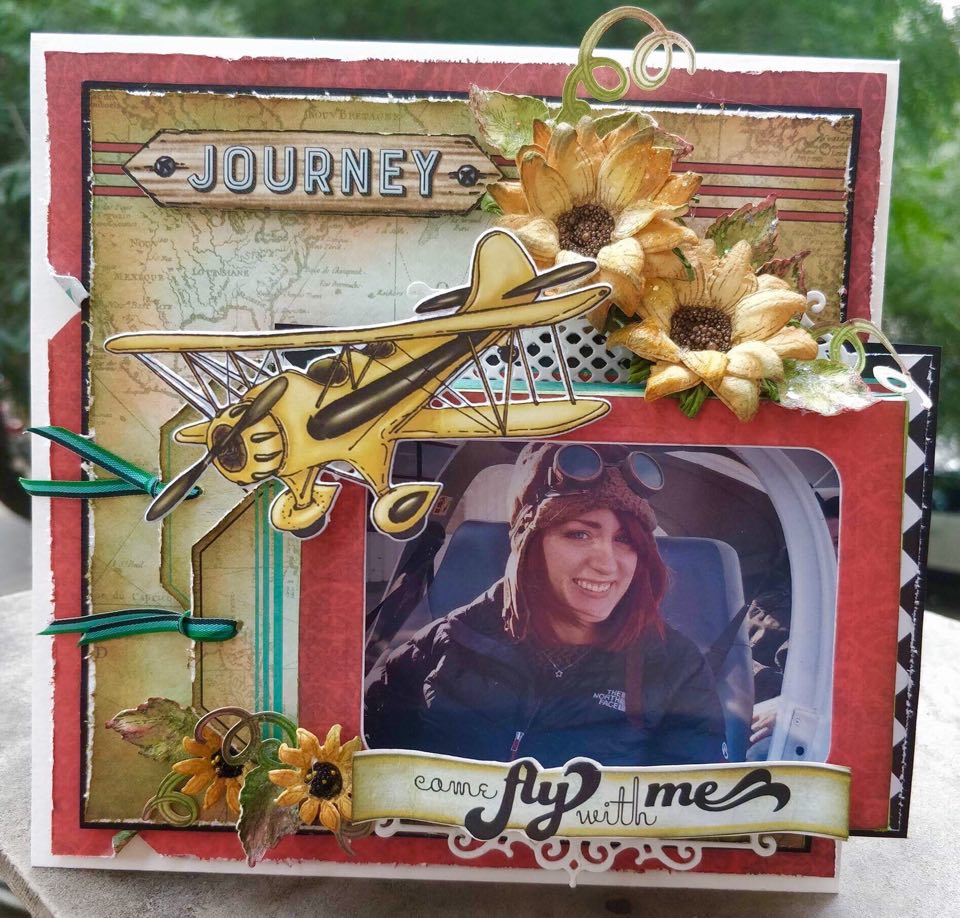
Welcome to my blog again. Today I have a shadow box card to share, using Young at Heart Collection and Classic Sunflower Collection by Heartfelt Creations. It is so much fun capturing memories and creating a picture shadow box card for loved ones.
Products from Heartfelt Creations:
HCBC1-456-3 Card Shadow Box Set-Kraft
HCDP1-283 Young At Heart Paper Collection
HCPC-3801 Simply Classic Cling Stamp Set
HCD1-7159 Simply Classic Die
HCD1-7158 Young At Heart Die
HCD1-753 Classic Sunflower Die
HCD1-7110 Classic Rose Die
HCPC-3752 Classic Rose Cling Stamp Set
HCPC-3626 Classic Sunflower Cling Stamp Set
HCD1-7150 Window Box Elements Die
HCD2-750 Cut Mat Create 1B Die
PGM15015 Rajni Chawla’s Crystal Clear
HCDA2-450 Stack and Store Daubers-Pack of 30
ANC845 Power Outage Prills
159723 Designer Dries Clear Adhesive
DDOTS Double Dots 100pc. -3D Foam Circles
71035 ColorBox Fluid Chalk Ink Pad – Dark Brown
71082 ColorBox Fluid Chalk Ink Pad – Harvest
71049 ColorBox Fluid Chalk Ink Pad – Pumpkin Spice
HCST1-401 Deluxe Flower Shaping Kit
Other Products Used: Smooth white cardstock, Archival inks Fern Green, Olive Green and Library Green, Paper distressing tool/scissors.
Videos:
For more tips on creating with the Young at Heart collection, watch the tutorial at https://youtu.be/kmqAVM6ibfM.
For more tips on creating the layered card & shadowboxes, watch the tutorial at https://youtu.be/DrMIKI-XTmI.
https://www.heartfeltcreations.us/video/75/classic-sunflower-shaping-and-stamping/1
Instructions:
The ready card base measures 6′ by 6′. To Create the card base, cut 12′ by 6′ smooth white cardstock and score at 6′ on the longer side and fold. For the first layer, choose a red pattern paper from the Young at Heart Collection and cut 1/8′ less on all the sides than the card base. For the second layer, choose 6′ by 6′ panel from the designer paper collection, trim it to 51/2′ by 51/2′. Distress all the four sides.of both the layers using a paper distressing tool or sharp scissors. Adhere both the layers using foam dots.
Follow the video on creating with Shadowbox cards and construct a 41/4 x 51/2” kraft shadow box. Cut the photograph and adhere it with glue that dries clear in the inside of the shadow box. Cover all the sides with pattern papers from the same collection. To cut the front window using Cut Mat Create 1B Die.
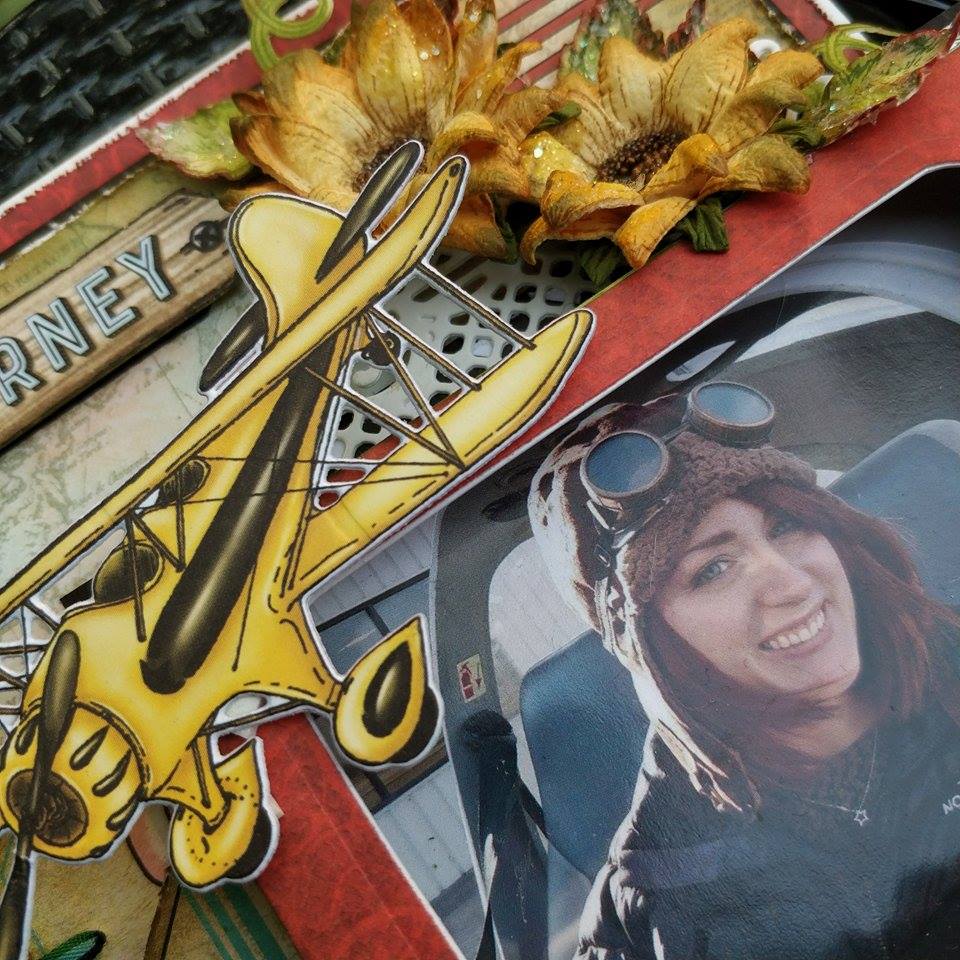
To embellish the cards, Cut 2 tags, distress the edges and put twine. Also, cut the image of the airplane from the paper collection and cut it using its coordinating die. You will also need a single die cut from white cardstock from Window elements die. Cut it across the center and keep aside.
For Sunflowers, Stamp multiple images of sunflowers from Classic Sunflower die with dark brown Color Box ink and cut them using its coordinating die. Color them using Harvest and Pumpkin Spice. Color all the image using Harvest and Pumpkin Spice color box ink. Shape all the flower petals using Deluxe Flower Shaping Kit. Assemble the flower and glitter them using Crystal Clear Powder.
For leaves, stamp few images of rose leaves from Classic Rose Collection with Library Green and color them using Fern Green and Olive Green Archival. Shape them using Deluxe Flower shaping kit and glitter them using Crystal Clear Powder.
Once all the elements are ready, adhere distressed tags and white die cut behind the shadow box and glue everything on the right side corner of the card panel as shown. Arrange the flowers, an airplane image and finish the card by adding a sentiment from the paper collection.
Love this card with the sunflowers and the Young at Heart Collection xxx
This is such a gorgeous piece of art! I love sunflowers and how you have used them with this collection!
Another beautiful creation!!!!
Absolutely gorgeous Rajni! Love the sunflowers!!!
what a great mini for a photo, love your sunflowers