Good Morning, Friends!!
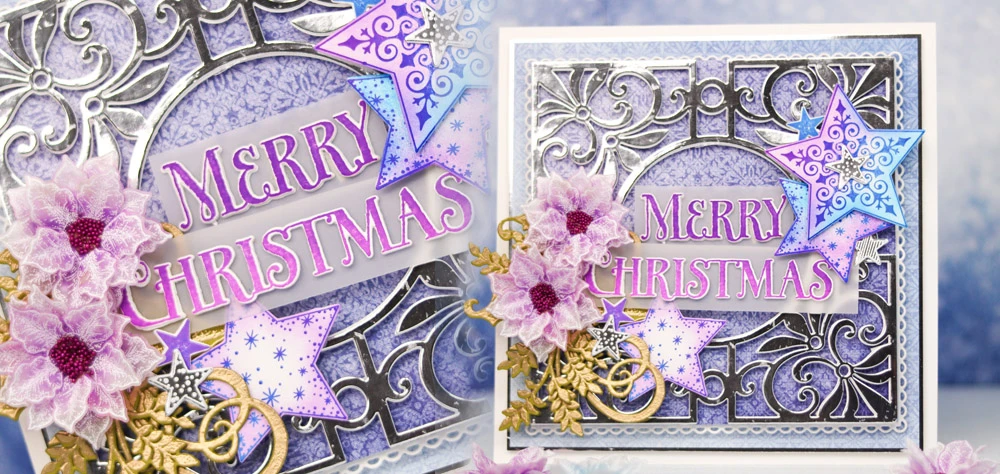
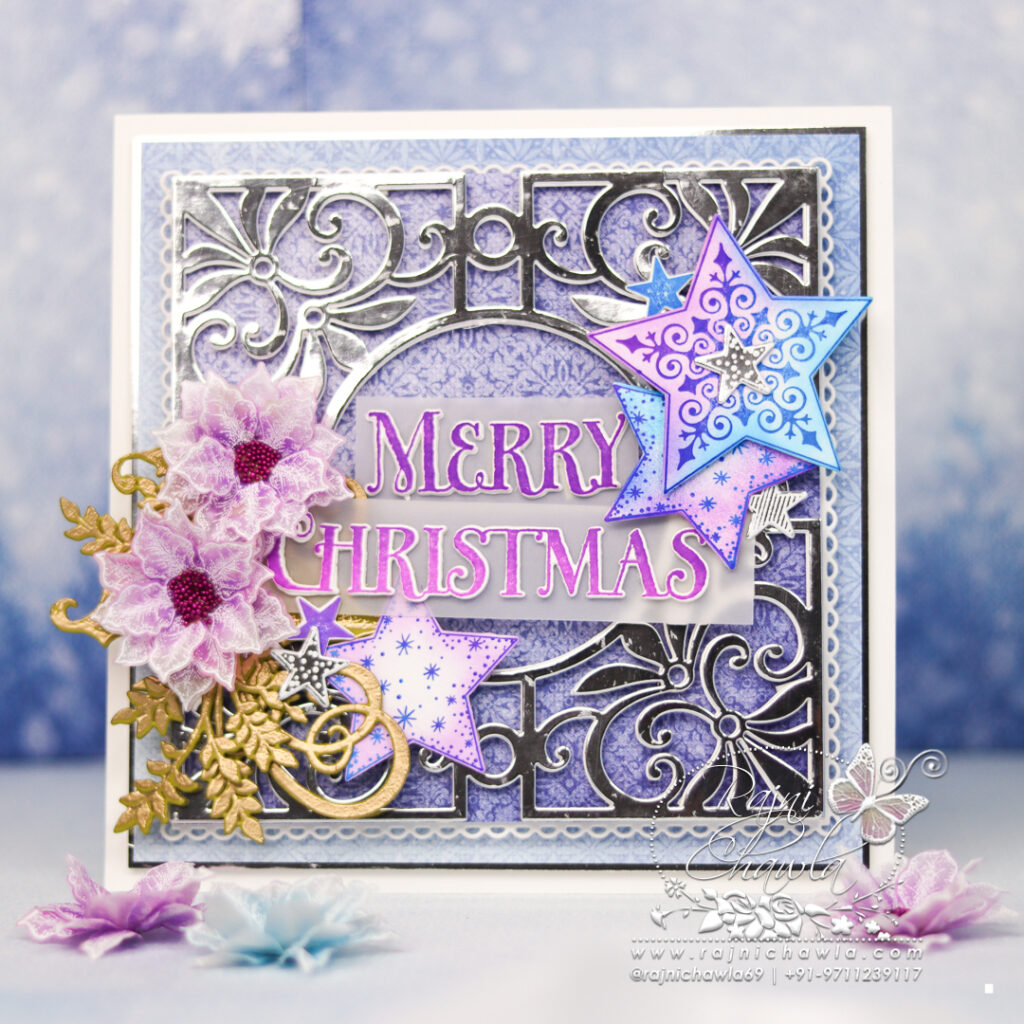
Its inspiration Wednesday with Heartfelt Creations. Continuing with the Holiday Star Collection, I have these colorful Christmas card to share. Ahhhhh….Loved this non-traditional color combo. Hope you liked it too.
Supplies from Heartfelt Creations:
HCPC-3995 Starry Holiday Greetings Cling Stamp Set
HCD1-7413 Starry Holiday Greetings Die
HCD1-7411 Holiday Star Die
HCD1-7412 Large Holiday Star Die
HCPC-3993 Holiday Star Cling Stamp Set
HCPC-3994 Large Holiday Star Cling Stamp Set
HCDP1-2141 Holiday Star Paper Collection
HCD1-7281 Stairway Gardens Die
HCD1-7397 French Gate Die
HCD1-7358 Large Festive Poinsettia Die
HCPC-3957 Large Festive Poinsettia Cling Stamp Set
HCFB1-5007 Large 3D Festive Poinsettia Shaping Mold
HCD1-7360 Holly Berry Spray Die
HCPC-3959 Holly Berry Spray Cling Stamp Set
HCGP1-493 Luxe Silver Cardstock
359760 Embossing Powder – Gold
TSVP080 VersaColor Pigment Ink Pad – White
EP100 Opaque Embossing Powder – White
PGM15015 Rajni Chawla’s Crystal Clear
18002 Rajni Chawla’s Vellum Flowerite – 10 Sheets
RACP985 Ranger Archival Ink Pad – Cactus Flower
RACP454 Ranger Archival Ink Pad – Manganese Blue
Other Supplies Used: Hero Arts white Pigment ink, Smooth white card stock, funnel tray, heat gun, glue dots.
Instructions: The ready top-fold card from smooth white cardstock measures 7″ by 7″. Choose the plainer cardstock from the designer paper collection and cut measuring 6 1/2″ by 6 1/2″. Glue it on the Luxe silver cardstock to create a border of 1/8″ on all four sides. Layer the panel on the ready card base.
Cut one each die cut from white cardstock and Luxe Silver Cardstock using the French Courtyard Die set. Stack and glue both the die-cut keeping white at the bottom to add extra strength. Layer the die-cut on fancy paper from the same collection and further layer it on the white die cut using Stairway Gardens Die. Finally, layer the panel on the ready card base.
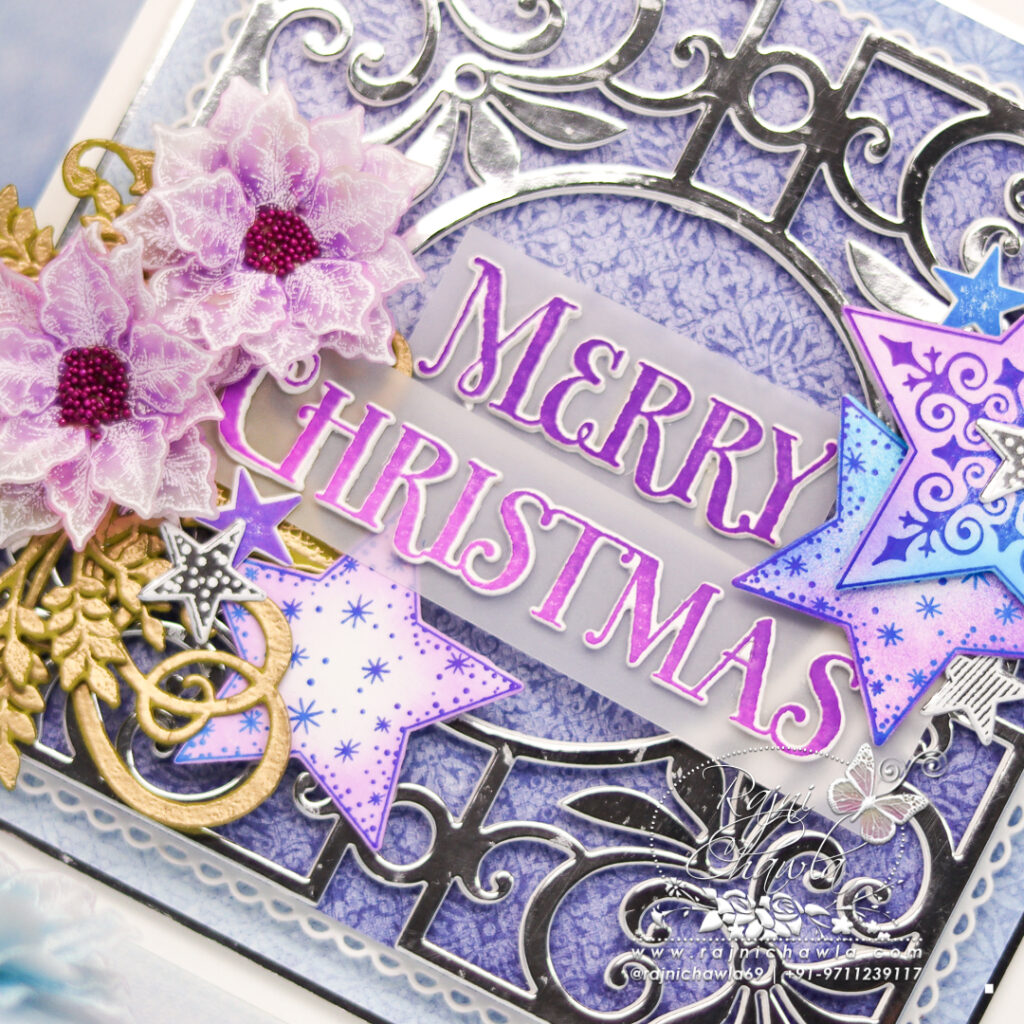
Stamp 6 Poinsettias from the Large Festive Poinsettia Cling Stamp Set using white pigment ink on Rajni Chawla’s Vellum Cardstock and sprinkle white heat embossing powder. Heat set the petals using the heat gun. Die-cut the flowers using its coordinating die set. Ink the flowers using Seedless Preserves and mist them a little. Shape the petals using its coordinating mold. Prepare 2 flowers of 3 petals each and add seed beads to the flower centers. Glitter the flowers using Rajni Chawla’s Crystal Clear powder.
Stamp the stars using the Large Holiday Star Cling Stamp Set andHoliday Star Cling Stamp Set on white cardstock using Cactus Flower and Manganese Blue Archival inks. Cut the stars using its coordinating die sets. Ink the stars a little with the same inks and keep them aside.
Stamp the star from the Large Holiday stamp set on Luxe Silver cardstock using white pigment ink and sprinkle white heat embossing powder, dust extras on to funnel tray, and heat set it using a heating tool. Cut all the stars using its coordinating die. Use the smaller stars to embellish the project and keep the bigger star for future use.
Gold heat emboss the Holy Berry foliage on the green cardstock and cut them using its coordinating die set.
Stamp the sentiment Merry Christmas using Cactus Flower and Manganese Blue archival inks and cut it using its coordinating die. Cut and stack two white die cuts to the sentiment to add extra strength. Layer the sentiment on the strip of vellum cardstock.
Once all the elements are ready, assemble the card as shown.