


Good Morning Friends….
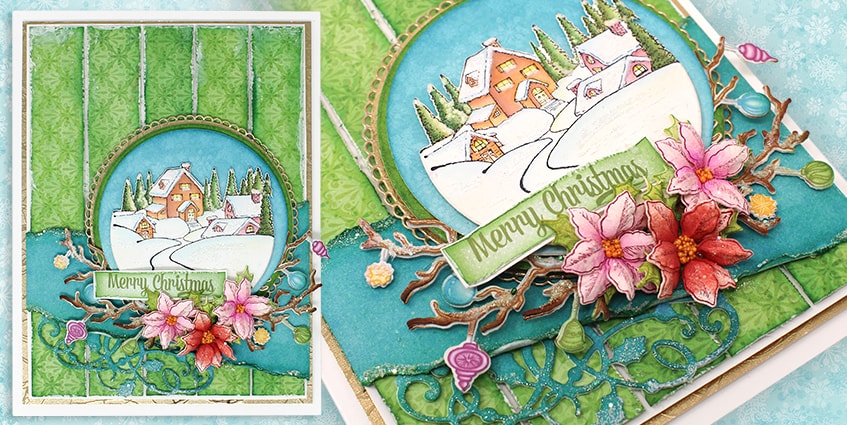
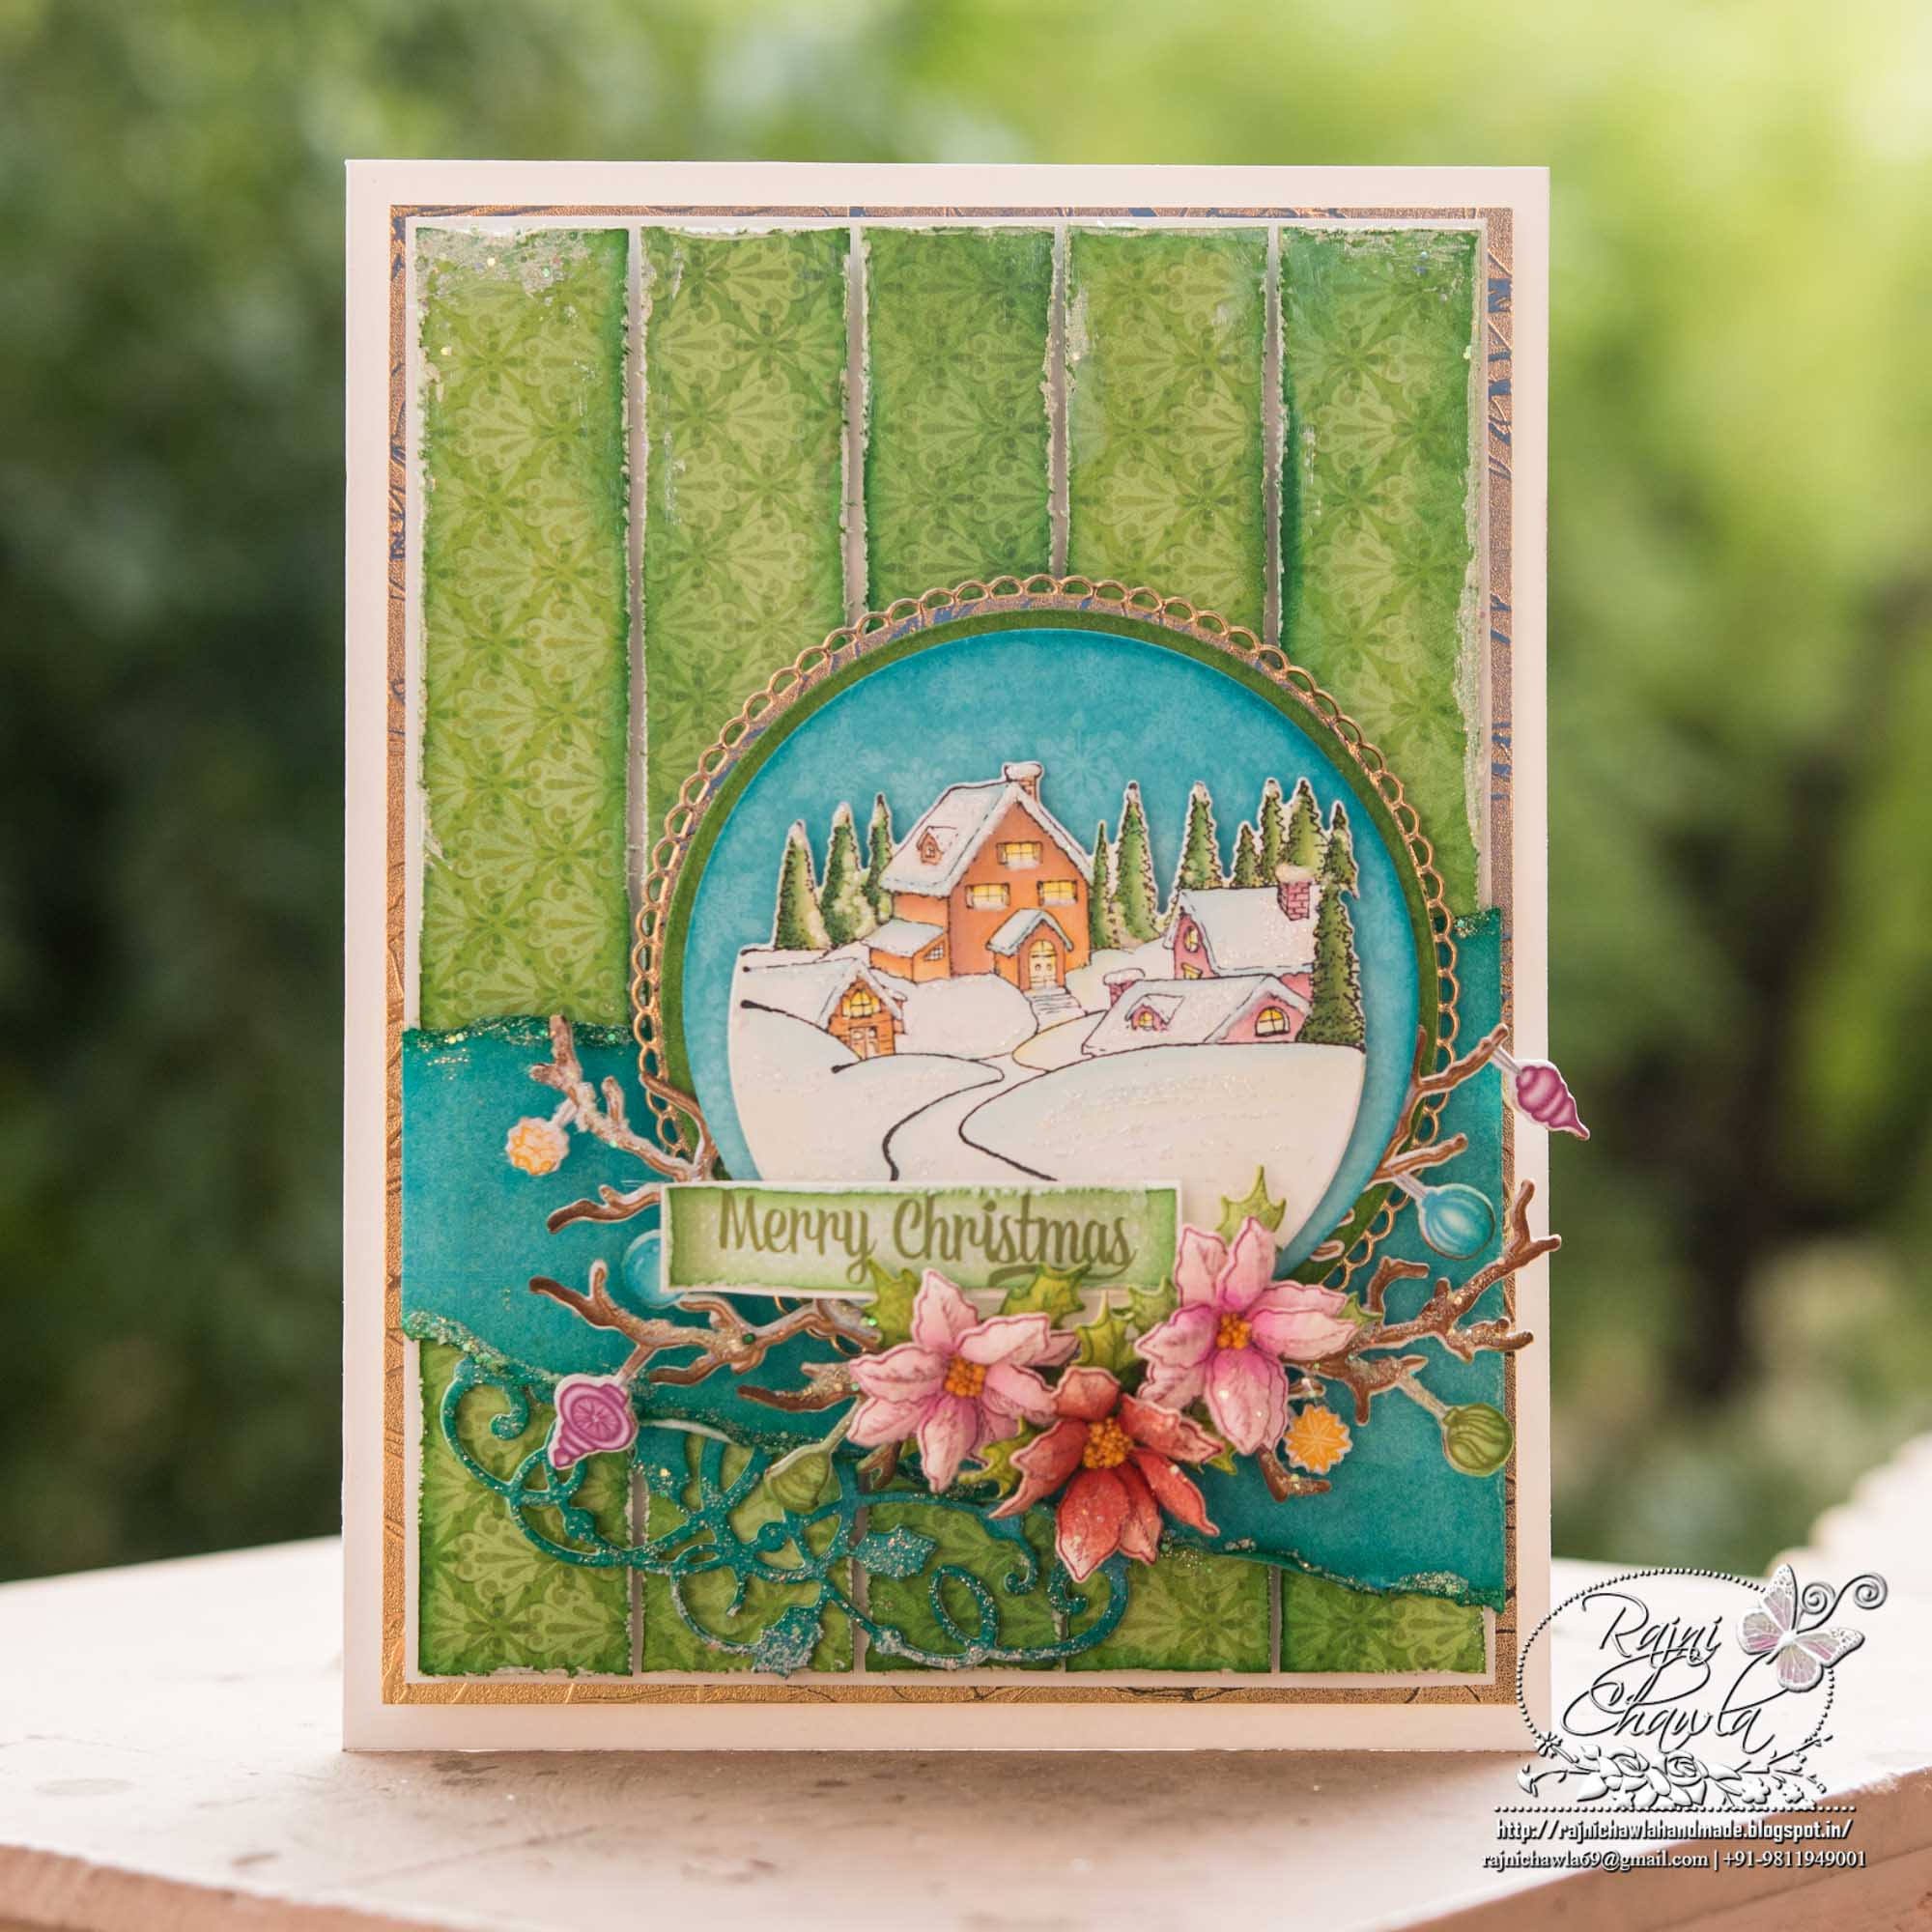
The summers are still at peak, here in India. Though rain showers sometimes make the weather cool. I am keeping myself busy creating Christmas cards for the coming season. For today’s inspiration, I have a beautiful Christmas to share which I created using Heartfelt Creation’s Merry and Bright collection.

Supplies from Heartfelt Creations:
HCD1-7194 Merry Little Christmas Die
HCD1-7195 Snowy Pine Village Die
HCPC-3836 Merry Little Christmas Cling Stamp Set
HCPC-3837 Snowy Pine Village Cling Stamp Set
HCDP1-293 Merry and Bright Paper Collection
HCD1-7188 Noel Ornament Die
HCPC-3822 Poinsettia & Holly Clusters Cling Stamp Set
HCFB1-463 3D Poinsettia Shaping Mold
HCD1-7154 Eyelet Circle & Basics Small Die
RACP499 Ranger Archival Ink Pad – Plum
RACP436 Ranger Archival Ink Pad – Leaf Green
RACP962 Ranger Archival Ink Pad – Fern Green
RACP614 Ranger Archival Ink Pad – Magenta Hue
RACP468 Ranger Archival Ink Pad – Jet Black
RACP461 Ranger Archival Ink Pad – Vermillion
PGM15016 Rajni Chawla’s Frosting Powder
PGM15015 Rajni Chawla’s Crystal Clear
HCDA2-450 Stack and Store Daubers-Pack of 30
ANC818 Go Man Go Prills
159723 Designer Dries Clear Adhesive
HCST1-401 Deluxe Flower Shaping Kit
Other Products Used: Smooth white cardstock, Paper distressing tool or sharp scissors, Foam tape, Gold metallic sheet, Distress Inks Peeled Paint and Salty Ocean and Zig Markers.
Videos Referred: https://youtu.be/6bgO6epBuBI.
Instructions: The ready side-fold card from smooth white stock measures 5 3/4″ by 7 3/4″. To create the top panel, choose the paper from the designer paper collection and cut to size measuring 5″ by 7″. Further cut the paper into 5 strips measuring 1′ by 7″. Distress all the stripes with Peeled Paint first and then with a distressing tool. Layer all the strips using foam tape on white cardstock measuring 5 1/4″ by 7 1/4′. Choose a teal color paper from the paper collection and hand tear it as shown. Wrap the paper around the panel as shown, sticking both the sides behind the panel. Cut a top piece of fancy lace from the ornament Noel Ornament Die in teal blue color and adhere it on the left side of the panel as shown. Further layer the ready panel on the golden metallic sheet and finally on the card base.
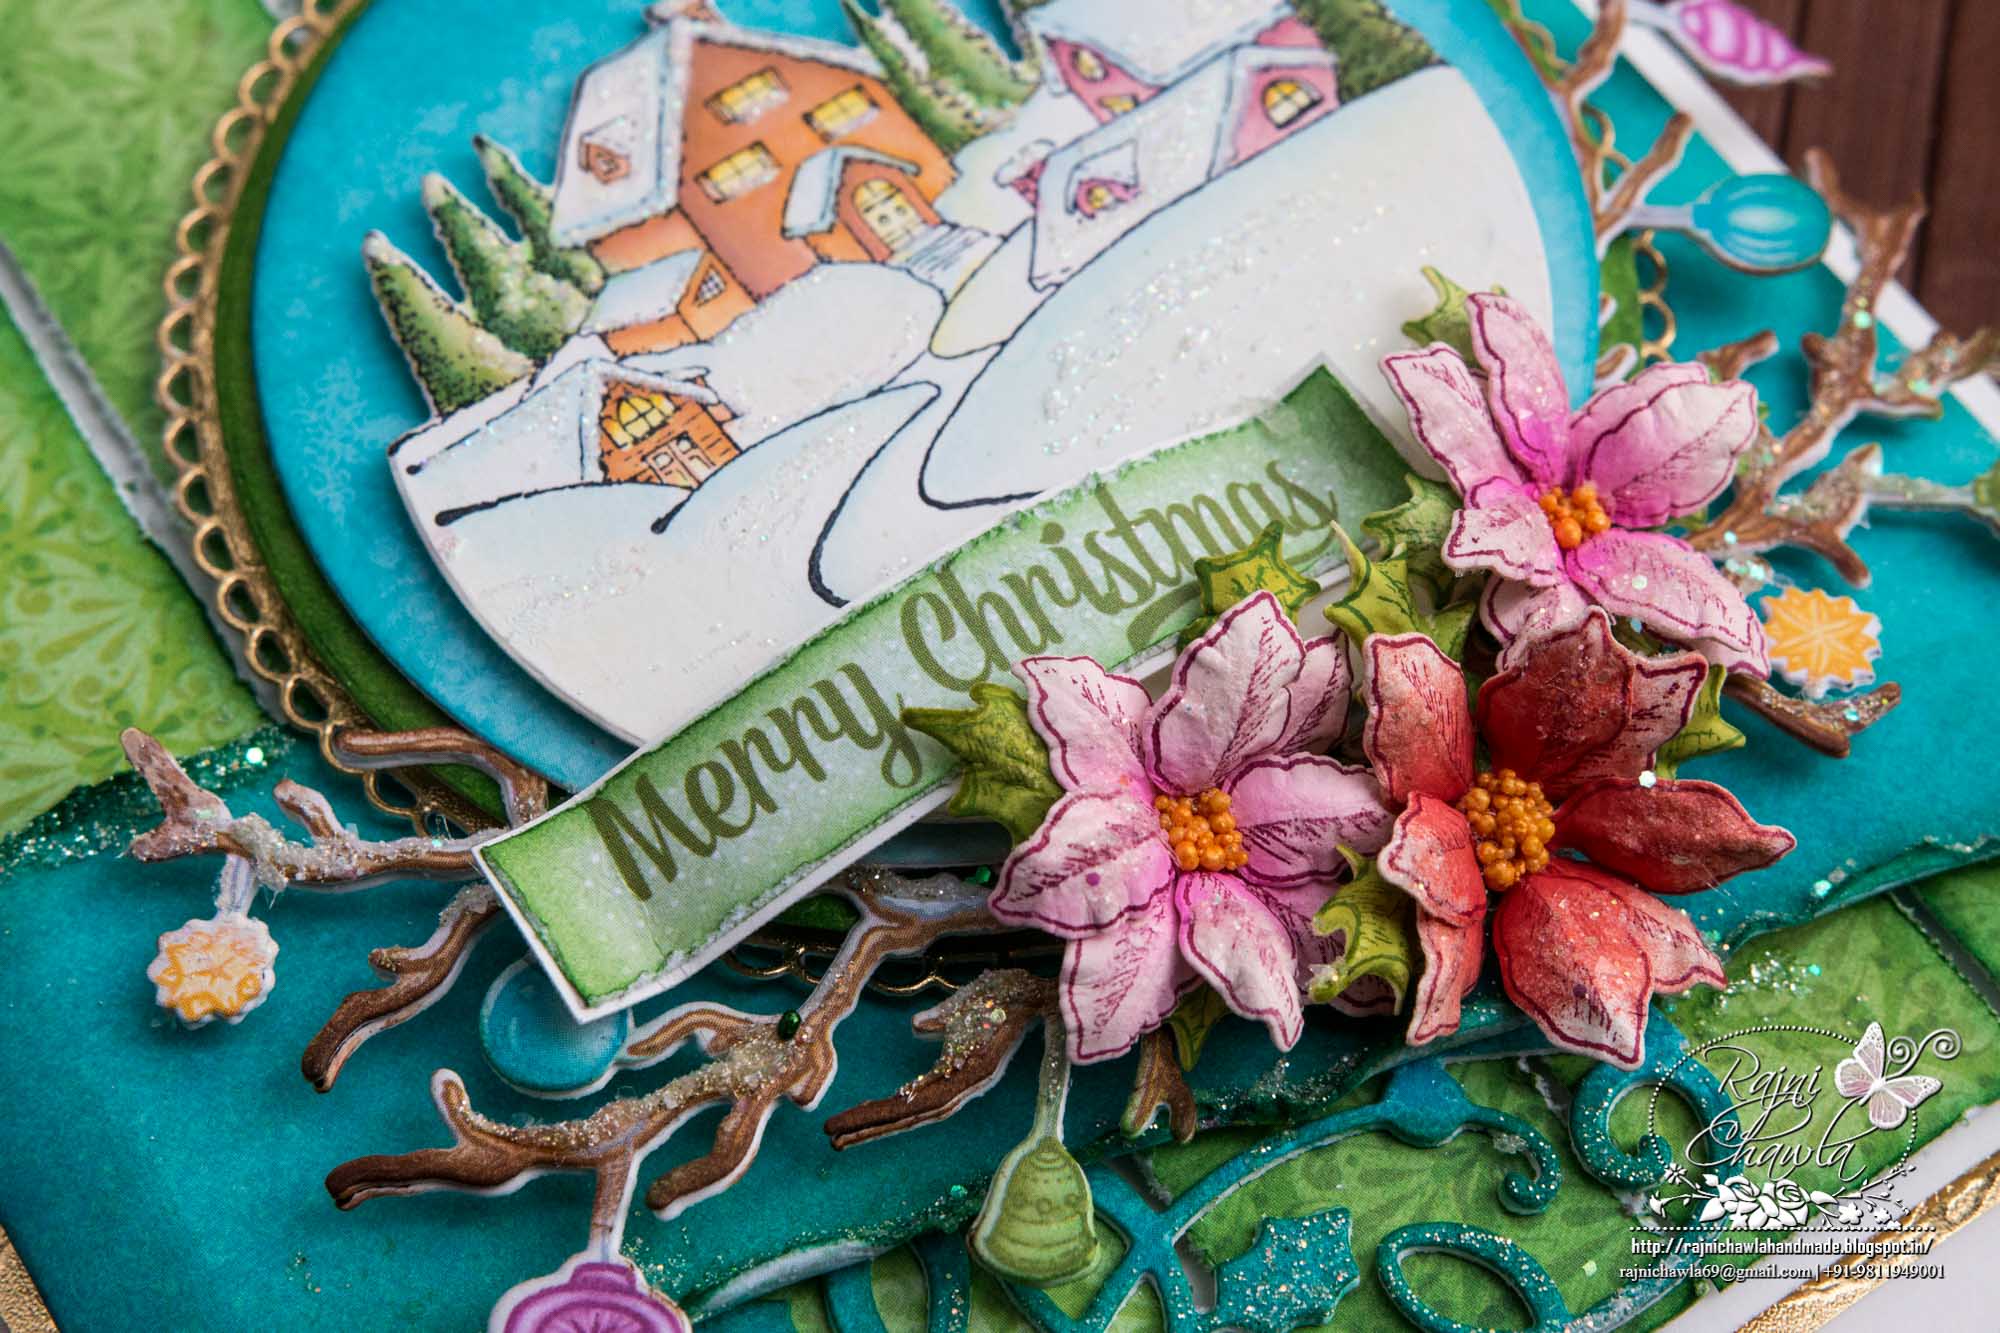
Stamp the images of branches with ornaments from Merry Little Christmas Cling Stamp Set and snowy village from Snowy Pine Village Cling Stamp Set on white cardstock using black archival ink. Cut them using their coordinating dies and color them using Zig Clean Clear Brush Markers. Add frosting powder and crystal clear powder to both the images using an adhesive that dries clear.
Cut one piece of a circle using outer most die from Eyelet Circle & Basics Small Die SDet, one piece each from 2nd and 3rd largest die from white cardstock. Distress them using Peeled Paint and Salty Ocean distress inks. Layer all the circle die cuts one on top of each other and further layer the painted snowy village on top.
For Poinsettias, stamp the images from Poinsettia & Holly Clusters Cling Stamp Set, using Plum Archival, color them using Magenta Hue and Vermillion and cut them using their coordinating dies. Once cut and painted, shape them using Poinsettia Shaping Mold and add prills to their centers. The pine leaves are stamped with Archival Fern Green and painted with Leaf Green archival ink. Once all the elements are ready to assemble the card as shown and glitter the edges randomly to add an extra accent to the card.
Another beautiful card Rajni!!
This is gorgeous Rajni! Love, love, love the colors you’ve chosen!