


Good Morning All…
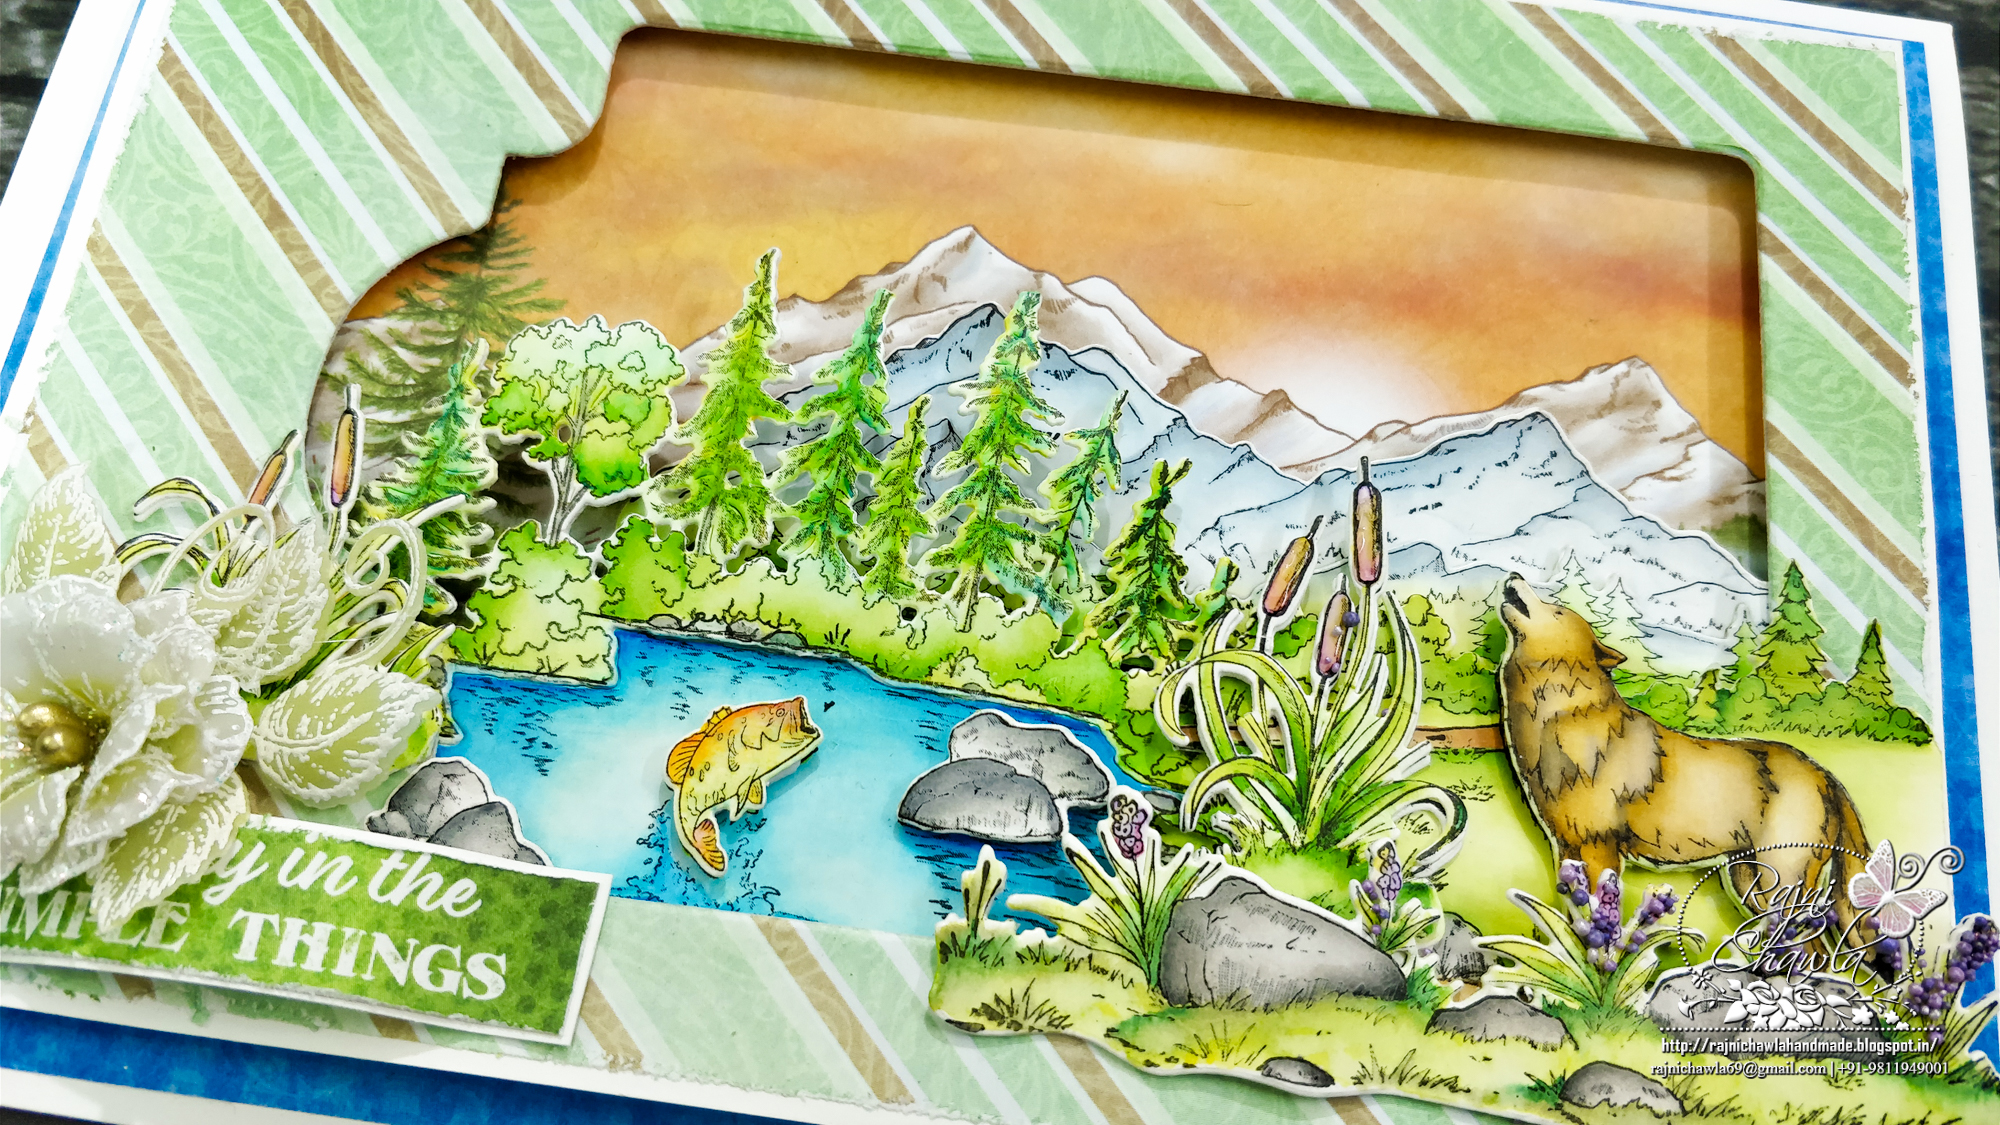
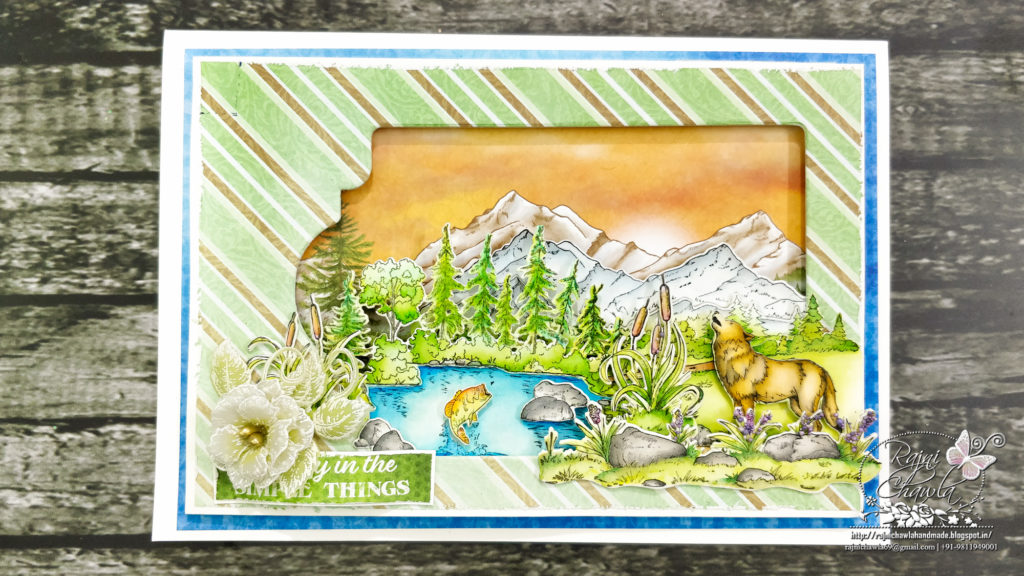
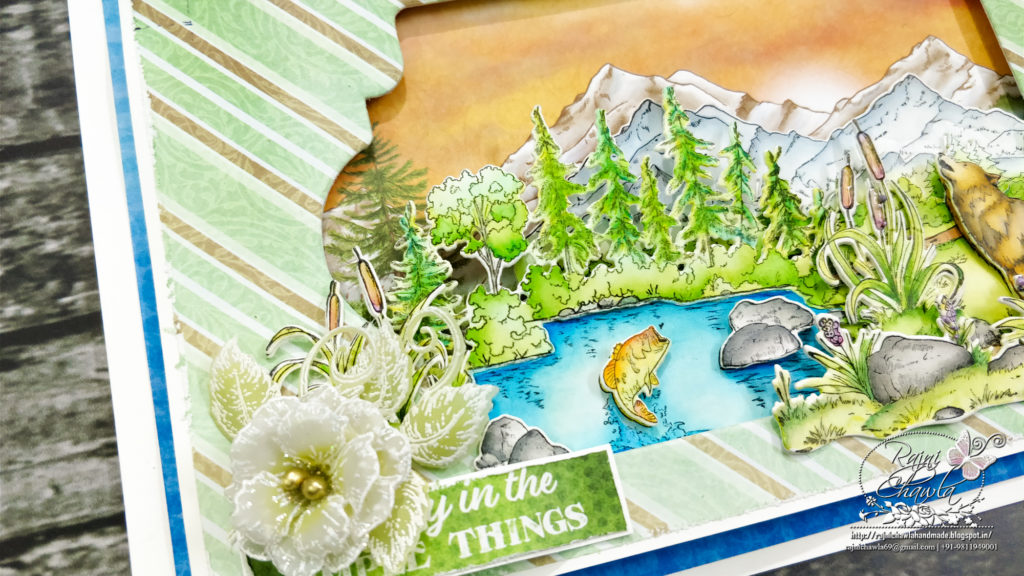
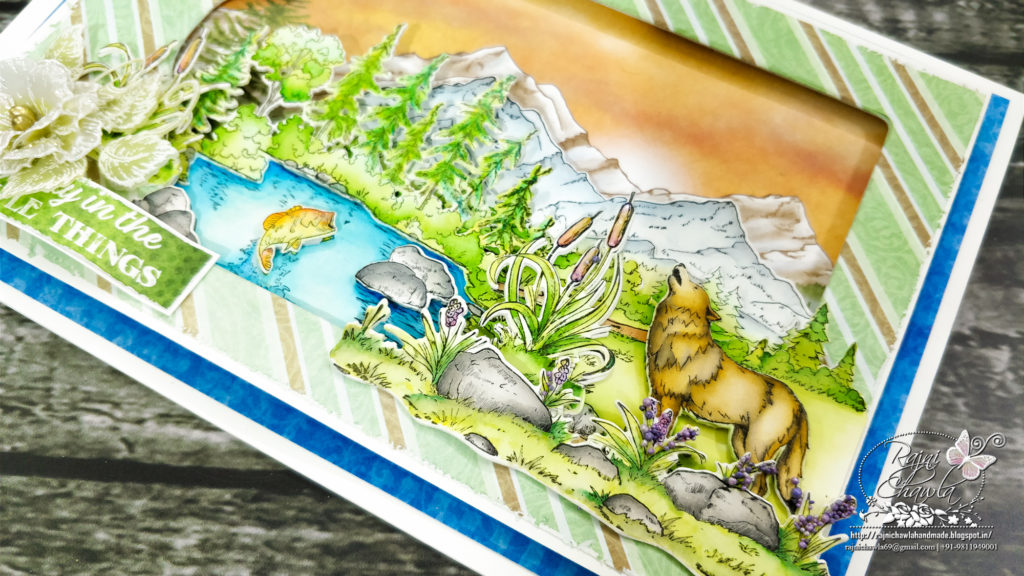
A warm welcome on my blog again!! Continuing with the Wilderness Retreat Collection, I have another window card to share.
The upcoming, Calla Lily Collection is about to release next week. Drop by the company’s blog to see the full preview here.

Supplies From Heartfelt Creations:
| HCD1-7267 Create a ‘scape Backcountry Die HCD1-7269 Create a ‘scape Trout Lake Die HCD1-7270 Create a ‘scape Nature Die HCPC-3893 Create a ‘scape Backcountry Cling Stamp Set HCPC-3895 Create a ‘scape Trout Lake Cling Stamp Set HCPC-3896 Create a ‘scape Nature Cling Stamp Set HCD1-7202 Album Tags and Accents Die HCPC-3752 Classic Rose Cling Stamp Set HCFB1-462 3D Rose Shaping Mold HCST1-401 Deluxe Flower Shaping Kit 18002 Rajni Chawla’s Vellum Flowerite – 10 Sheets PGM15015 Rajni Chawla’s Crystal Clear HCDA2-450 Stack and Store Daubers-Pack of 30 159723 Designer Dries Clear Adhesive HCDP1-2108 Wilderness Retreat Paper Collection 478455 Zig Clean Color Real Brush Markers – 36 Pack 409311 Color In Watercolor Brush – Fine RACP468 Ranger Archival Ink Pad – Jet Black ANC822 I Cannot Tell A Lilac Prills |
Other Products Used: Smooth White Cardstock, Double Sided Foam Tape, Diecutting Machine, Score=Board and, Glossy Accent.
Video Referred:
Instructions: The ready top fold card from smooth white cardstock measures 8 1/2″ by 6″. Choose the paper from the designer paper collection of Wilderness Retreat Collection. Distress the edges using sharp scissors and glue it on the white cardstock keeping the white border of 1/16″ on all sides. Using Album Tags and Accents Die set. cut a window leaving 1 1/2″ on the panel on the left. Next, choose a scenic panel from the paper collection and layer it behind the window. Cut another layer from blue paper from the same collection making a delicate border of 1/16″ on all the sides. Finally, layer the panel on the ready card base.
Stamp all the images needed from Create a ‘scape Backcountry Cling Stamp Set and Create a ‘scape Trout Lake Cling Stamp Set and Create a ‘scape Nature Cling Stamp Set, using black archival ink and color the images using Zig Clean Brush Markers. Cut all the images using their coordinating dies. Add extra layers to add strength, where needed. Also, add foam tape to create extra dimensions.
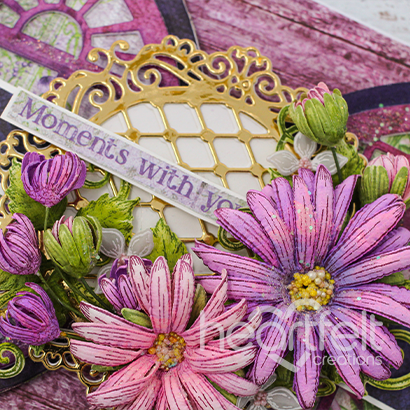
For Vellum Roses and leaves, Stamp the images from Classic Rose Stamp Set and Classic Rose Vines Cling Stamp Set with white Color Box ink on Vellum, Sprinkle white heat embossing powder and dust extras in the funnel tray and heat set. Color the flowers using Distress Oxide Peeled Paint in the center. Also, Die cut all the images using their coordinating dies. Shape the flowers using a 3D flower shaping mold. Press the centers and glue them together to form beautiful flowers. Pick the flower centers using needle tool and secure golden color pearl stamens using tacky glue. Assemble a small bouquet as shown and finish the card by adding a sentiment tag from the paper collection
Shape the elements slightly with your hands to add extra interest. Add prills using an adhesive that dries clear and glossy accent for adding more natural dimensions. finish the card using a sentiment from the collection.
Beautiful card Rajni! As always, your coloring is just gorgeous!