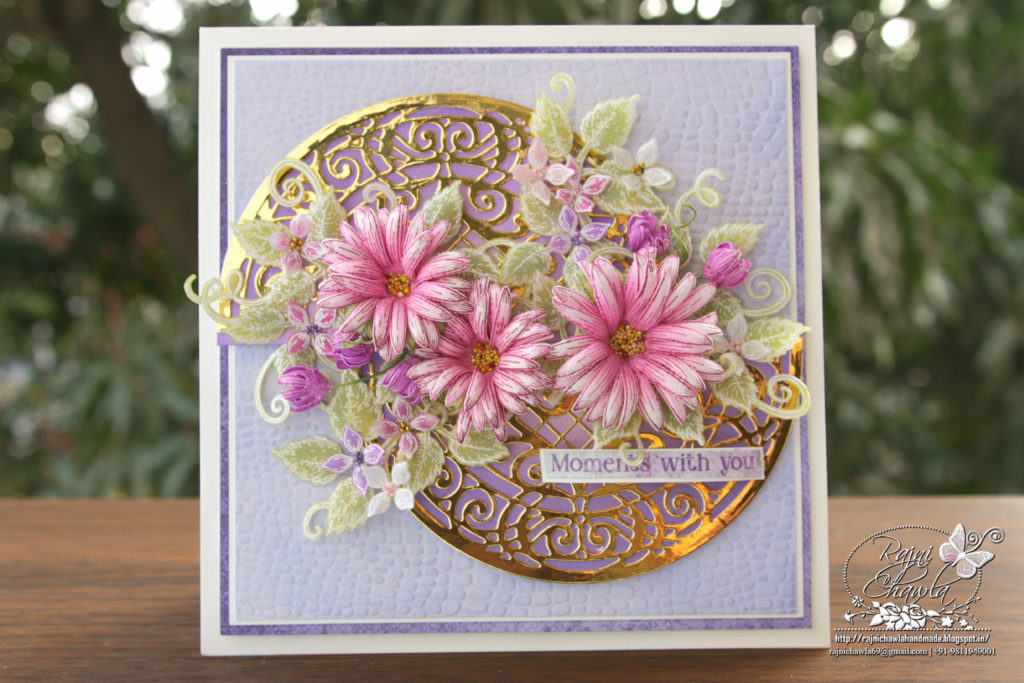
Back again with inspiration Wednesday share. I have this simple yet elegant card to share. The Luxe gold cardstock by Heartfelt Creations is the best mirror cardstock I have come across to date. I can truly say, I m in love with these. The layering of dies using white n gold combination along with my handmade Vellum flowers brings out such a quick, easy n elegant beauty to my handmade cards. I have always liked the outcome.

Supplies from Heartfelt Creations:
HCD1-7257 Wild Aster Die
HCPC-3887 Wild Aster Cling Stamp Set
HCPC-3835 Leafy Accents Cling Stamp Set
HCD1-7193 Leafy Accents Die
18002 Rajni Chawla’s Vellum Flowerite – 10 Sheets
RAHT Heat It Craft Tool
HCDA2-450 Stack and Store Daubers-Pack of 30
159723 Designer Dries Clear Adhesive
HCGP1-488 Luxe Gold Cardstock
HCD1-7256 Heart of Joy Decorative Die
RACP499 Ranger Archival Ink Pad – Plum
RACP985 Ranger Archival Ink Pad – Cactus Flower
HCPP1-475 Deluxe Flower Shaping Paper Pack of 50 – White
Other Products Used: Smooth White Cardstock, Glue that dries clear, Hero Arts white pigment ink, Ranger’s White Heat Embossing Powder, Distress oxide Peeled Paint, Warm Lipstick and Seedless Preserves, and Double Sided Tapes
Videos Referred: For more tips on creating with the Wild Aster Collection watch the tutorial
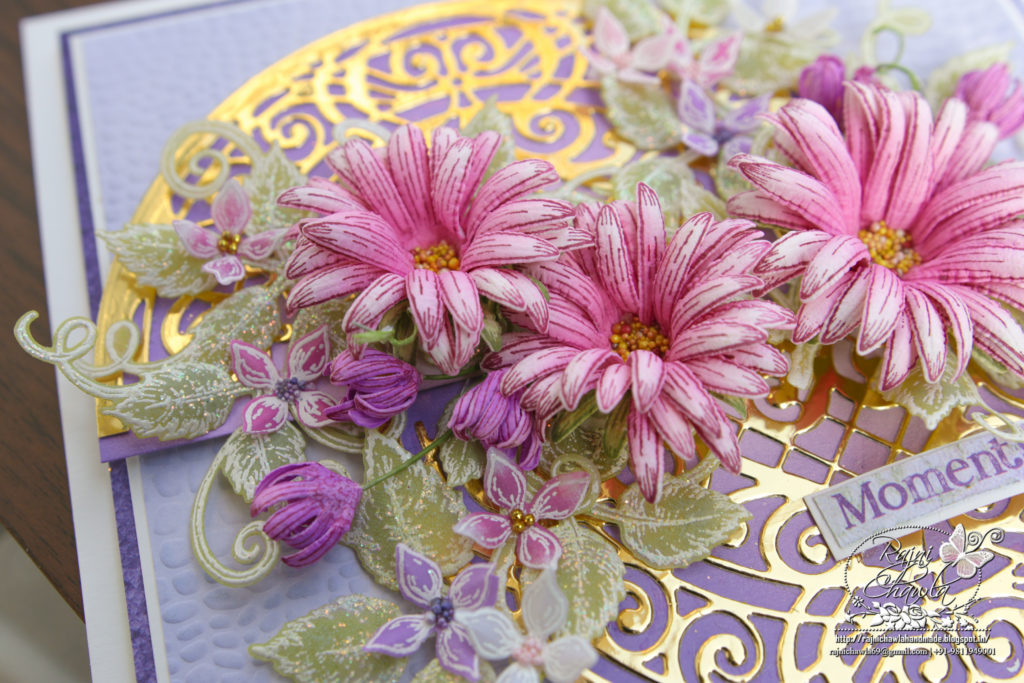
Instructions: The ready top-fold card from smooth white cardstock measures 7″ by 7″. To create the front panel, cut a piece of white cardstock measuring 6 1/2″ by 6 1/2″, dry emboss it using an embossing folder, and layer it on the card front. Next, cut 2 pieces of half doilies using Luxe Gold Cardstock with the help of Heart of Joy Decorative Die. Also, cut 2 solid semi-circles from white cardstock and color them using wilted violet distress ink. Adhere the die cuts as shown and use these as an accent to the floral bouquet.
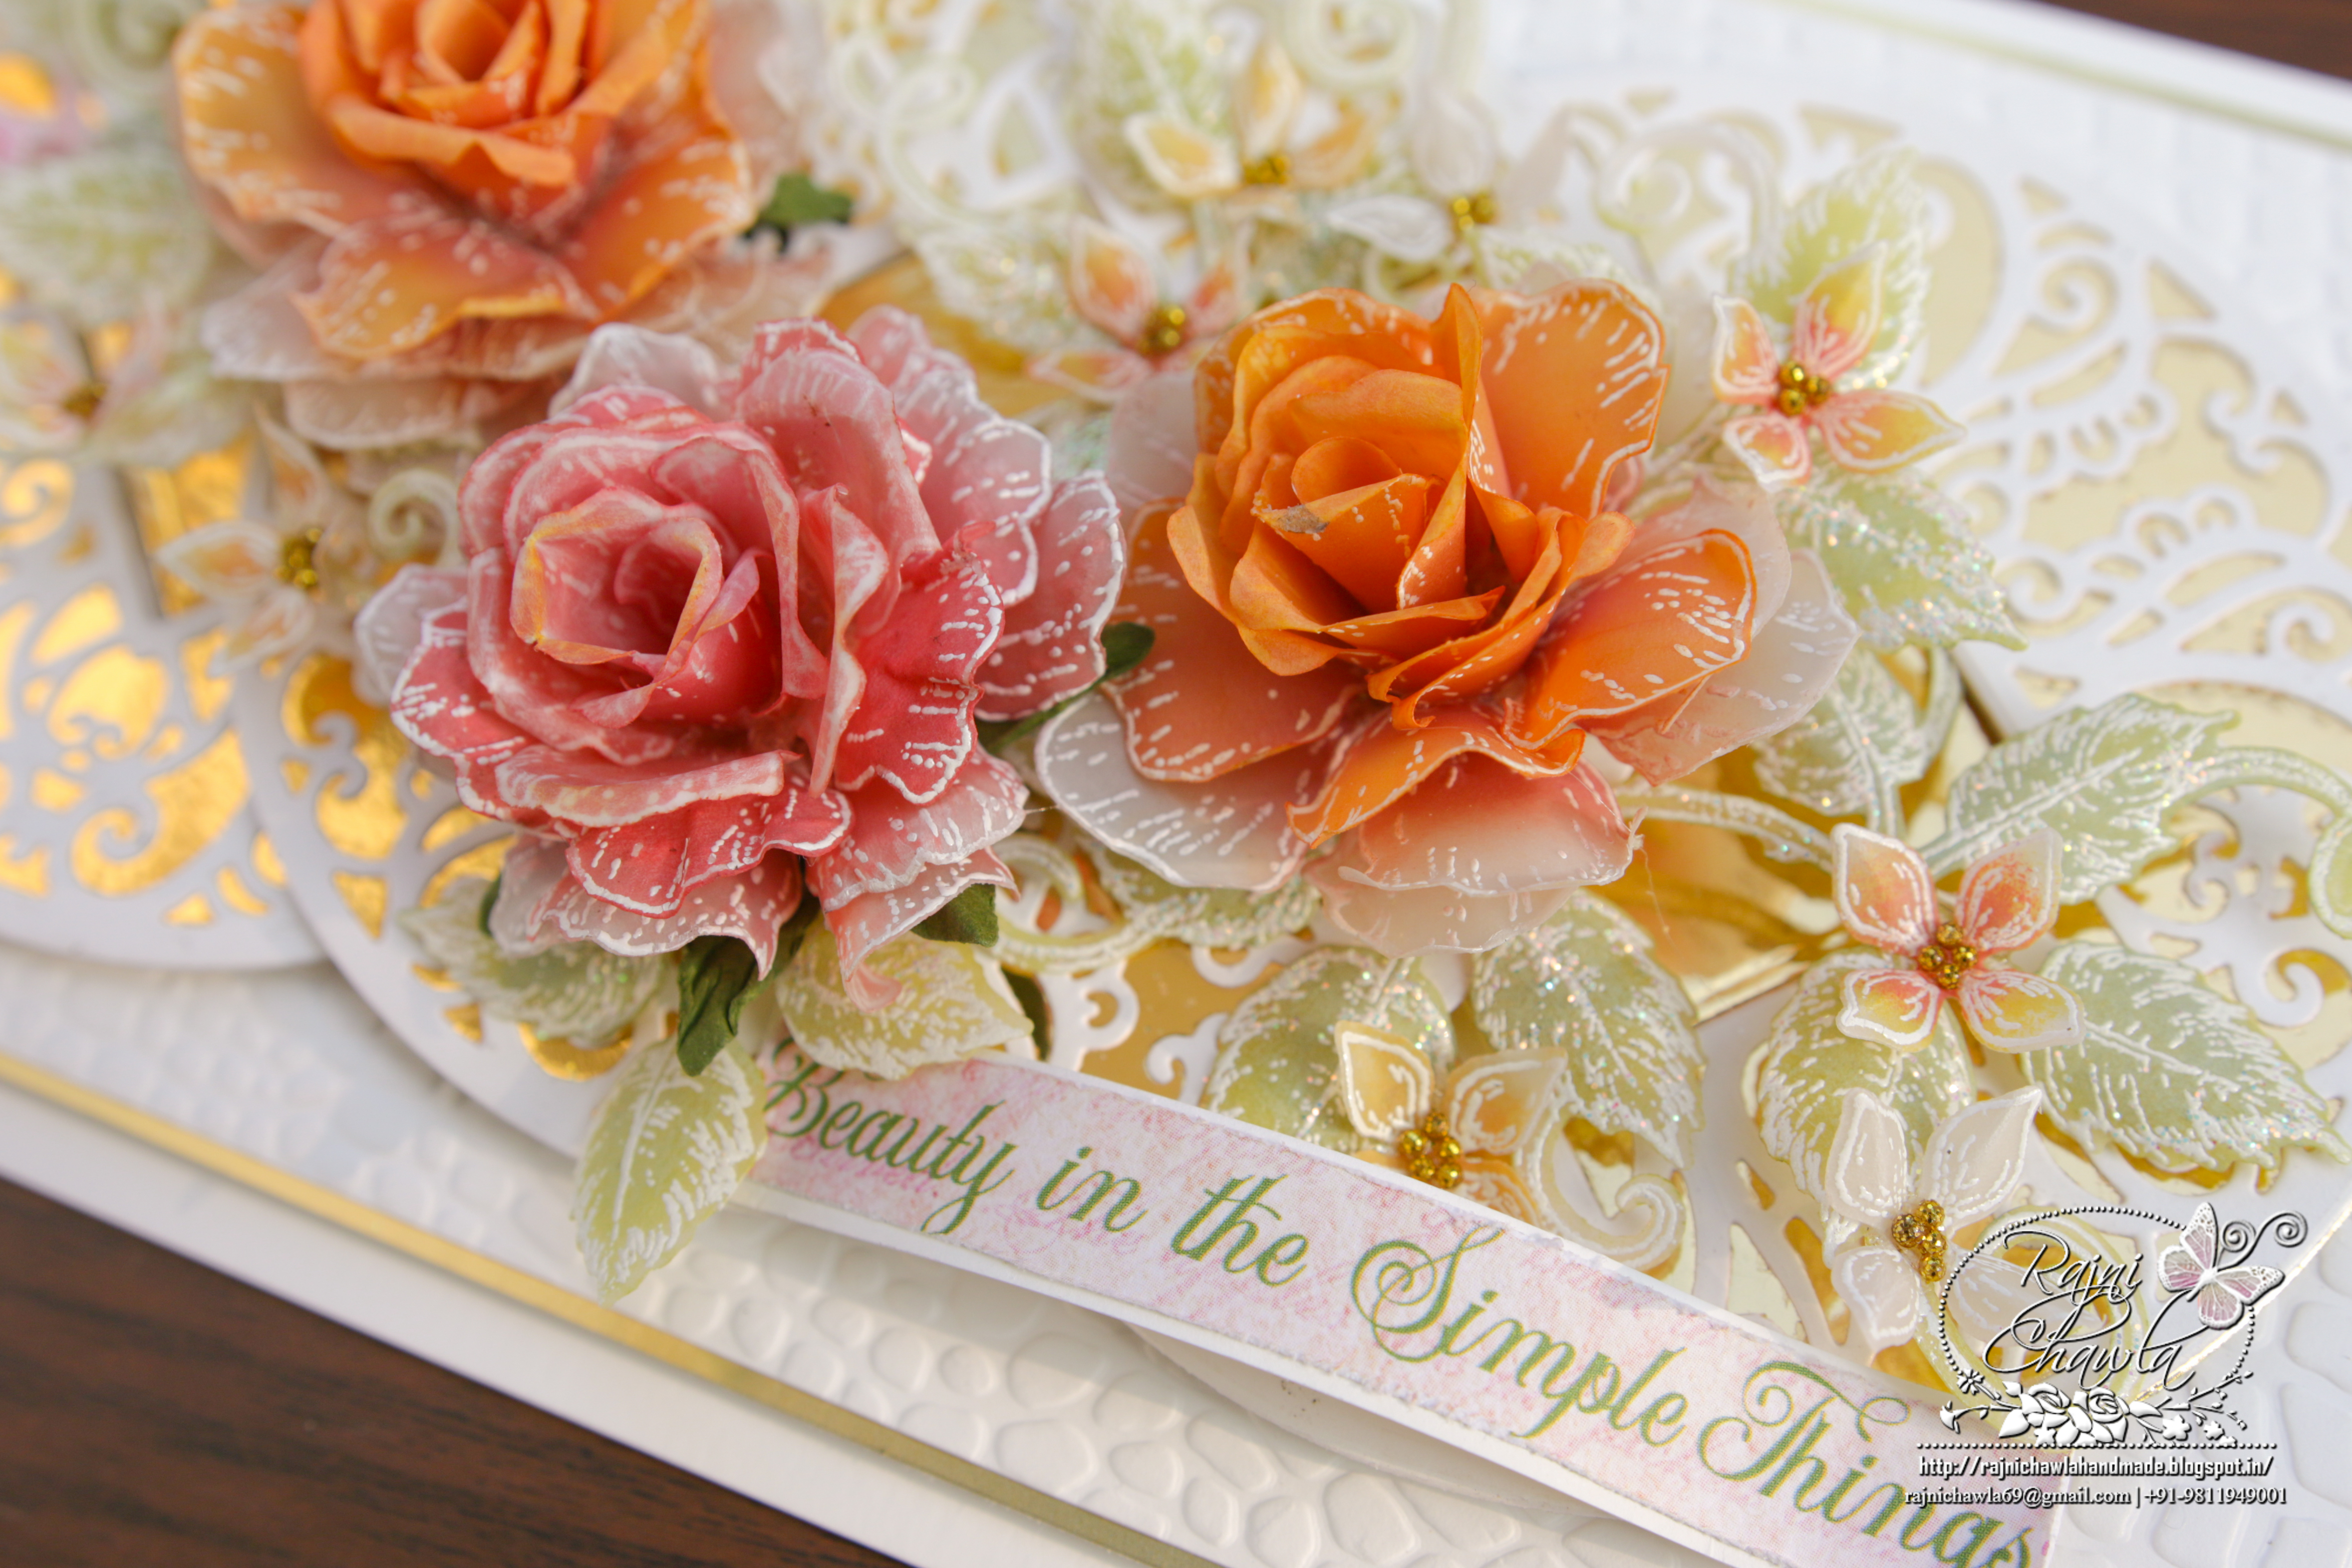
For the flowers, Stamp multiple images of mixed florals from Wild Aster Cling Stamp Set on Deluxe flower shaping paper using Plum Archival Ink and cut them using their coordinating dies. Color the flowers using Cactus Flower Archival Ink and shape them using Deluxe Flower Shaping Kit. Prepare 1 large,1 medium, and 2-3 small flowers and complete them by adding prills in the centers. Also, prepare 2-3 pink buds by using the smallest flowers from the set and shaping them inwards and adding wired stamens.
For Vellum leaves and tiny lush lilacs, Stamp the images from Leafy Accents Cling Stamp Set and Lush Lilacs with white pigment ink on Vellum, Sprinkle white heat embossing powder and dust extras in the funnel tray and heat set. Color the leafy vines using Distress Oxide Peeled Paint and lush Lilacs in the shades of pink. Shape the leafy vines and Lilacs with the help of a needle tool. To the tiny flowers add glitter balls in the center.
Once all the elements are ready, assemble the card as shown and finish the card by cutting the sentiment from the paper collection.