


Good Morning all….
Once again it’s time for the new collection. Can’t believe it’s October n we at Heartfelt Creations are releasing October month release, Buttons and Blooms Collection. 2018 has really moved very fast.
Beautiful floral fabric, delicate trimmings and charming buttons accompanied by delicate hand-stitch work, and precise patchwork become a most exquisite project in the hands of an experienced seamstress! While sewing may not be a talent gifted to everyone, you can now experience the same stunning results in your paper crafts with the Buttons and Blooms Collection from Heartfelt Creations! An inviting paper collection bound in delightfully vibrant hues of bright blues, happy yellows, pretty pinks and robust reds boast alluring patterns of dainty florals, fun filled polka dots and quilt like patterns which will beckon you to caress them as you would the beautiful bolts of material found in your favorite fabric store! “Applique” cards and scrapbook pages quickly and with ease using the striking yet functional premade card panels designed in varying sizes and patterns! Embellish your handmade creations with a variety of hand-stitched accents found in the gorgeous assembling of cling stamp sets and coordinating dies. Choose from delicately embroidered sentiments, stitched banners, charming patchwork pockets, decorative patches and rick rack trim, all lending that personal handmade touch to your crafty creations! Lastly, “hem” your projects with fetching blossoms that have been skillfully illustrated to give them the appearance of having been cut from patchwork fabric! Designed in three varying sizes, these pleasing posies are ideal for using as flat embellishments, or layered to create wonderful dimensional blooms! So, come along with us…grab your shears, patterned papers and patchwork die cuts and let’s head into the craft room! Bobbins, threads and sewing machines not required!
Products from Heartfelt Creations;
HCD1-7205 Buttons and Blooms Die
HCD1-7206 Patchwork Pocket & Patterns Die
HCPC-3849 Buttons and Blooms Cling Stamp Set
HCPC-3850 Patchwork Pocket & Patterns Cling Stamp Set
HCPC-3851 Hand-stitched Accents Cling Stamp Set
HCDP1-295 Buttons and Blooms Paper Collection
HCD2-750 Cut Mat Create 1B Die
HCD1-7110 Classic Rose Die
HCFB1-462 3D Rose Shaping Mold
HCPC-3752 Classic Rose Cling Stamp Set
RACP468 Ranger Archival Ink Pad – Jet Black
RACP482 Ranger Archival Ink Pad – Olive
TSSZ63 StazOn Ink Pad – Teal Blue
RACP436 Ranger Archival Ink Pad – Leaf Green
159723 Designer Dries Clear Adhesive
Other Products Used: Smooth white cardstock, Acetate sheet, Red Tacky Tape, Sequence mix, Glossy Accents, Double-sided foam tape.
Videos Referred: For more tips on creating with the flower shaping molds, watch the tutorial at https://youtu.be/FSdPL7nXvQE.
For more tips on creating with the Buttons and Blooms collection, watch the tutorial at https://youtu.be/WpR2XrSH0U0.
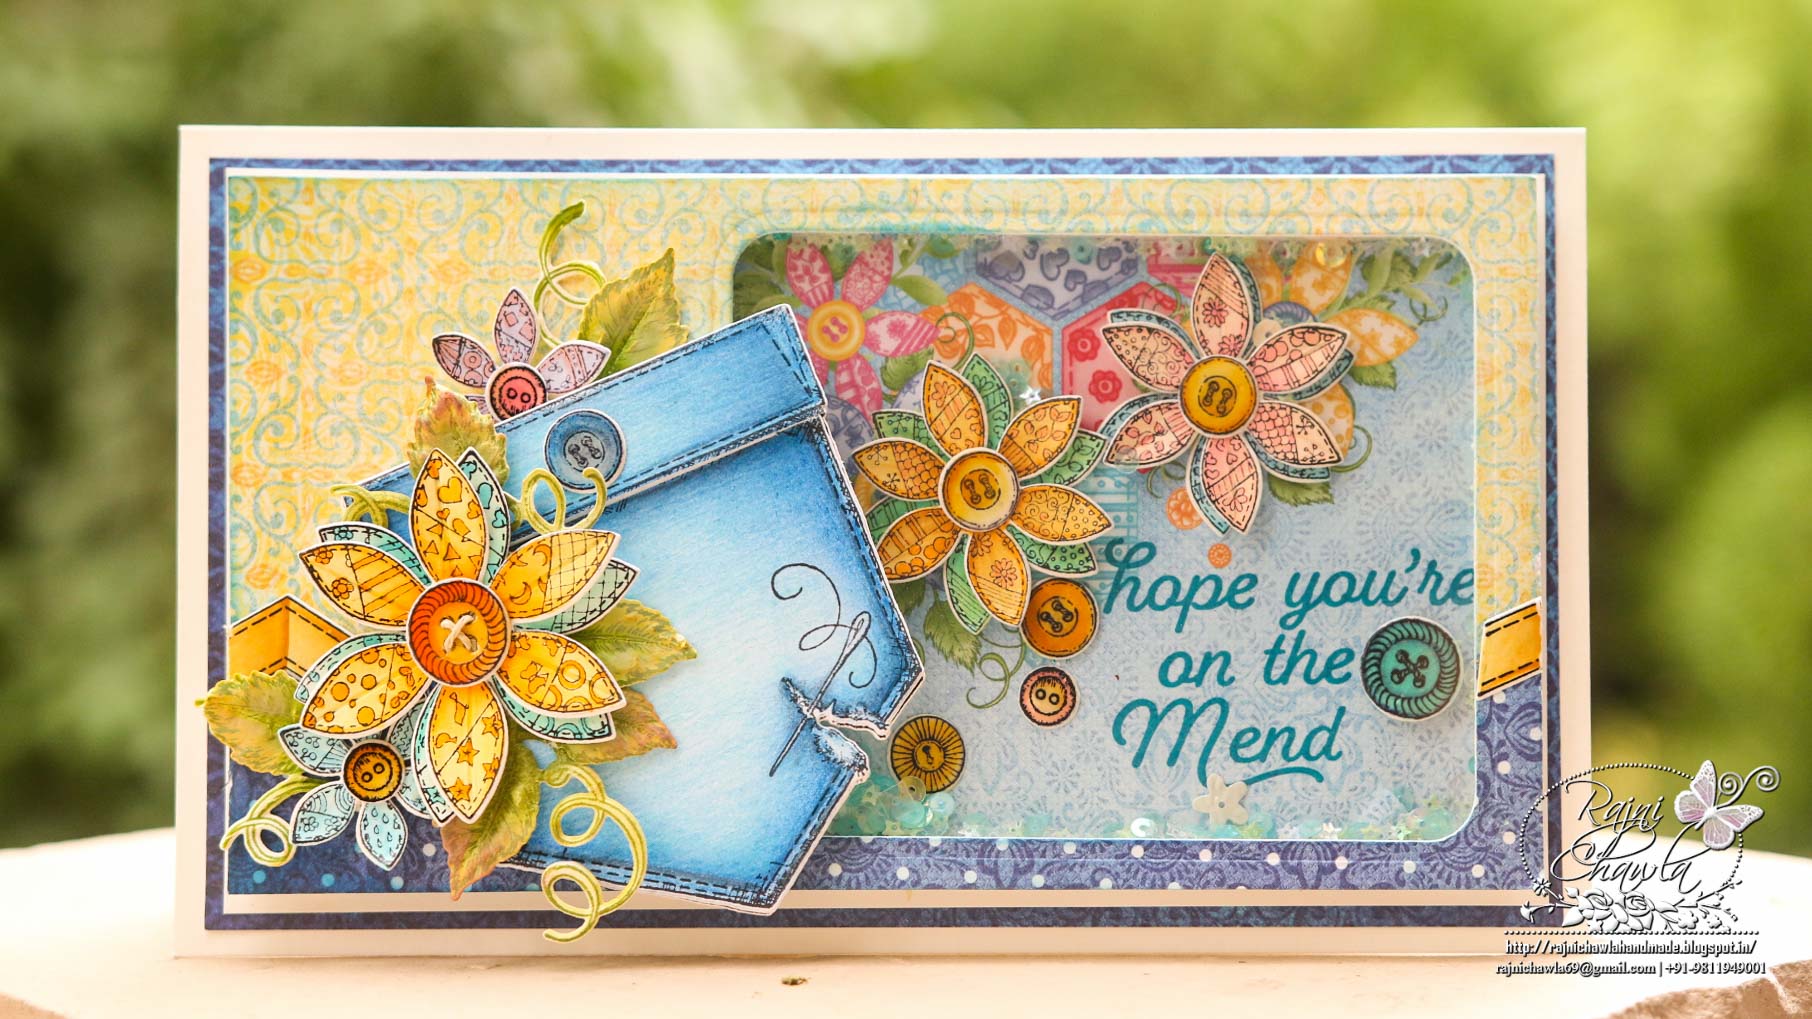
Instructions: The ready top-fold card from white cardstock measures, 9″ by 5 1/4″. Starting from the top panel, first, choose the paper from the designer paper collection. The top panel measures, 4 1/2″ by 8 1/2″ to create which we need a color combination of two pattern papers. Cut a strip of blue dotted paper measuring 1 1/2′ by 8 1/2″ and light yellow paper measuring 3″ by 8 1/2″. Adhere both the strips on a thin rough strip of paper. Neat the edges with the help of paper trimmer. Set the small photo mat die on the right-hand side of the ready panel and run through die cutting machine to create the window. Cover the window with acetate sheet from the back using red tacky tape.
Shaker window: Choose the pattern paper from the paper collection to create the back panel of the window, glue layered and slightly shaped flowers, and buttons. Also, stamp the sentiment from Hand-stitched Accents Cling Stamp Set with Teal color Stazon. To the top panel add two layers of foam tape, add sequence mix, release the backing of the tape and close the shaker window with the back panel. To the shaker, window, add a layer of white and then a layer of dark blue paper and then mat it on the ready card base.
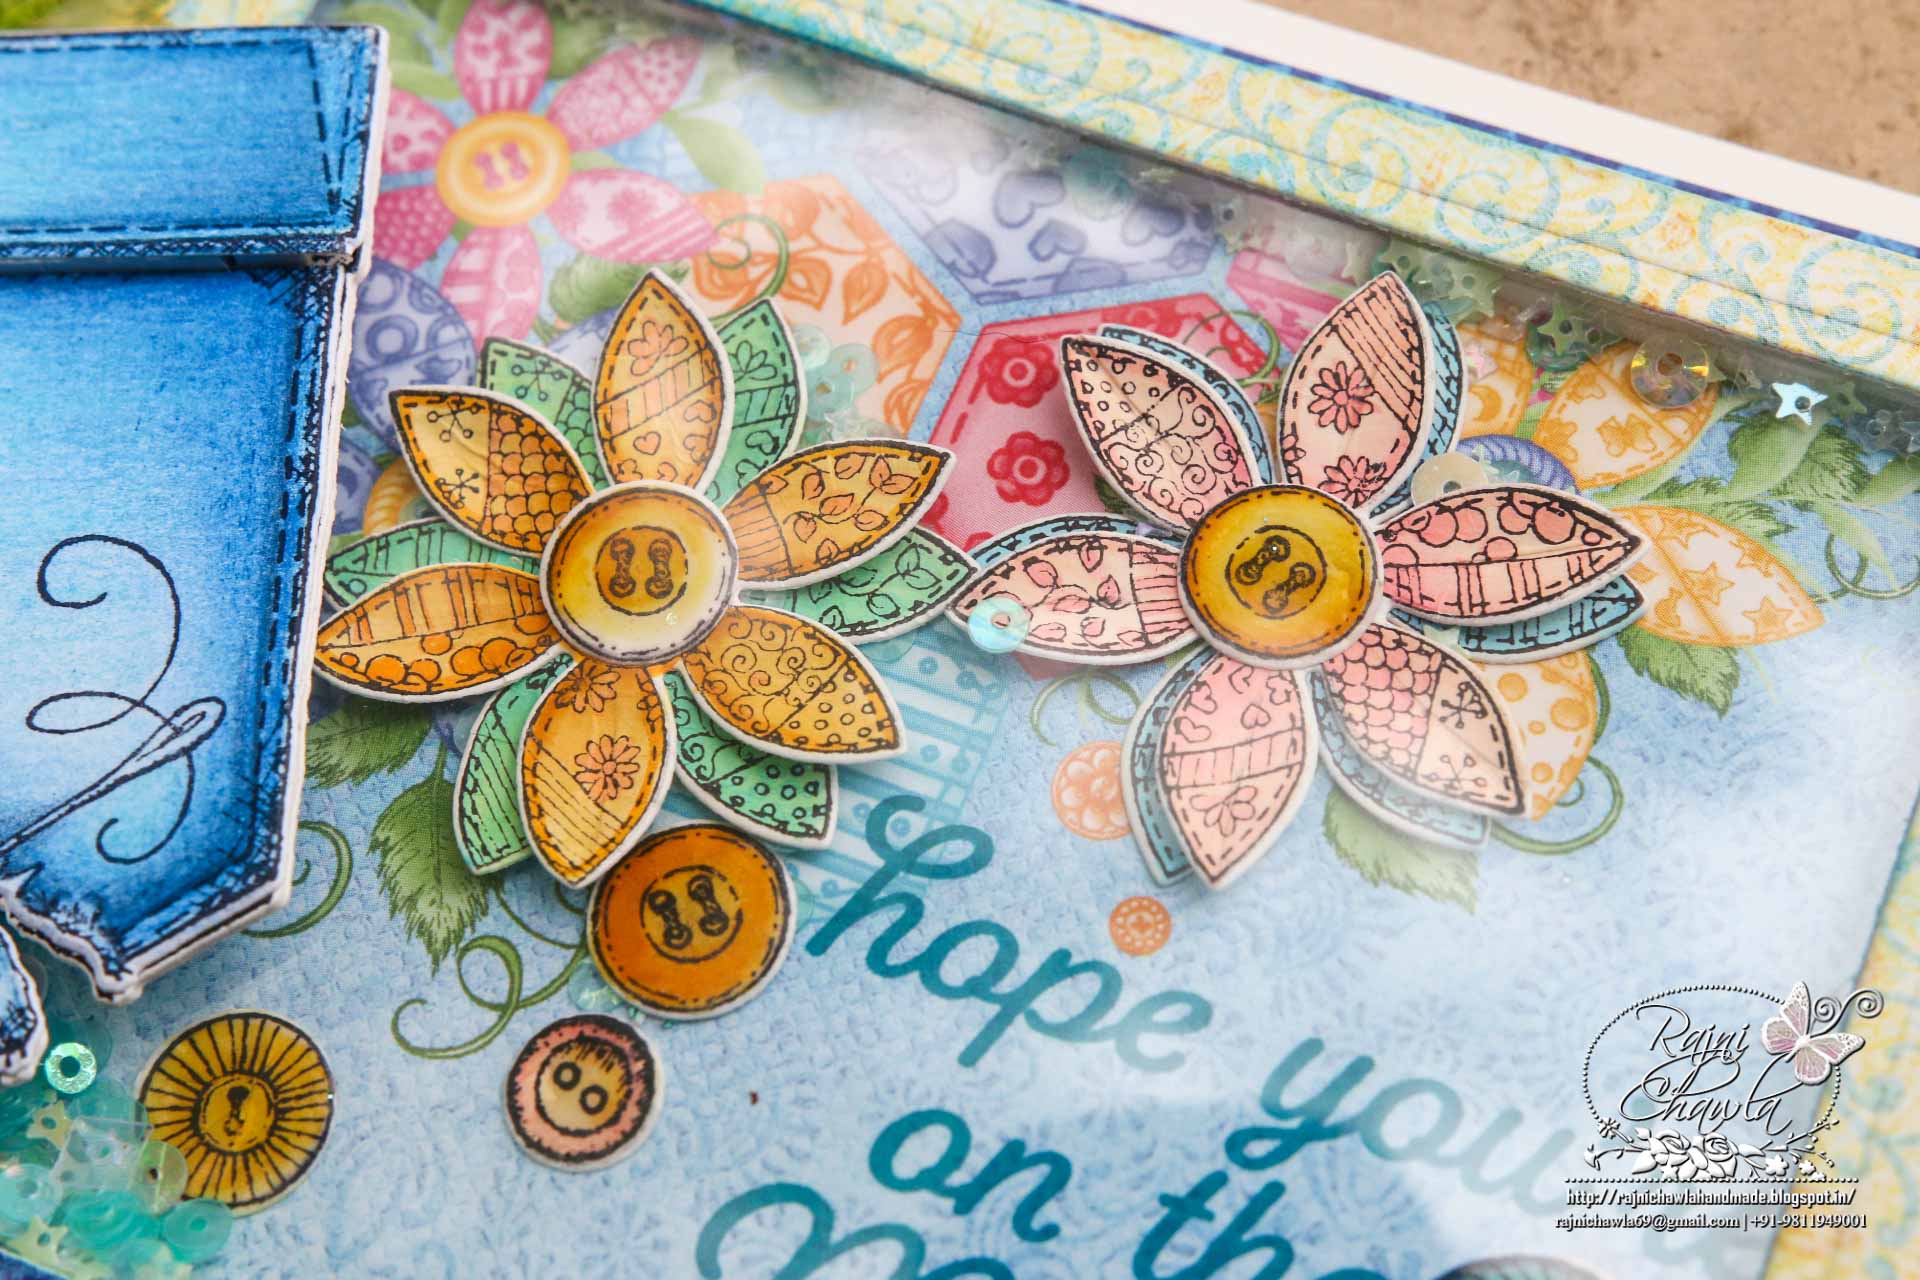
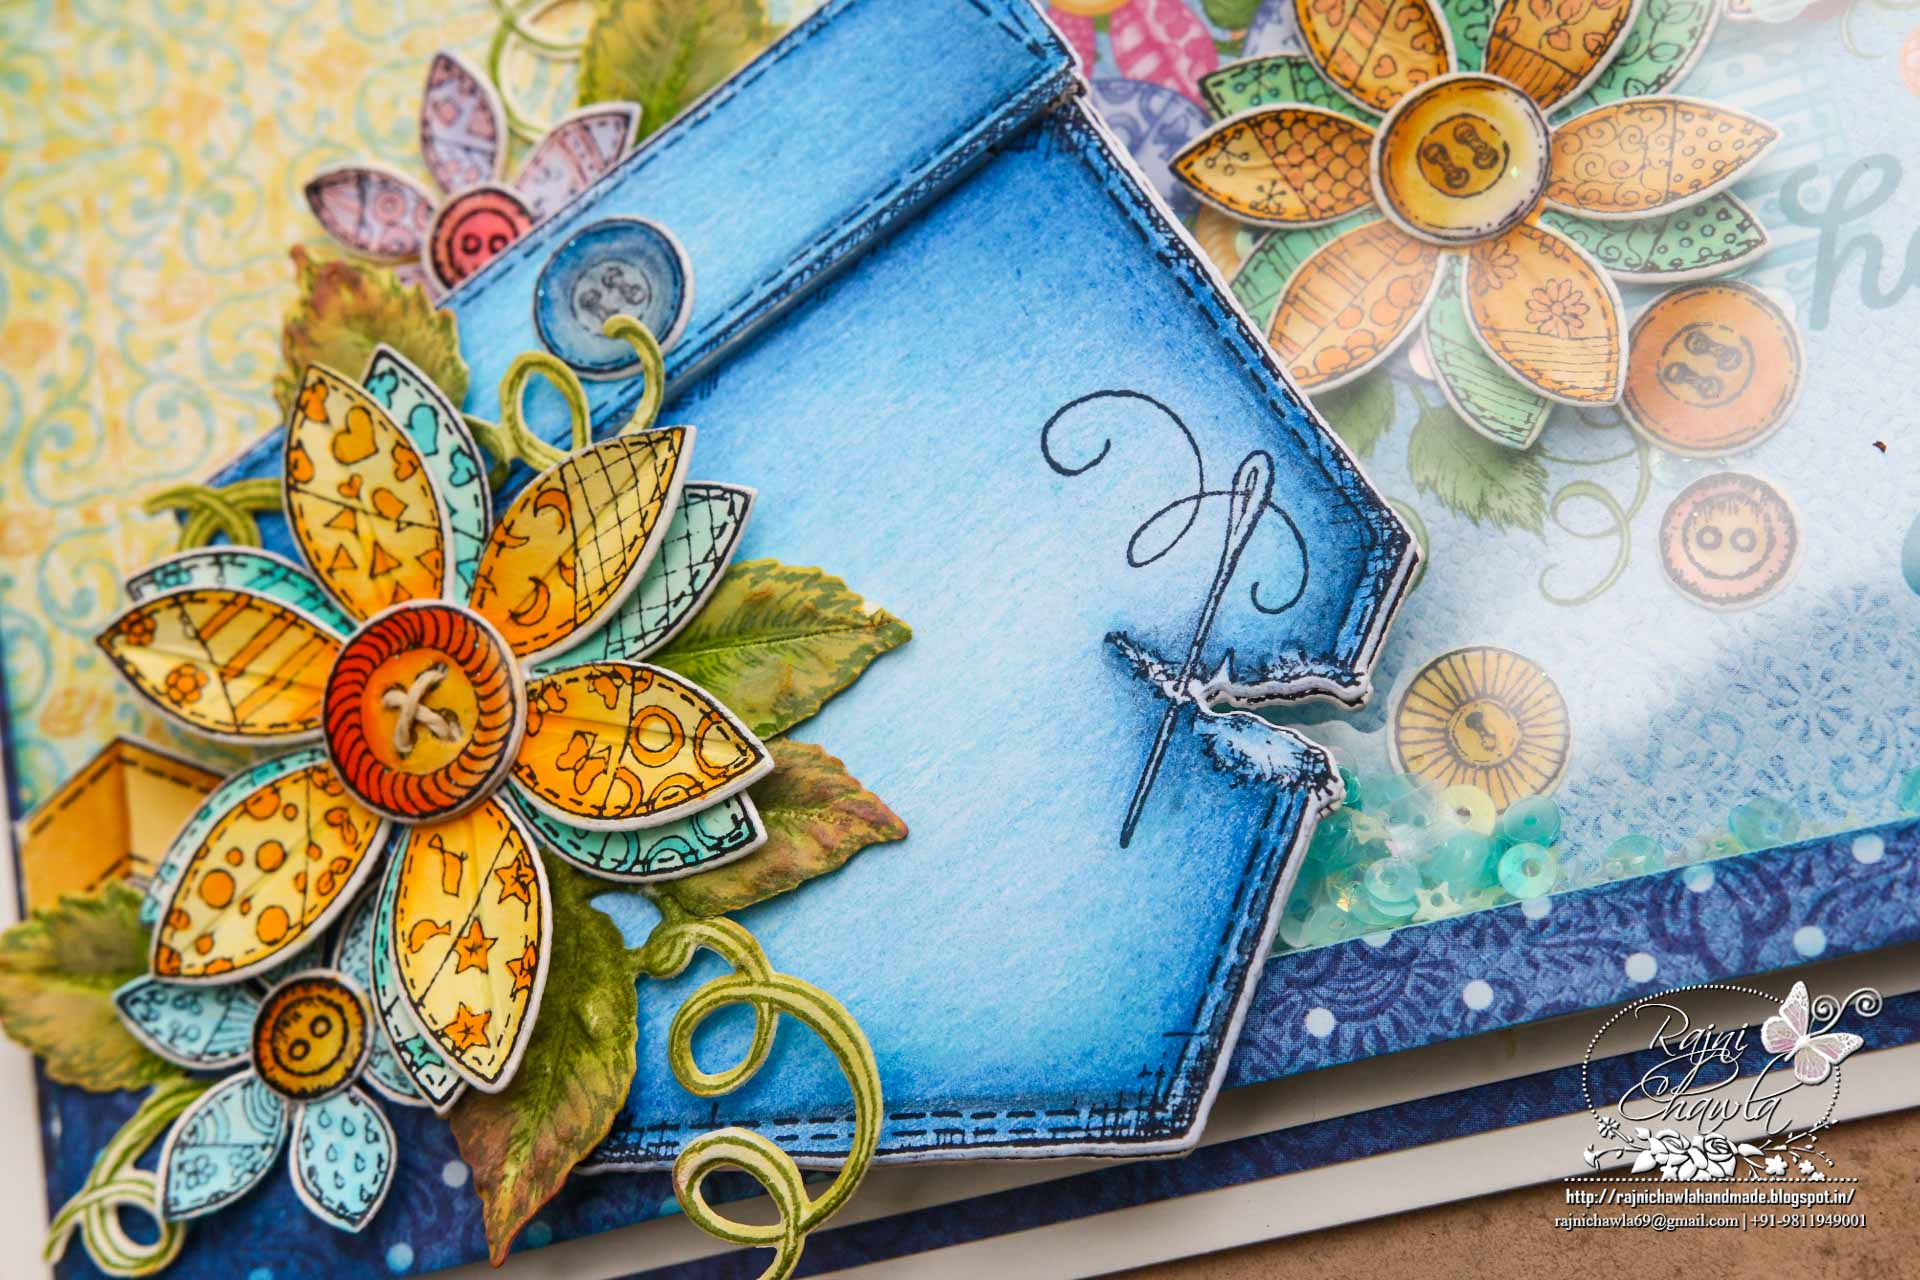
Embellishments: Stamp all the needed images from Buttons and Blooms Cling Stamp Set and Patchwork Pocket & Patterns Cling Stamp Set with black archival ink, cut them using their coordinating dies and paint them using Zig Clean Clear Brush Markers. The Buttons are painted and then given a coating of glossy accents. To add the dimensions to the pocket, cut the painted image and add foam tape.
The leaves from Classic rose Collection are stamped with Olive green, painted using Leaf green and cut using it’s coordinating die. Shape the leaves using Rose Shaping Mold.
Another gorgeous creation Rajni!!! Love how you shaped the flowers!
You know I’m a huge fan and this card now joins the ranks of all the other gorgeous creations coming from your fingers! I love the flowers!