Good Morning Friends..
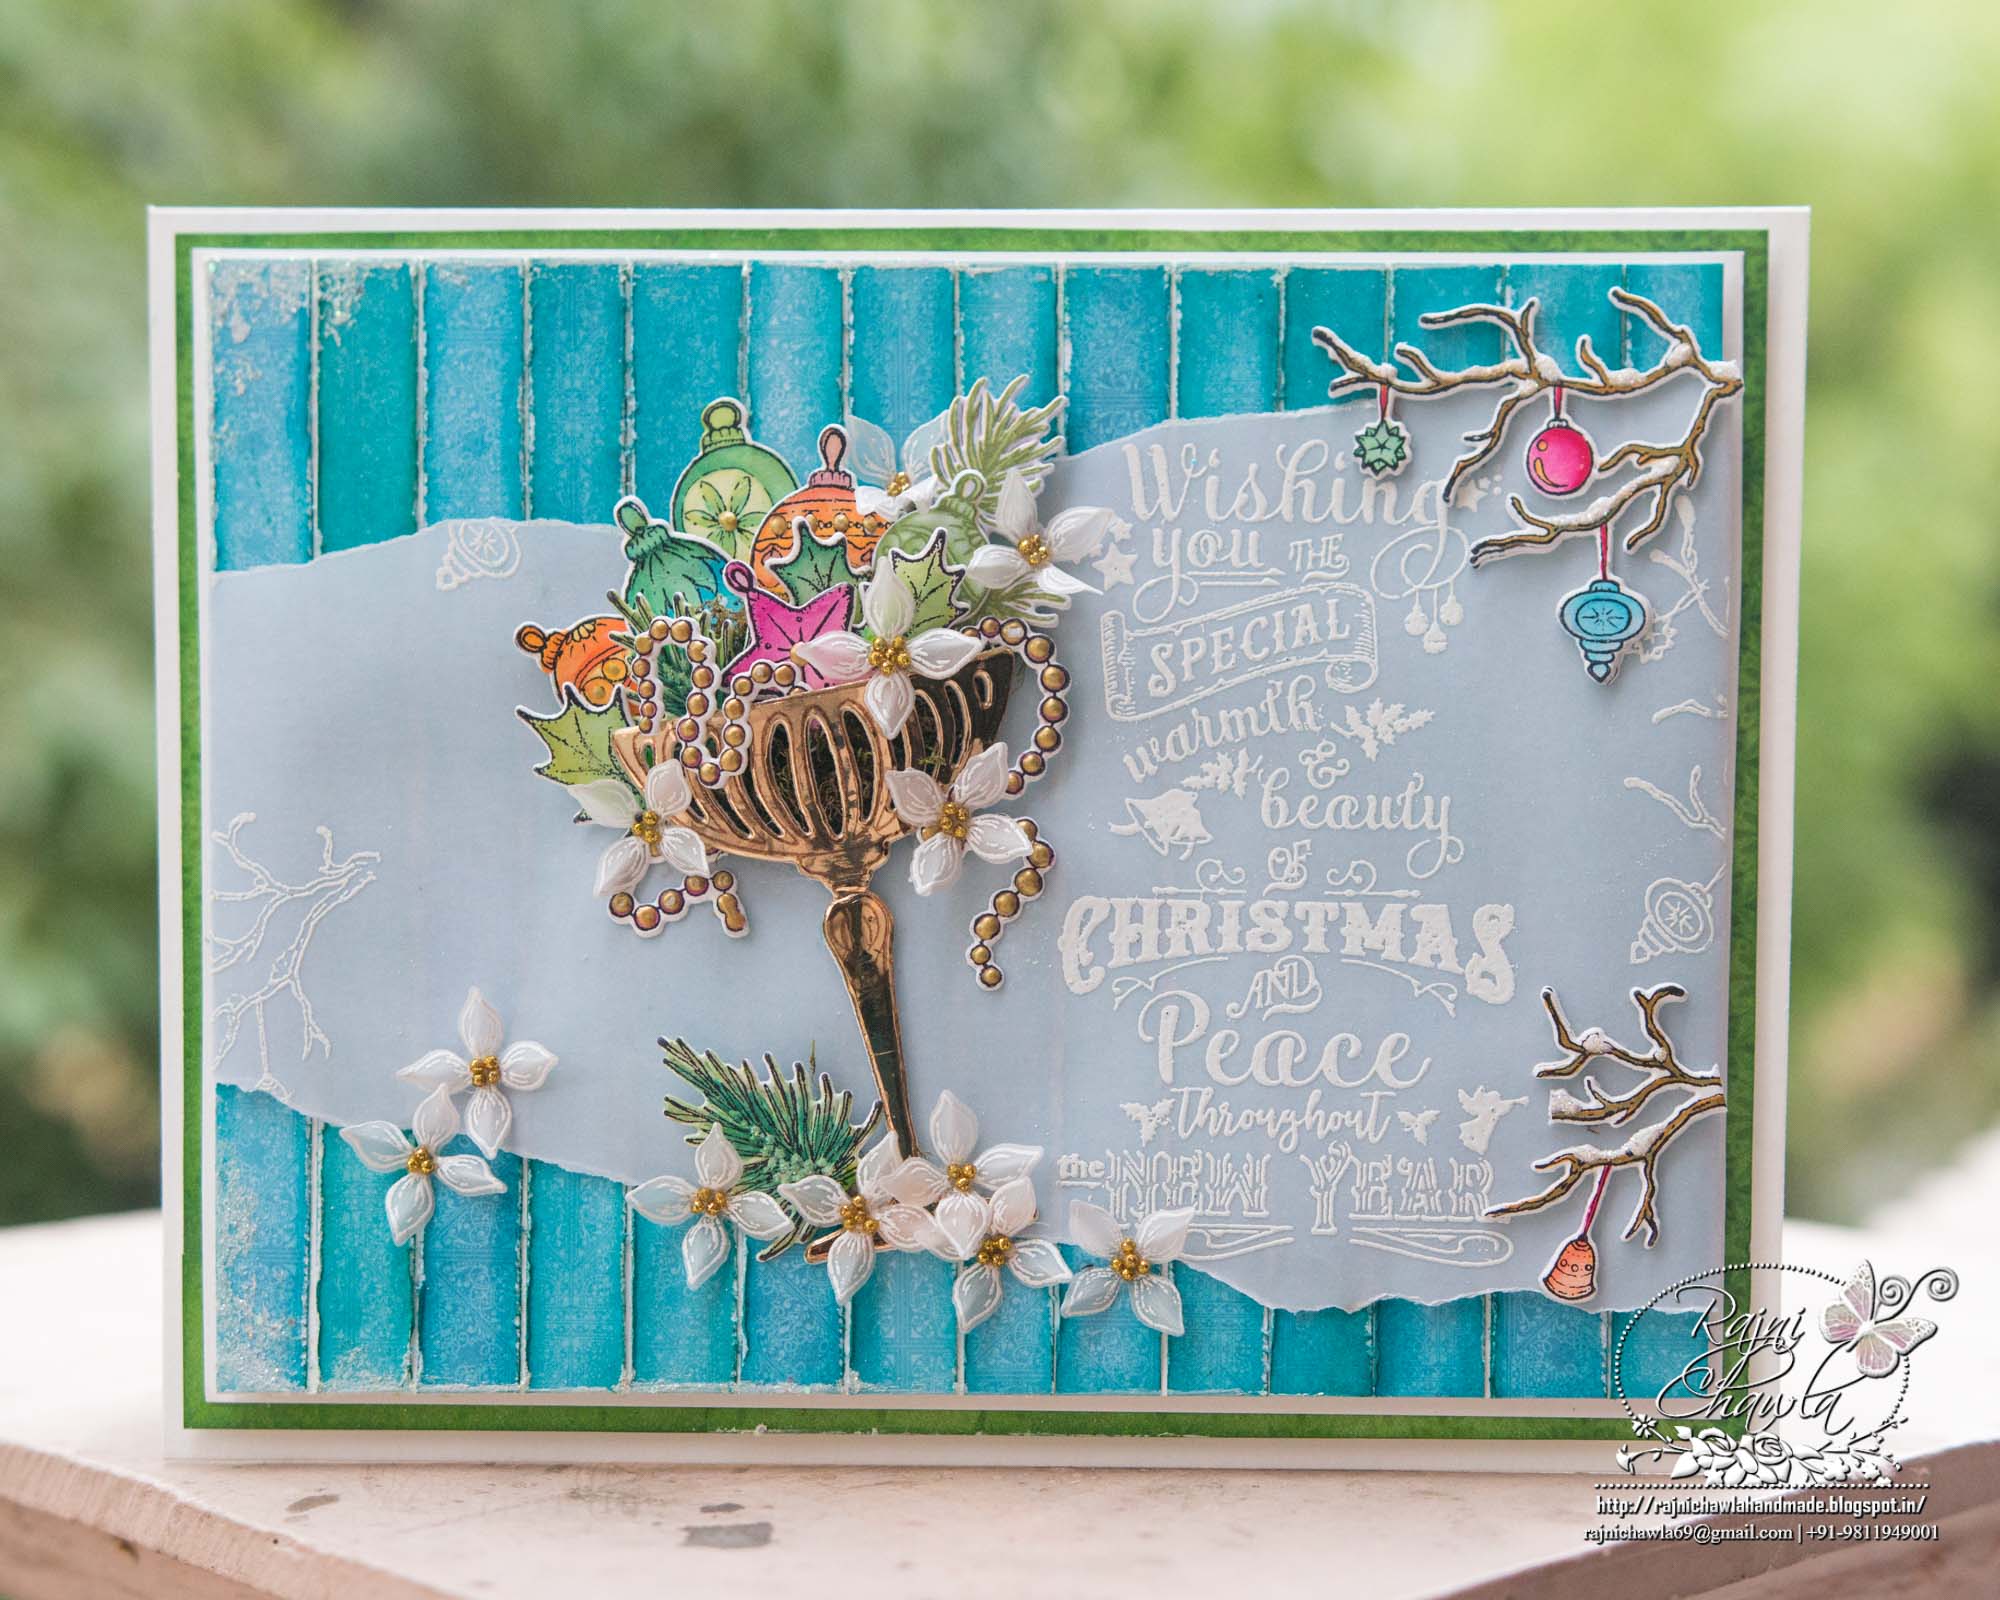
Continuing with Christmas cards, I have another card to share using Merry And Bright Collection. by Heartfelt Creations. The simple background, white heat embossed sentiment and white delicate lilacs are giving such an elegant and frosty look to this card.
Supplies from Heartfelt Creations:
HCPC-3834 Noel Sentiments Cling Stamp Set
HCD1-7194 Merry Little Christmas Die
HCPC-3836 Merry Little Christmas Cling Stamp Set
HCPC-3838 Merry and Bright Accents Cling Stamp Set
HCD1-7196 Merry and Bright Accents Die
HCDP1-293 Merry and Bright Paper Collection
HCD1-7170 Lush Lilac Die
HCPC-3816 Lush Lilac Cling Stamp Set
RACP468 Ranger Archival Ink Pad – Jet Black
RAHT Heat It Craft Tool
TSSZ41 StazOn Ink Pad – Timber Brown
PGM15016 Rajni Chawla’s Frosting Powder
PGM15015 Rajni Chawla’s Crystal Clear
RPEJ685 Embossing Powder – White
Other Products Used: Distress Ink Salty Ocean, Papericious Vellum, golden mirror sheet, liquid golden pearl paint, and golden glittered microbeads.
Videos Referred: For more tips on creating with the Merry and Bright collection, watch the tutorial at https://youtu.be/6bgO6epBuBI.
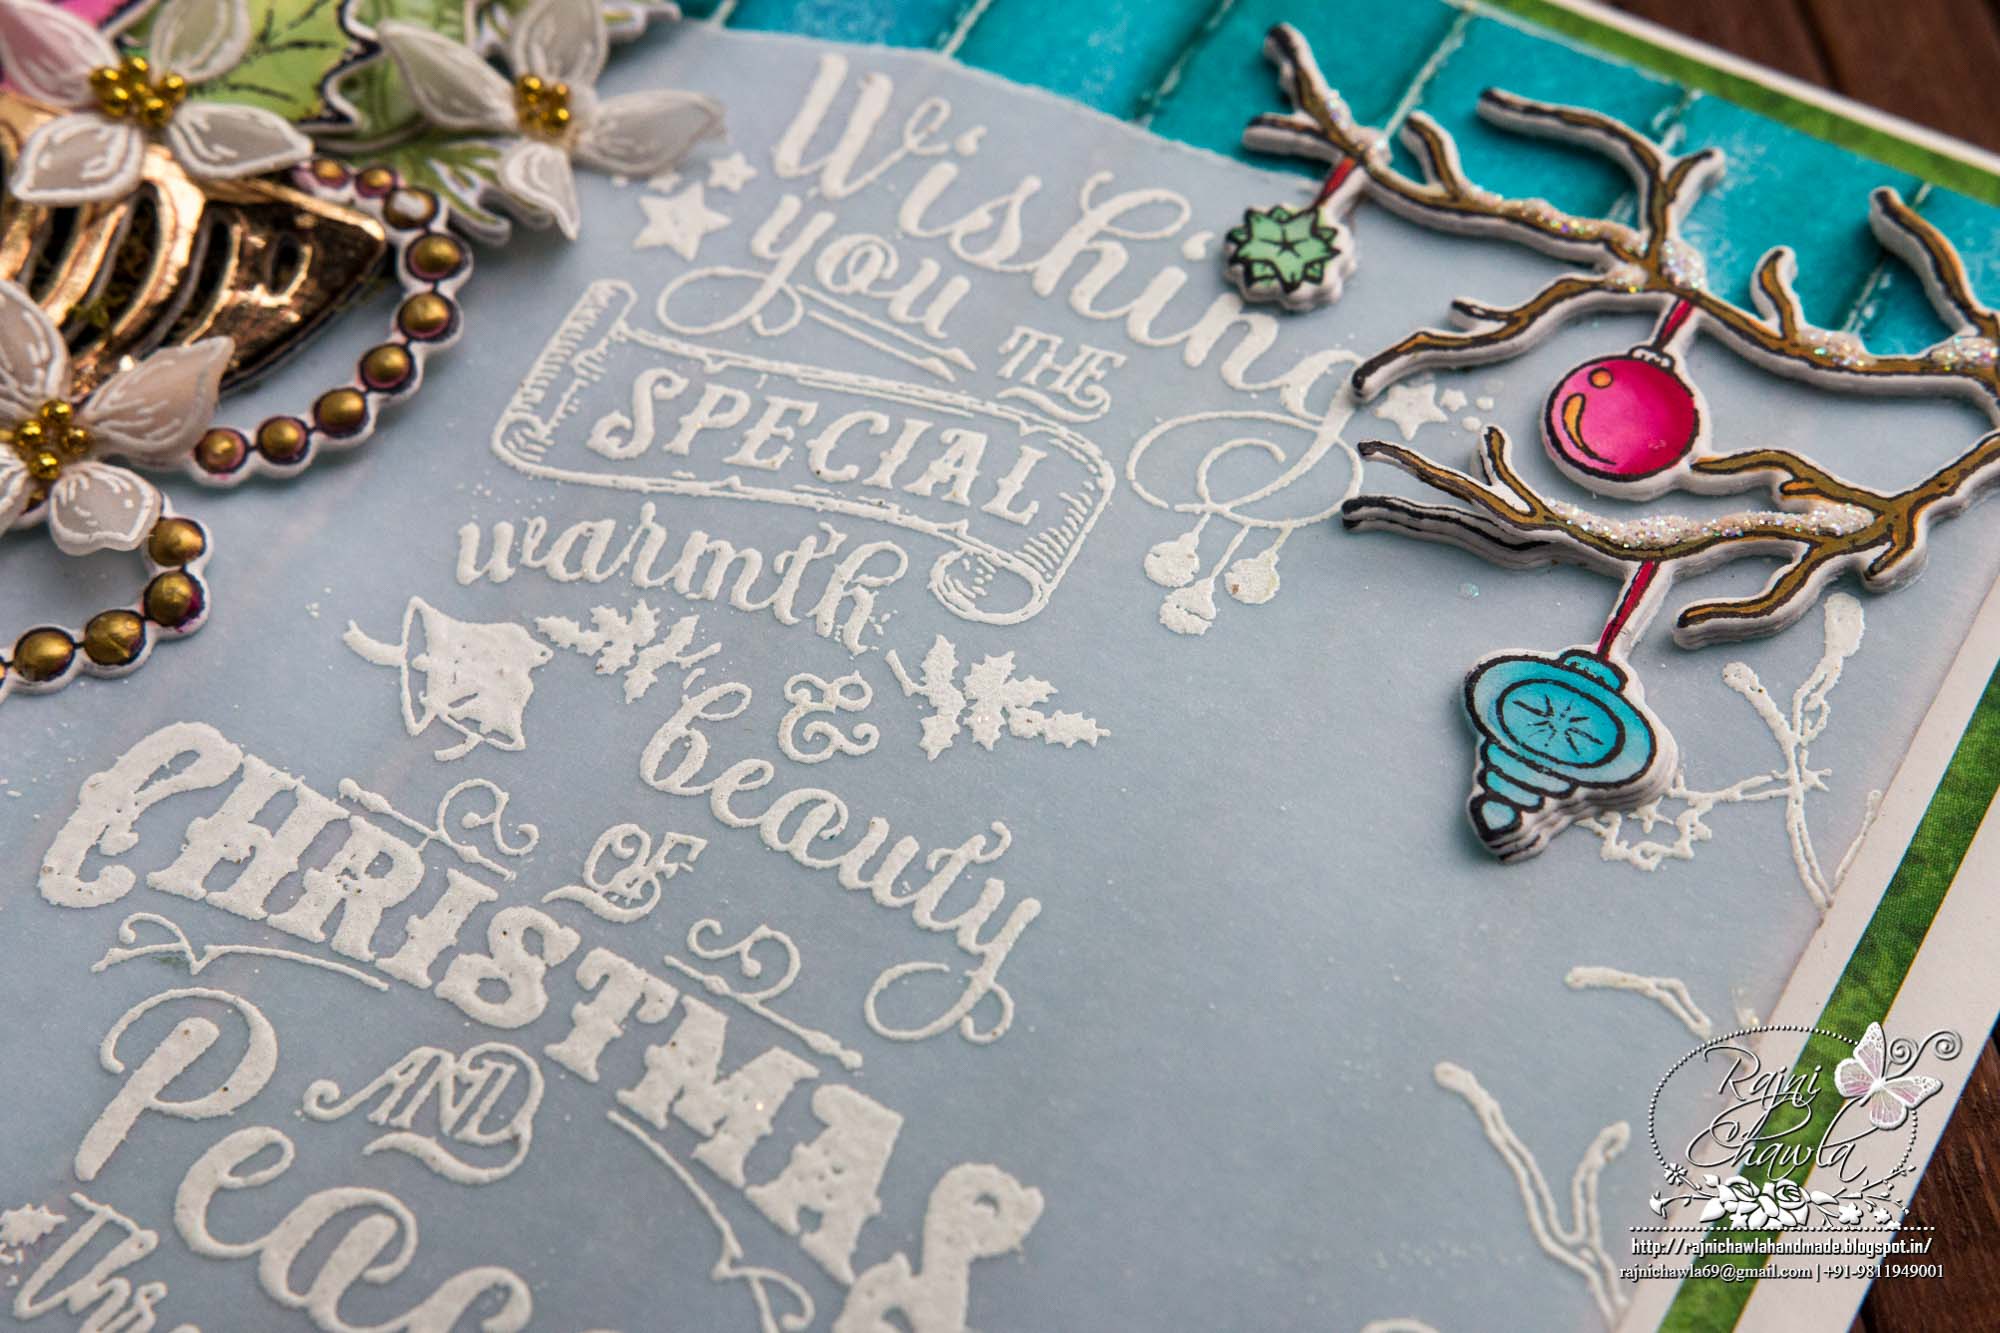
Instructions: The ready top fold card measures 5 3/4″ by 7 3/4″. To create the top panel, choose the paper from the designer paper collection. Cut it measuring 5′ by 7′. Further, chop it into strips of 1/2″ by 7″. Distress all the edges with salty ocean distress ink and further distress them using the distressing tool. Layer all the strips on a white cardstock measuring 5 1/4′ by 7 1/4″. Cut a strip if Papericious vellum, measuring 4′ by 8′, hand tear it as shown and white heat emboss the sentiment from Noel Sentiments Cling Stamp Set and branch images from Merry Little Christmas Cling Stamp Set. To white heat emboss, stamp the images first with White color box ink, sprinkle the white heat embossing powder and dust extras in funnel tray. Now heat set it using the heating tool.
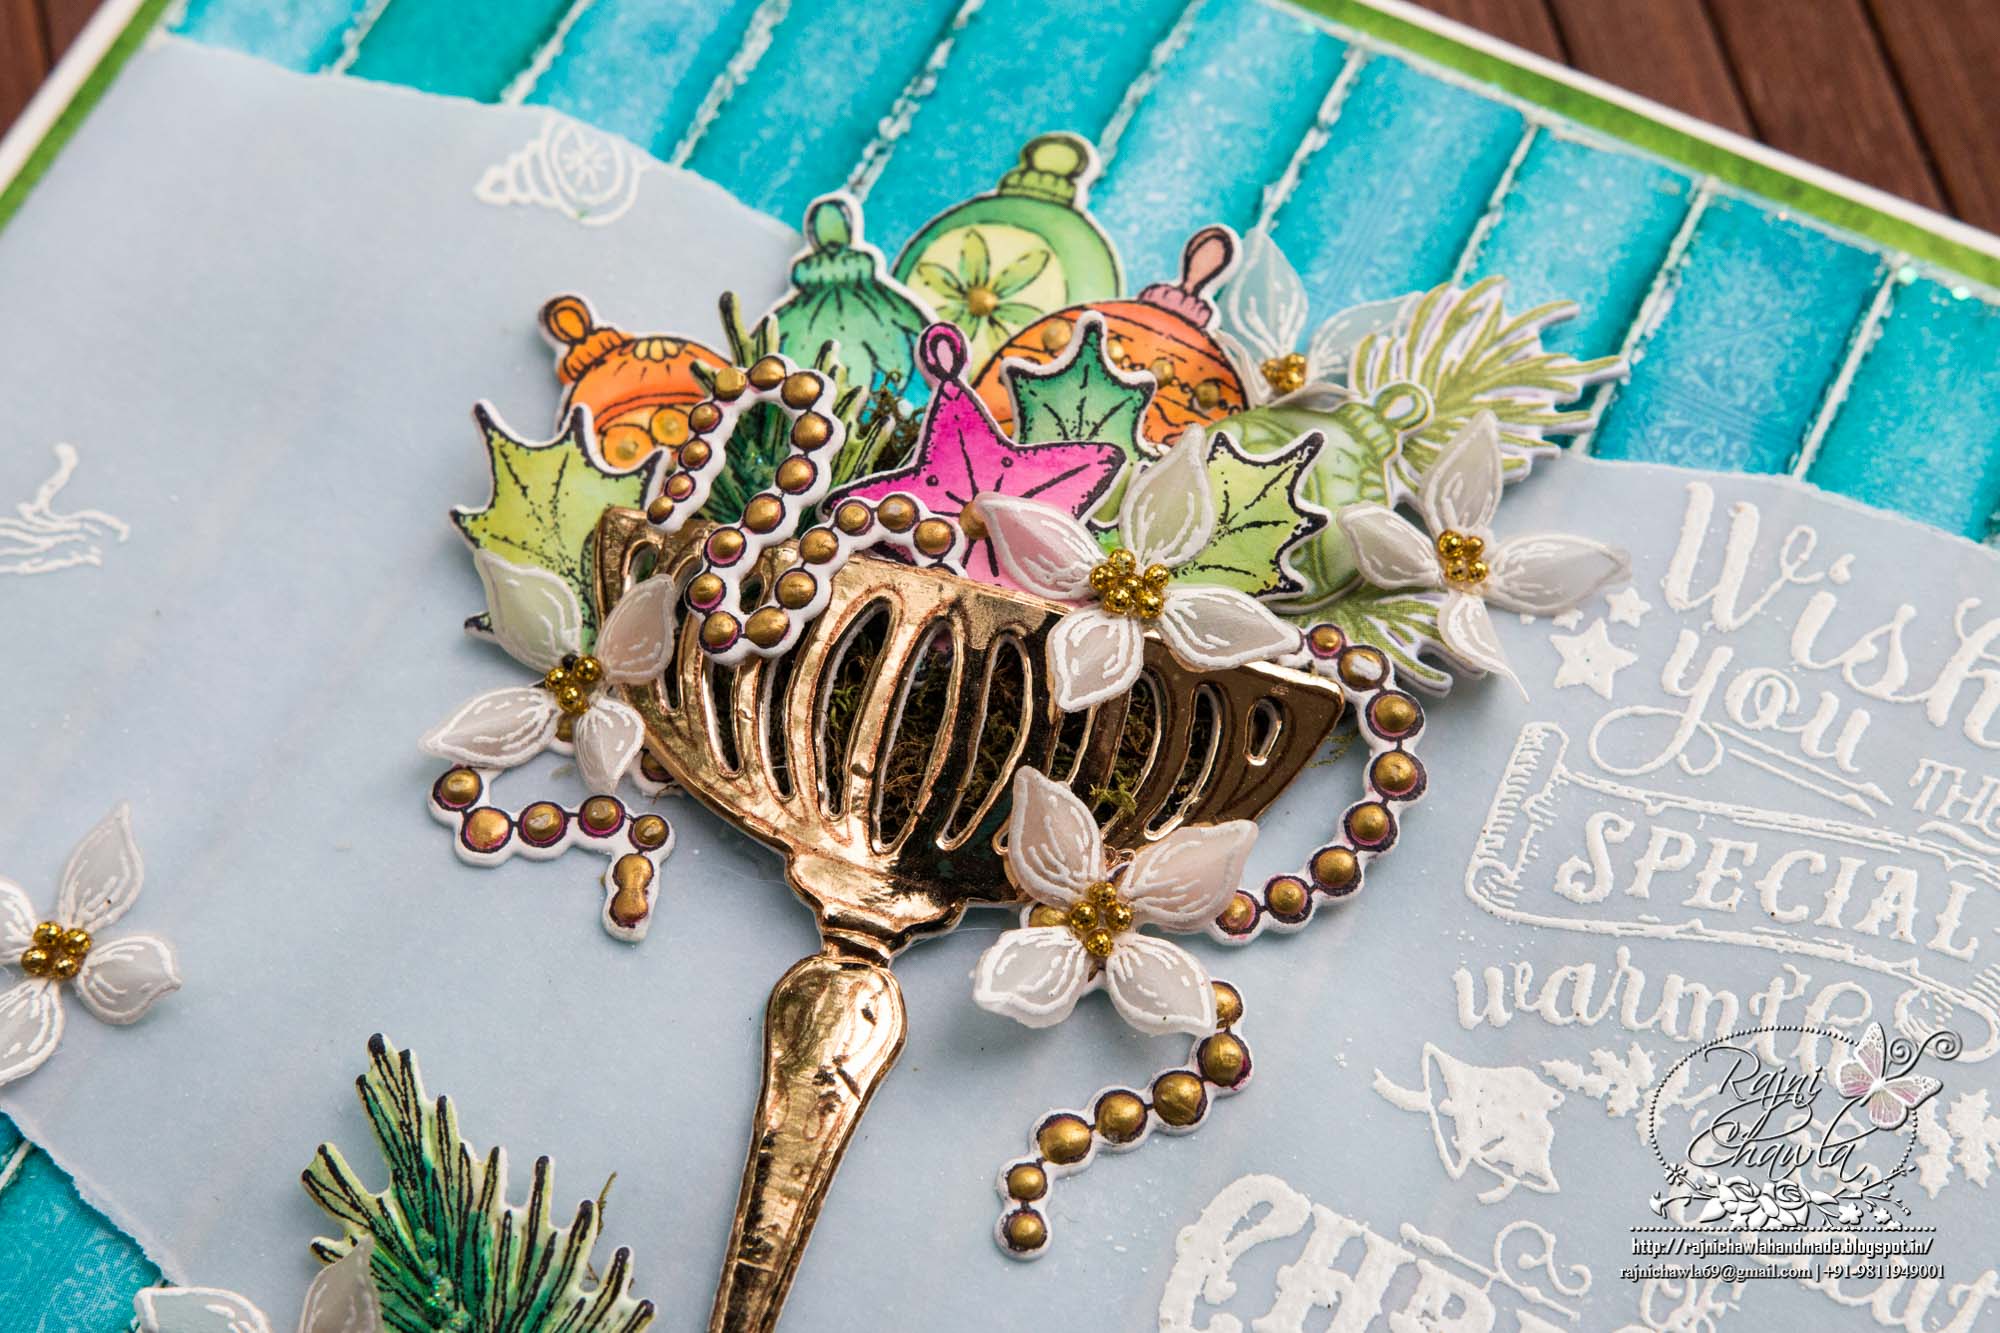
Wrap the vellum around the ready panel and stick the hanging sides behind the panel using tacky tape. ASlso white heat emboss few Lush Lilac flowers and shape them using back of the stylus. Add glittered microbeads in the center.
Stamp few ornaments, leaves and ornament branches from Merry and Bright Accents Cling Stamp Set on white cardstock using black archival ink and color them using Zig Markers. Shape them a little with hands and decorate them a little with frosting powder and crystal clear powder.
Stamp Christmas goblet on golden mirror sheet using StazOn Ink Pad – Timber Brown ink and cut it using it’s coordinating die. Cut 2 extra die cuts of the same from white cardstock and stack them together keeping golden one on top. Shape the goblet a little with your hands and adhere it on the left side of the ready panel. Also, stamp pearl strings with black archival, cut them using a coordinating die and decorate them using liquid golden pearl paint.
Once all the elements are ready, decide on the placement of all ornaments, pearl strings, lilac flowers, and branches. Assemble the card as shown and finish the card by adding extra frost and crystal clear on the edges of the card.