Good Morning all…
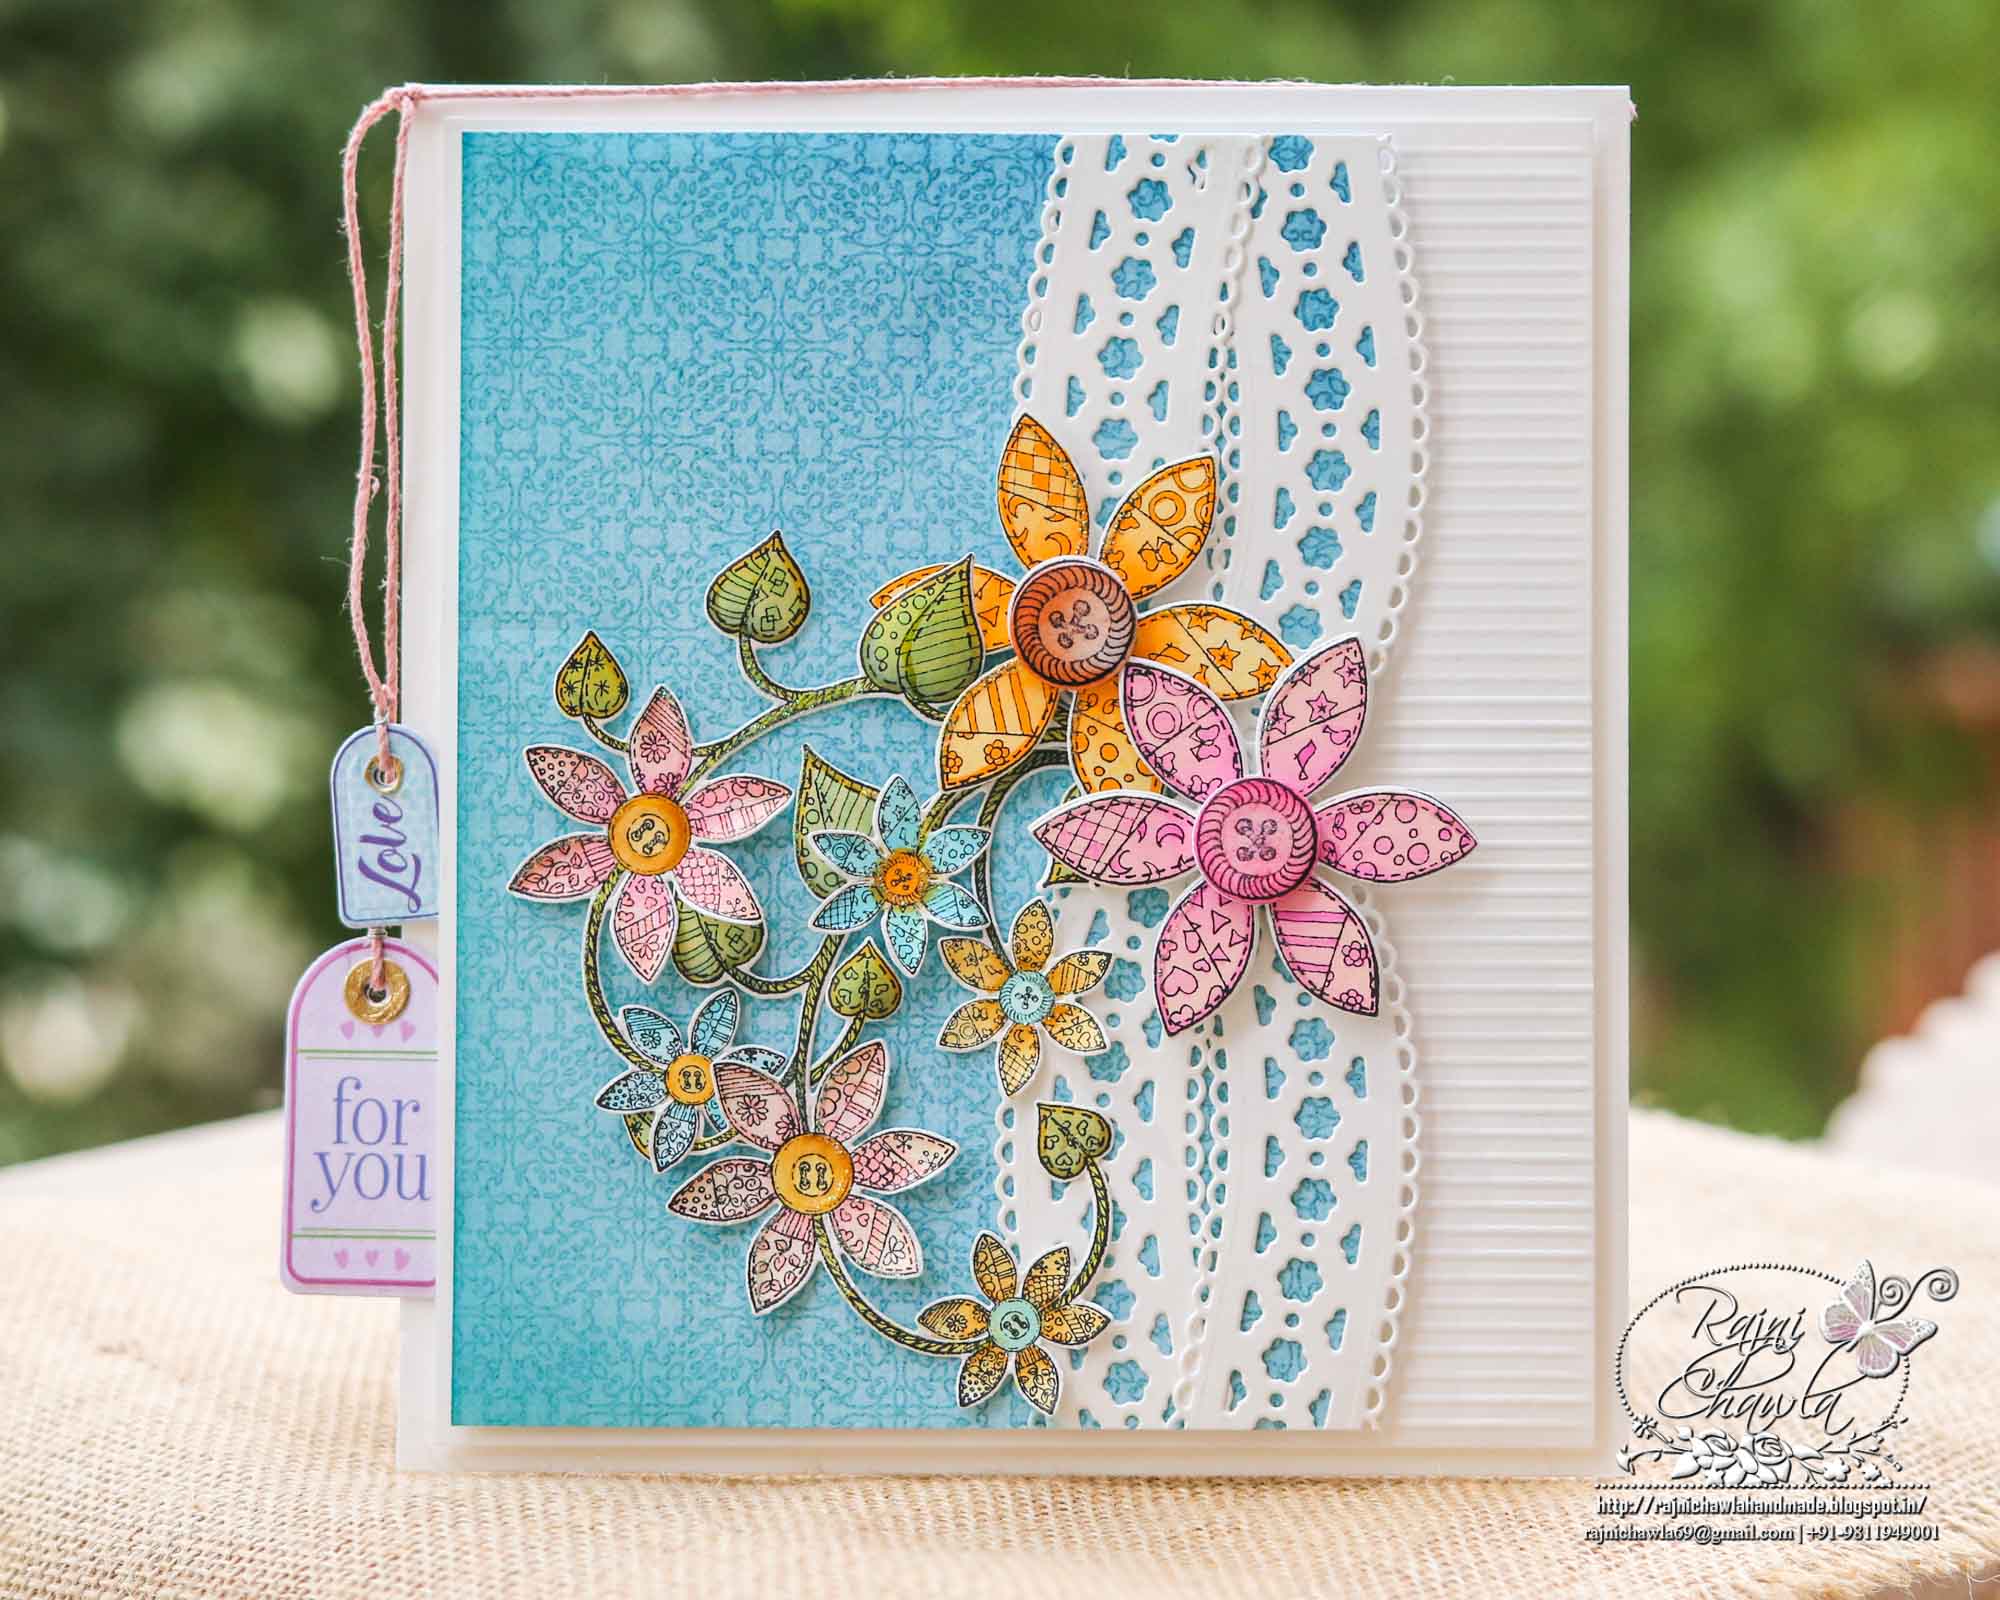
It’s an inspiration Wednesday with Heartfelt Creations, again. For today’s inspiration. Continuing with Patchwork Daisy Collection, I have a simple, yet elegant card to share.
Supplies from Heartfelt Creations:
HCD1-7208 Patchwork Daisy Die
HCPC-3852 Patchwork Daisy Cling Stamp Set
HCDP1-296 Patchwork Daisy Paper Collection
HCD1-7210 Eyelet Border Basics Die
HCD1-7205 Buttons and Blooms Die
HCPC-3849 Buttons and Blooms Cling Stamp Set
HCD1-7202 Album Tags and Accents Die
RACP468 Ranger Archival Ink Pad – Jet Black
159723 Designer Dries Clear Adhesive
Other Supplies Used: Smooth White Cardstock, Zig Clean Clear Brush Markers, Glossy Accents, Twine, Rajni Chawla’s Twinkling Spark.
Videos Referred: For more tips on creating with the Patchwork Daisy collection, watch the tutorial at https://youtu.be/v5BEpcSlmoI.
Instructions: The ready top-fold card from smooth white cardstock measures, 7 1/2″ by 6 1/4″. The first layer is created using smooth white cardstock measuring 5 3/4″ by 7″. The right side of the card is scored horizontally, each time at 1/8 of an inch.
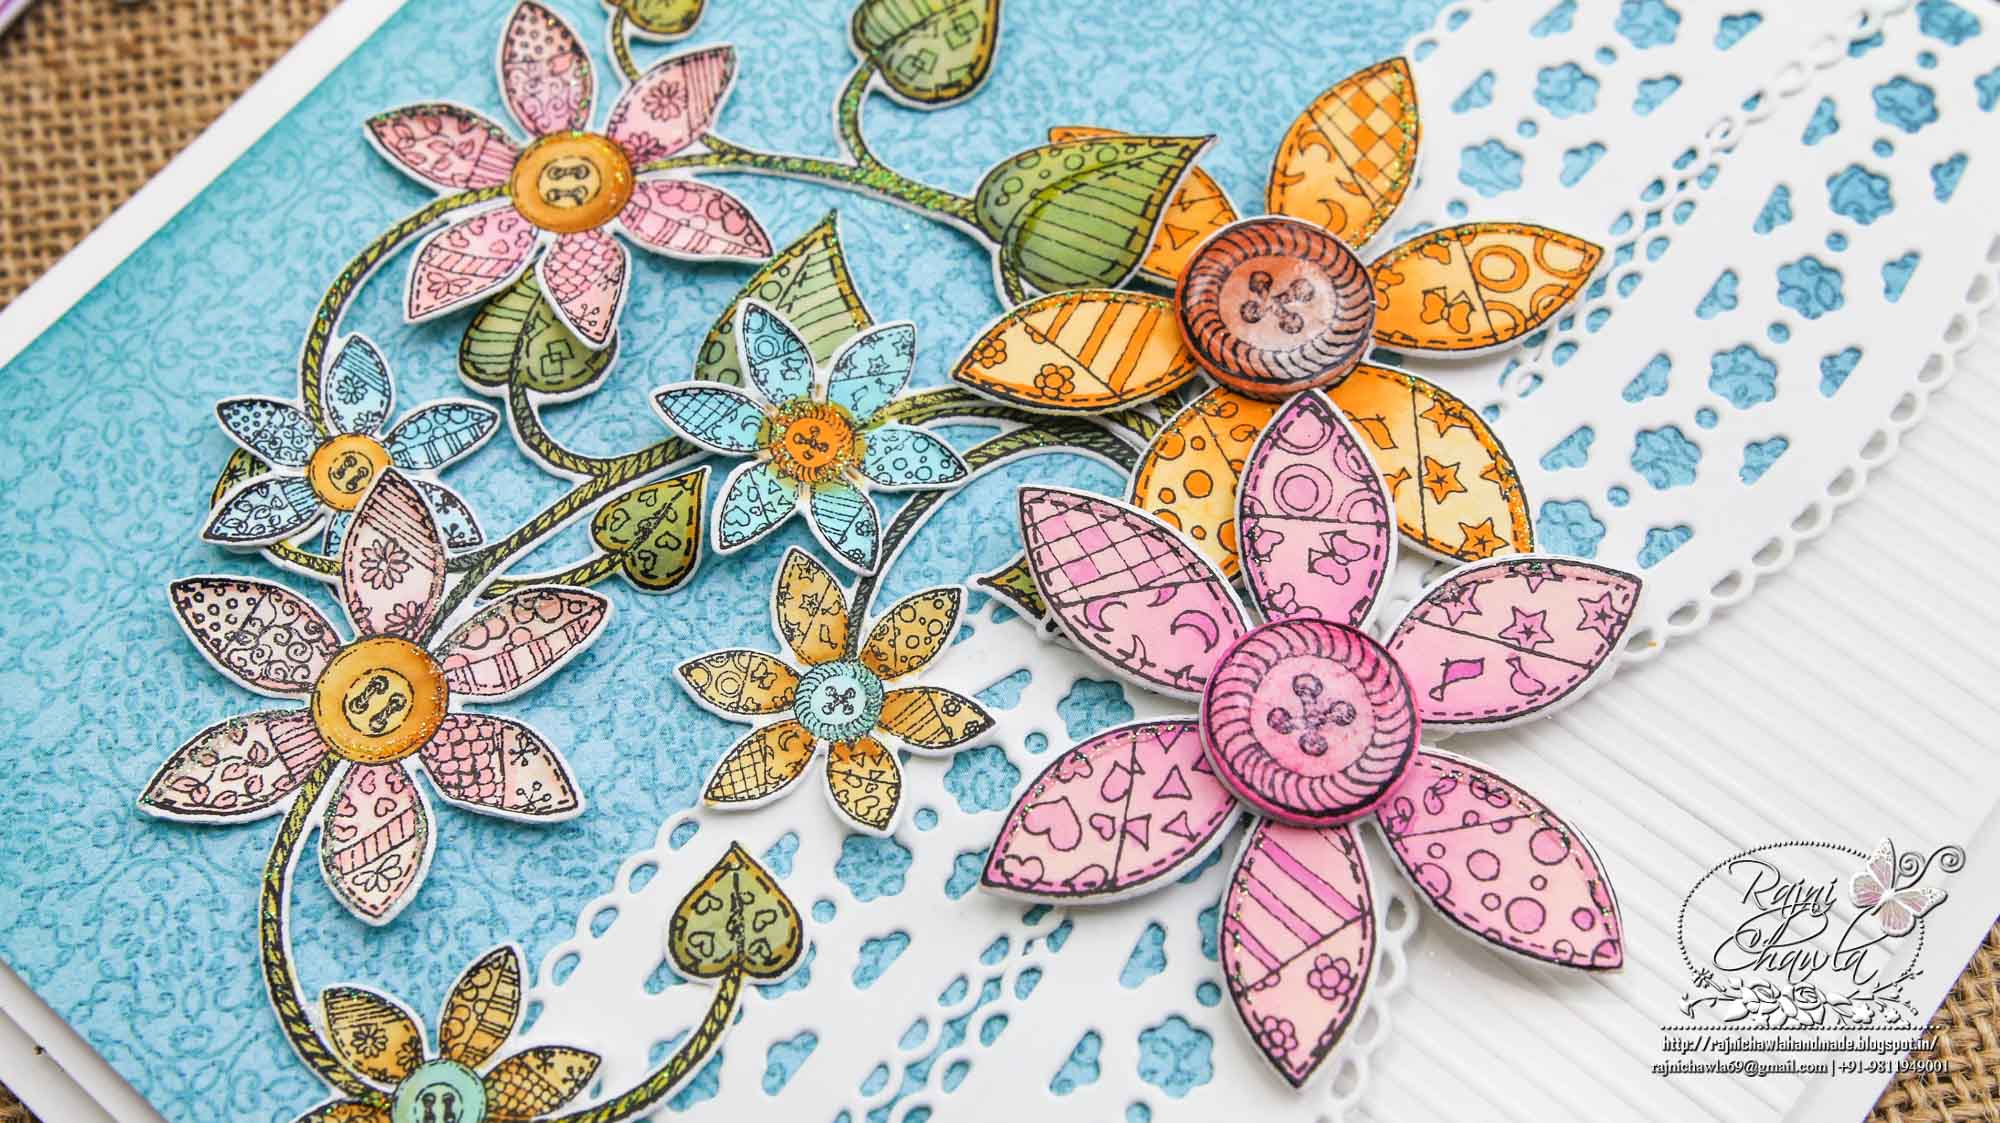
To create the top fancy panel of the card, cut 2 pieces of lace from white cardstock, keeping eyelet dies on both the edges of the fancy border. Cross the borders from the center and tightly glue the top and the bottom edge. Choose a teal color paper from the paper collection and cut it measuring 5″ by 6 3/4″. Glue the ready lace border on right side of the teal panel as shown. While the glue was wet, snip the teal paper keeping the cut little inside of the white fancy border edge. Layer the teal panel on the scored panel and further layer it on the ready card base.
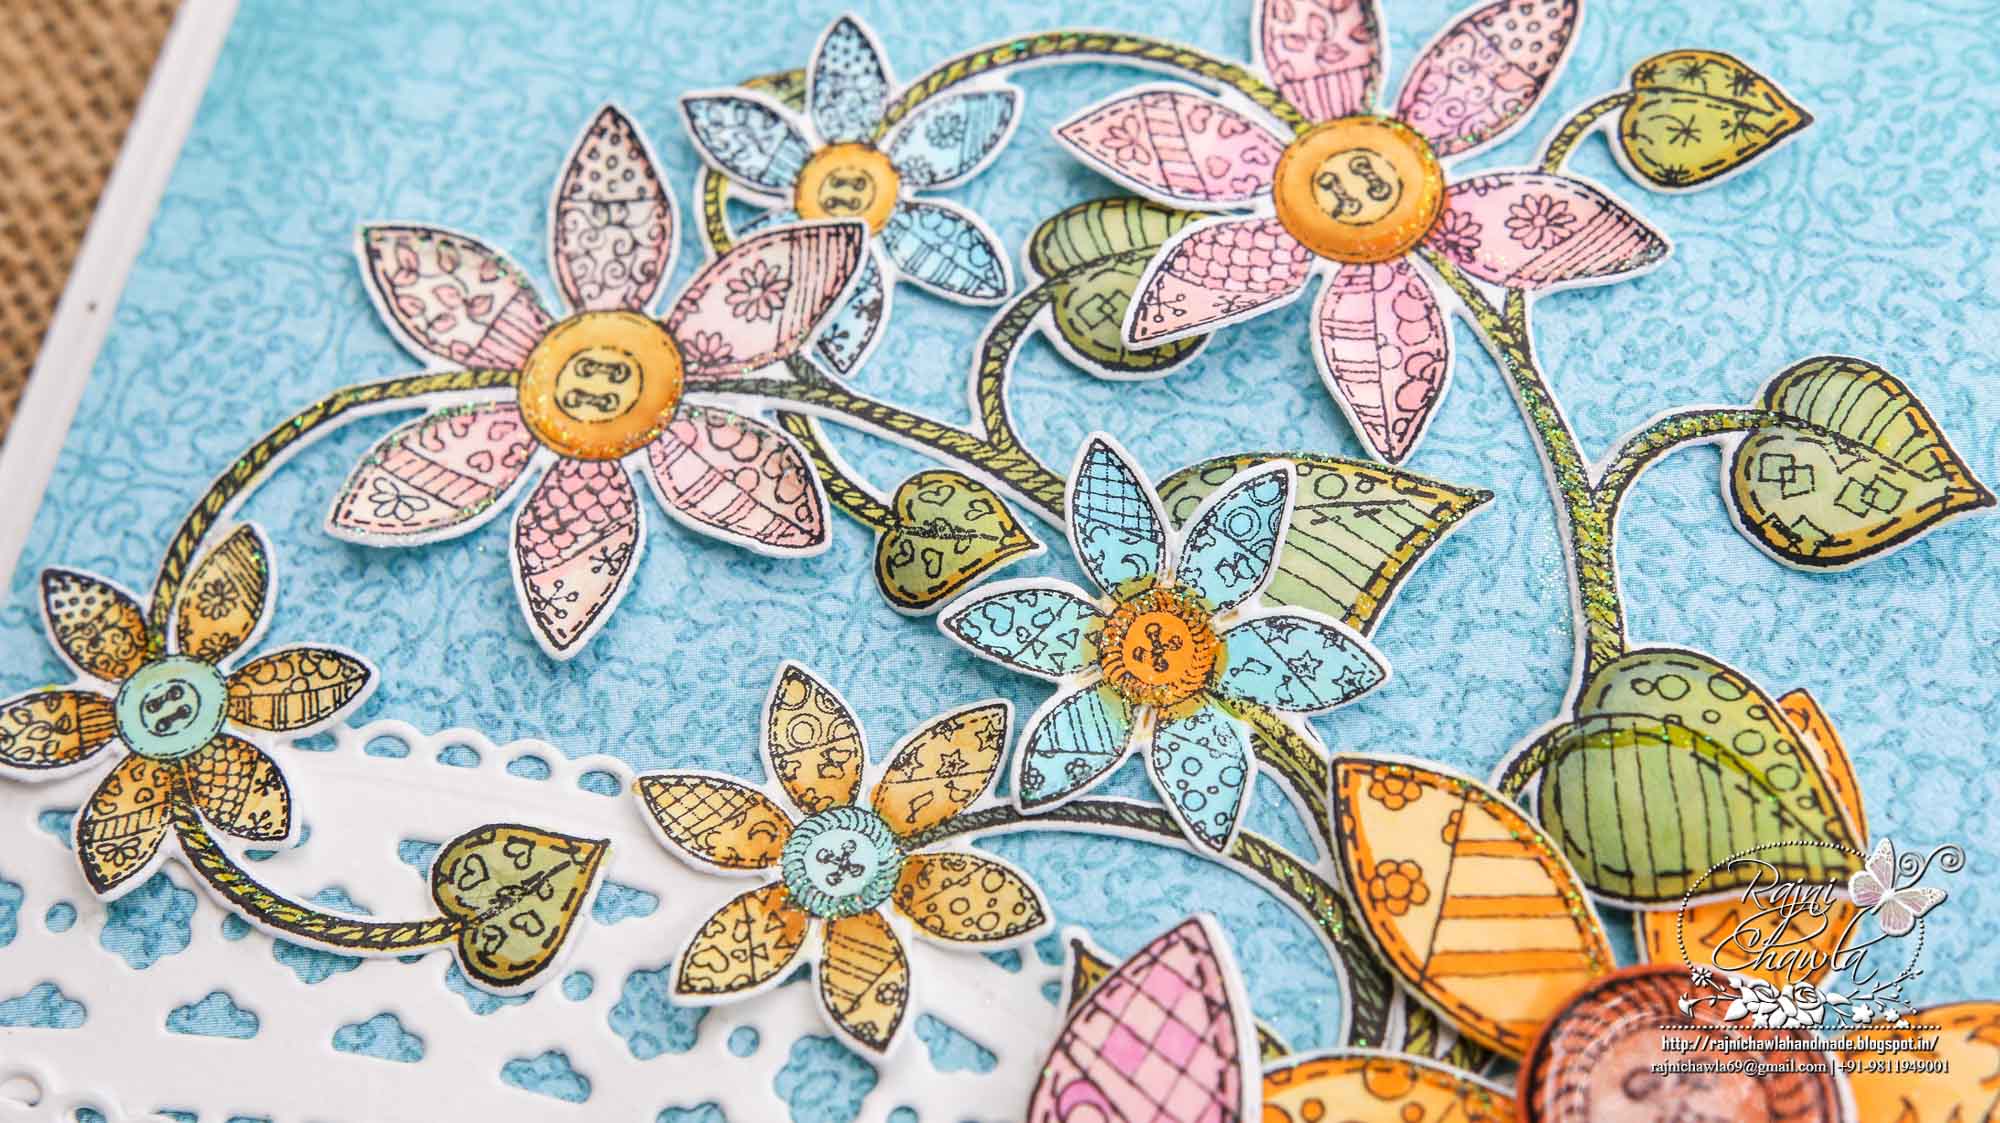
Stamp 2 pieces of right paisleys from Patchwork Daisy Cling Stamp Set and 2 large blooms from Buttons and Blooms Cling Stamp Set, using black archival ink. Cut the images using their coordinating dies. Paint the images using Zig Clean Clear Brush Markers, Also stamp, cut and paint, 2 large buttons for the larger blooms. Add a glossy accent to the buttons for extra accent.
Once all the elements are ready, assemble the card as shown and complete it by adding sentiment tags from the paper collection. Also, add Twinkling Spark to add some shine to the final card.