


Good Morning Friends…
Once again its a happy time for the new release of Heartfelt Creation’s monthly collection. Today we are debuting Patchwork Daisy Collection which is so gorgeous and goes so well with lst month collection. Reminisce of days gone by when laughter filled quilting bees were a treasured outing filled with chatter, decadent dainties and a great sense of accomplishment at the end of the day! Little girls admiring beautiful hand-stitched quilts coming together under the direction of the hands of skillful seamstresses, as they imagine the day that they too will learn the secrets of perfect stitching and delicate embroidery. Let your mind wander back the days when pretty hand-stitched blankets lined Grandma’s clothesline, flapping in the breeze as daisies danced gently in the background! Join us as we remember simpler times with the old-fashioned Patchwork Daisy Collection! Immerse yourself in designer papers filled with soft and gentle hues reminiscent of purple lavender-filled fields, warm sunshine yellows, clear sky blues, and beautiful wildflower pinks. Feel the gentle warmth of a hand-stitched quilt as you are embraced by dainty illustrations of tranquil florals, decorative patterns and delicate patchwork panels similar to those on Grandma’s finest coverlet! A wonderful array of beautifully detailed cling stamps, along with coordinating dies provide endless “embroidered and quilted” embellishments to adorn all of your handcrafted projects…from dainty daisy florals delicately illustrated, appearing to have been cut from decorative quilt blocks and then hand-stitched, to a wonderful assortment of graceful eyelet trim borders perfectly designed for “finishing” your handcrafted projects! The perfect assembling of decorative papers clings stamps and coordinating dies to blend with the previously released Buttons and Blooms Collection! So, gather your crafty friends around the kitchen table…it’s time to laugh, snack, reminisce, and show off your creative handiwork!
Products from Heartfelt Creations:
HCD1-7209 Patchwork Daisy Border Die
HHCPC-3853 Patchwork Daisy Border Cling Stamp Set
HCD1-7210 Eyelet Border Basics Die
HCDP1-296 Patchwork Daisy Paper Collection
HCD1-7202 Album Tags and Accents Die
HCPC-3844 For My Friend Sentiments Cling Stamp Set
HCD1-7205 Buttons and Blooms Die
HCPC-3849 Buttons and Blooms Cling Stamp Set
HCD1-7120 Fleur Border Basics Die
TSSZ63 StazOn Ink Pad – Teal Blue
173842 Scor-Pal Measuring & Scoring Board
DDOTS Double Dots 100pc. -3D Foam Circles
HCDA2-450 Stack and Store Daubers-Pack of 30
159723 Designer Dries Clear Adhesive
RACP468 Ranger Archival Ink Pad – Jet Black
Other Products Used: Smooth white cardstock, Zig Clean Clear Brush Markers, Swarovski Crystals, and Glossy Accents.
Videos Referred: For more tips on creating with the Patchwork Daisy collection, watch the tutorial at https://youtu.be/v5BEpcSlmoI.
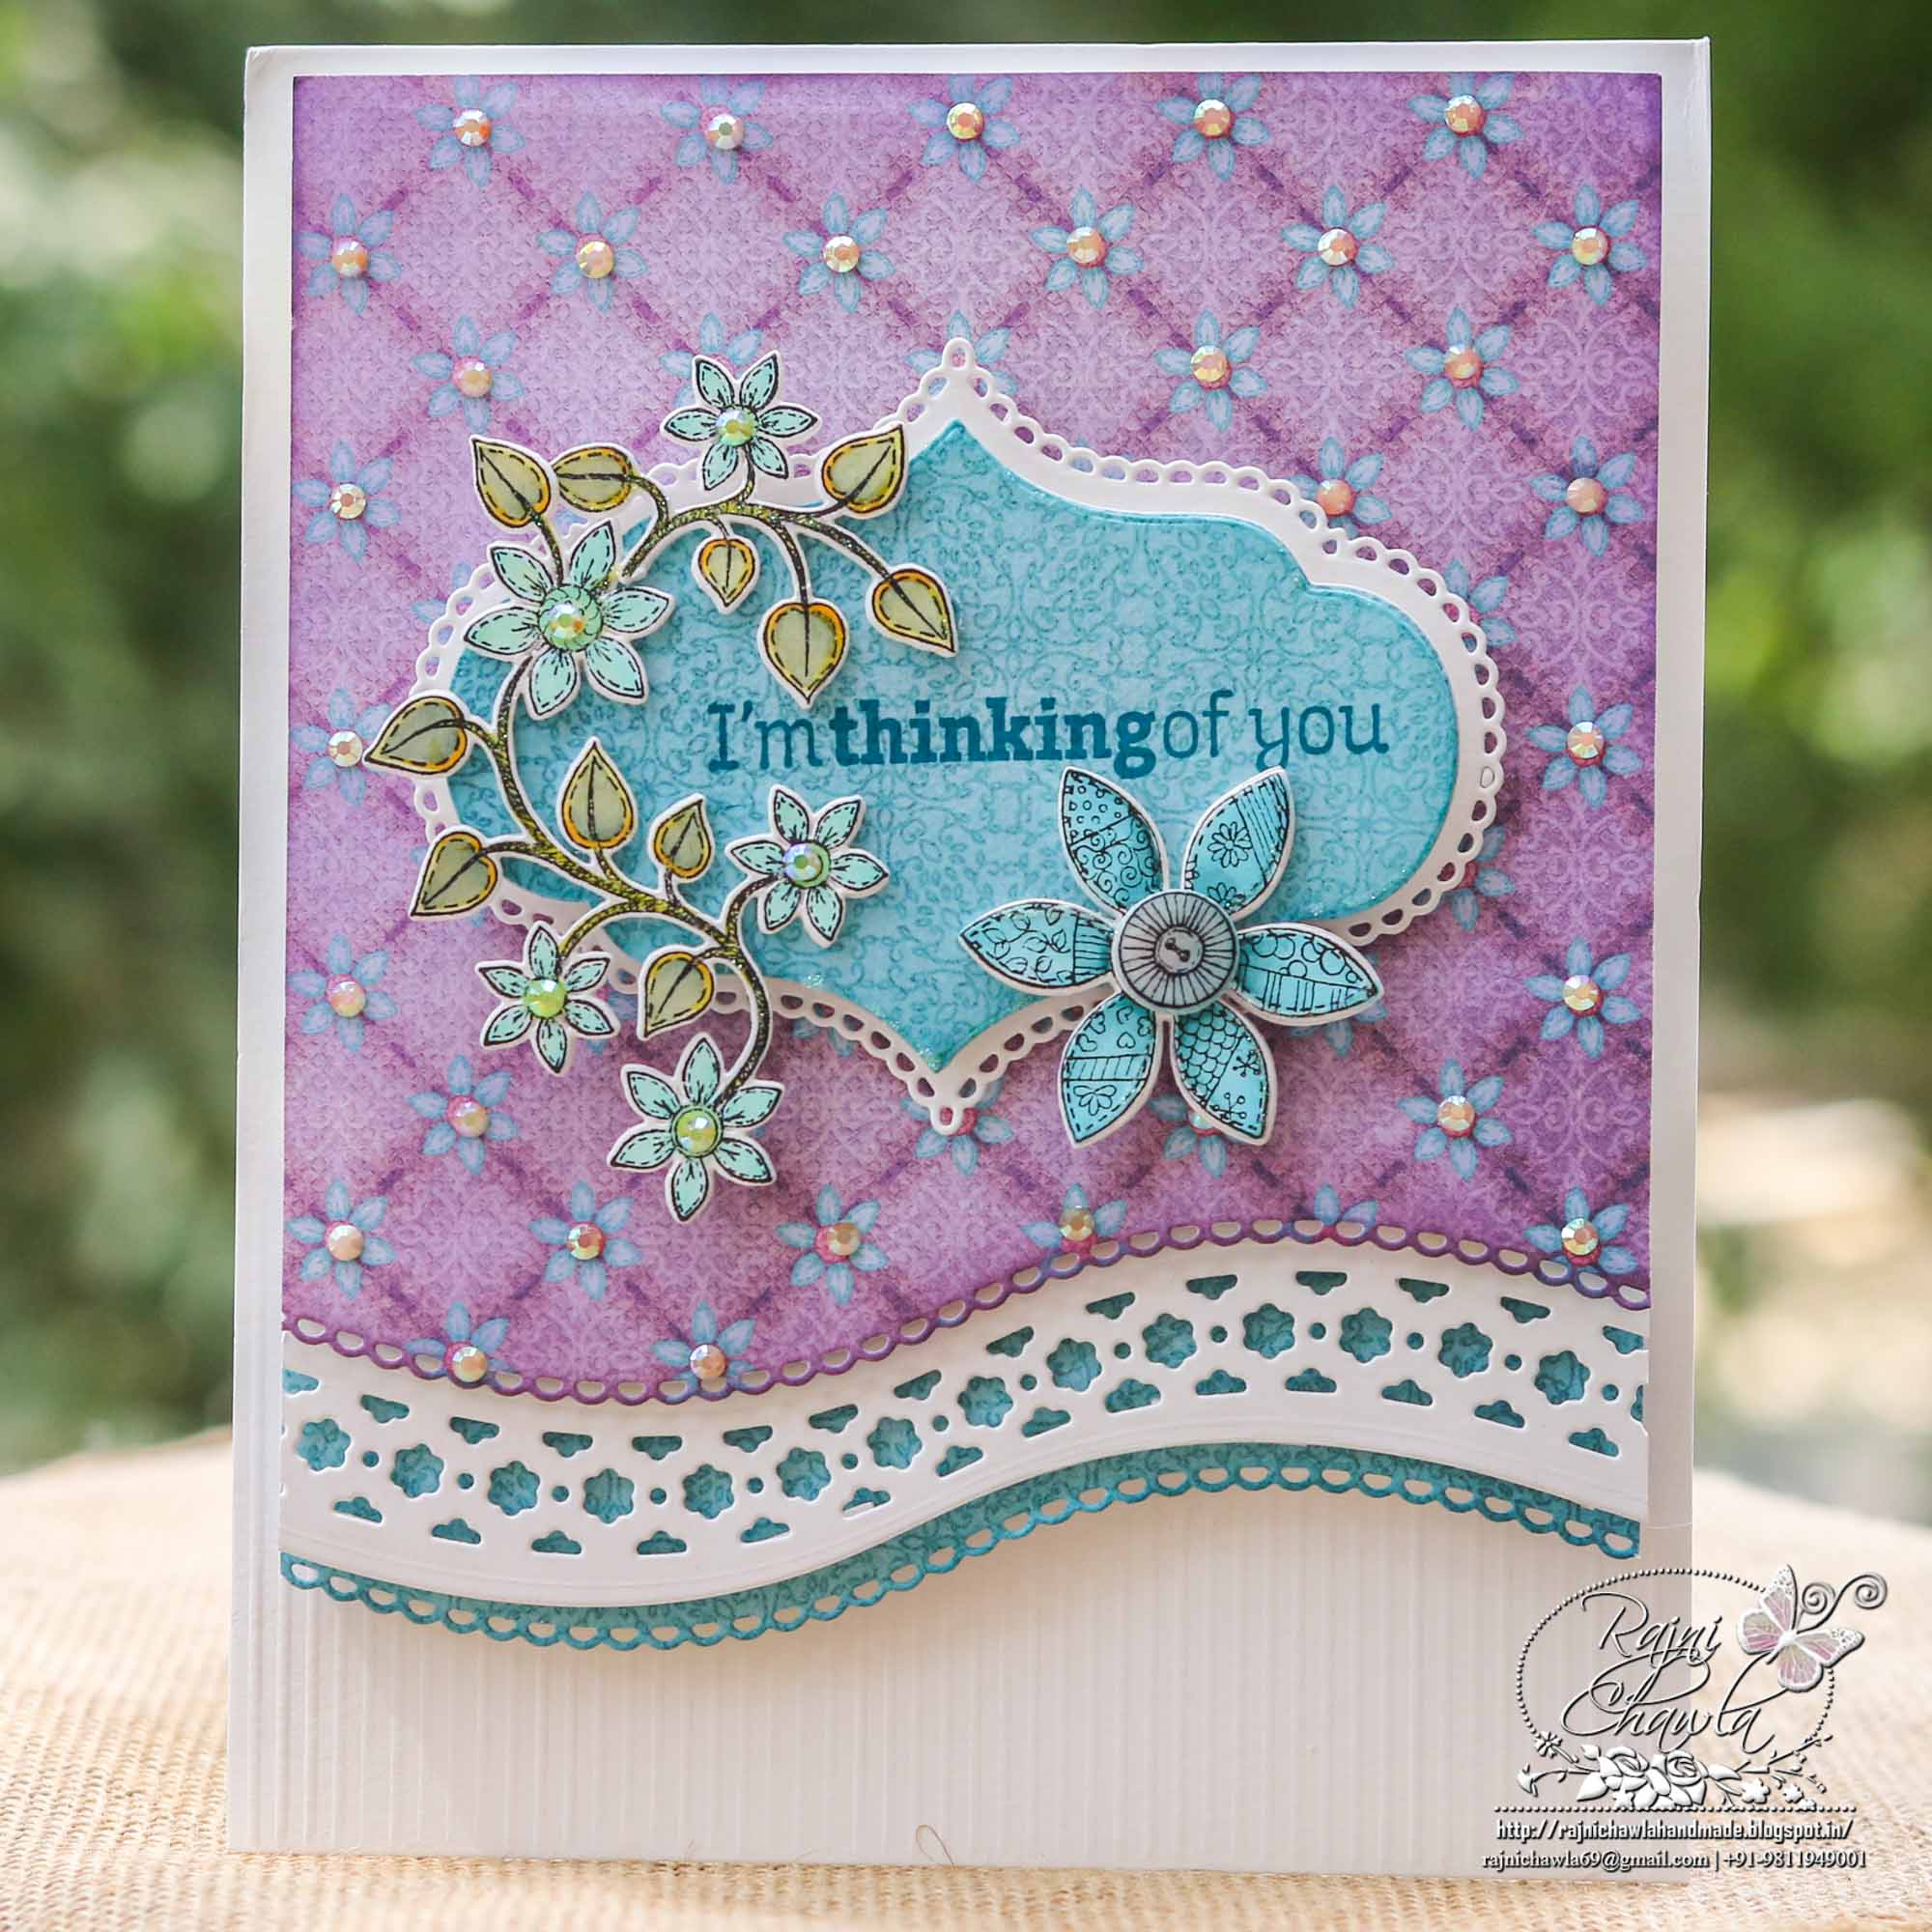
Instructions: The ready top-fold card from white smooth cardstock, measures 6′ by 8″. Score the lower base of the front panel of the card each time at 1/8″ with the help of scorepal.
The front panel of the card has 3 separate layers with different borders. To create the topmost layer of the card panel, choose the paper from the designer paper collection and cut it measuring 5 1/2″ by 5 1/2″. To the lower base, tape down the eyelet die from Eyelet Border Basics Die and run through die cutting machine. Clean the edges and distress the edges using Wilted Violet Distress ink. For the second layer, cut a piece of 3′ by 5 1/2″ white smooth cardstock. Cut the fancy border using a die from Eyelet Border Basics Die and edge die from Fleur Border Basic die. For the final third layer, cut a teal color paper measuring 4″ by 5 1/2′. To the lower base, tape down the eyelet border and run through die cutting machine. Layer them together with the help of double sided glue dots and finally layer the ready panel on the scored card base.
Cut an eyelet tag from white cardstock using Album Tags and Accents Die and also cut it’s coordinating mat from teal color paper from the paper collection. Stamp a sentiment from For My Friend Sentiments Cling Stamp Set, using teal color Stazon ink.
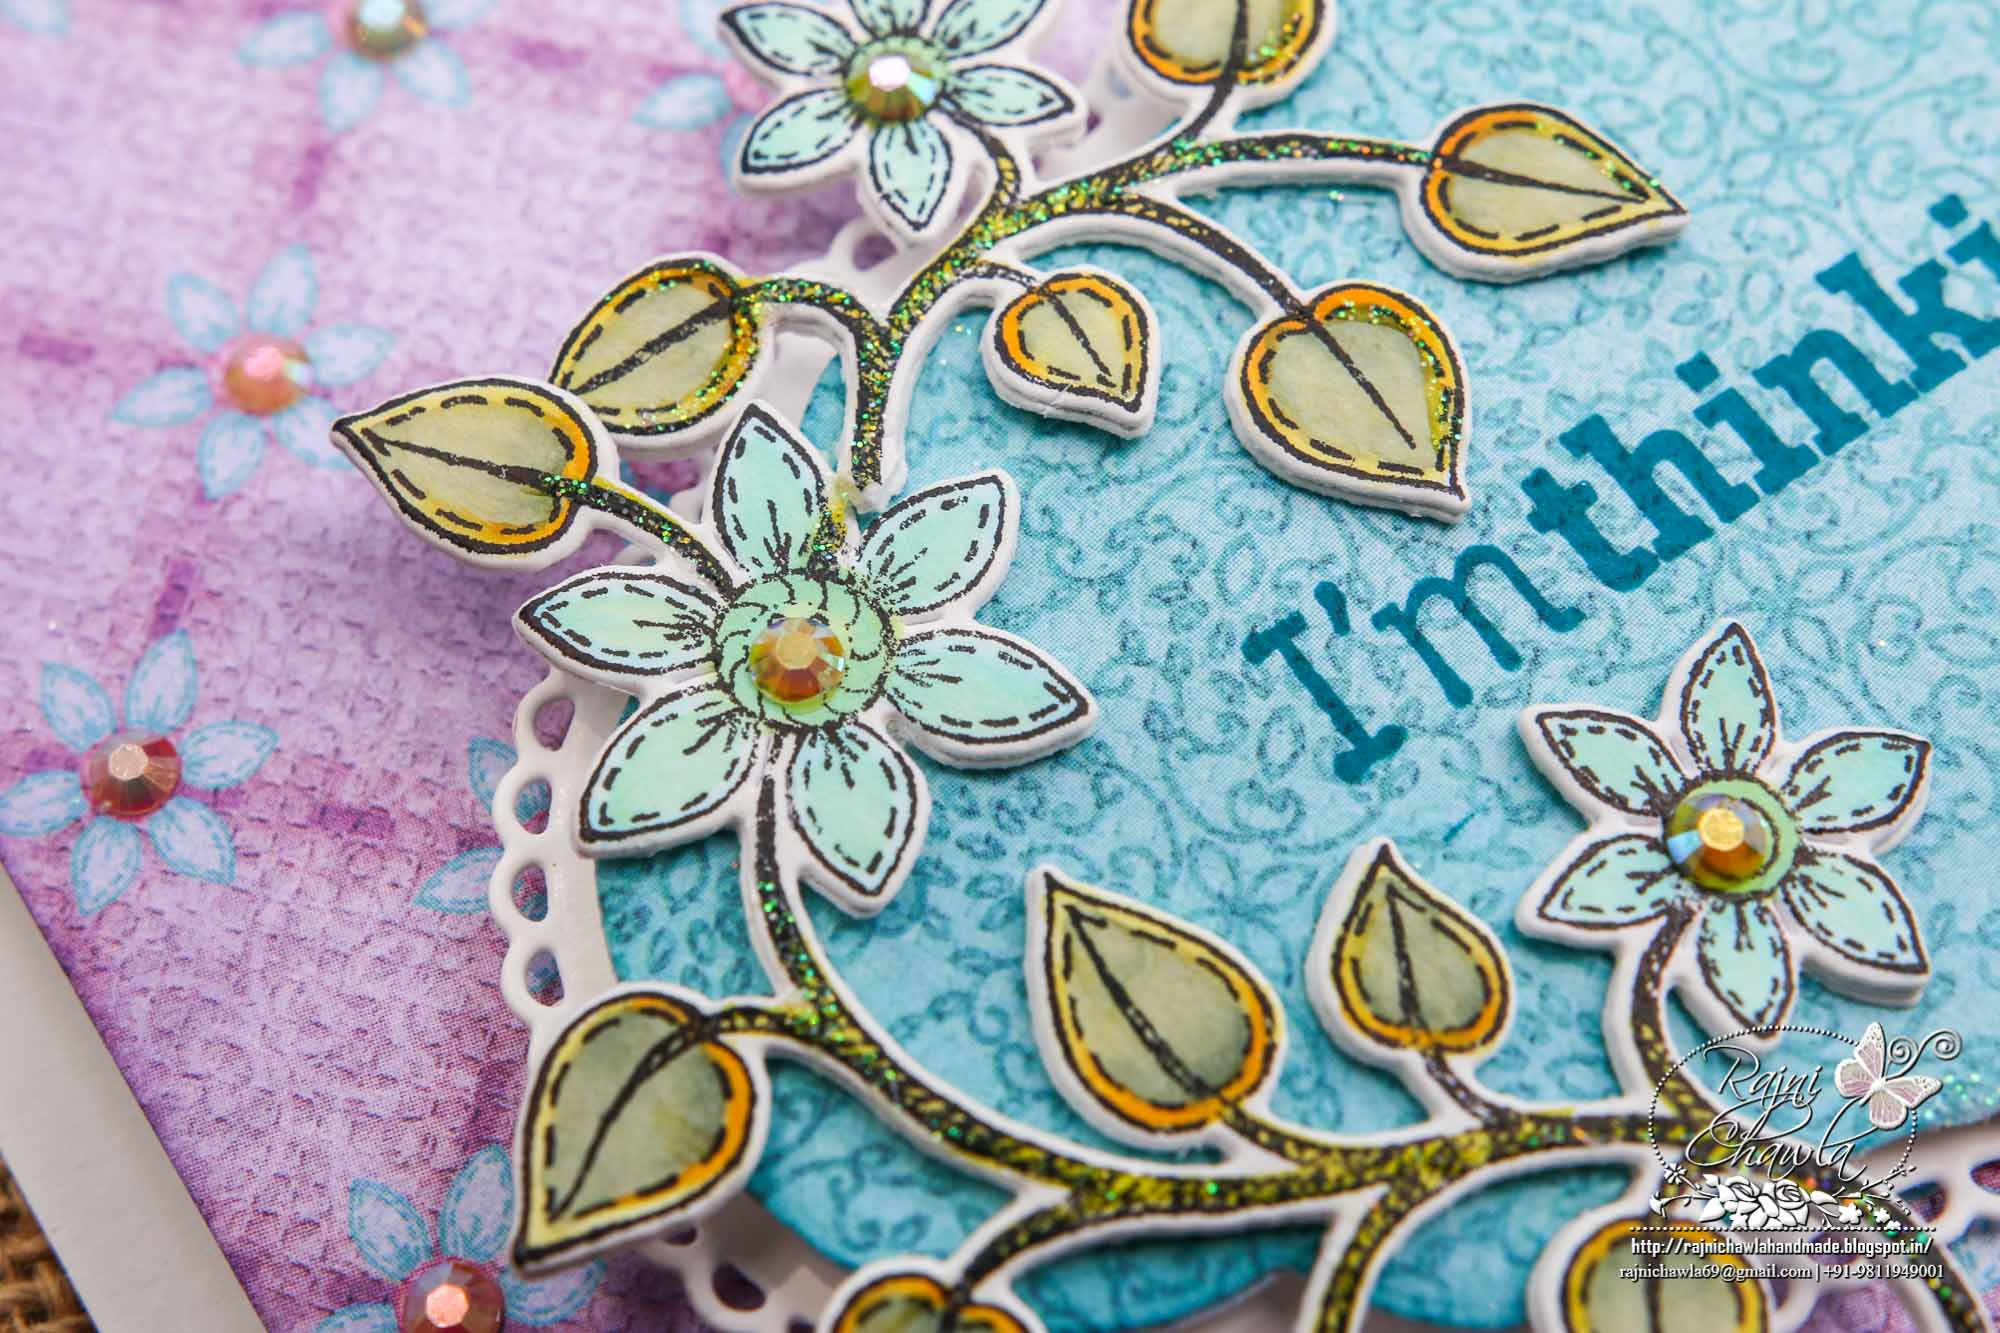
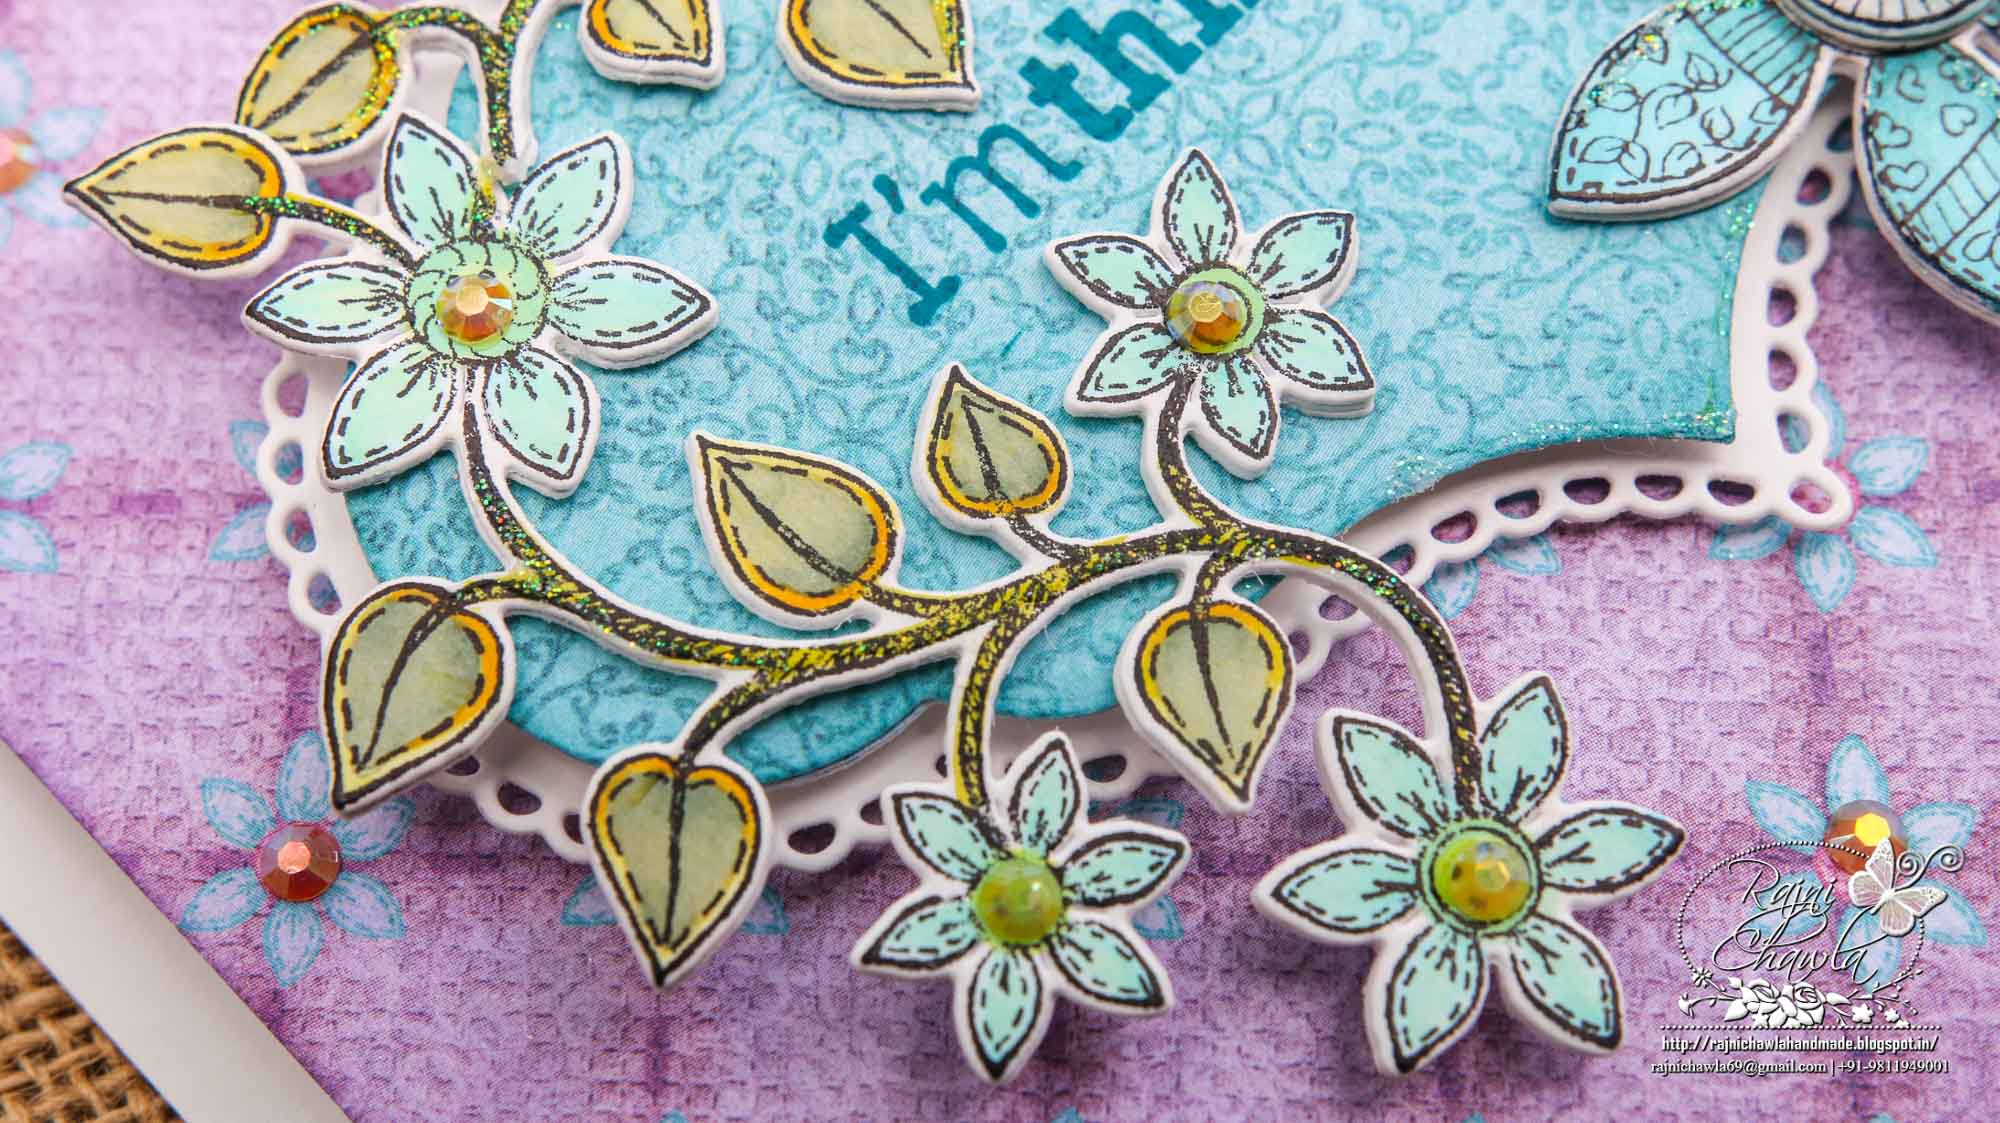
Stamp the image from Patchwork Daisy Border Cling Stamp Set using black archival ink and color the image using Zig Clean Clear Brush Markers. Cut the element using it’s coordinating die. Stack 2 extra die cuts under the painted element to make it bit sturdy as it is hanging out in the air. Also, stamp, cut and paint a medium size bloom from Button and Bloom Collection. Add a painted button in the center and add a glossy accent. To complete the card, add sworoskies to the flowers centers and in the background as shown.
Absolutely beautiful card as always, Rajni! Love it!