


Good Morning All…
Once again it’s that special time of the month when the new collection gets available for all. Today, we are debuting the beautiful Christmas collection for the year 2018, called O Holy Collection. The collection with it’s traditional red and green colors is just stunning.
Celebrate and create inspirational Christmas greetings that spread the true meaning of the holiday season with the O Holy Night Collection from Heartfelt Creations! Immerse yourself in the Christmas story right alongside the angels who announced the Savior’s birth, the shepherds who received the good news, as well as the loving family who welcomed the holy babe in Bethlehem so many years ago! Swaddled in a traditional color palette of reds and greens mingled with hues of midnight blues, golden starlight yellows and snowy whites, this festive paper collection has been beautifully wrapped with tender lace-like details, charming plaids, flowing swirls, and elegant brocades all nestled among pretty poinsettias, delicate snowflakes, fanciful Christmas ornaments and gentle images depicting that holy night when Christ was born! Three exquisite cling stamp sets along with coordinating dies provide wonderful options for creating dimensional nativity scenes, holiday-themed accents such as an old-fashioned scroll, a pinecone with greenery, as well as an assortment of beautifully scripted Christmas sentiments in a variety of styles perfect for all of your holiday card making! The substantially sized and intricately detailed ornament die is magnificent for creating wonderful focal point images on card fronts, stunning accents on scrapbook layouts, or for creating ornament shaped cards ready to deliver your Christmas greetings to friends and loved ones! So pause, reflect and spread the message of God’s love given that holy night so many thousands of years ago as you create and send off holiday wishes with the O Holy Night Collection

 Supplies From Heartfelt Creations:
HCD1-7186 Silent Night Scroll Die
HCD1-7187 O Holy Night Die
HCD1-7188 Noel Ornament Die
HCPC-3832 O Holy Night Cling Stamp Set
HCPC-3833 Silent Night Scroll Cling Stamp Set
HCPC-3834 Noel Sentiments Cling Stamp Set
HCDP1-292 O Holy Night Paper Collection
HCPC-3822 Poinsettia & Holly Clusters Cling Stamp Set
HCD1-7176 Poinsettia & Holly Clusters Die
HCD1-7145 Festive Holly & Cardinals Die
HCPC-3791 Festive Holly & Cardinals Cling Stamp Set
HCD1-7170 Lush Lilac Die
HCPC-3816 Lush Lilac Cling Stamp Set
RACP468 Ranger Archival Ink Pad – Jet Black
RAHT Heat It Craft Tool
PGM15016 Rajni Chawla’s Frosting Powder
HCDA2-450 Stack and Store Daubers-Pack of 30
CB80 C olorBox Pigment Ink Pad – Frost White
RPEJ685 Embossing Powder – White
159723 Designer Dries Clear Adhesive
Other Products Used: Papericious Vellum, Twine, Glittered microbeads, Smooth white cardstock, Golden Mirror Sheet, Versamark Ink, Zig Clean Clear Brush Markers.
Videos Referred: For more tips on creating with the O Holy Night collection, watch the tutorial at https://youtu.be/UWDeK6soJ0E.
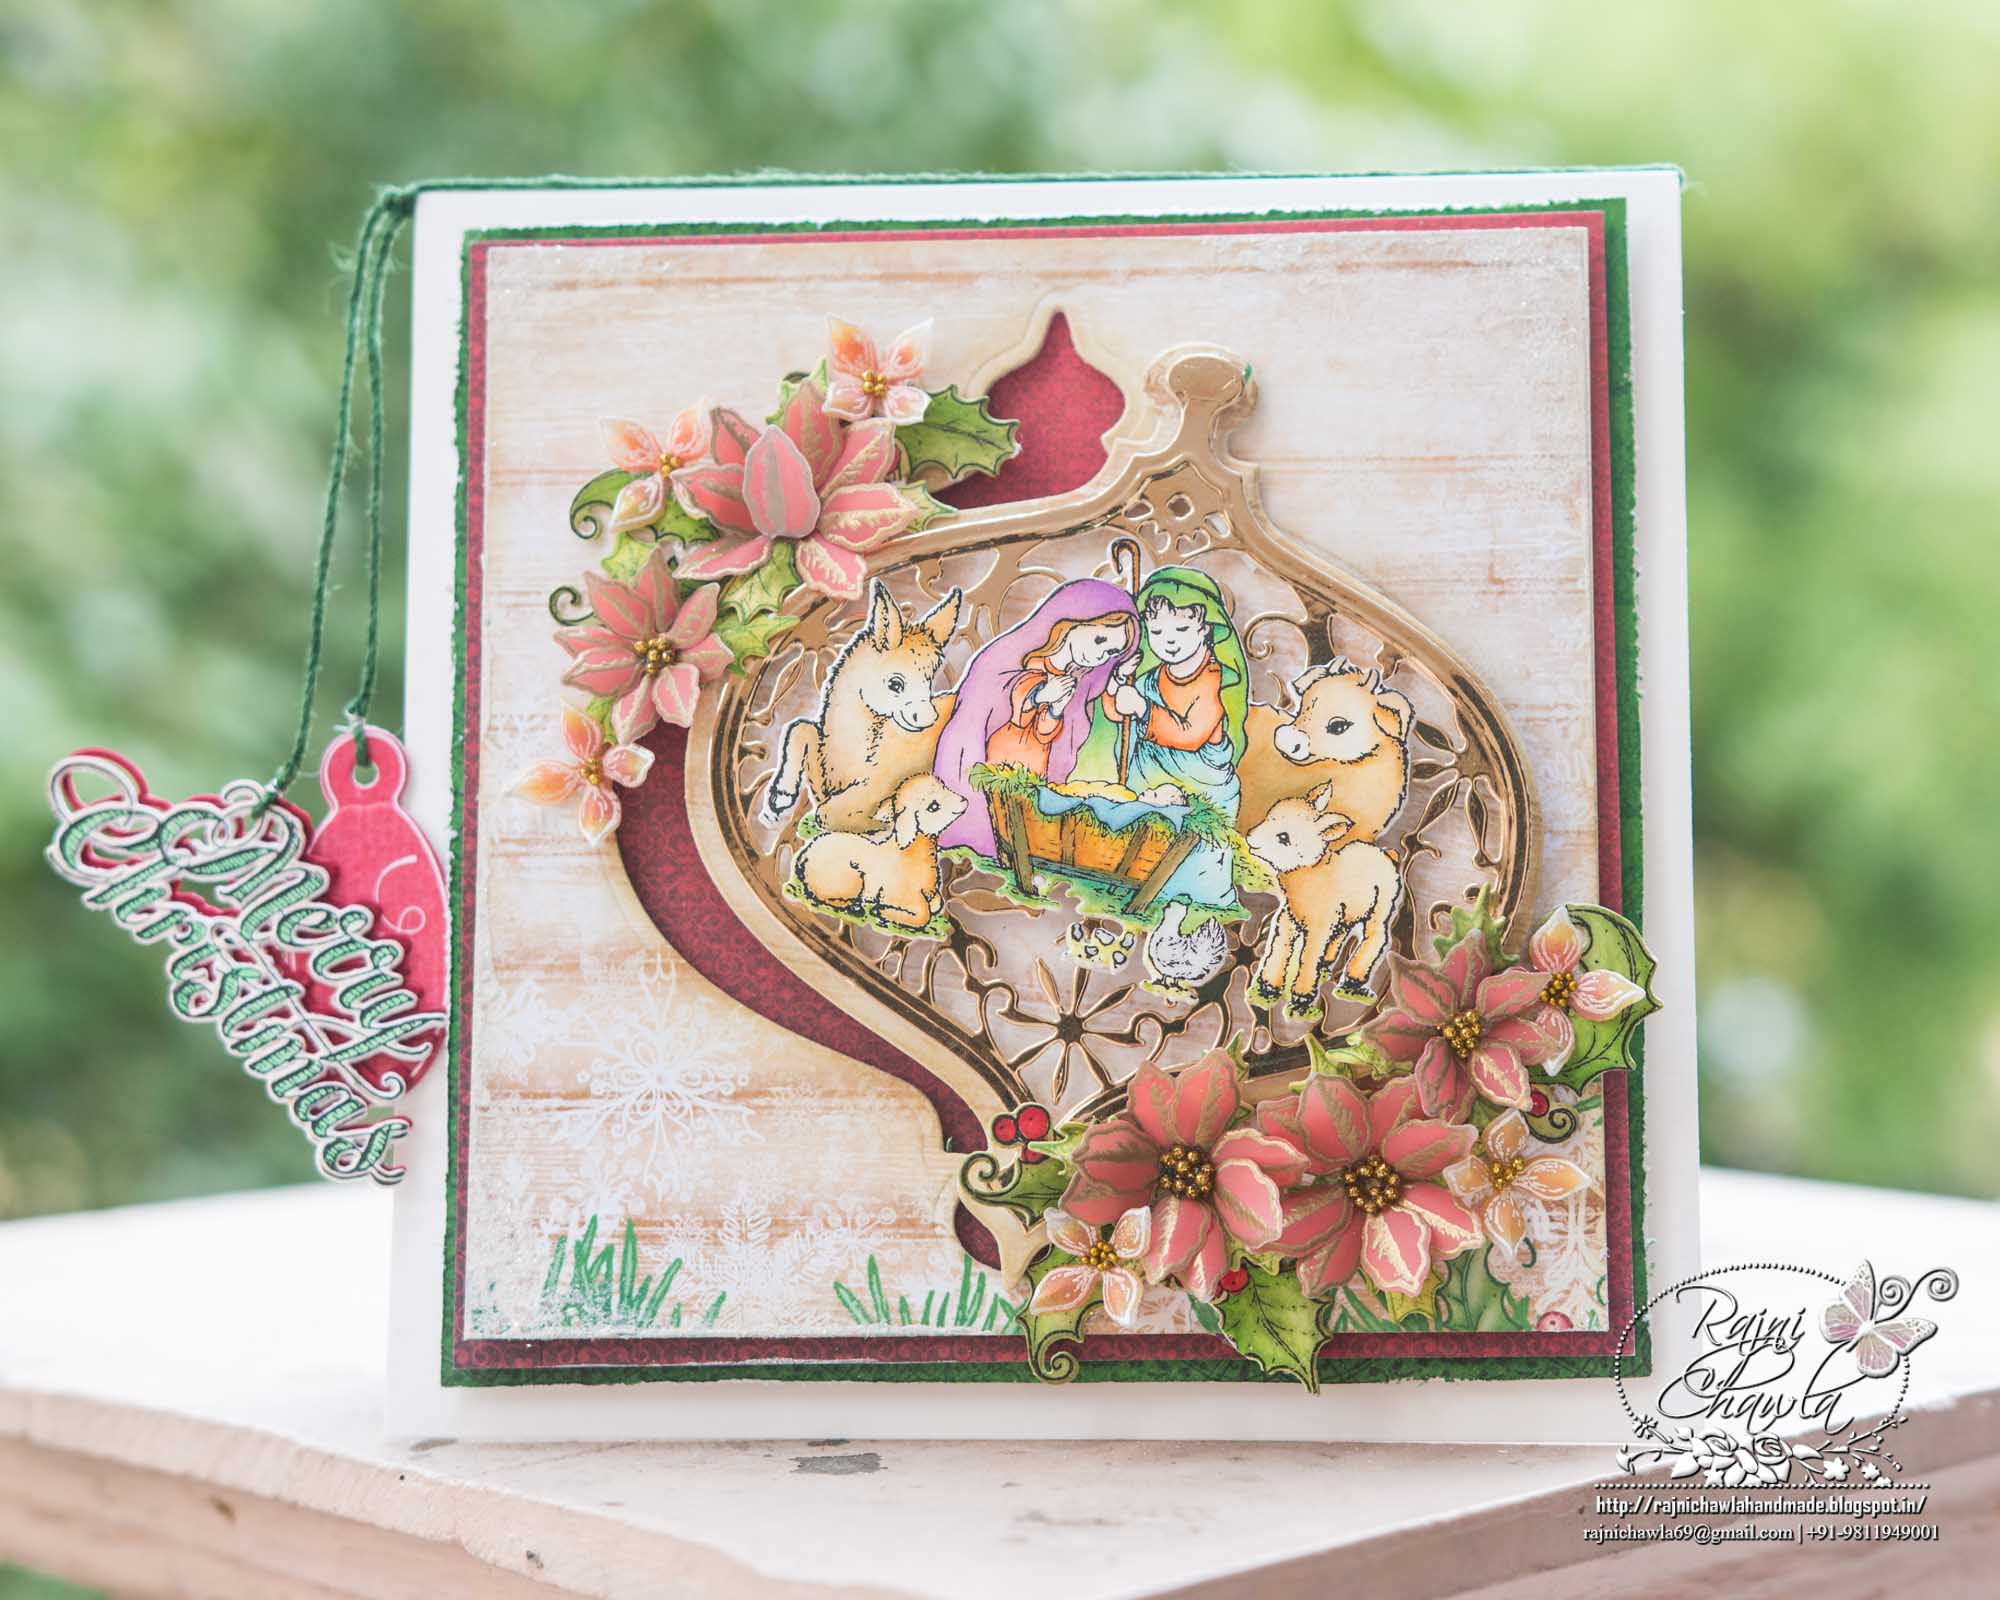
Instructions: The ready side-fold card from smooth white cardstock measures, 6 1/2″ by 6 1/2″. To create the top panel. choose the paper from the designer paper collection and cut the window using a solid die of the Noel Ornament Die Set. We will use the cut ornament to create the focal image later. Create more layers, one from deep red paper and next from Dark green paper from the designer paper collection, keeping each layer 1/4″ larger to the previous layer. Adhere the panel to the ready card base using glue dots.
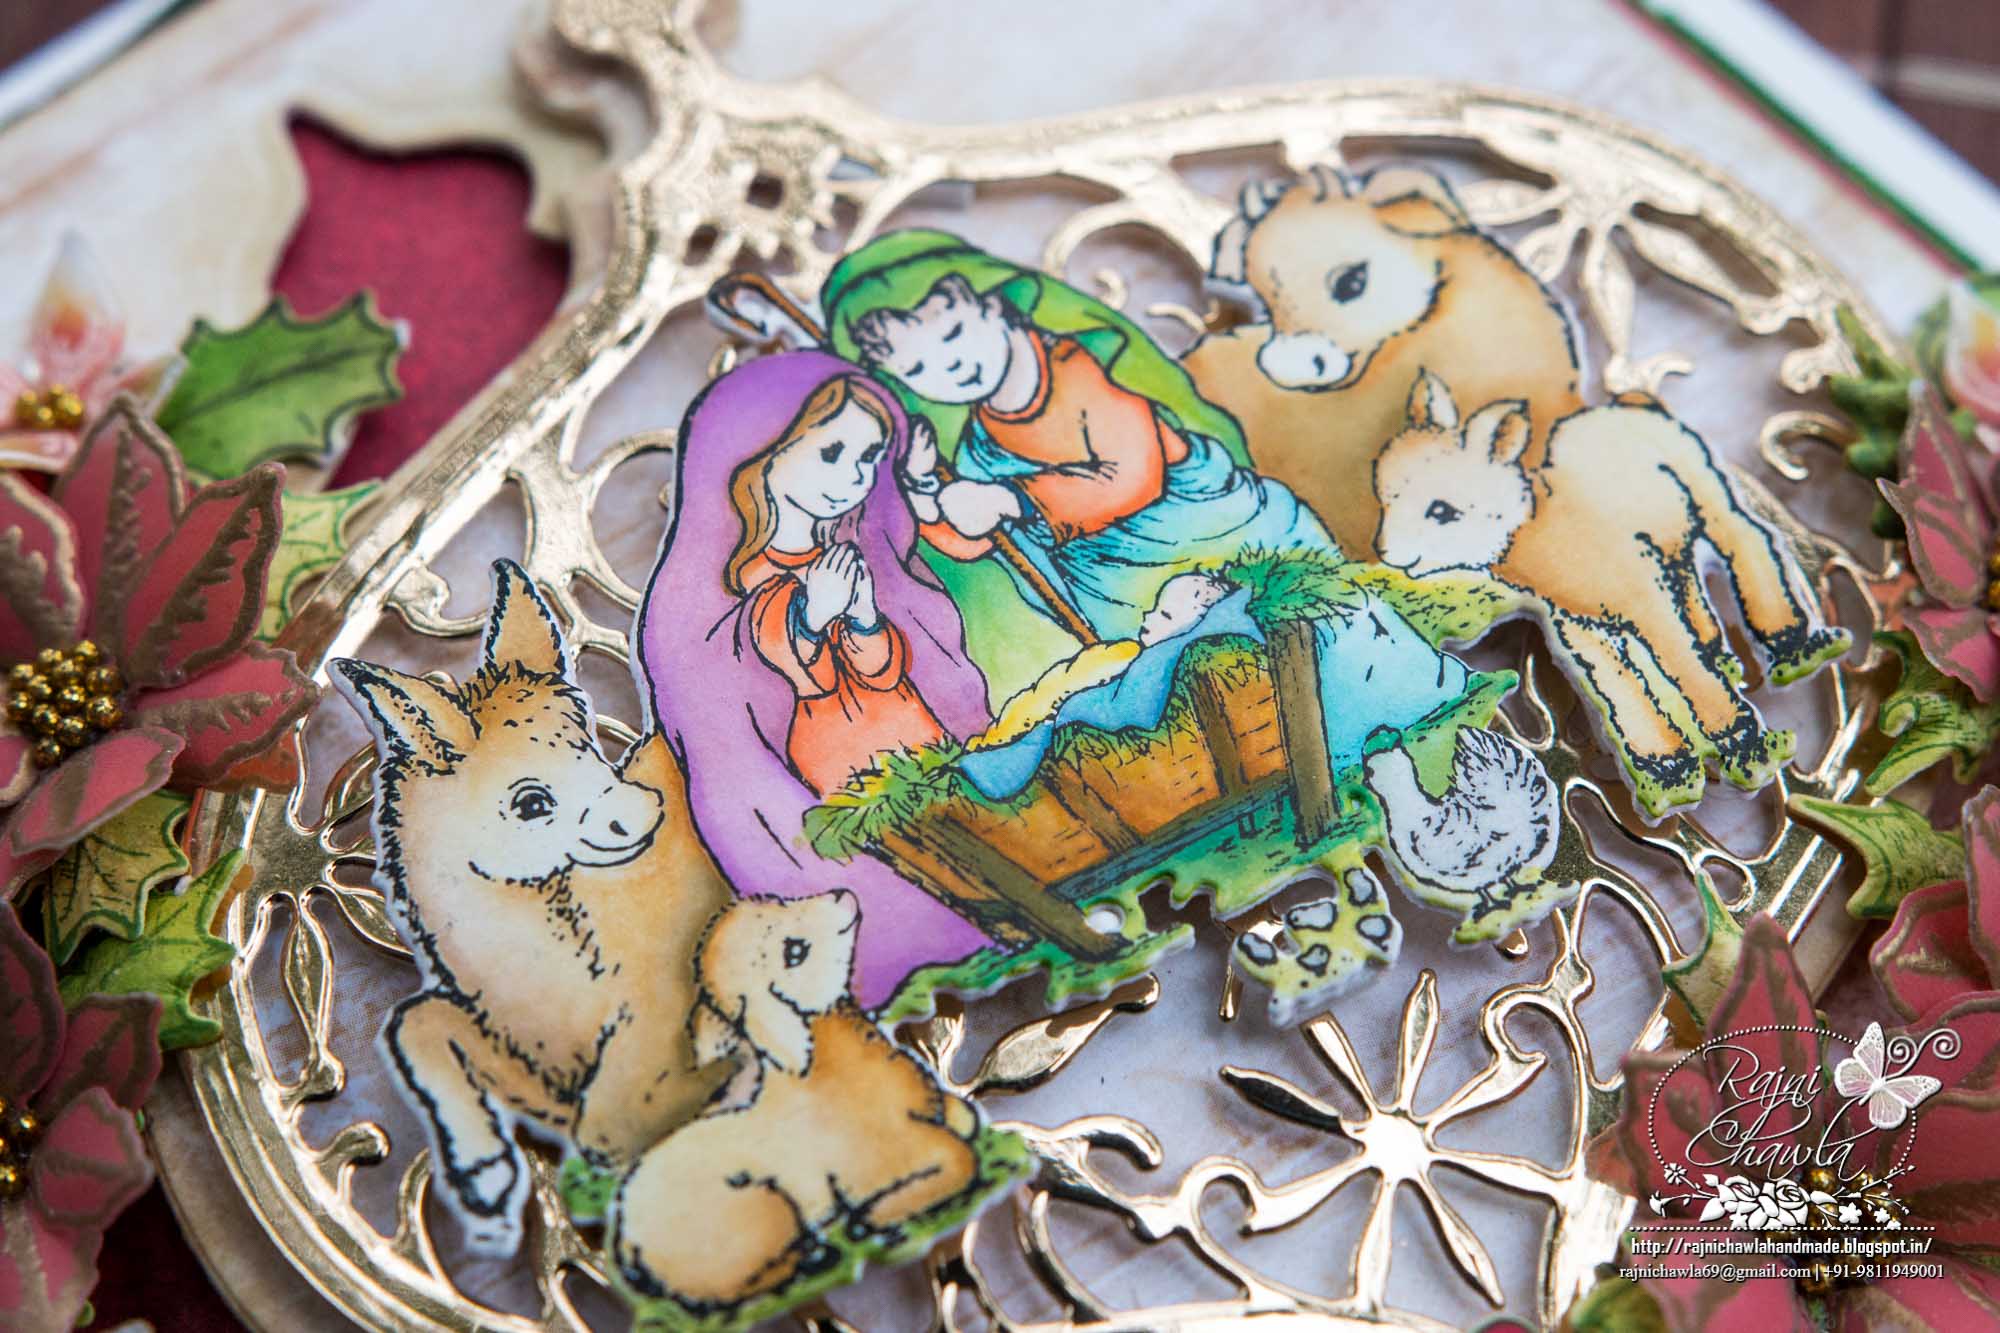
Stamp the image of Holy Family from the O Holy Night Cling Stamp Set, using black archival ink on smooth white cardstock and color the image using Zig Markers. Cut the image using it’s coordinating die. Also stamp, color and cut the holly leaves from Poinsettia & Holly Clusters Cling Stamp Set.
To create the ornament, cut the ornament from a gild mirror cardstock using Noel Ornament Die, keeping the inlay die in the center. Layer the gold die cut using glue dots on the already cut base ornament die cut which was left while cutting a window from the panel. Also, layer the already painted Holy Family image on the ornament. Further layer the complete ornament, slightly tilted on the right as shown.
For the Poinsettias, stamp the images from Poinsettia & Holly Clusters Cling Stamp Set with Versamark Ink on Papericious Vellum, sprinkle golden heat embossing powder, dust extras and heat set using the heating tool. Cut the flowers using it’s coordinating die. Shape the flowers gently on the back of stylus and add gold glittered microbeads to the centers using an adhesive that dries clear. Make 2 small and 3 large flowers.
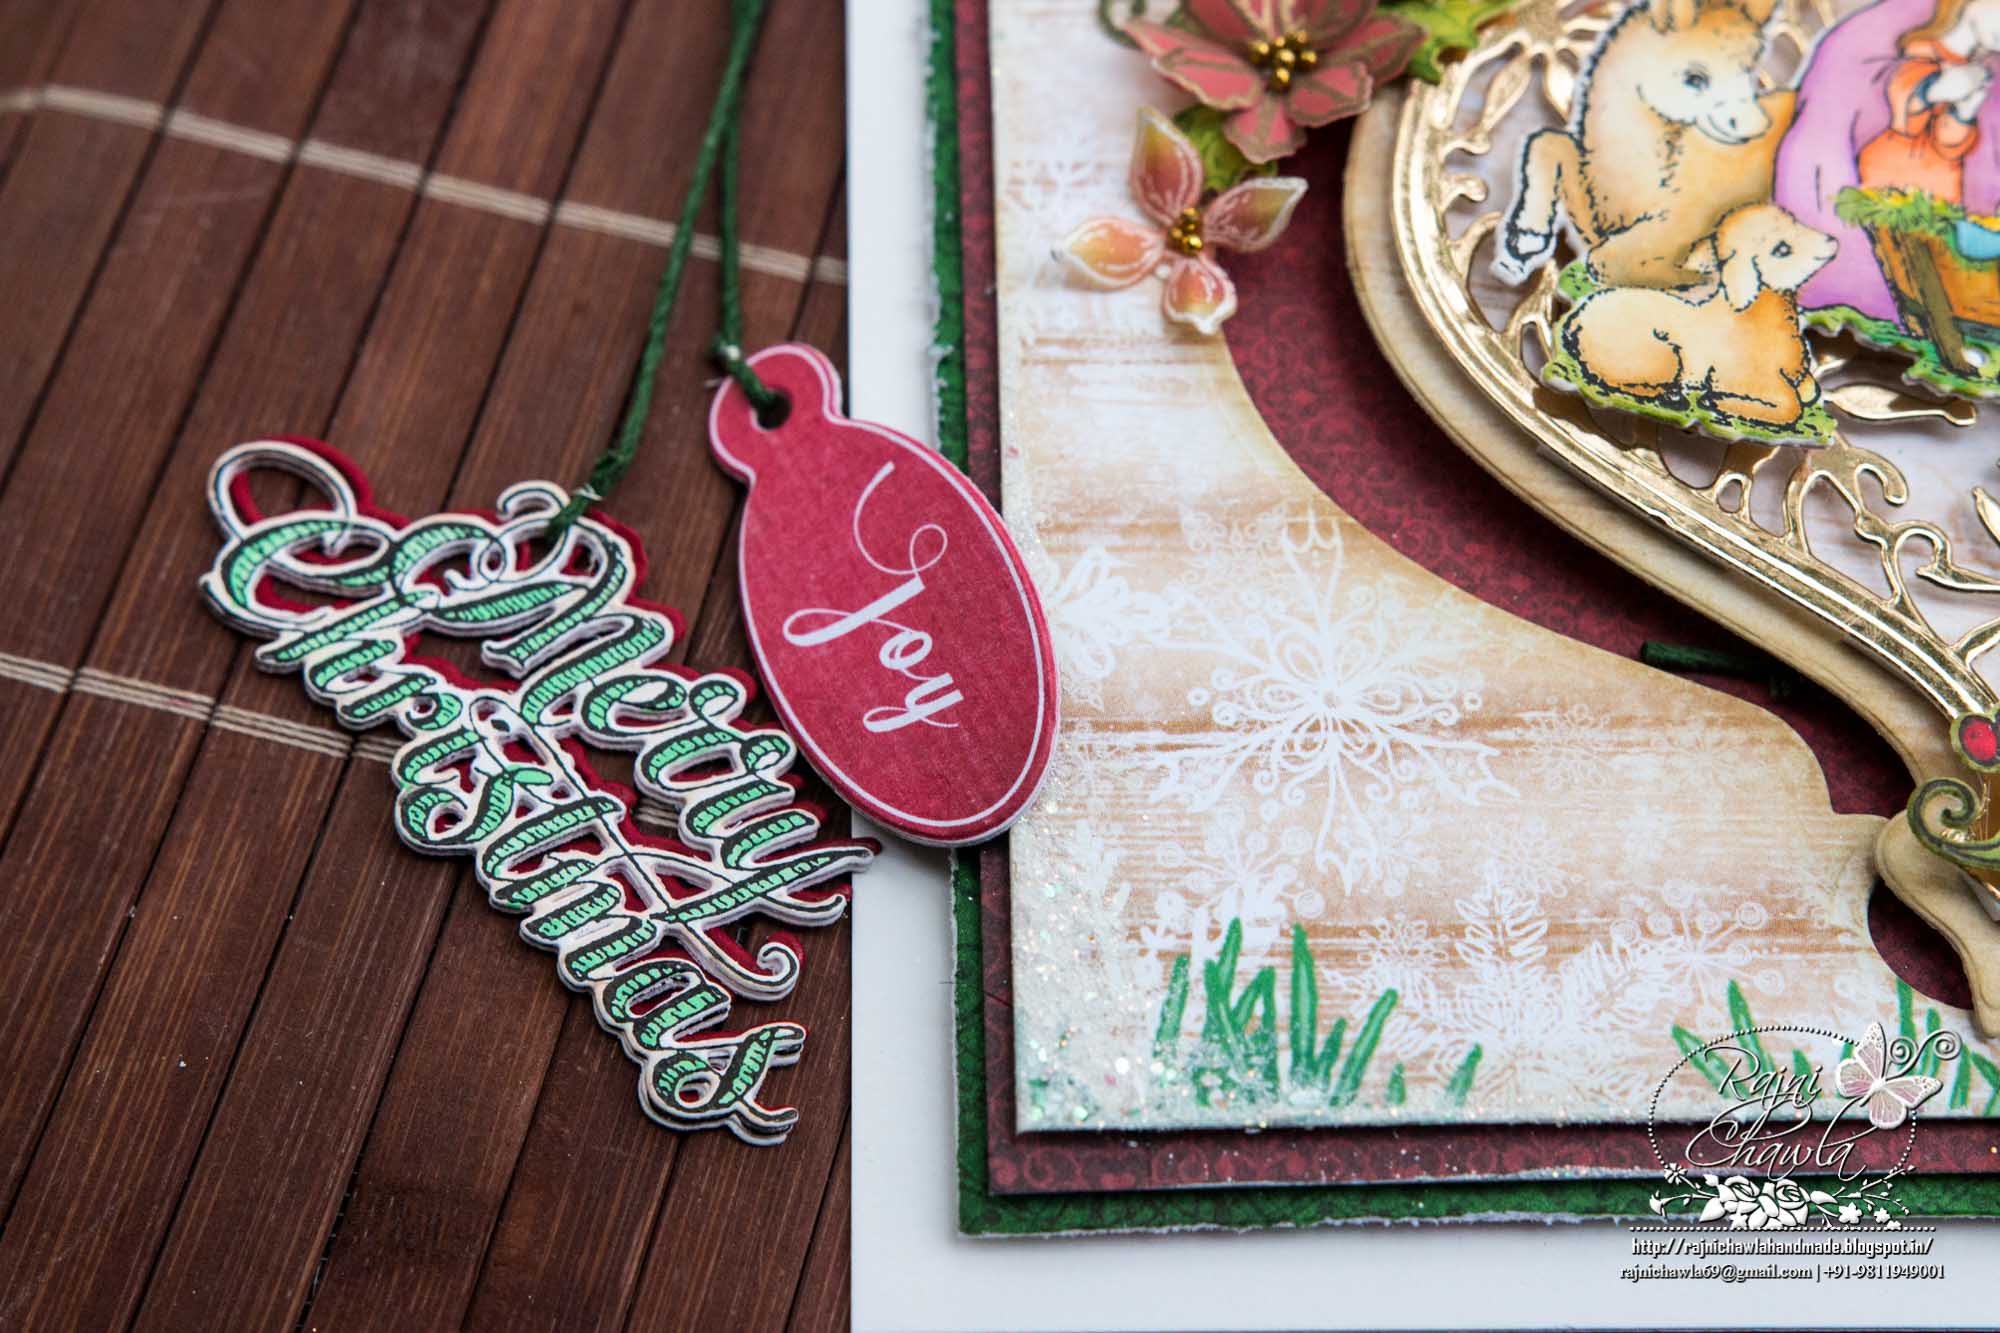
Create flower clusters on top and the bottom edge of the ornament as shown and complete the card by adding hanging sentiment and frosting powder for extra interest.
Wow…another gorgeous creation Rajni! Love design and your coloring is amazing! Love it!
Beautiful!!! I love everything about this card!!