


Good Morning Friends….
The wait is over. Today, we all brings you to the fabulous new collection by Heartfelt Creations. The elegant, and well known lilac blossom takes center stage early in the spring season and is one of the first flowers to usher in the season of new beginnings! Enchanting clusters of tiny blossoms come together to create quaint floral displays with amazing color and a sweet-smelling fragrance that brings with it a feeling of gentility and old world charm! Join us in celebrating a perennial favorite…Introducing the Lush Lilac Collection by Heartfelt Creations! Venture out for a springtime stroll through a dreamy, garden themed paper collection filled with soft hues of luscious lavenders, deep purples, sky blues and pastel pinks accented with dreamy and romantic illustrations of cozy cottages, lilac filled parasols and lovely lilac filled garden settings! Softly scrolling swirls, vintage script and lace like details bring an old fashioned charm to this soft and innocent assembling of decorative papers, while three graceful cling stamp sets along with coordinating dies boast lush lilac sprays, a fetching lilac laden scroll, several endearing sentiments, as well as a winsome lilac filled parasol perfect for paper craft creations celebrating a multitude of occasions! A wonderful mix of lilac buds and blossom petal illustrations lend themselves beautifully to creating realistic and dimensional lilac blossoms when paired with the coordinating die and will bring a gentle touch of spring to all of your garden creations! So come along with us as we celebrate new beginnings and Spring.

Products from Heartfelt Creations:
HCD1-7170 Lush Lilac Die
HCD1-7171 Lush Lilac & Umbrella Spray Die
HCD1-7172 Sweet Lilac Scroll & Cage Die
HCPC-3816 Lush Lilac Cling Stamp Set
HCPC-3817 Lush Lilac & Umbrella Spray Cling Stamp Set
HCPC-3818 Sweet Lilac Scroll & Notes Cling Stamp Set
HCDP1-287 Lush Lilac Paper Collection
HCFB1-466 3D Lush Lilac Shaping Mold
HCD1-7119 Classic Border Basics Die
HCD1-7154 Eyelet Circle & Basics Small Die
RACP985 Ranger Archival Ink Pad – Cactus Flower
RACP524 Ranger Archival Ink Pad – Vibrant Fuchsia
RACP494 Ranger Archival Ink Pad – Majestic Violet
PGM15015 Rajni Chawla’s Crystal Clear
Stack and Store Daubers-Pack of 30
HCDA2-450 Stack and Store Daubers-Pack of 30
159723 Designer Dries Clear Adhesive
HCST1-401 Deluxe Flower Shaping Kit
Other Products Used: Smooth white cardstock, scoreboard, Distress ink Wilted Violet AND Seedless Preserves Black Archival ink, Zig Clean Clear Brush Markers, Dimensional tape, Purple cardstock.
Videos Referred: For more tips on creating with the Lush Lilac collection, watch the tutorial at https://youtu.be/KDbdzC0MnAI.
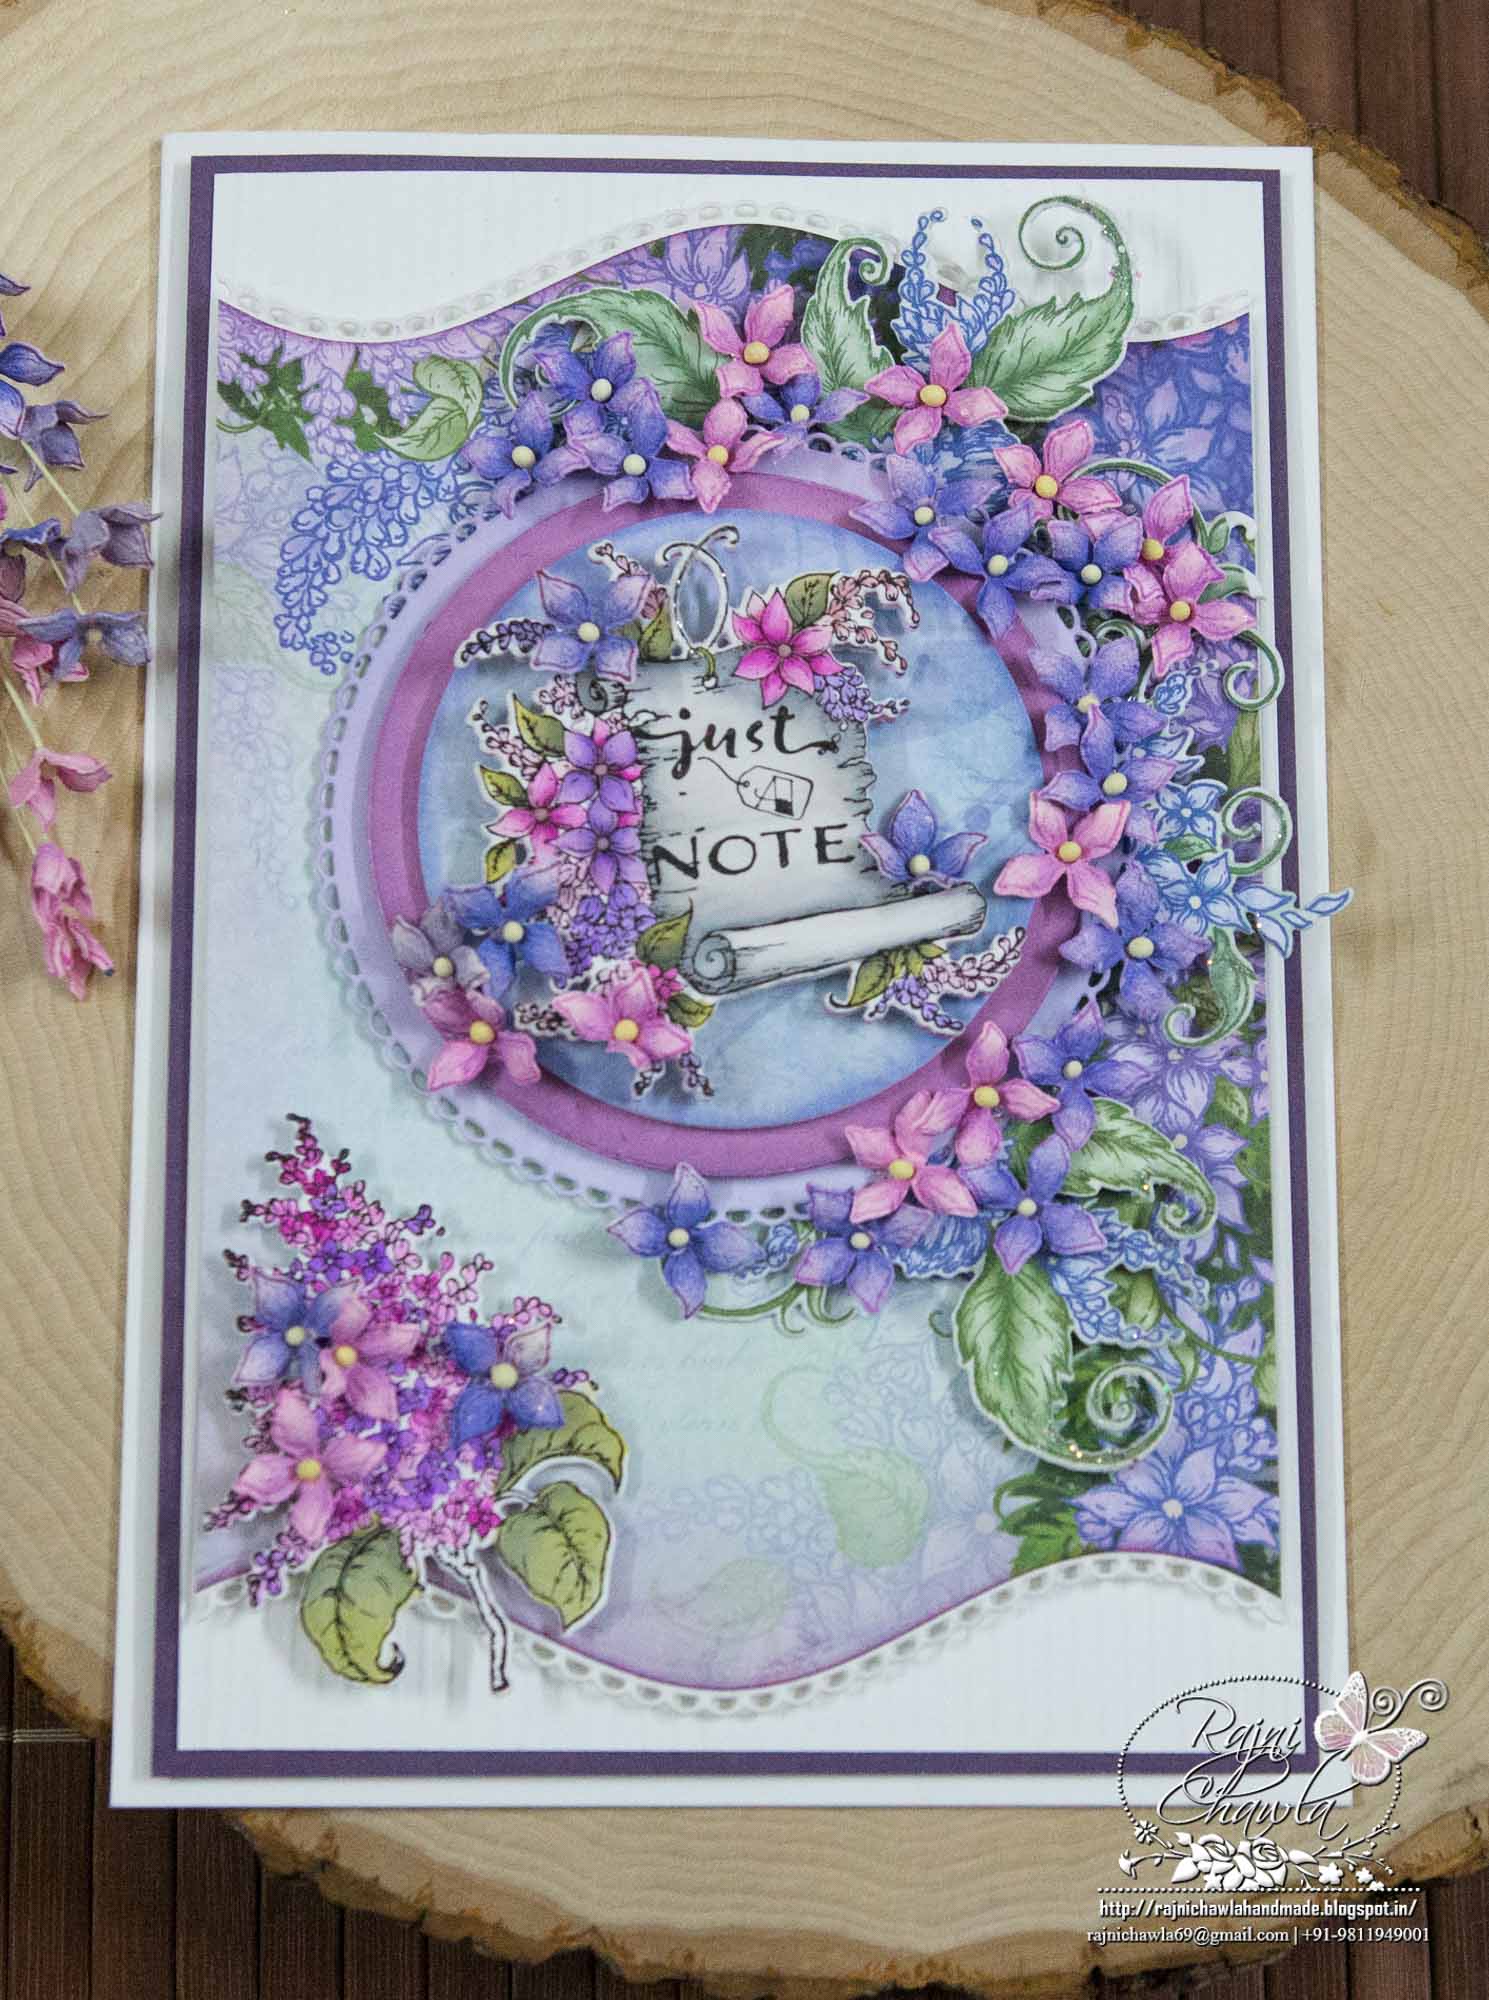
Instructions: The ready side fold card measures, 6″ by 8″. The very first layer of the card is made using purple colored cardstock which measures 5 1/2″ by 7 1/2″. Next op layer is from a white cardstock which measures, 55 1/4″ by 7 1/4″. It is scored at 1/8th of an inch each time.
To create the top panel, choose the pattern paper from the paper collection and cut a paper measuring 7 1/2″ by 5″. The top and bottom edges are cut using Classic Border basic die. Cut 2 fancy laces from the same die from white cardstock and adhere to the back using an adhesive that dries clear. Distress both the edges using Seedless Preserves Distress Ink. Layer the panel on the ready card base as shown, using dimensional tape.
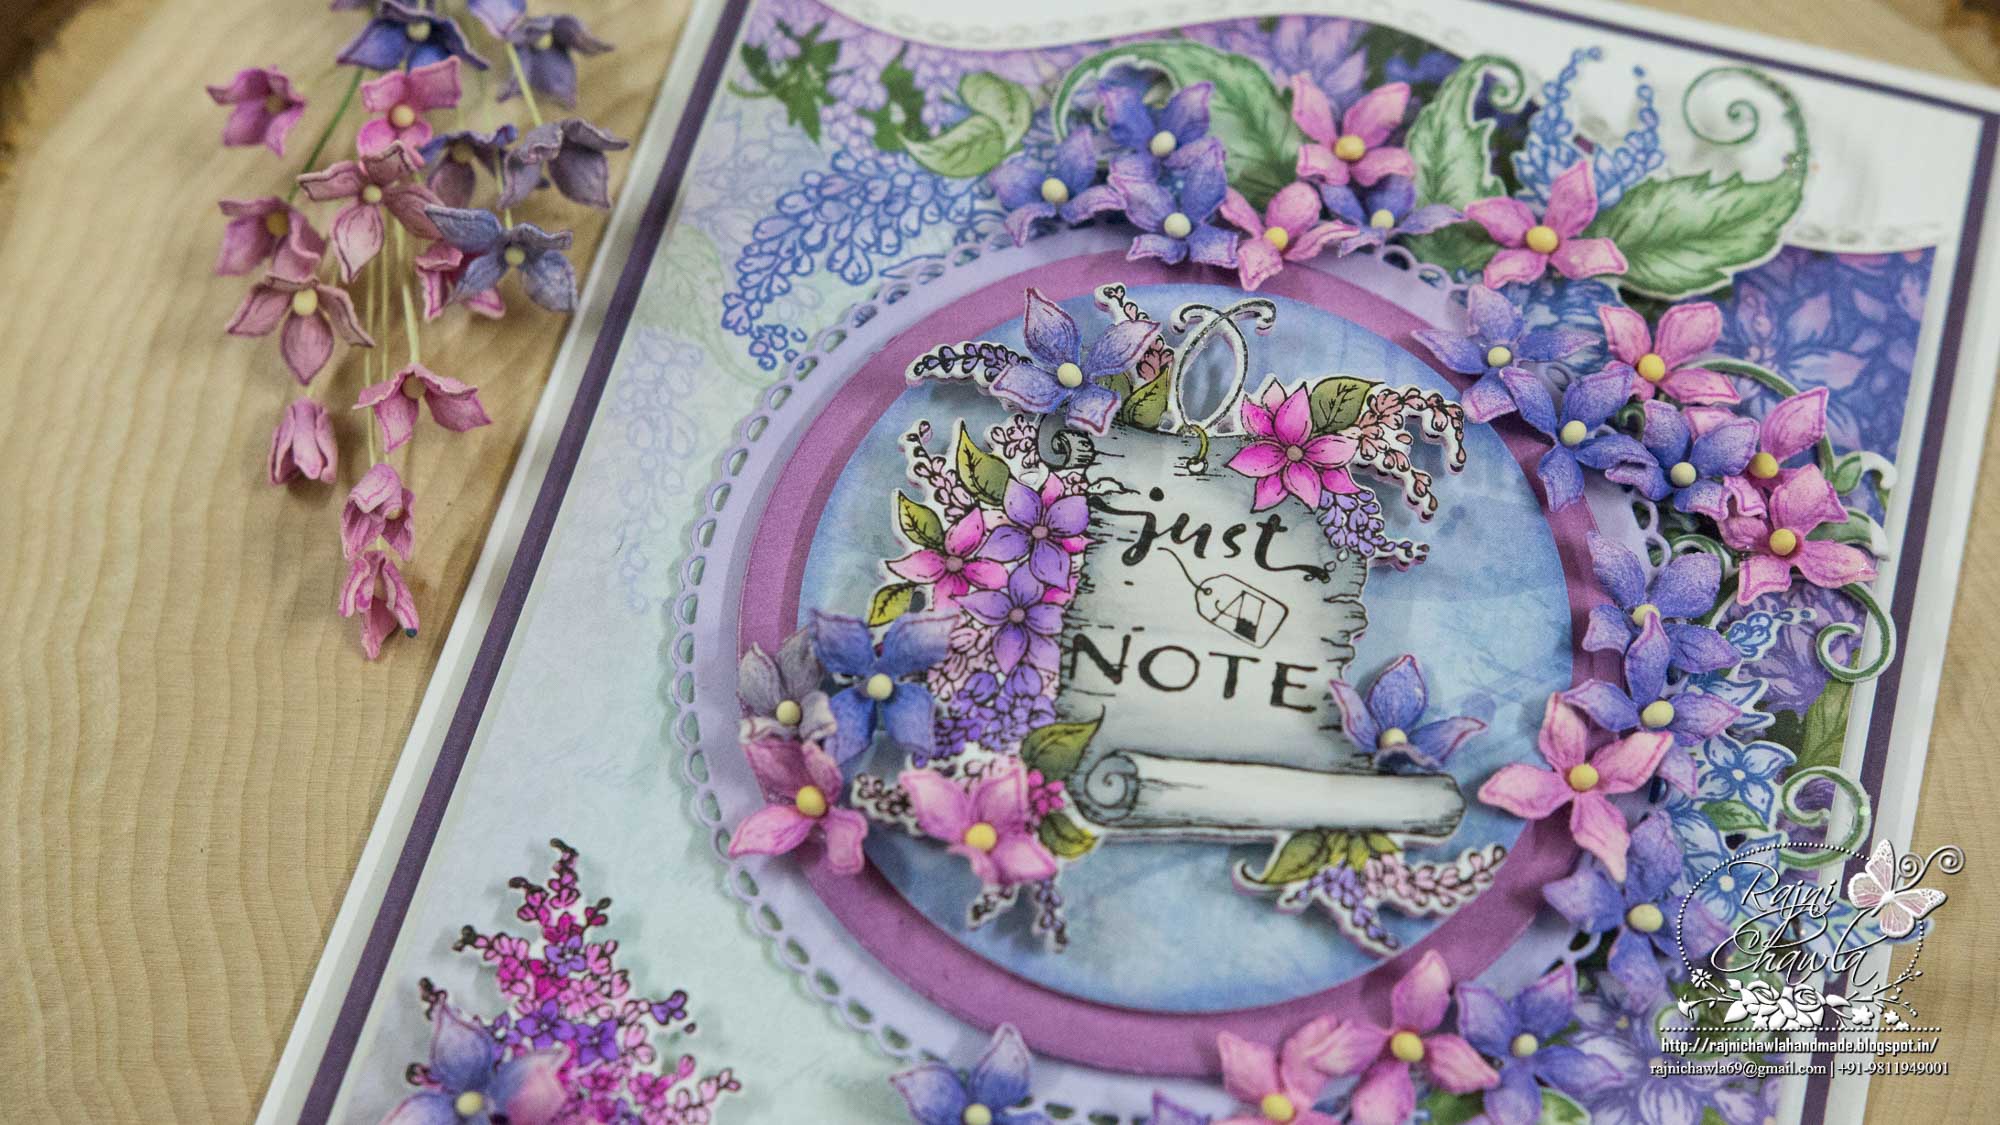
For the topmost fancy top layer, Cut two pieces from the Eyelet Circle Basic Die from white cardstock. Color the lower circle using WiltedViolett and the second layer using Seedless Preserves. The top most circle is cut using pattern paper.
For the focal image, stamp the image from Lush Lilac Cling Stamp Set using black Archival and cut it using it’s co ordinating die. Color the image using Zig Clen Clear Brush Markers and stamp the sentiment from same stamp set using black archival ink.
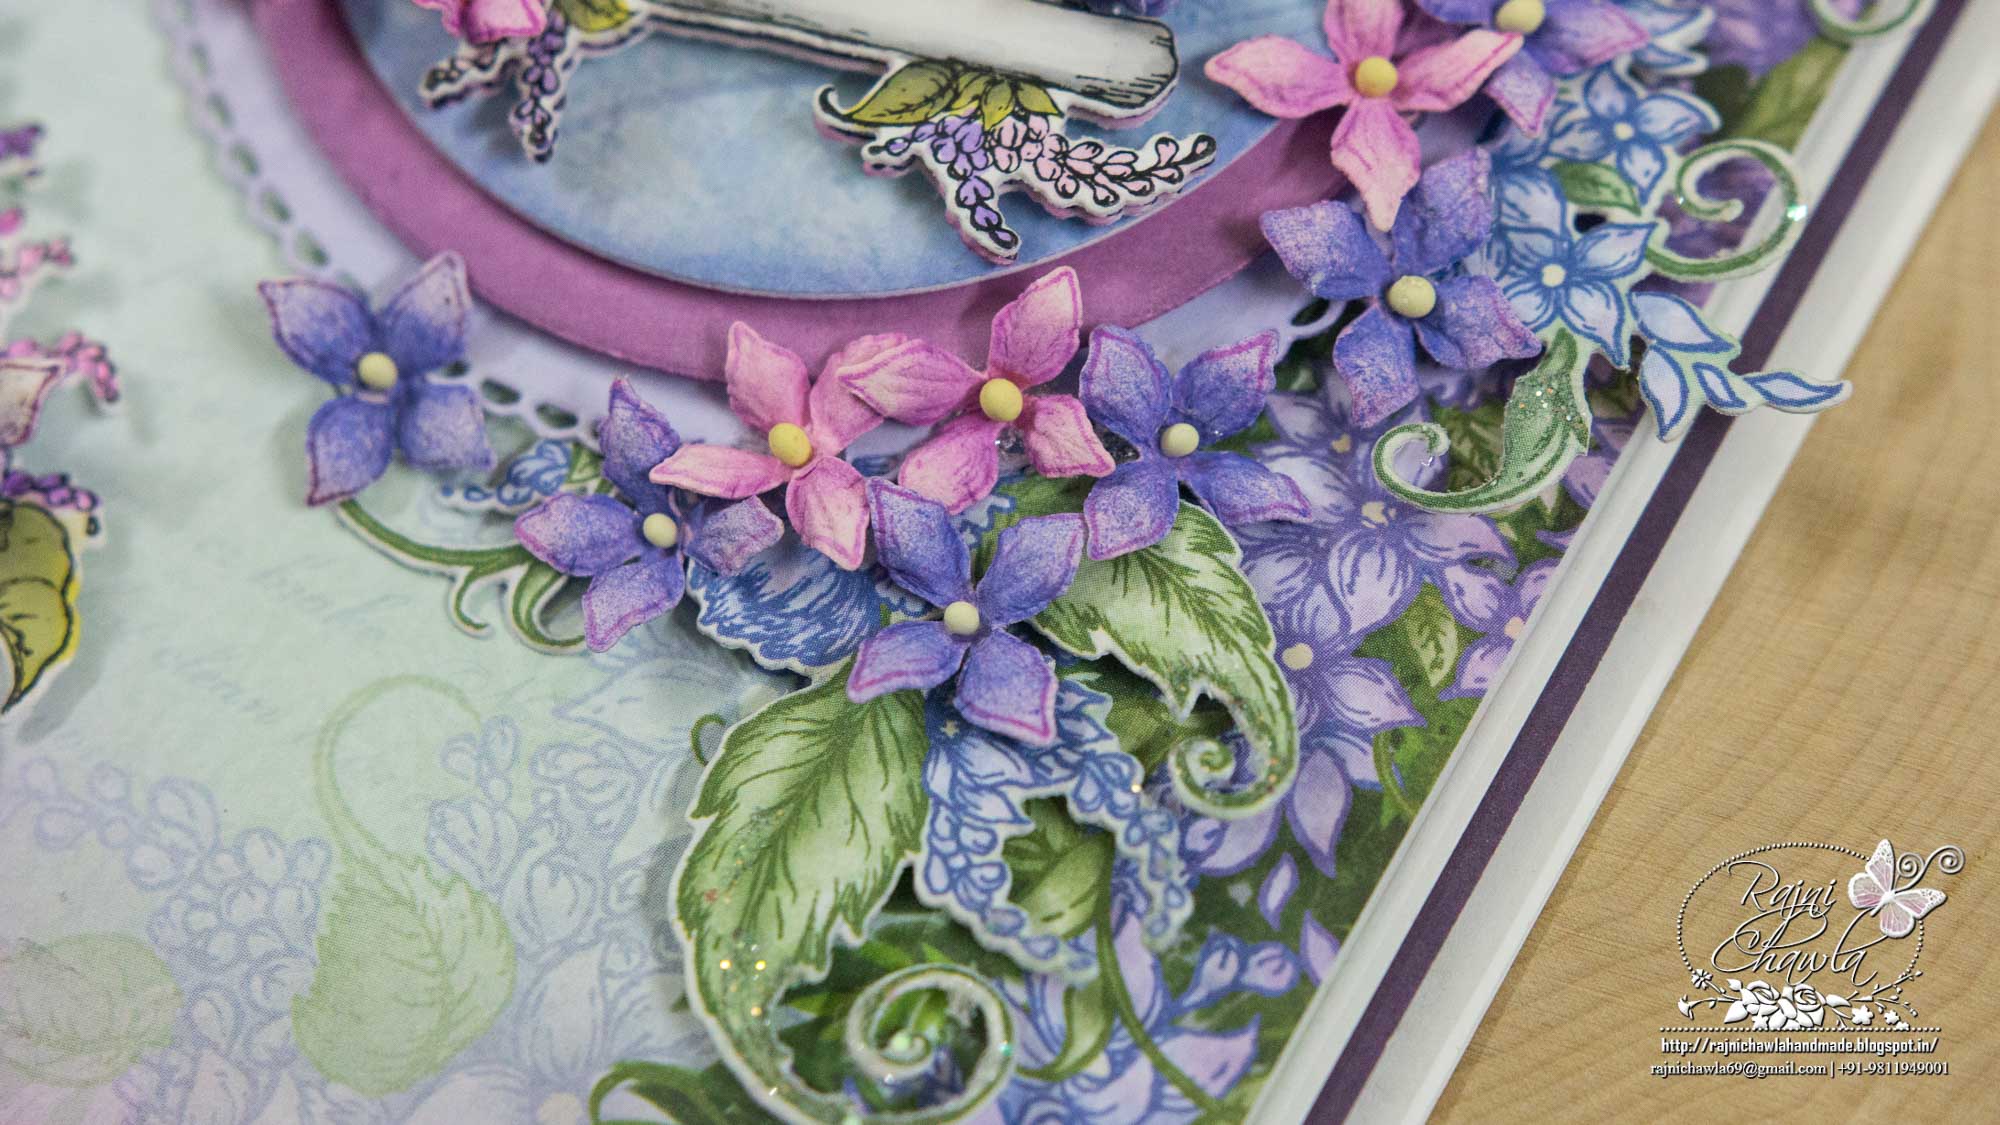
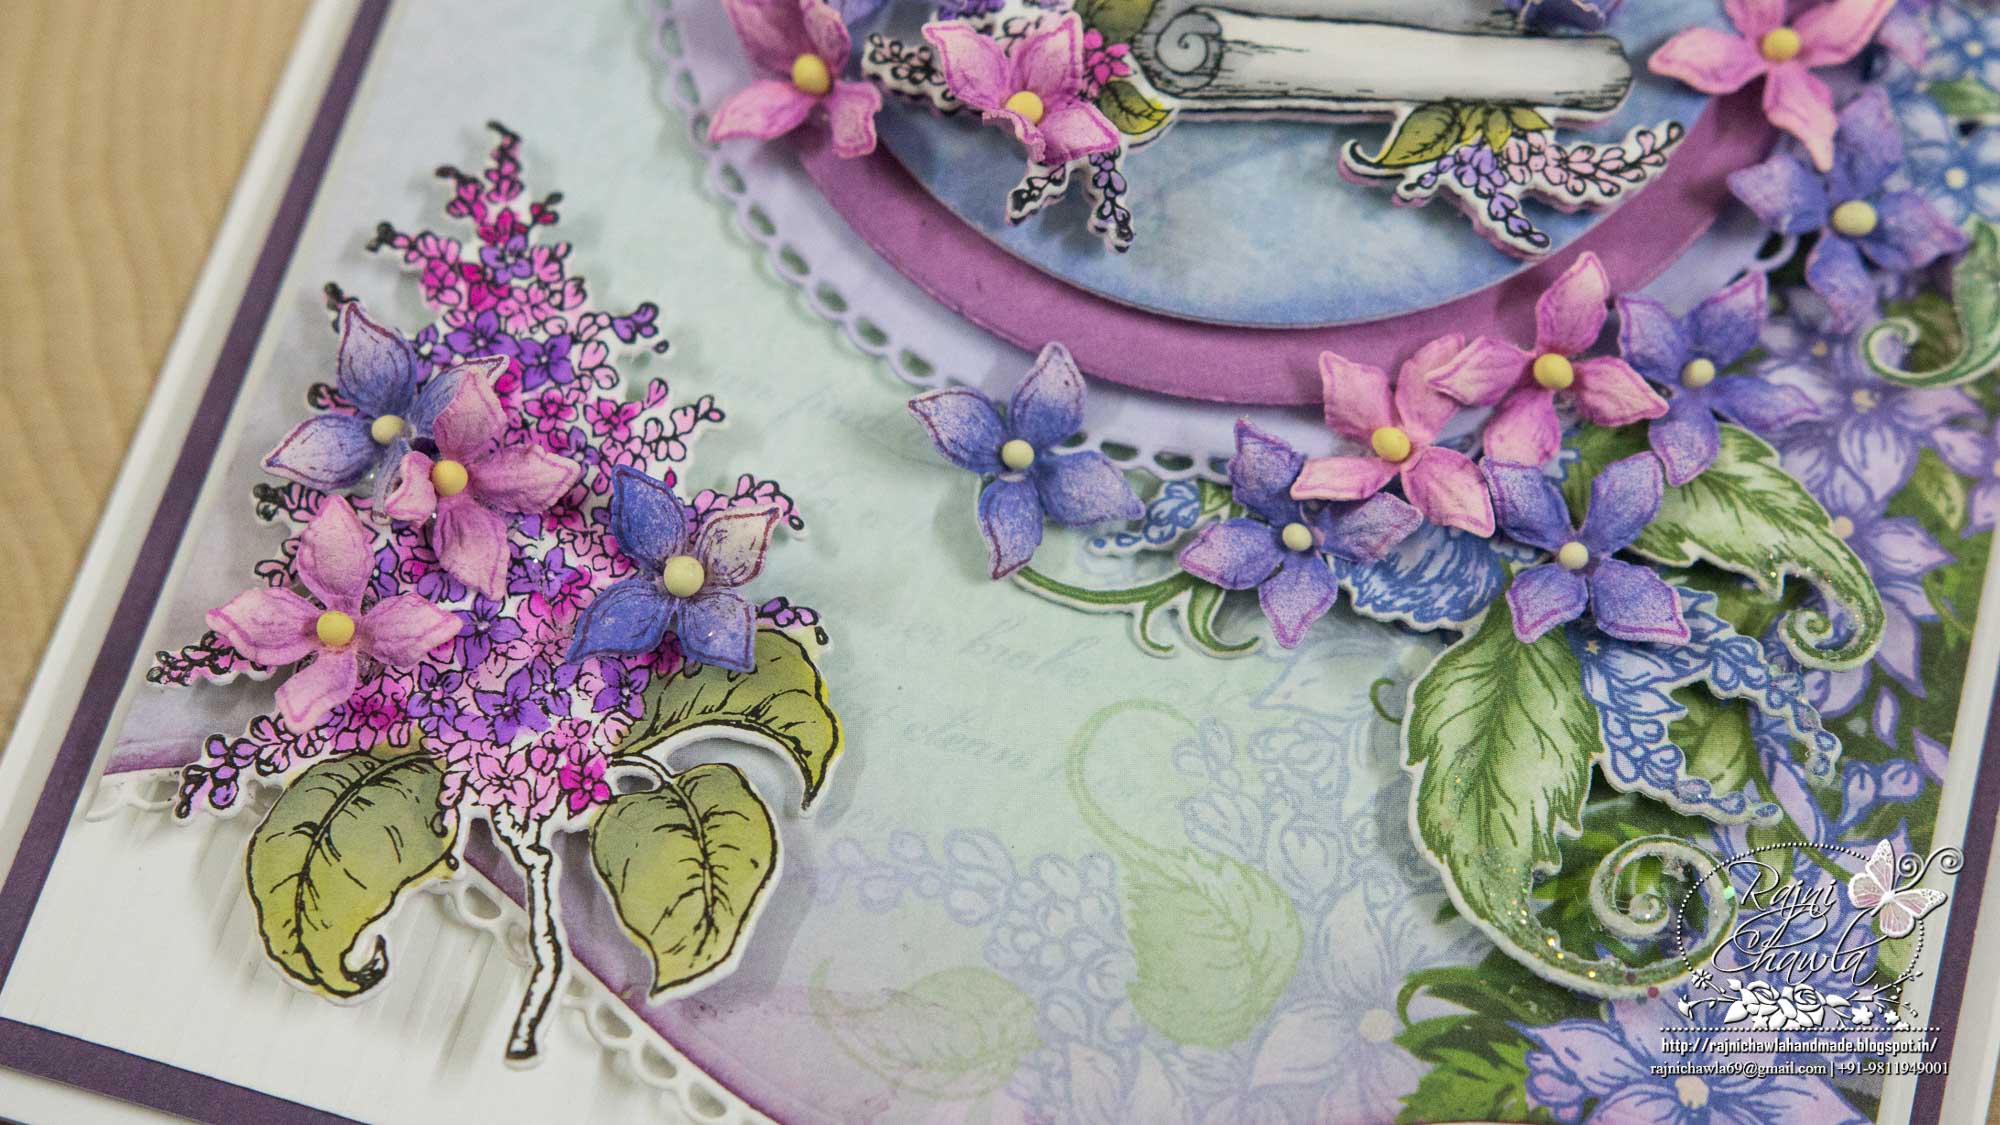
For flowers, stamp the images using Plum Archival ink and color them using Cactus Flower, Majestic Violet and Vibrant Fuschia. Shape the flowers usong Deluxe flower shaping kit.
Cut few floral images from the paper collection and cut them using their co ordinating die. Once all the elements are ready, assemble the card as shown. For the final touches add some Crystal Clear Glitter on the scrolls, using adhesive that dries clear.

Absolutely Stunning!
another breathtaking work of art!!!!